This article will help you to setup a landing page to accept registrations for a particular webinar you are going to organize.
Please note that one landing page can accept registrations for only 1 webinar at a time.
Step 1 – Once your GotoWebinar connector is added and configured, you will see a screen like this when you click on “Configure” on the GotoWebinar connector row-action.

Click on “Go to your Webinar Data”.
You will see your upcoming webinars that you have created.
1. Copy the WebinarID for the webinar for which you need to setup the landing page.
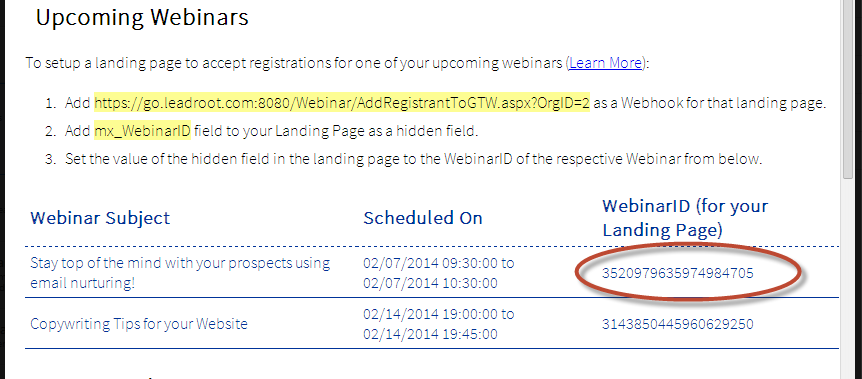
2. In your Landing Page form, add the WebinarID field that you configured for the Connector as a hidden field.
3. Paste the WebinarID value in the hidden field. Again, this WebinarID belongs to the webinar for which you want to setup the landing page to accept registrations.
4. Publish the landing page. This page can now be used to accept registrations.
5. One last configuration. Add a Webhook for that landing page with the URL that is mentioned in yellow highlight just below “Upcoming Webinars”. The Webhook URL would be https://go.leadroot.com:8080/Webinarv2/AddRegistrantToGTW.aspx?OrgID=<your_account_number>.
This webhook configuration enables the connector to receive a signal whenever a landing page is submitted. So landing page form gets submitted -> webhook is invoked -> calls the GoToWebinar connector -> connector sends the lead information to GoToWebinar and adds the registrant.
Please let us know if we can assist you with any of this. We’d love to hear from you on support@leadsquared.com


