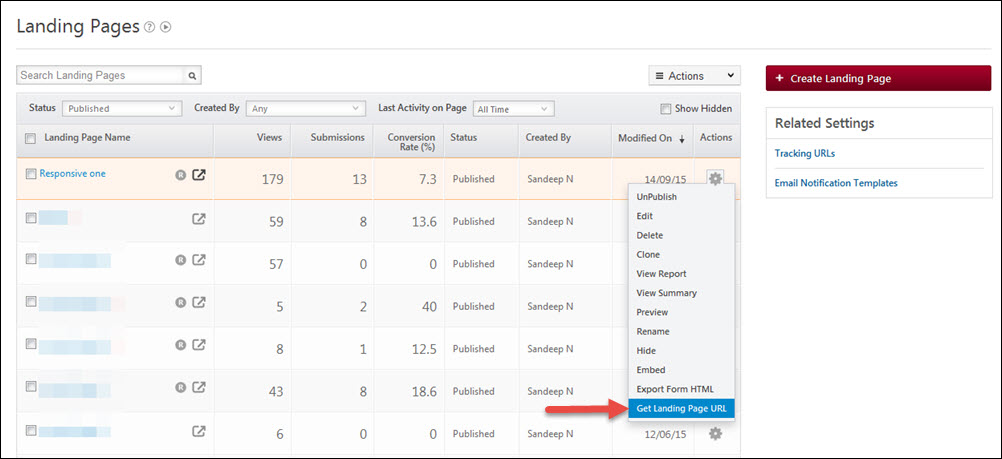
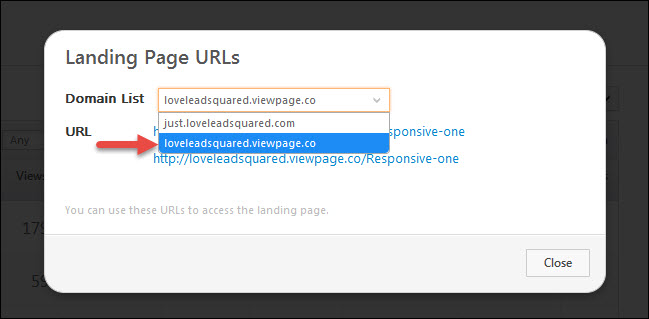
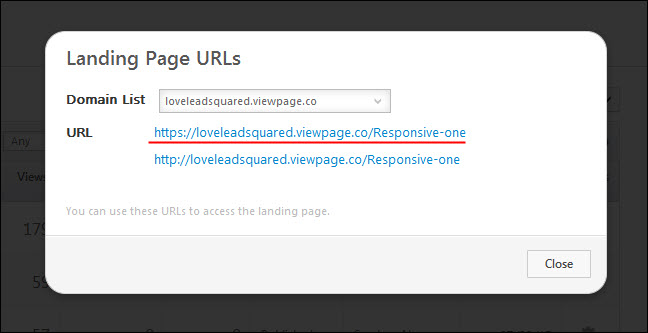
You can create landing pages in LeadSquared and embed them on Facebook. A Facebook landing page can give you greater visibility and higher number of leads. You use this procedure to create a Facebook landing page.
You can now use LeadSquared’s Facebook App to create landing pages. It is recommended that you use LeadSquared’s own Facebook App to host a landing page in your company’s Facebook page. Note that you have to create a landing page in LeadSquared first and then host it in Facebook. For more information, see How can I use LeadSquared Facebook App to have a landing page tab?
Prerequisites
- You have logged in to LeadSquared.
- You have created and published a landing age in LeadSquared. For more information, see How to Create and Publish a Landing Page?
- You have created a Facebook page for your company.
Procedure
1. Log in to your company’s Facebook page. Search for Static HTML: iframe tabs App in Facebook. Click here to view the App.
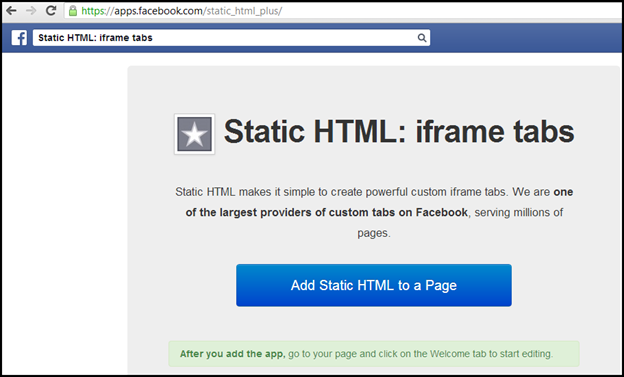
2. Click on Add Static HTML to a Page button. You will be re-directed to another page where you will have to choose the Facebook page to which you want to add a Static HTML (Landing Page). Click on Add Static HTML: iframe tabs button.
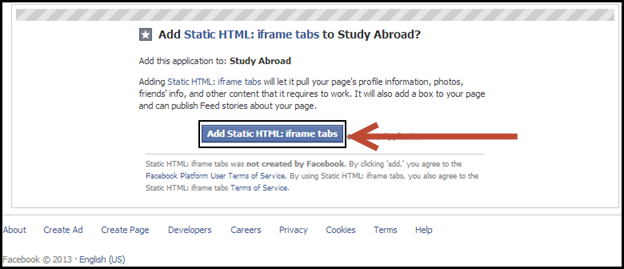
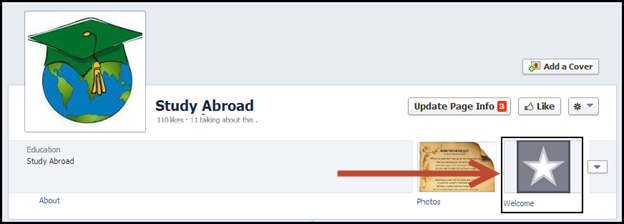
3. After authorizing the App, you would see a new box added to your Facebook tabs, named ‘Welcome’. You can edit it by clicking on it.
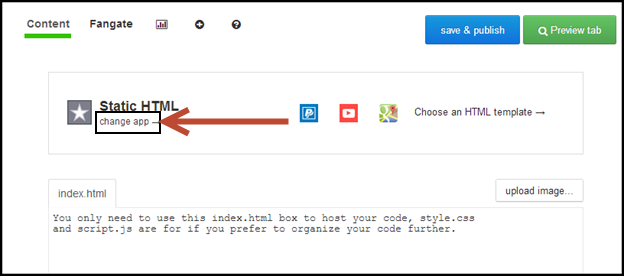
4. The edit app page opens up. Here you can edit the app. Click on change app (as shown in the screen shot).
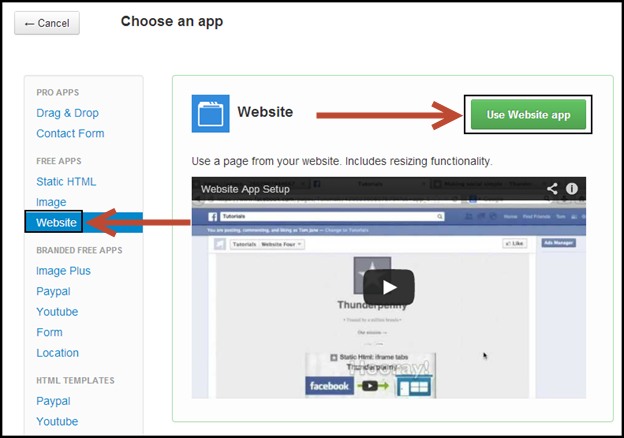
5. Select Website option in the left side. Click on Use Website app button.
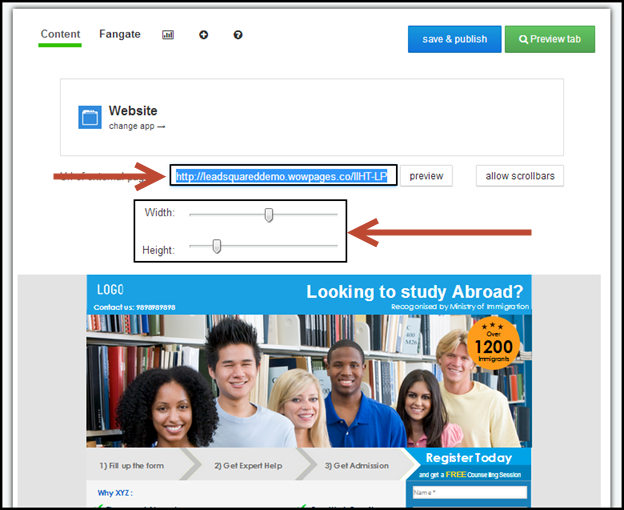
6. You will be redirected to the Website App edit page. Here you can enter the URL of the landing page that you have created in LeadSquared. You can adjust the width and height of the landing page using the scroll buttons available.
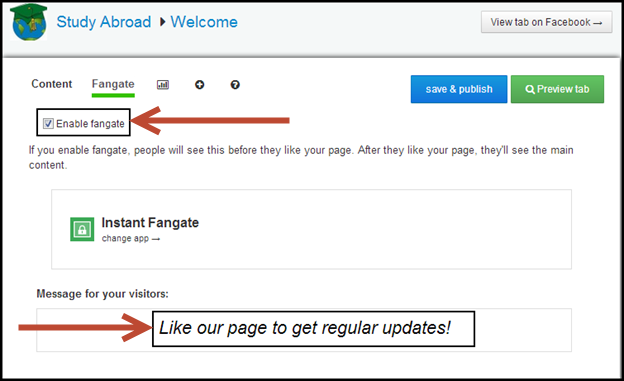
7. Next, click on click on the Fangate tab. Select the Enable fangate check box. If you enable fangate, people will see this before they like your page. After they like your page, they’ll see the main content. You can also edit the Message for your visitors section.
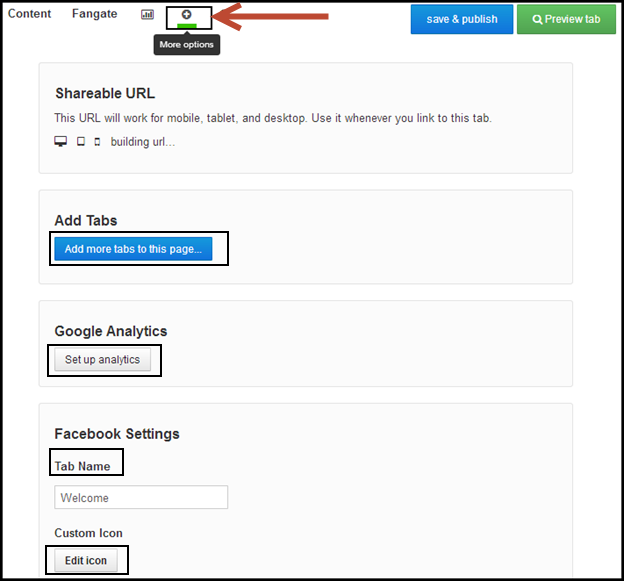
8. Click on More options button. In this page you can Add Tabs to your page, set up Google Analytics (if you have not set up LeadSquared’s own tracking script), edit the Tab Name, and also include a Custom Icon.
9. You can Preview and Publish the page now. It will be visible in your Facebook page.
10. If you want to include an image, click on the Dropdown Arrow that you see just next to your tab. Hover over your Tab, you will see an Edit option (the pencil icon on right). Click it. From the Dropdown Box, Click ‘Edit Settings’.
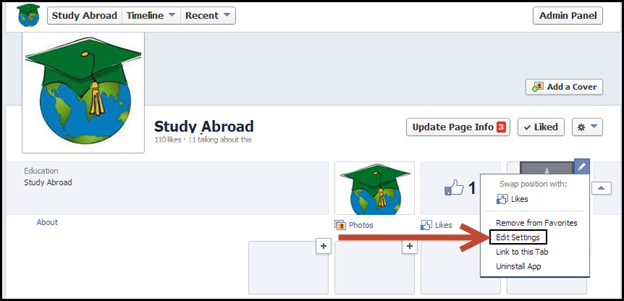
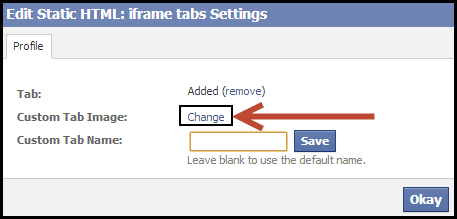
11. On a popup, you would now see an option called Custom Tab Image. Click on Change.
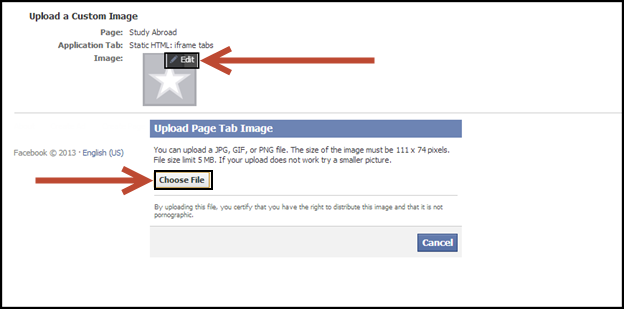
12. You will be re-directed to a new page where you can upload a custom image. Click on the Edit button present on the default image. Upload Image pop-up opens up. Here you can choose the image to upload. You can upload a JPG, GIF, or PNG file. The size of the image must be 111 x 74 pixels. File size limit 5 MB. If your upload does not work try a smaller picture.
13. If anyone clicks on this Icon, your Landing Page would open. You can also use this app’s URL in Facebook ads.