Tag Archive for: Lead Tags

Manage Lead Tags

Important: This feature was deprecated, and is no longer available on LeadSquared after 31st August, 2023. However, this does NOT impact the Marketing Tags feature, which will continue to be available.

1. Feature Overview

Tagging is a quick way to add a label to a lead, for easy identification of leads. The Lead Tagging feature enables users to associate leads with relevant tags (e.g., the lead’s city – Bengaluru, Chennai, the lead’s profession – Doctor, Accountant, etc.). These tags can be created using words or phrases. The intent of tagging is to describe certain attributes that are not captured in lead fields or activities.

Note: To know how to add tags to your leads, refer to Tag Your Leads.


2. Prerequisite

You must be the Administrator of your LeadSquared account.


3. Create a Lead Tag

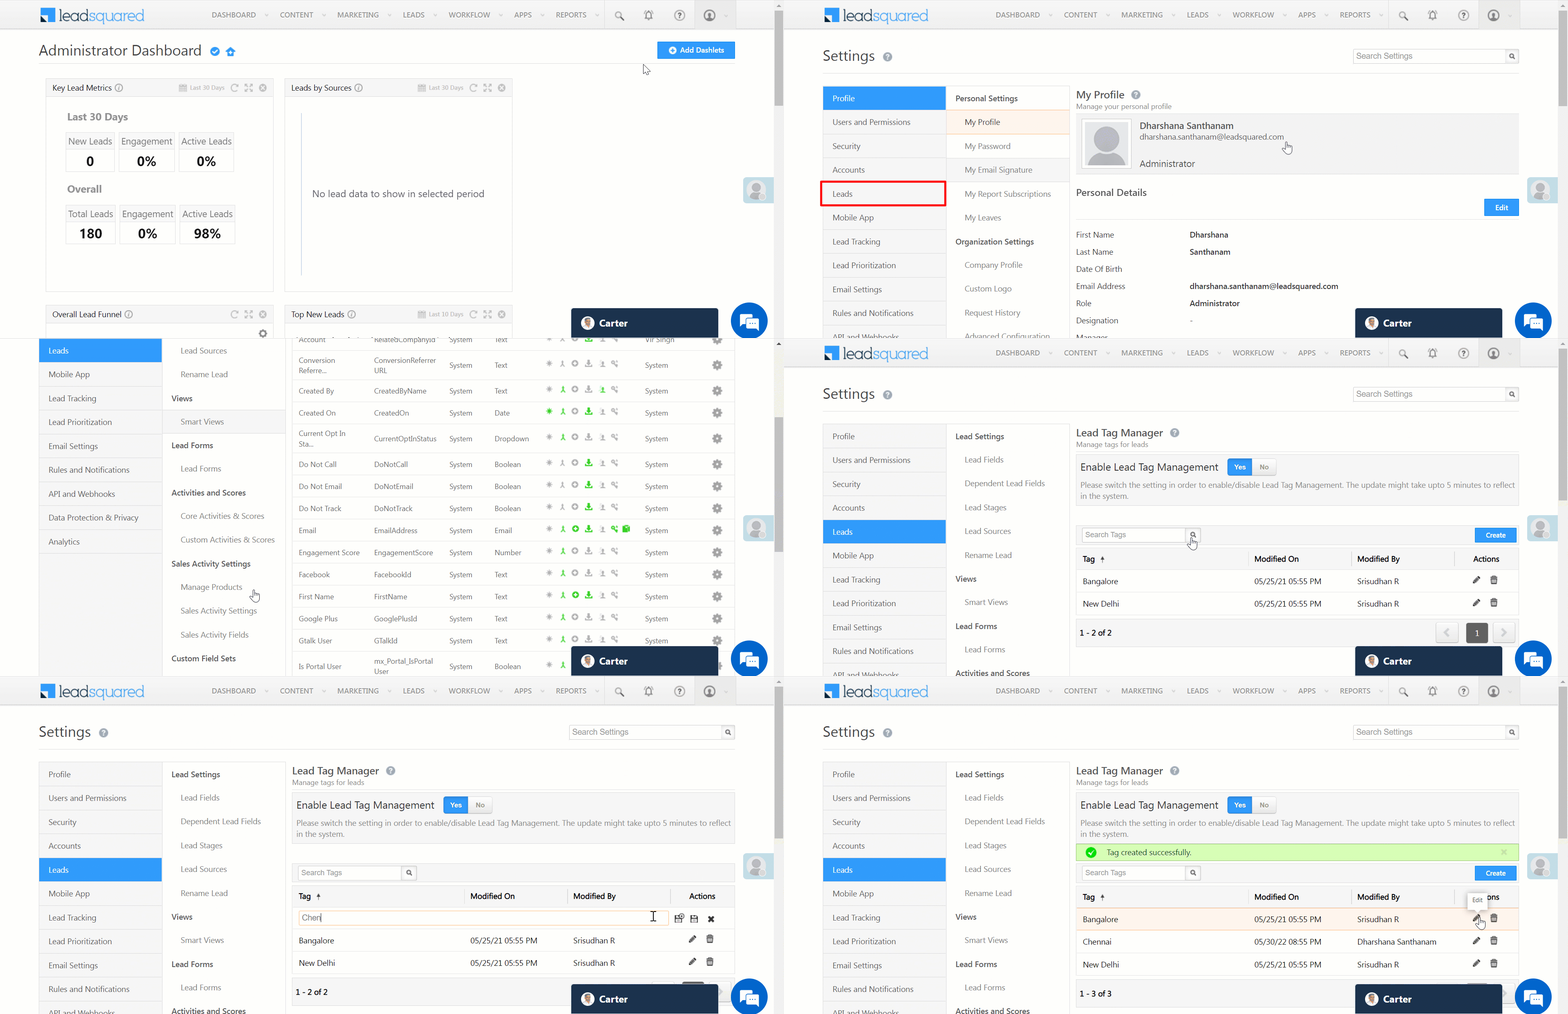
  1. Navigate to Settings>Leads>Lead Tag Manager.
  2. Click Create.
  3. On the text bar, enter the Lead Tag, and click .
  4. To save the current tag and add more Lead Tags, click Save & New.

LeadSquared - Create Lead Tag


4. Other Actions

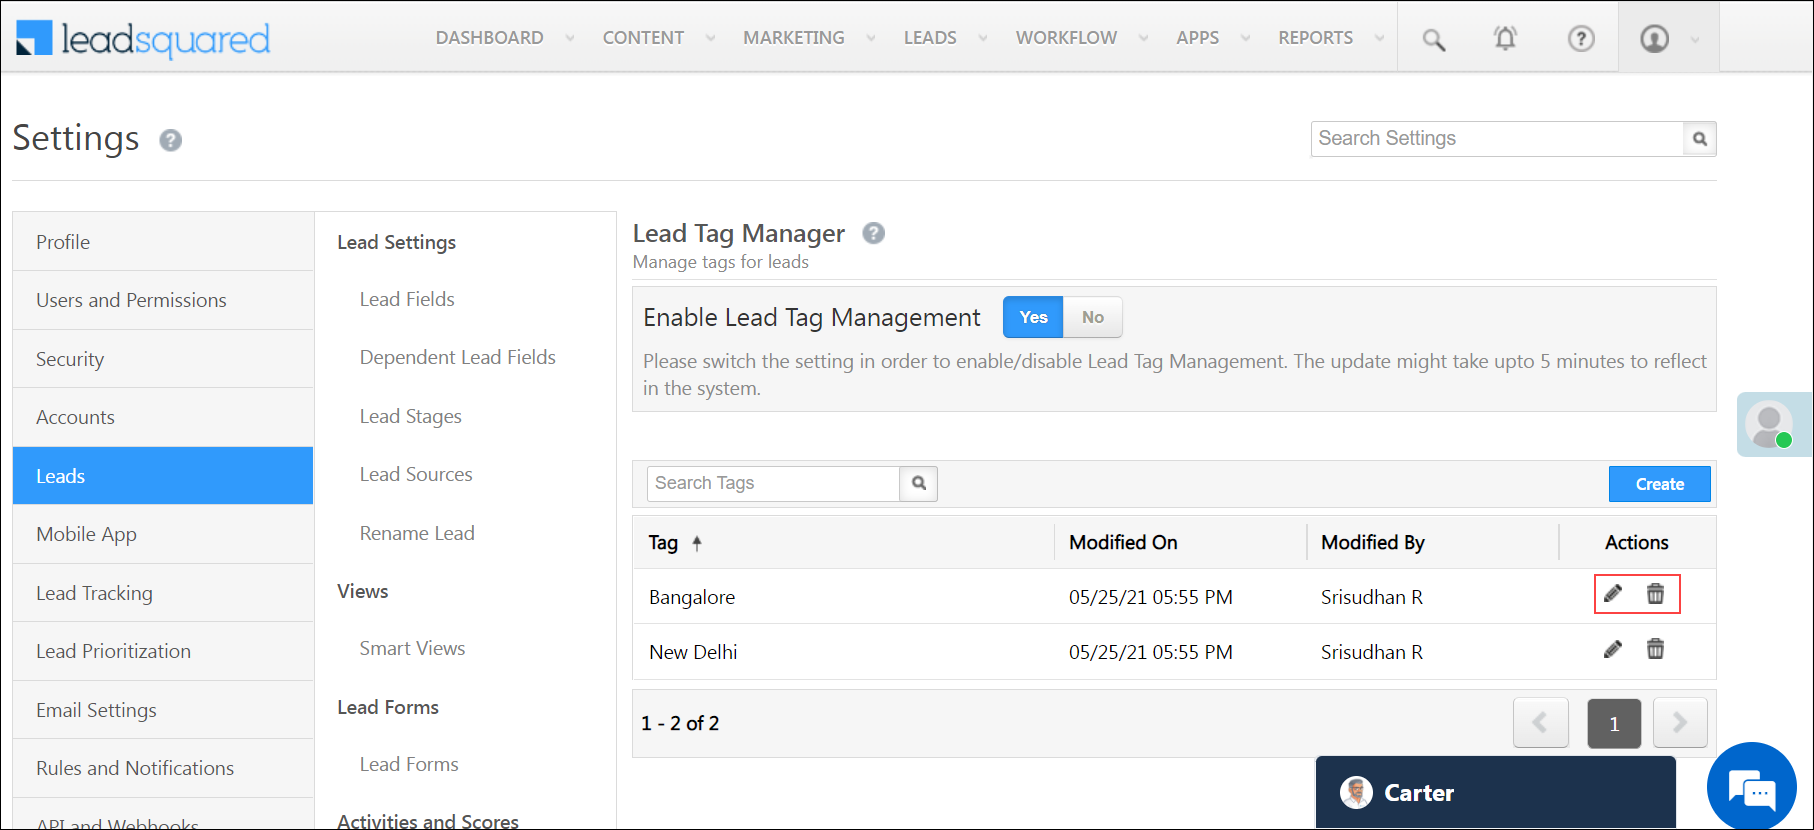
  • To edit an existing Lead Tag, alongside the tag, click Edit.
  • To delete an existing Lead Tag, alongside the tag, click delete.

LeadSquared - Edit Lead tags


5. Permission to Add New Tags

By default, all the users in your account can add existing tags to your leads. In addition to this, you can also permit users to add new tags to leads directly from the Lead Details page.
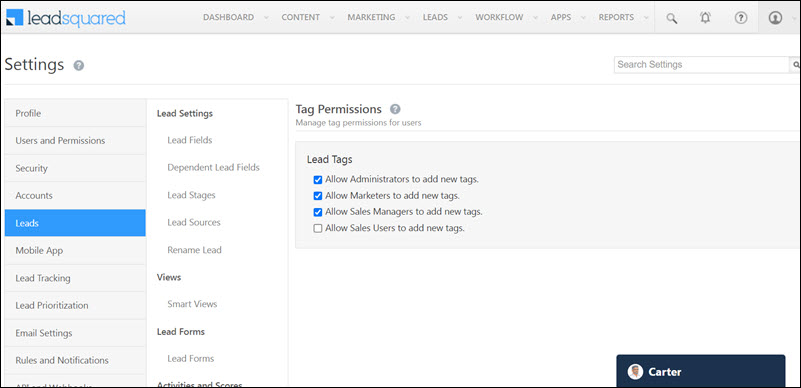
LeadSquared - Tag permissions

For example, if you have existing tags “Bangalore”, “Chennai” and “New Delhi” in your account, and you want to add the tag “Hyderabad”, you can enter this term in the search box, and hit ENTER. This new tag is added to your lead, and a new tag is automatically created in your account.
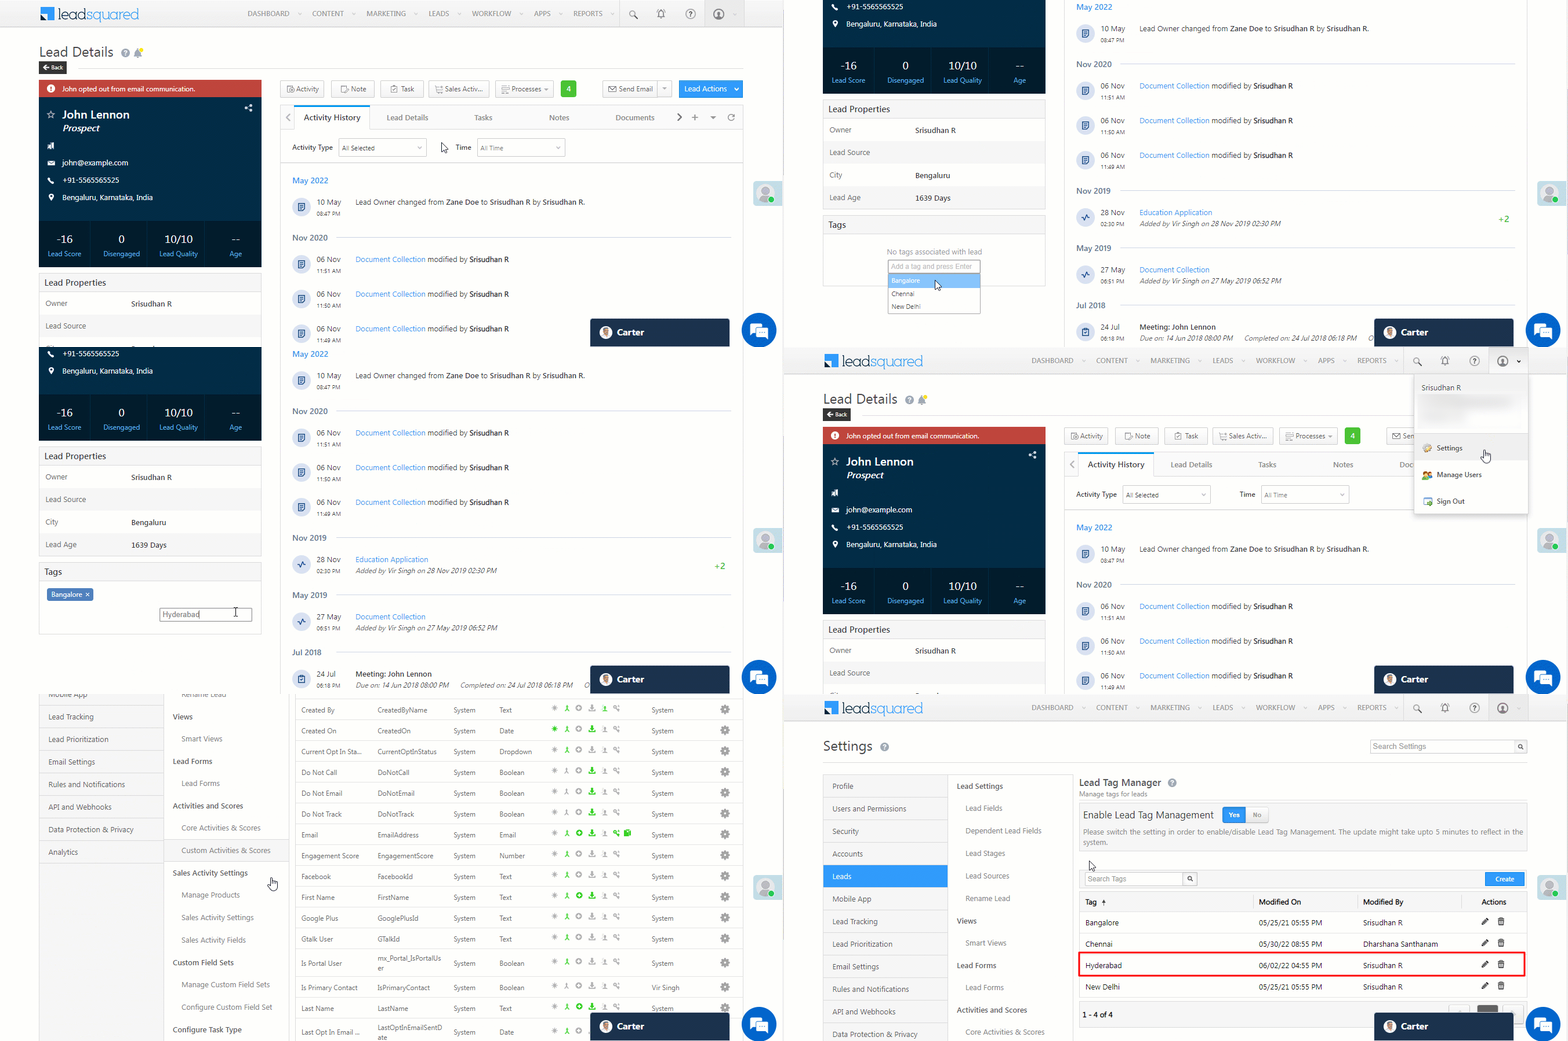
Lead Tags


6. Alternatives to Lead Tags

We recommend the following alternatives to address the exact same use cases for tagging your leads –

  1. Create a custom lead field 
    Set the data type of the field to multi-select dropdown and create the lead tags as options. For more details, see How to Create Custom Lead Fields.
  2. Create a Custom Activity Field
    Add a multi-select dropdown field to an activity type of your choice and use it to tag your leads. For more details see How to Add Custom Activity Types.
  3. Use the lead notes feature to add tags
    Add relevant tags as notes to your leads from the lead details page.
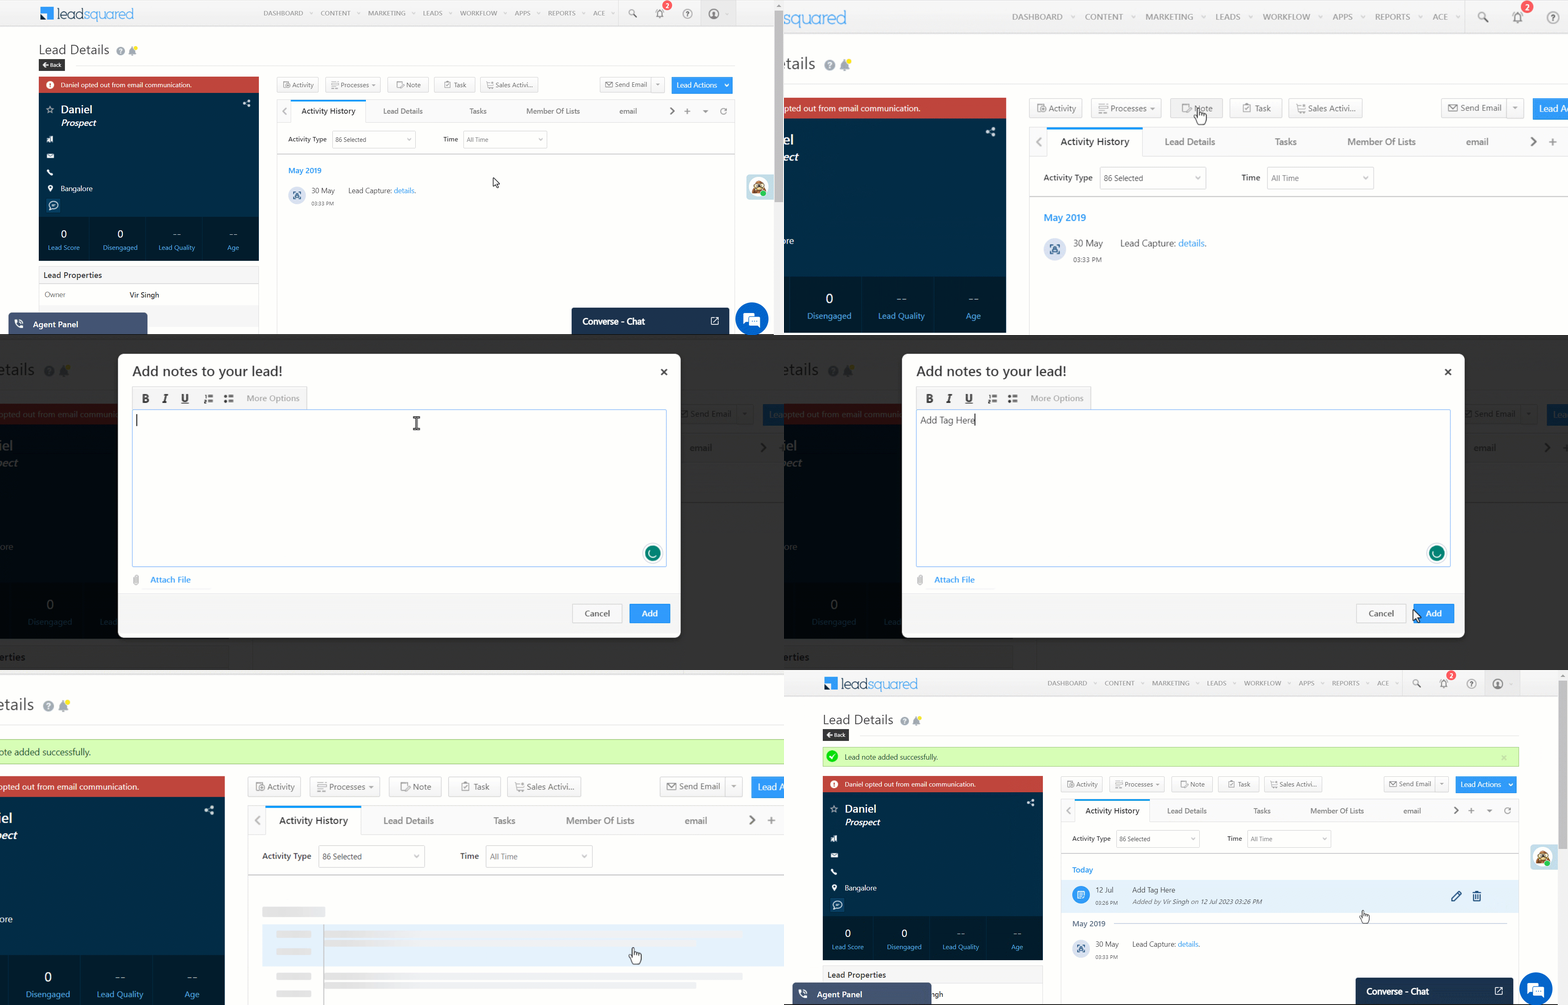
LeadSquared Lead Management Notes Feature

You can then use advanced search to help you filter leads and create lists according to your tags.


Any Questions?

Did you find this article helpful? Please let us know any feedback you may have in the comments section below. We’d love to hear from you and help you out!
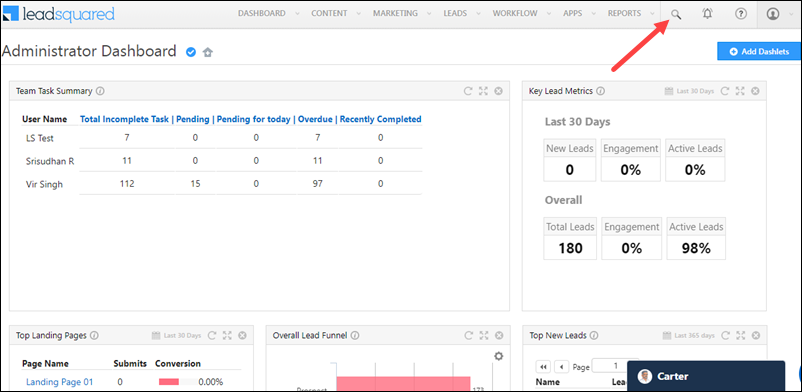
Tag Your Leads

Important:

  • For customers onboarded after 17th January 2023, the Lead Tag Manager feature will not be available.
  • For customers onboarded before the said date, if the feature was not enabled on your account before 17th January 2023, the feature is no longer available for you.

1. Feature Overview

Once you’ve created Lead Tags on your account, assign these tags to your leads. When tags are assigned to multiple leads, enter the lead tag in the Quick Search bar to identify all the leads that share a common tag.

Note: When you use the Quick Search bar, if the lead tag contains more than one word (e.g., New York City), put the tag name in quotes like “New York City”.

Lead Tags


2. How it Works

You can tag leads as follows:

  • Tag a lead from the Manage Leads page.
  • Tag multiple leads at once from the Manage Leads page.
  • Tag a lead from the Lead Details page.

Tag can be a word or a phrase of words. The maximum number of characters allowed per tag (tag length) is 50.


3. Tagging from the Manage Leads Page

You can tag one lead at a time or multiple leads from the lead details page –


3.1 Tagging One Lead at a Time

  1. Under the Actions column, hover your cursor over the settings Settings icon icon corresponding to the lead you wish to tag,
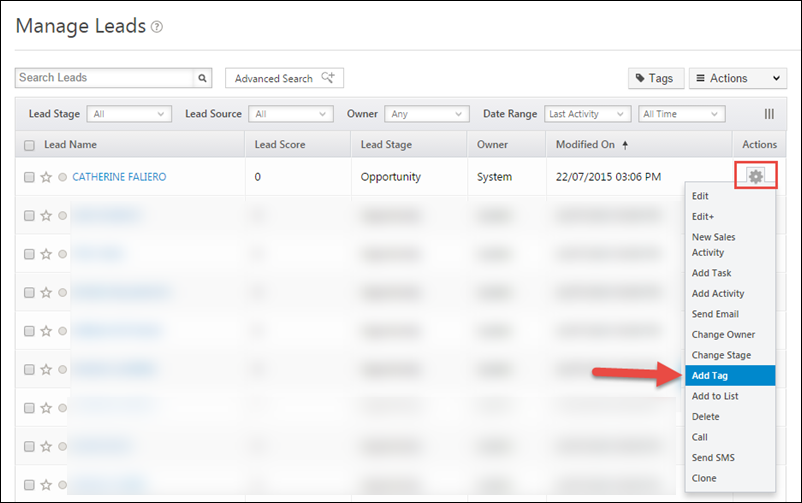
  2. Click Add Tag from the list of actions.

Add tag to a lead

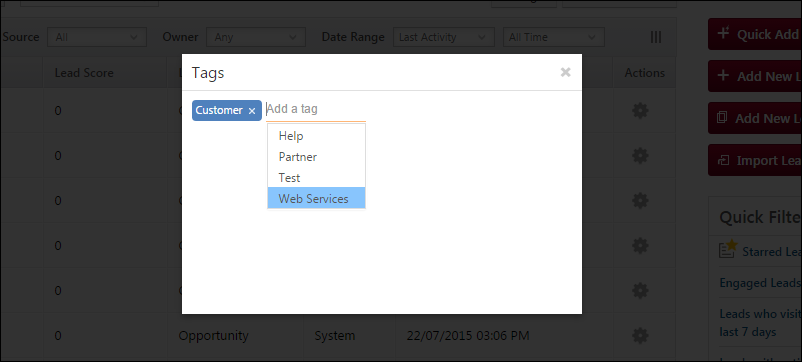
On the Tags pop-up,

  1. You’ll be able to add tags by selecting from the available tag options.
  2. If you have permission to add new tags, you can key in the new tag name and press Enter.

121 tag popp


3.2 Tagging Multiple Leads at Once

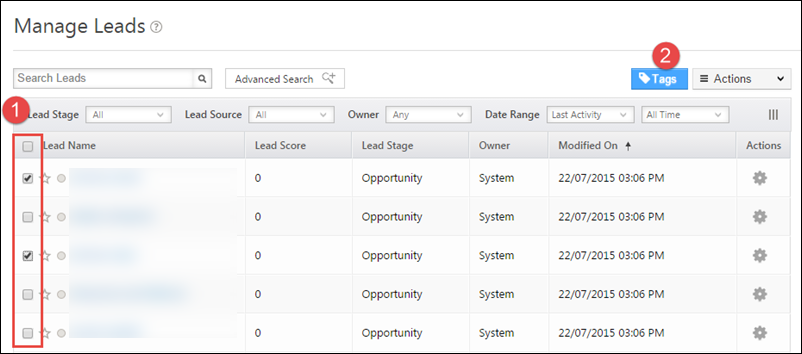
  1. Select one or multiple leads by selecting the checkbox alongside the Lead Name.
  2. Click the Tags button to add tags to the selected leads.

Tags-in-Manage-leads

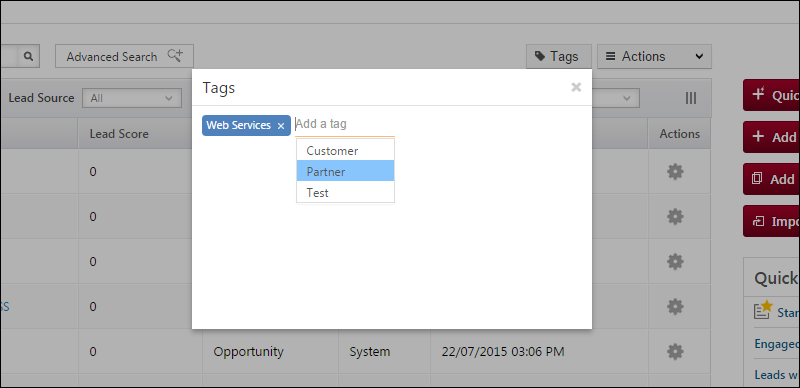
On the Tags pop-up,

  1. You can add tags by selecting from the available tag options.
  2. If you have permission to add new tags, you can key in the new tag name and press Enter.

Tags in ML popup

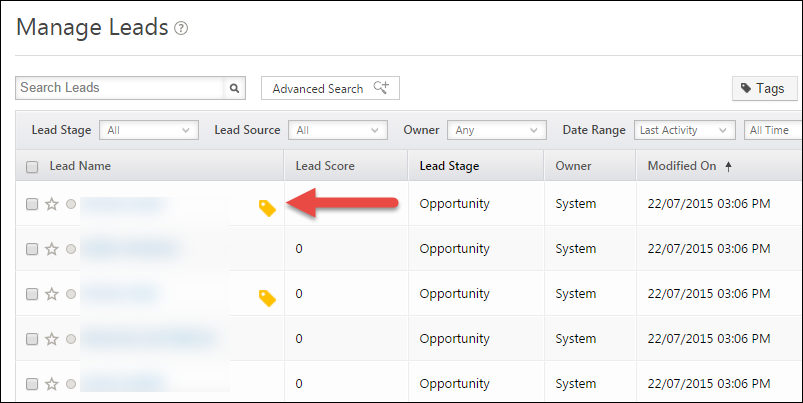
Leads with tags can be identified with the golden/yellow tag icon seen next to the leads on the Manage Leads page.

Manage-Leads-tag-icon

To see or edit the tags of a lead, click on the Tag icon. You’ll see a pop-up where you can add more tags or delete the existing tags as required.


4. Tagging Leads from the Lead Details Page

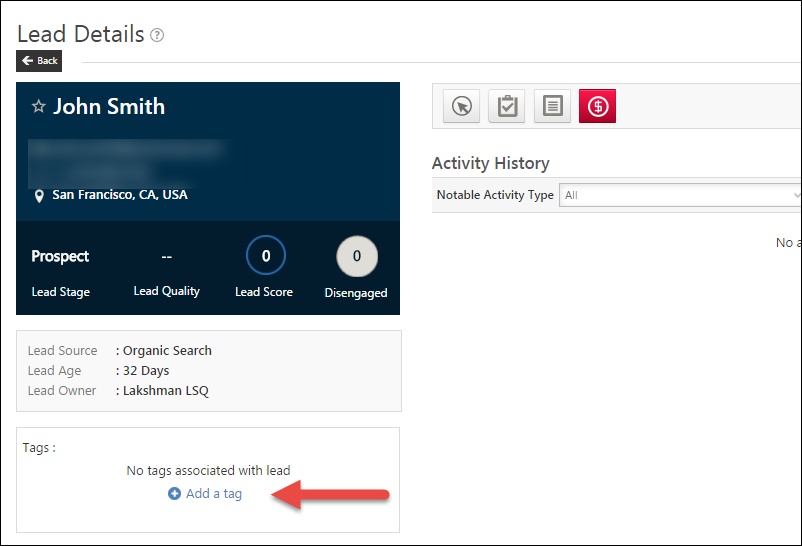
You can also tag a lead from the Lead Details page. You’ll see Tags section a little below the Vcard to the left of the page, click the Add a tag link to select from the available tag options.

Lead details Tags

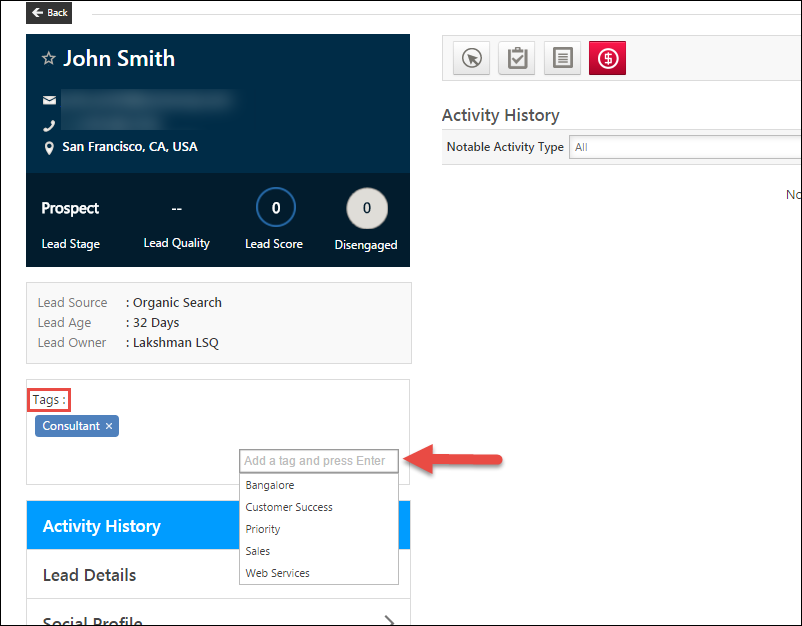
You can also add new tags and press the Enter key to add a tag to the lead.

Lead details tags 2

All the tags attributed to the lead can be seen in the Tags section.


5. Searching for Tags with Quick Search

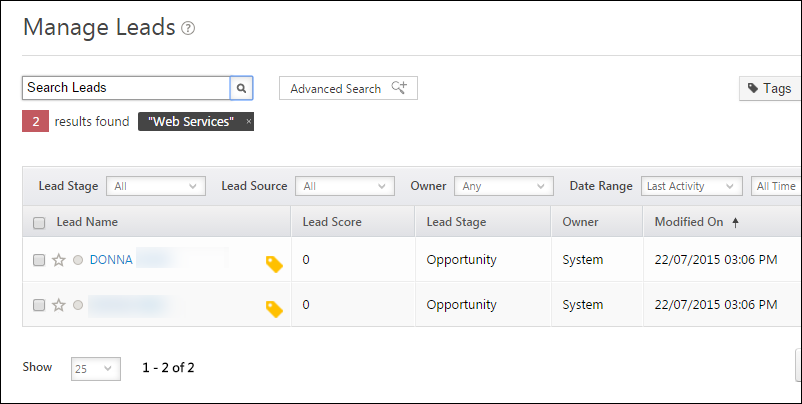
You can search for tagged leads using Quick Search.

  • If the Tag has a single word, use it directly in the quick search bar.
  • If the tag is a phrase comprising of two or more words, use double quotes while searching the leads. E.g., “Web Services”.

Search-Tags


Any Questions?

For any queries, feel free to leave us a comment below.