


Get Started
Sales Suite
Field Ops
Marketing
Service CRM
Integrations & Apps
FloStack
AdvancedMD Connector
1. Feature Overview
AdvancedMD is a comprehensive medical office management software. LeadSquared’s no-code AdvancedMD connectors sync leads between your AdvancedMD and LeadSquared accounts.
Note:
- This connector is currently only available for healthcare domain customers in the US.
- Depending on your use case, install and configure any or both of the following AdvancedMD connectors –
- AdvancedMD Lead Sync – Uses patients in your AdvancedMD account to periodically create and update leads in your LeadSquared account.
- AdvancedMD Create Patient – Uses leads in your LeadSquared account to create and update patients in real-time in your Appointment Sync connector.
2. Prerequisites
- You must be the Administrator of your LeadSquared account to install and configure this connector.
- This is a paid connector. To enable it, reach out to your account manager, or write to support@leadsquared.com.
3. How it Works
This is a simple, out-of-the-box connector that doesn’t require an elaborate setup process. Once the connector access is enabled on your account, install the connector. Then, configure the connector with the relevant AdvancedMD details, and ensure the field mappings are accurate. This completes the connector set-up and leads/patients will be synced between AdvancedMD and LeadSquared.
4. Install the AdvancedMD Connector(s)
Note: The steps listed below are the same for the following connectors –
- AdvancedMD Lead Sync
- AdvancedMD Create Patient
We’ve used the AdvancedMD Lead Sync connector to demonstrate the installation process.
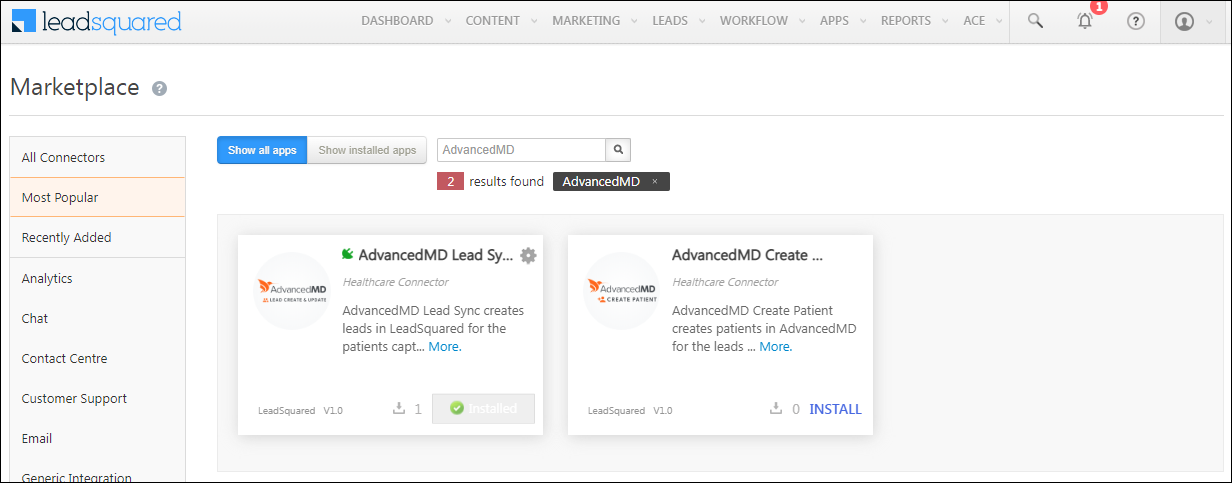
- Navigate to Apps>Apps Marketplace.
- Search for AdvancedMD Lead Sync, and click Install.
- Alternatively, you can find the connector on the left panel, under Lead Capture.
- Once installed, hover your cursor over
 , and click Configure. On the Configure AdvancedMD screen, you can ignore the Connector Access tab, and directly click Save Details. This completes the connector set-up process.
Note:
- Only Admin users can install the connector.
- You do not have to provide Connector Access for any of your users. Once installed, by default, all your users will be able to create and view leads through this connector.
5. Admin Configuration
To continue the connector configuration, navigate to Apps>AdvancedMD Appointment Sync.
5.1 Basic Settings
Enter the following details –
| Property | Description |
| Username | The username provided by your AdvancedMD team. |
| Officecode | The unique office code shared by the AdvancedMD team. |
| App Name | Enter the name of the application created in your AdvancedMD account. |
| authURL | To obtain these, reach out to your AdvancedMD account manager. |
| Password | |
| baseURL | |
| forView | |
| columnId | |
| Lead Source | Enter the lead source through which the leads were captured (e.g., AdvancedMD, email campaign, etc.). This detail will be displayed on the Lead Details page, under Lead Source. |
| Default Country Code | If the lead’s mobile number is captured without a country code, then the default country code that’s selected from the dropdown will be added to the lead’s mobile number. |
| Select Time Zone | The time zone that’s followed in your AdvancedMD account. |
| Lead Capture Search By Criteria | This is used to identify existing leads who made the payment using AdvancedMD.
This is also used to avoid creating duplicate leads. You must select one unique lead field (e.g., email Id, mobile number, etc.) as the search key. This will be used to identify the leads pushed from AdvancedMD. |
| Lead Capture Secondary Search By Criteria | If lead identification and capture through the primary Search By criteria fails, it will be re-attempted using the secondary Search By criteria. |
| Select User to Notify on Failure | If there is an error identifying and capturing leads who made the payment, the selected user will receive a failure message via email. You can select a user from the list of all the users available in your LeadSquared account.
To know more about the type of errors, please refer to Error Notifications. |
| Enable Notification | Enable the |
Once you’re done entering all the details, click Save & Next.

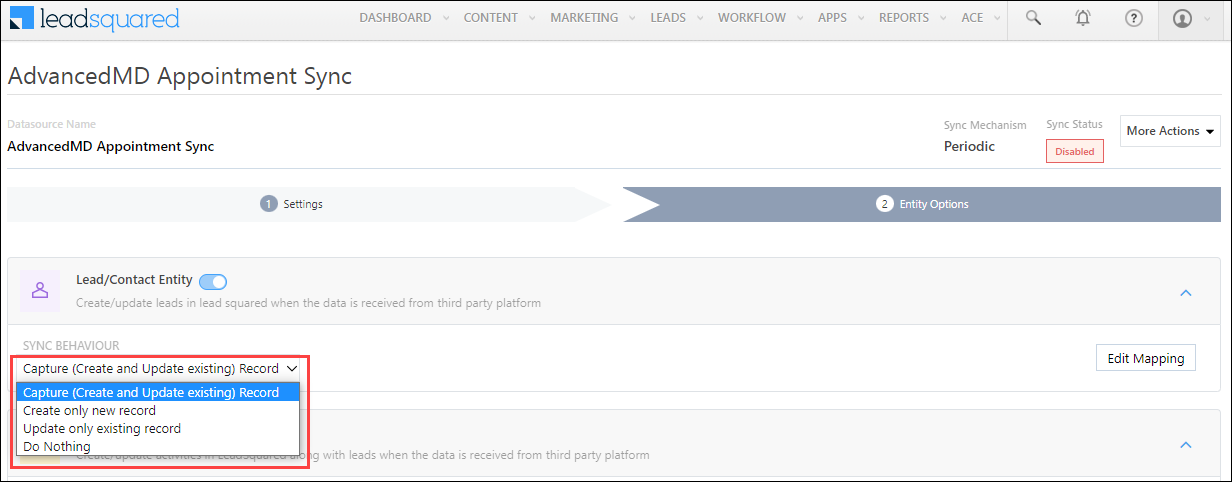
5.2 Entity Options
Define the sync behaviour of the connector when payment activities and leads are captured.
5.2.1 Lead/Contact Entity
Based on the Lead Capture Search By criteria (email Id, phone number, etc.), LeadSquared identifies and captures leads from your AdvancedMD account. Lead capture is enabled by default, and it cannot be disabled. The following options are available to configure the connector’s Sync Behaviour –
- Capture (Create and Update existing) Record – Leads not existing in your LeadSquared account will be created. Leads that currently exist in your LeadSquared account will get updated.
- Create only new record – Leads not existing in your LeadSquared account will be created.
- Update only existing record – Leads that currently exist in your LeadSquared account will get updated.
- Do nothing – Leads do not get created or updated by syncing.
Note: A lead is classified as a new lead or an existing lead based on the Lead Capture Search By Criteria you’ve selected in the previous section.
5.2.2 Mapping
When you click Edit Mapping, on the Mapping pop-up, the AdvancedMD system fields mapped to the corresponding LeadSquared lead/activity fields are visible. This mapping is carried out by default. If required, you can change or update the default field mapping.
- To provide a default value for any field, click
 , enter the value under Default Value, and click
  .
.
- If the data provider doesn’t send data for any lead/activity field, then the default value will get assigned to that specific field. But if the field already has an existing value, then the default value will be ignored.
- To disable lead data capture for any field, disable the
 slider.
 - You can also mark and update a unique lead field as the search key from this screen, by clicking
 .
. - To create a custom AdvancedMD field, click the Add Custom button.
- Once this field is created, you must map it to the relevant LeadSquared lead field.
- After the field is mapped, to save the custom field, click .
- To delete a custom field, click
 .
.
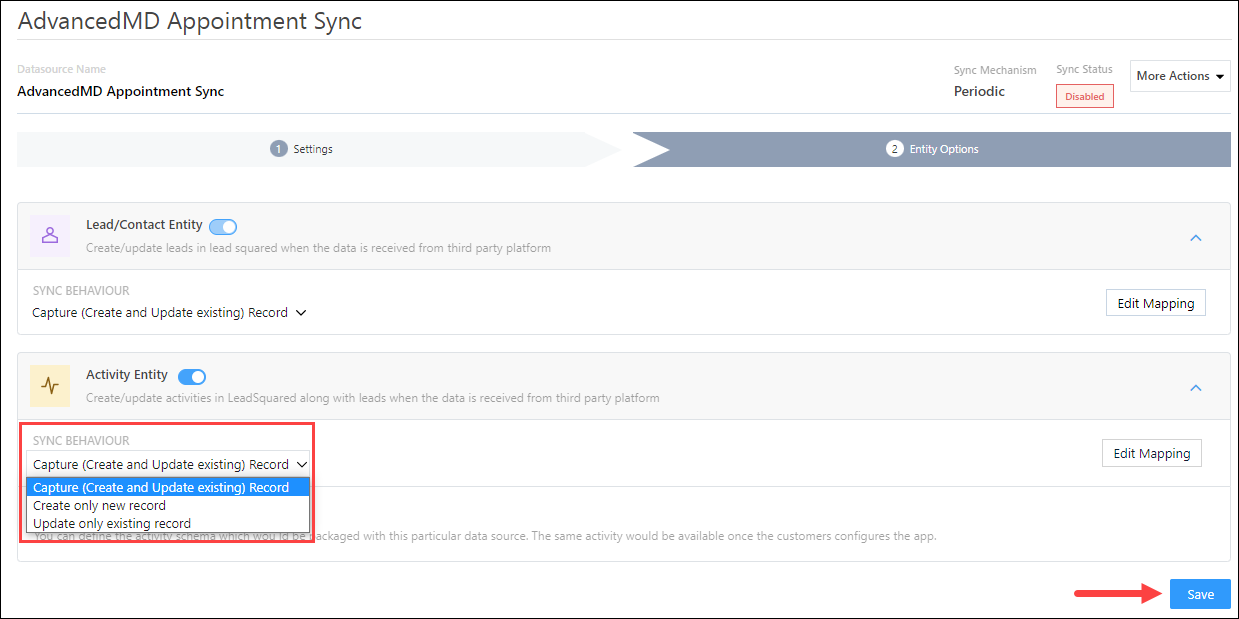
5.2.3 Activity Entity
Once leads are captured to LeadSquared, you can post custom activities to these leads (e.g., Appointment Created, etc.). These activities will help users keep track of the lead’s journey to conversion.
To post activities to the leads captured from AdvancedMD, against Activity Entity, enable the ![]() slider. The following options are available to configure the connector’s Sync Behaviour when activities are synced to LeadSquared –
slider. The following options are available to configure the connector’s Sync Behaviour when activities are synced to LeadSquared –
- Capture (Create and Update existing) Record – New activities will get posted to the lead in LeadSquared, while existing activities will get updated.
- Create only new record – Only new activities will get posted to leads in LeadSquared.
- Update only existing record – Only existing activities on the leads captured will get updated in LeadSquared.
6. Create Leads
If you’ve installed the AdvancedMD Create Patient connector, the leads you create in LeadSquared are created as patients in your AdvancedMD account. To know how to create leads, refer to How to Create Leads.
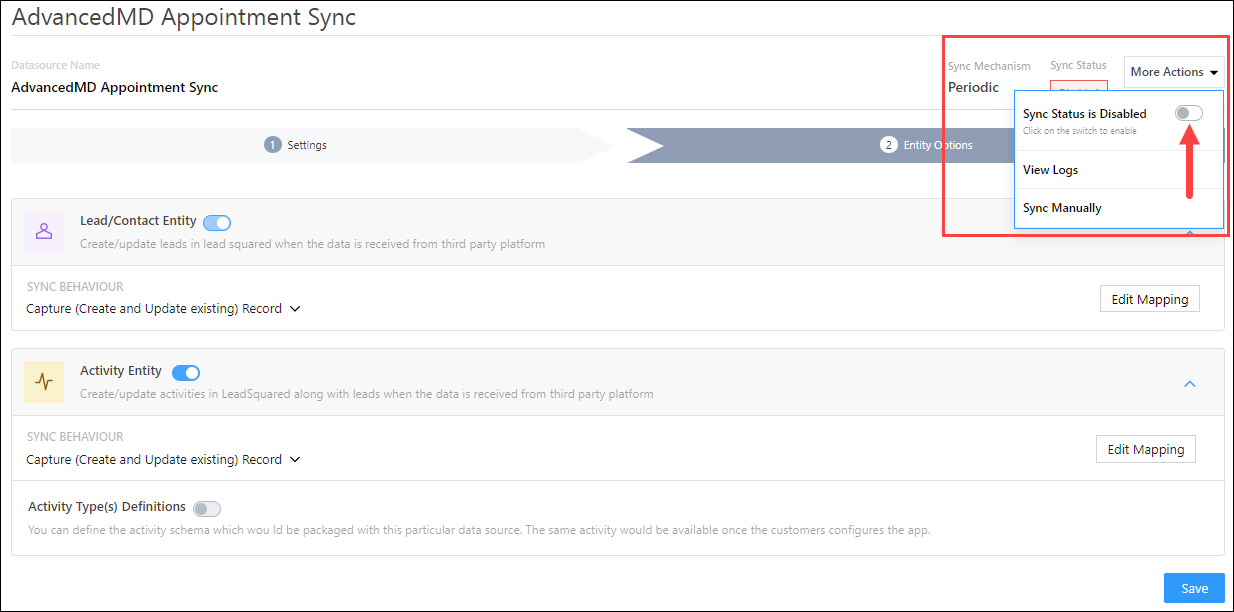
7. View Leads
If you’ve installed the AdvancedMD Lead Sync connector, to view the leads captured in your LeadSquared account –
- Navigate to Leads>Manage Leads.
- Click on a lead that’s been captured/updated from your AdvancedMD account.
- On the Lead Details page, you can view the lead’s information.
Any Questions?
Did you find this article helpful? Please let us know any feedback you may have in the comments section below. We’d love to hear from you and help you out!