1. Feature Overview
Custom Apps will now enable you to build, release and host UI apps inside LeadSquared. You can use any UI framework to build a single page/static website (the default page is index.html). The key benefits are –
- Efficiently manage all your customizations.
- Easily add your apps without having to depend on external help.
2. Prerequisites
- You must be the administrator of your LeadSquared account.
- You must have access to the Custom Apps license.
Note – If you want to access your Custom Apps license, reach out to support@leadsquared.com, or speak to your Customer Success Executive, and they will help you out.
3. Process
3.1 Create the Custom App
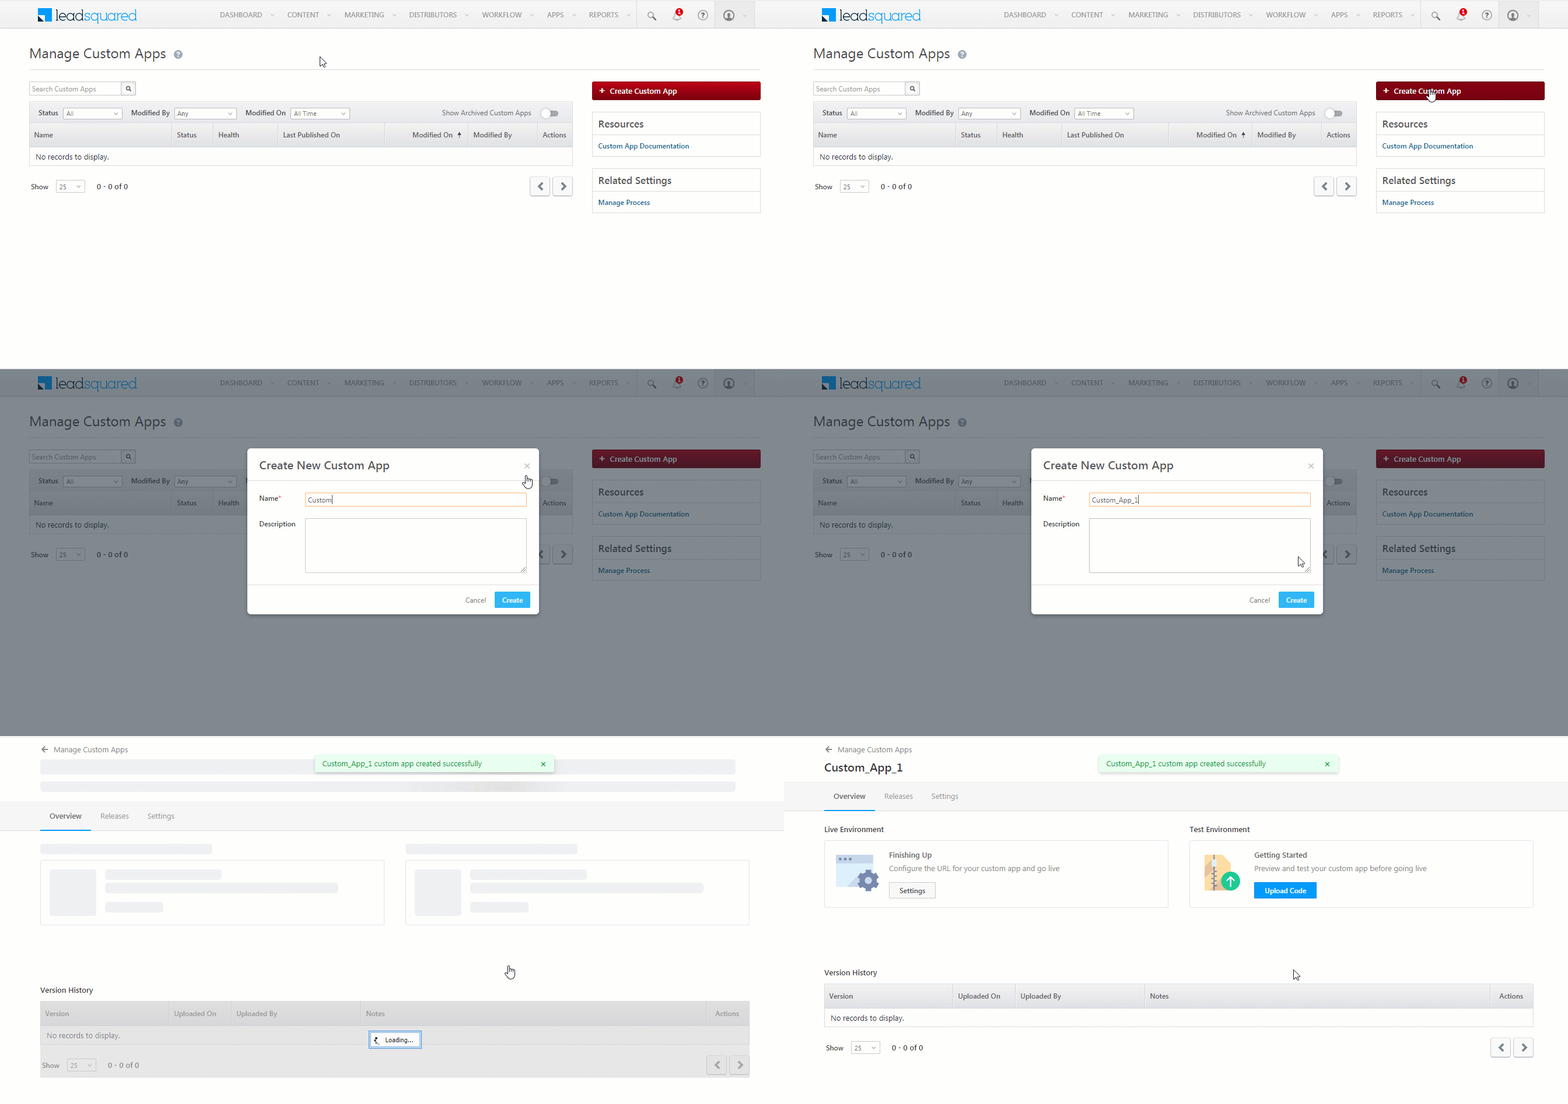
- From the LeadSquared dashboard, navigate to Apps>Manage Custom Apps.
- Click the Create Custom App button.
- Give a relevant name for the app, and add a description if required. Once you are done, click Create.
3.2 Test the Custom App
You can test the custom app on the Test Environment to see if it has been deployed correctly. Once the test is successful, you can make it live.
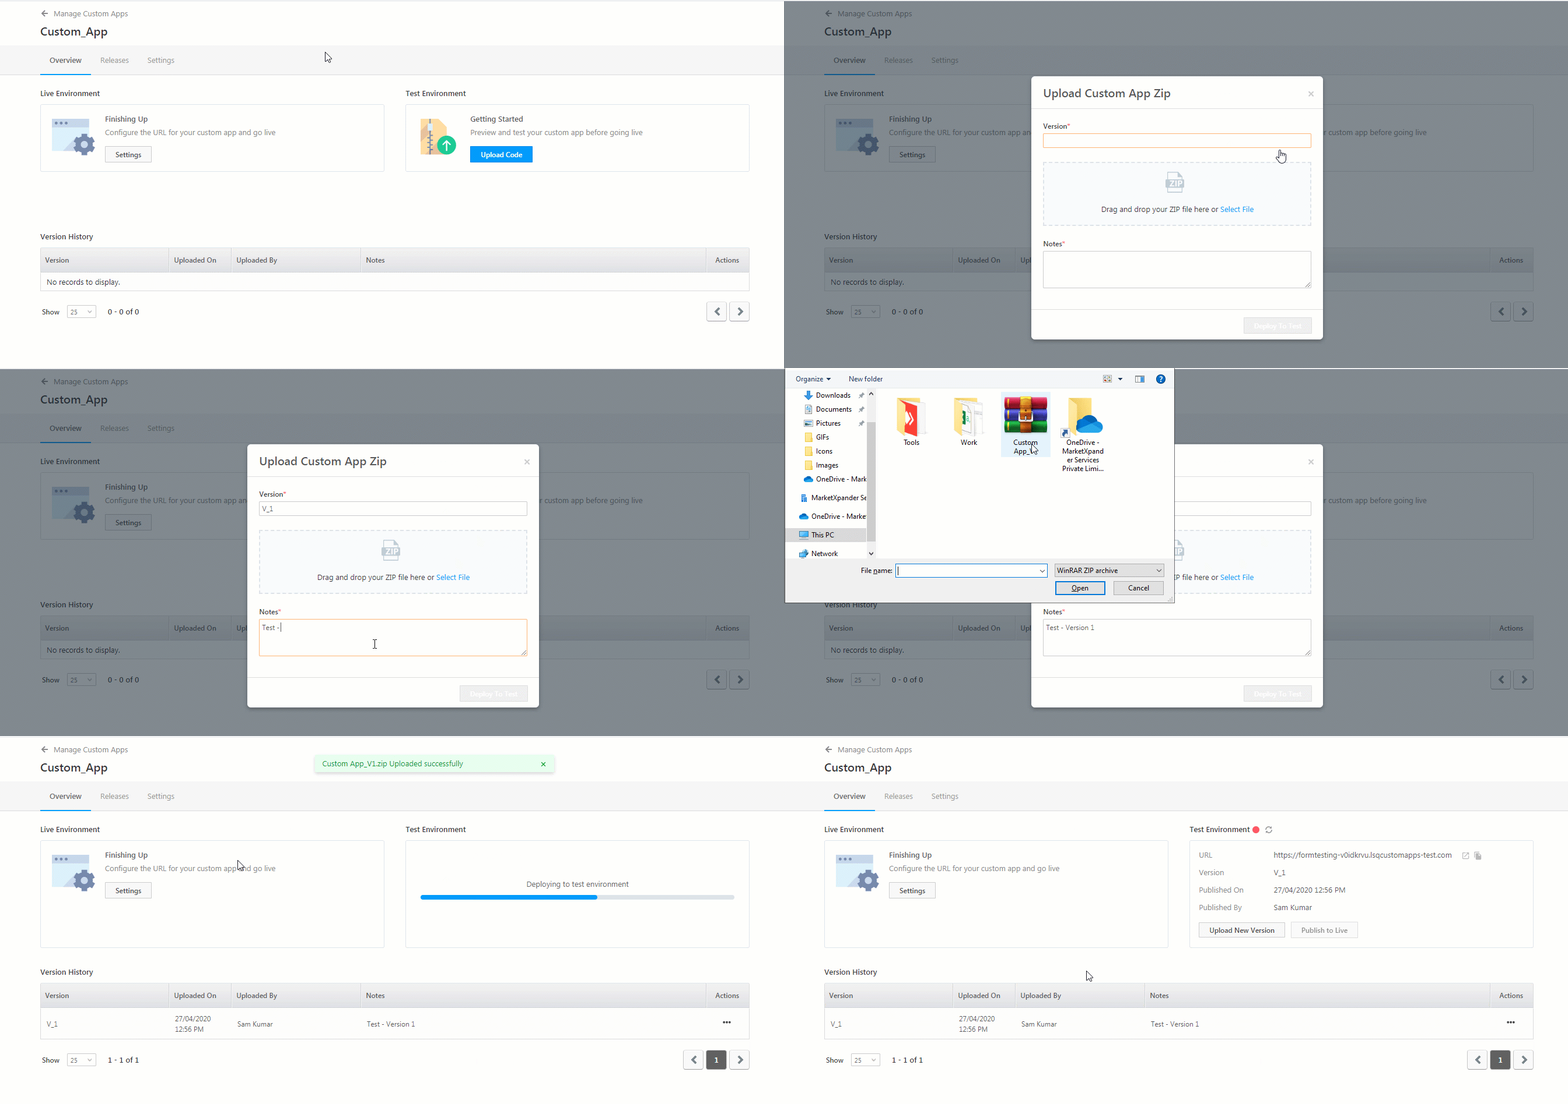
- On the Custom App homepage, under Test Environment, click on Upload Code. Name the version of the zip file you are uploading.
- You can drag and drop the code file, or upload it by clicking Select File. You will have to keep the following points in mind while uploading a zip file –
- Custom Apps can be deployed to Test Environments by uploading a Custom App Build File, as a compressed zip file.
- The Custom App Build File can be any build file of a static website which can be hosted and deployed within Leadsquared. While React is recommended, Custom Apps support other web frameworks as well. The maximum allowed upload size for the zip file is 10 MB. If you have complex use cases which requires a larger zip file size, you can reach out to support@leadsquared.com, or your customer success manager.
- Leadsquared checks for the index.html file in the root of the uploaded zip file to understand the structure, runtime logic and other information about your website. Besides requiring the index.html file to be in the root of the Custom App Build File, Leadsquared puts no other restrictions on the directory structure of your website.
- Once you have successfully uploaded the file, under Notes, mention points that might be important to you or your team.
- Once you have completed all the above steps, click Deploy to Test. The file will automatically get uploaded to the Test Environment.
- For a couple of minutes, the Test Environment status will stay
 red.
red. - The status will automatically turn
 green. If it doesn’t, click on the
  refresh icon.
 - If your Custom App is enabled in the live environment, you can click Publish to Live.
3.3 Domain Settings
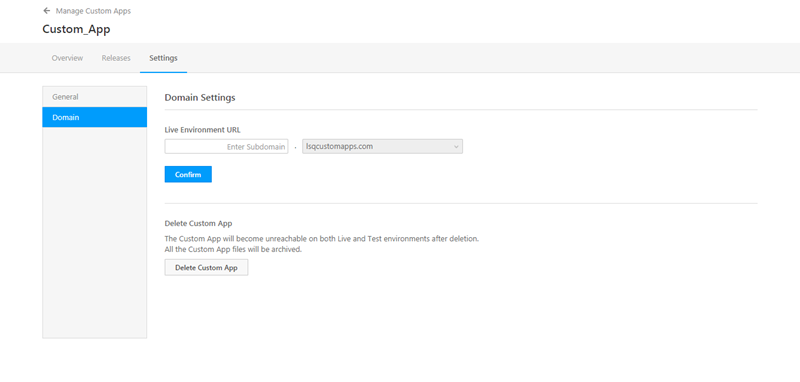
To host your app on the LeadSquared domain, navigate to Overview>Finishing Up>Settings, or click the Settings tab.
- In the Domain Settings column, enter a subdomain name for the app you’ve created.
- The URL for the default LeadSquared domain is “lsqcustomapps.com”
- Once you have added the subdomain name, click Confirm.
- You can choose to delete the app by clicking the Delete Custom App button.
4. Version History
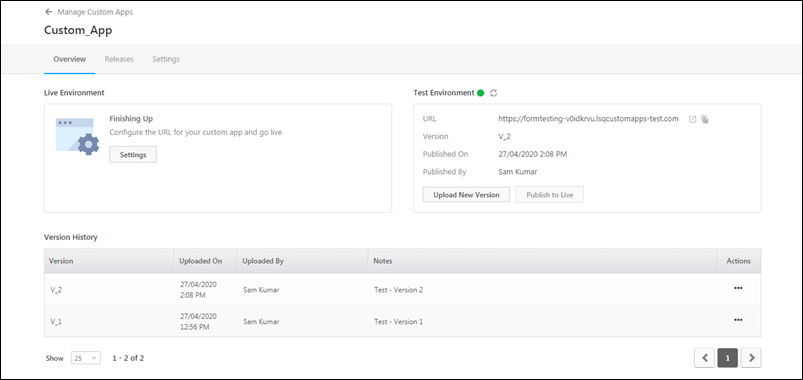
You can view the various versions of the code that was uploaded on this app.
- Under Actions, click the
 icon against any version of the code.
 - To test a previous version of the code, click Publish to Test.
- To download a previous version of the code, click Download Zip.
5. Releases
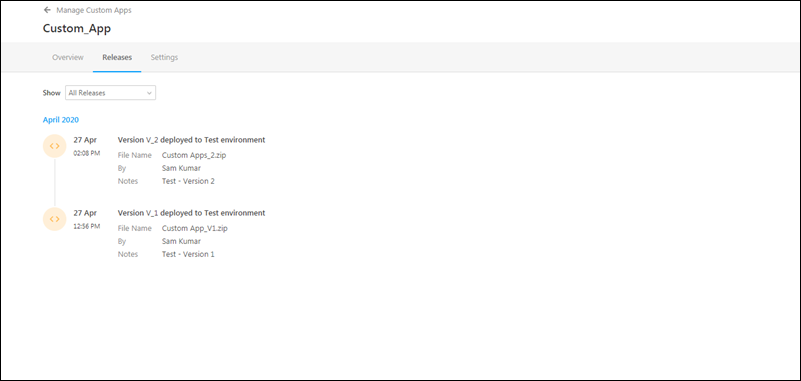
- You can check all the versions that have been uploaded to the app under the Releases tab.
- The default selection is All Releases, but you can also filter by Test Releases and Live Releases.
6. Mange Custom Apps
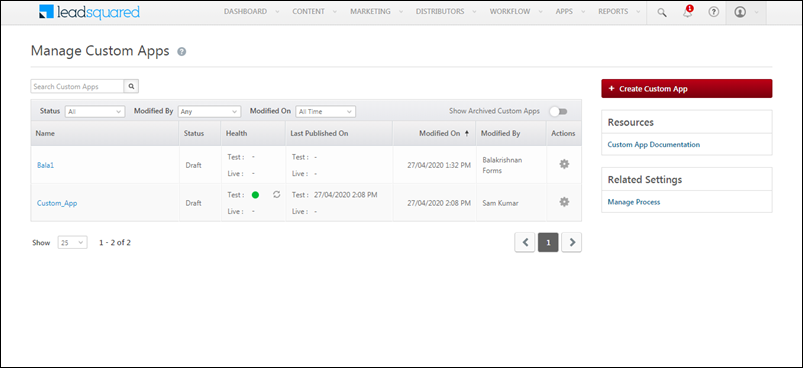
Existing and newly created apps will show up under Manage Custom Apps. You can use filters to search for apps on the basis of various parameters, such as when they were created, the current status and so on. You can also edit and delete apps on this page.
Any Questions?
Did you find this article helpful? Please let us know any feedback you may have in the comments section below. We’d love to hear from you and help you out!


