1. Feature Overview
By default, landing pages created using Landing Pages Pro are hosted on a LeadSquared subdomain. To maintain brand consistency, you can instead publish landing pages on your own custom domain (e.g., pages.yourcompany.com).
This article explains how to configure a custom domain and map it to your Landing Pages Pro environment.
2. Prerequisites
- You are an Admin user in your LeadSquared account.
- You have access to the Landing Pages Pro feature (contact your account manager if not enabled).
- Access to your Domain Name Service (DNS) provider’s account (GoDaddy, Hostgator, Bluehost, etc.).
3. How It Works
To publish landing pages on your custom domain securely (over HTTPS), you’ll need to configure two CNAME records in your DNS provider:
- One CNAME record sets up an HTTPS certificate using LeadSquared’s certificate manager.
- The second CNAME record maps your custom domain (e.g.,
pages.mybusiness.com) to LeadSquared’s CDN endpoint for content delivery.
You’ll switch between the Landing Pages Pro domain settings in LeadSquared and your DNS provider’s dashboard during the setup.
Here’s a quick overview of the steps involved. The following sections explain each in detail:
1. Configure the subdomain in Landing Pages Pro.
LeadSquared will generate a Name and Value pair for the first CNAME record.
This record sets up HTTPS to secure your landing pages.
2. Add and verify the first CNAME record in your DNS provider’s dashboard.
Use the values provided by LeadSquared on your DNS’s provierds dashboard and then verify. This confirms that the HTTPS certificate has been issued and is active.
3. After verification, add the CDN URL from LeadSquared on your provider’s dashboard.
This is used to serve your landing pages efficiently. Add the second CNAME record in your DNS provider. Use your custom domain as the host and the CDN URL as the value.
Once this is complete, your landing pages will be securely accessible via your custom domain.
4. Configure the Subdomain in Landing Pages Pro
To configure your subdomain on Landing Pages Pro –
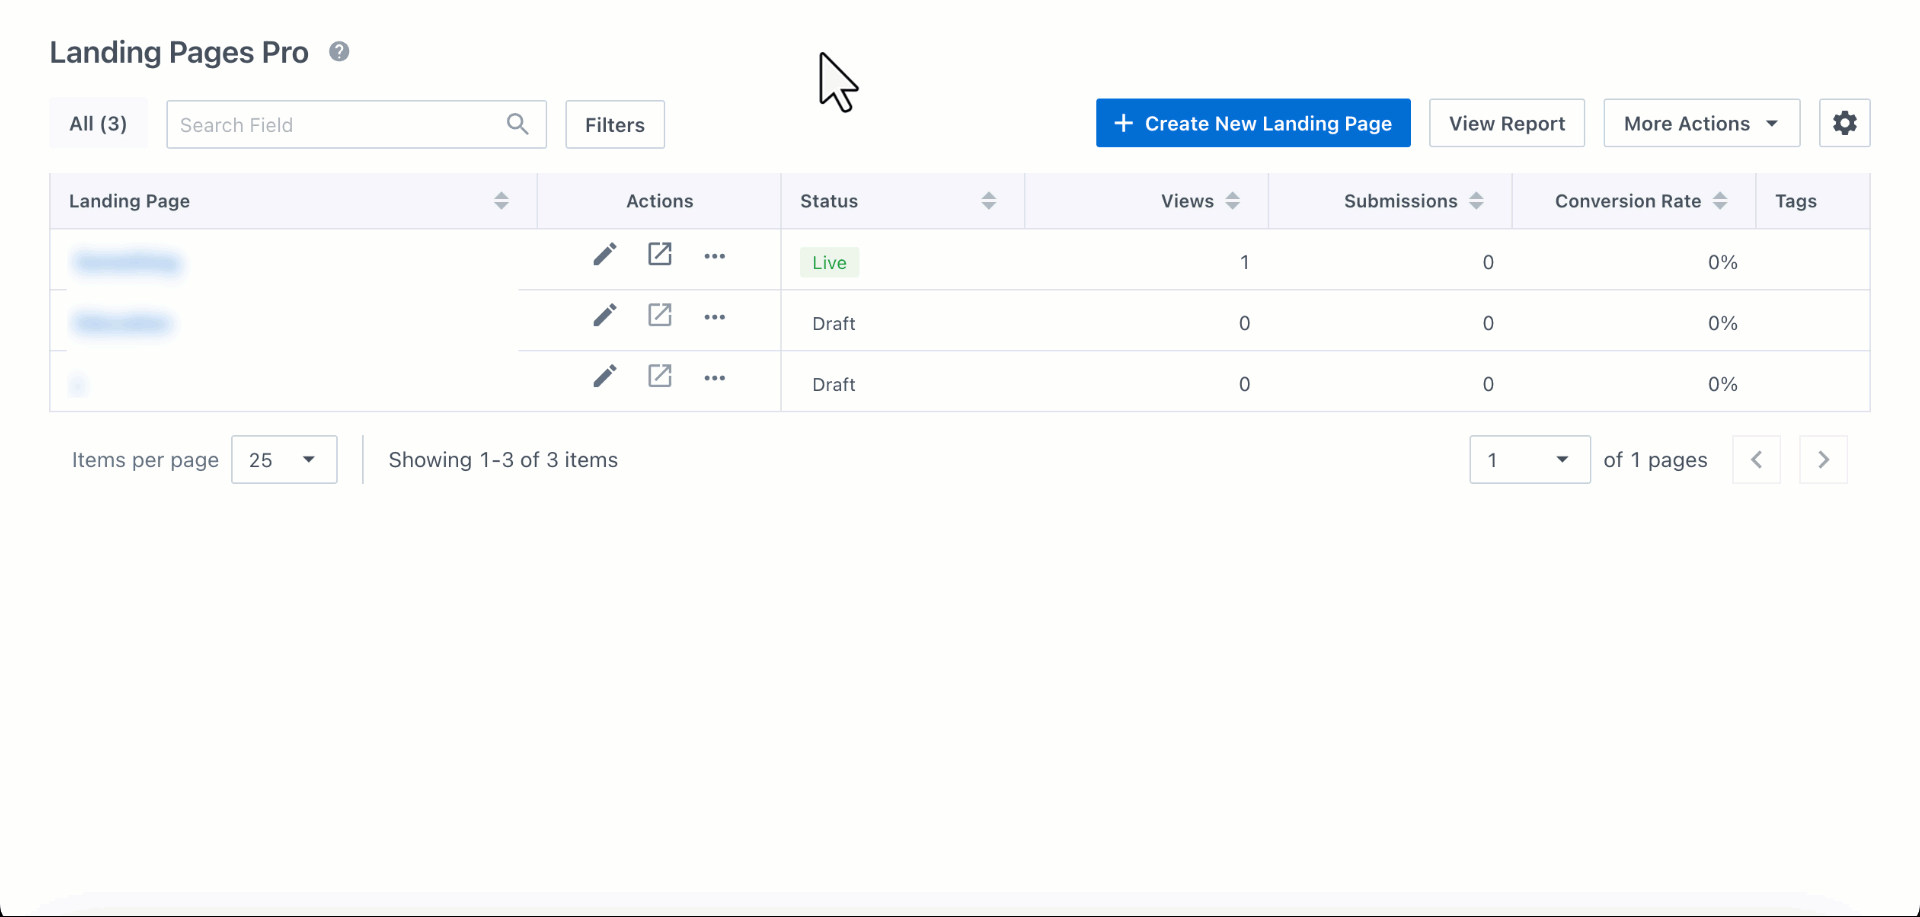
- Navigate to Marketing>Landing Pages Pro.
- Click More Actions, and then select Manage Subdomains.
- Click + Add Subdomain.
- In the Domain dropdown, select + Add Domain to add a new domain.
- Once the domain is added, it will appear in the dropdown list and can be selected.
- Enter the required subdomain.
- Click Continue.
LeadSquared will generate the CNAME Name and CNAME Value. Copy these details and configure them in your domain provider’s DNS settings (refer to the next section).
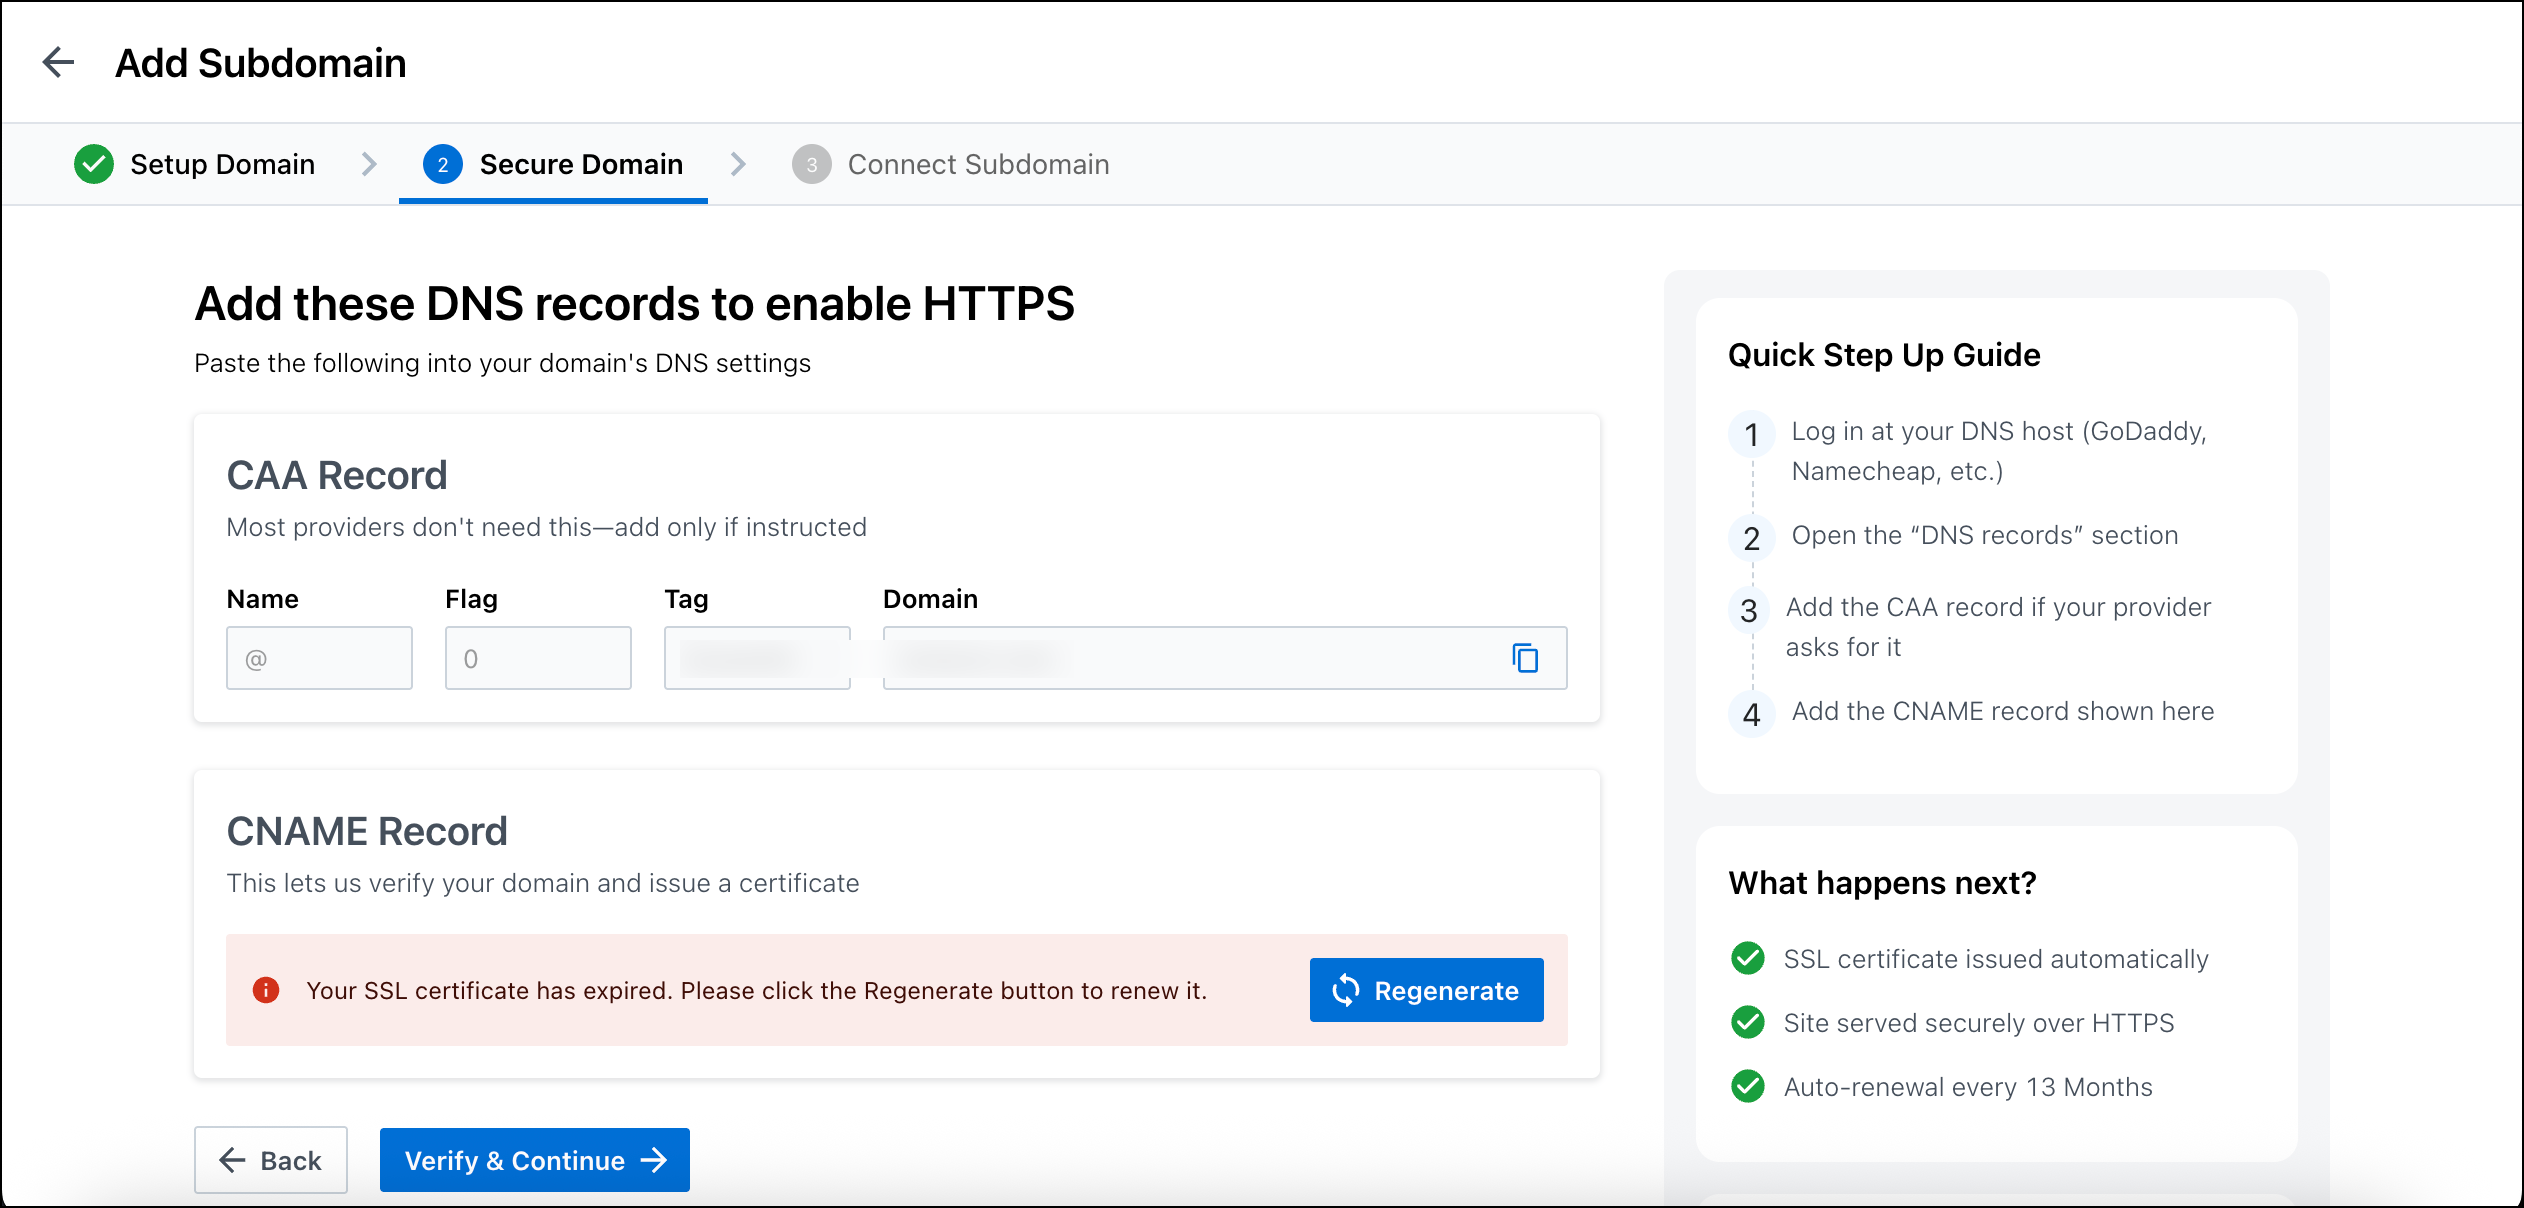
5. Create and Verify CNAME Record for HTTPS Certificate
In this step, you’ll create a CNAME record in your DNS that connects your domain to a Certificate Manager and sets up an SSL certificate. This ensures your landing pages are secure and served over HTTPS.
Here is some documentation for popular DNS providers –
- GoDaddy: Add a CNAME record
- Namecheap: How to Create a CNAME Record For Your Domain
- Dreamhost: Adding a Custom DNS record
- Bluehost: DNS Management: How to Add, Edit, or Delete DNS Entries
Log in to your Domain Name Service provider’s account (GoDaddy, Hostgator, Bluehost, etc.).
- Click on the DNS settings for the selected URL and create a new CNAME record entry. Paste the above values in the Name (or host) and Value (or Target) fields, respectively.
- Select the minimum TTL value available.
- Save the record.
- Successful configurations may take some time to reflect.
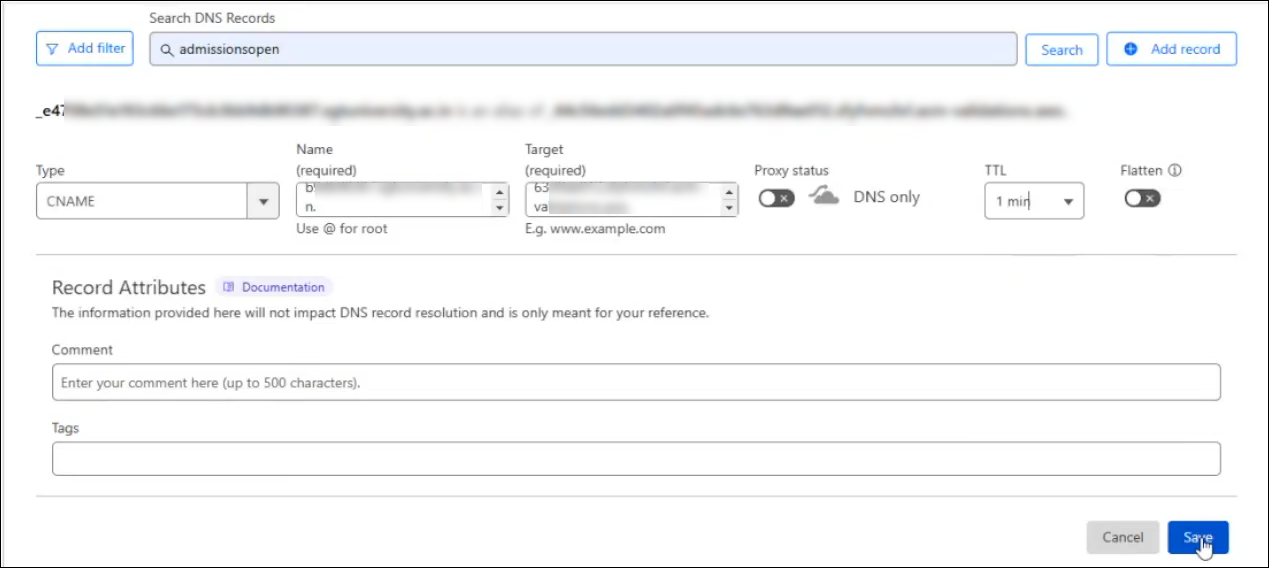
Here’s an example from a Cloudflare account –
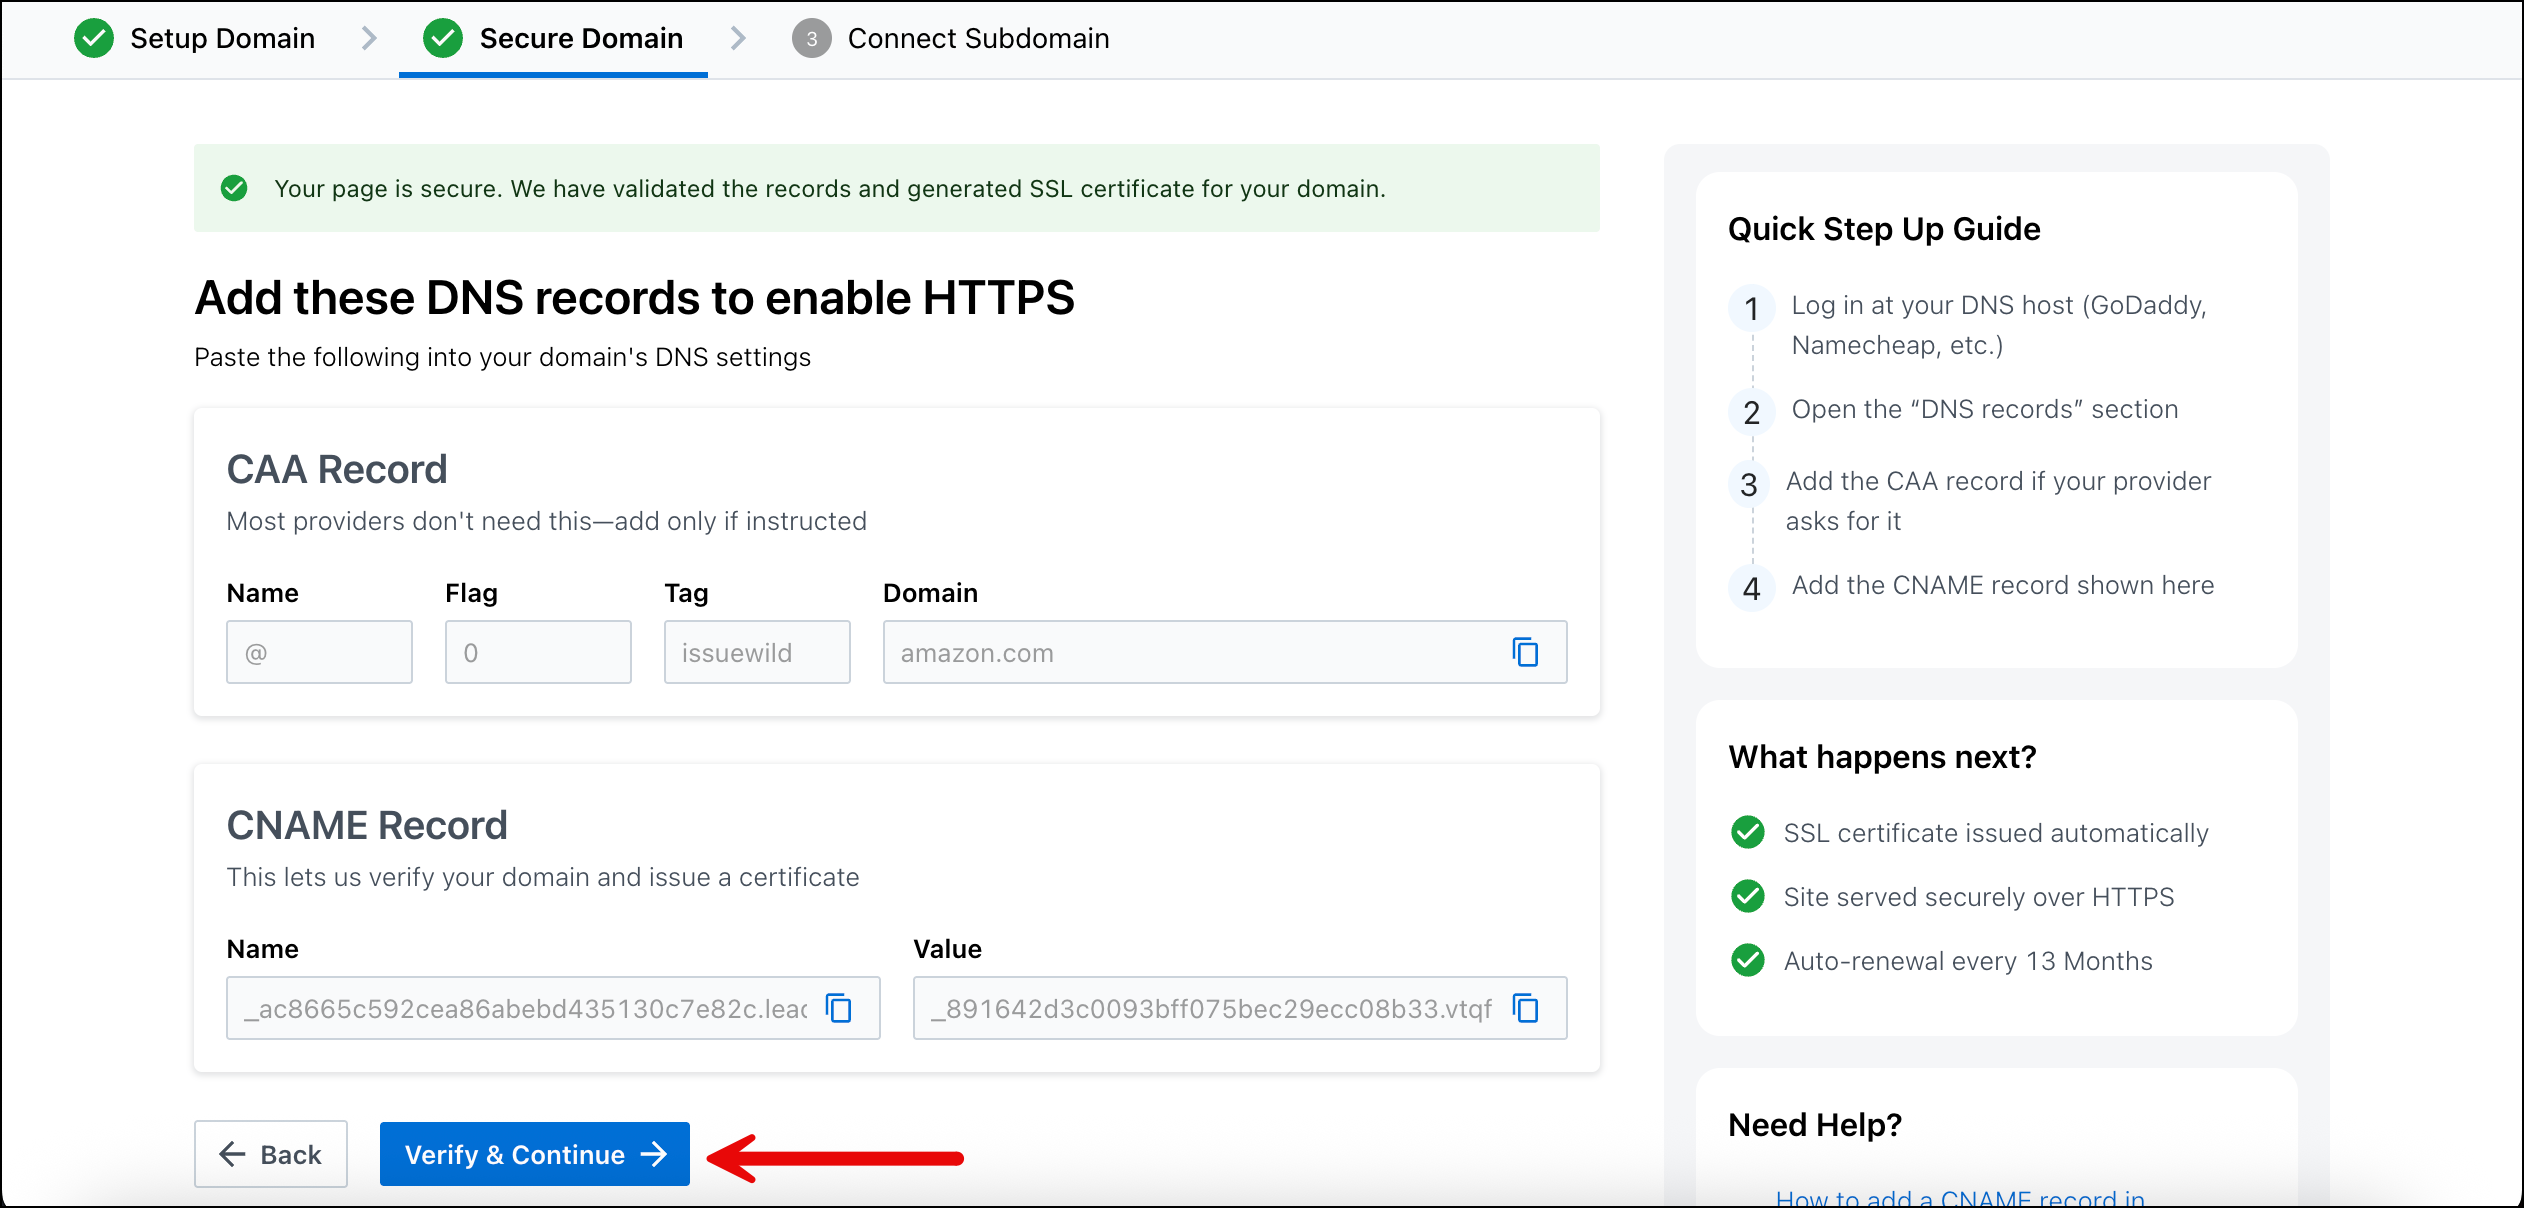
Navigate back to your LeadSquared account and on the Landing Page Pro Secure Domain page, click Verify & Continue.
Note: If you’re experiencing issues while validating your SSL certificate, review the following troubleshooting steps –
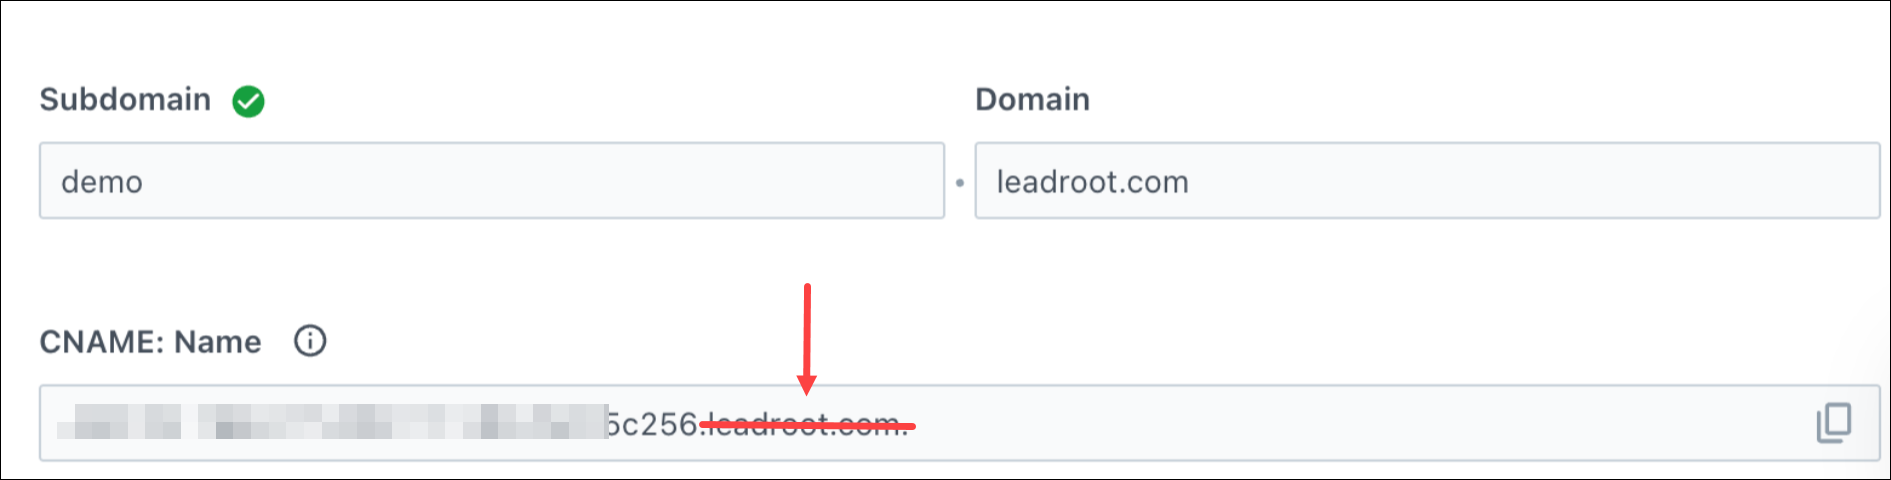
- Domain mapped to .leadroot.com – If you’re using GoDaddy or Hostinger, ensure that the domain is not mapped to
.leadroot.com. Remove any such CNAME entries, as they can interfere with SSL verification. For example, in the image below, remove.leadroot.comfrom the CNAME:Name field. - CAA records blocking certificate issuance – Check your domain’s CAA (Certification Authority Authorization) records using a tool like nslookup.io:
- If no CAA records are found, you can proceed with the SSL setup.
- If CAA records exist, verify that a record allowing
amazon.comis present. Specifically, the CAA record should include theissuewildtag foramazon.com. For details, refer to the AWS documentation: Set up CAA records.
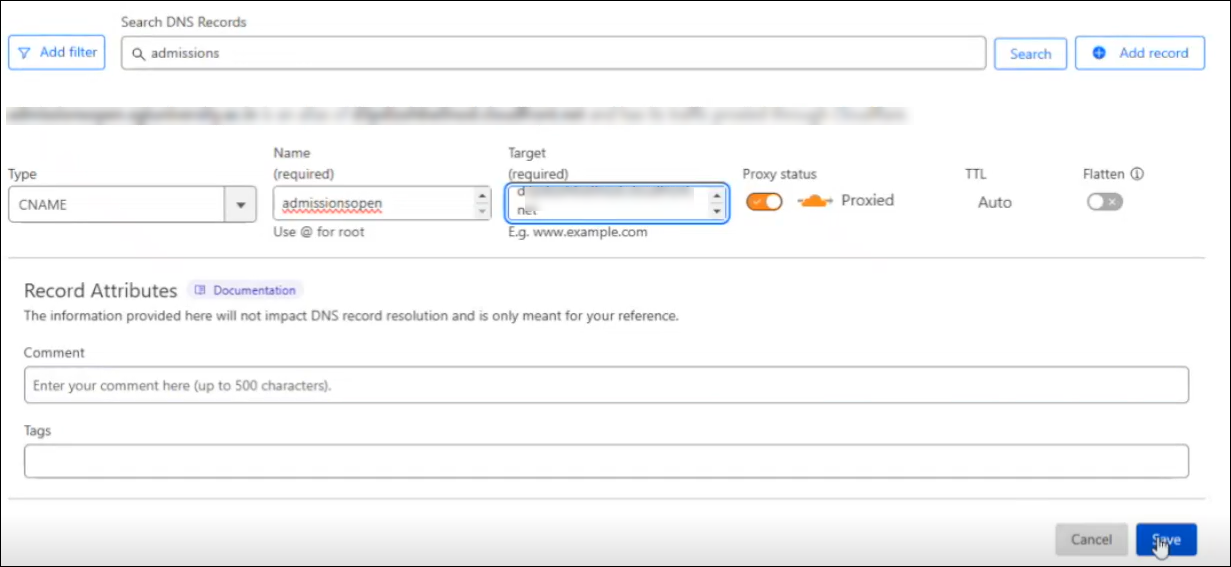
6. Create and Verify CNAME record for the Sub-Domain
- In your DNS provider’s account, click the DNS settings for the selected URL and create a new
CNAME record entry. - Paste the sub-domain name (e.g. ‘applications’ from applications.mybusiness.com) the Name (or Host) and CDN URL in the Value (or Target) fields, respectively.
- Select the minimum TTL value available and save the record.
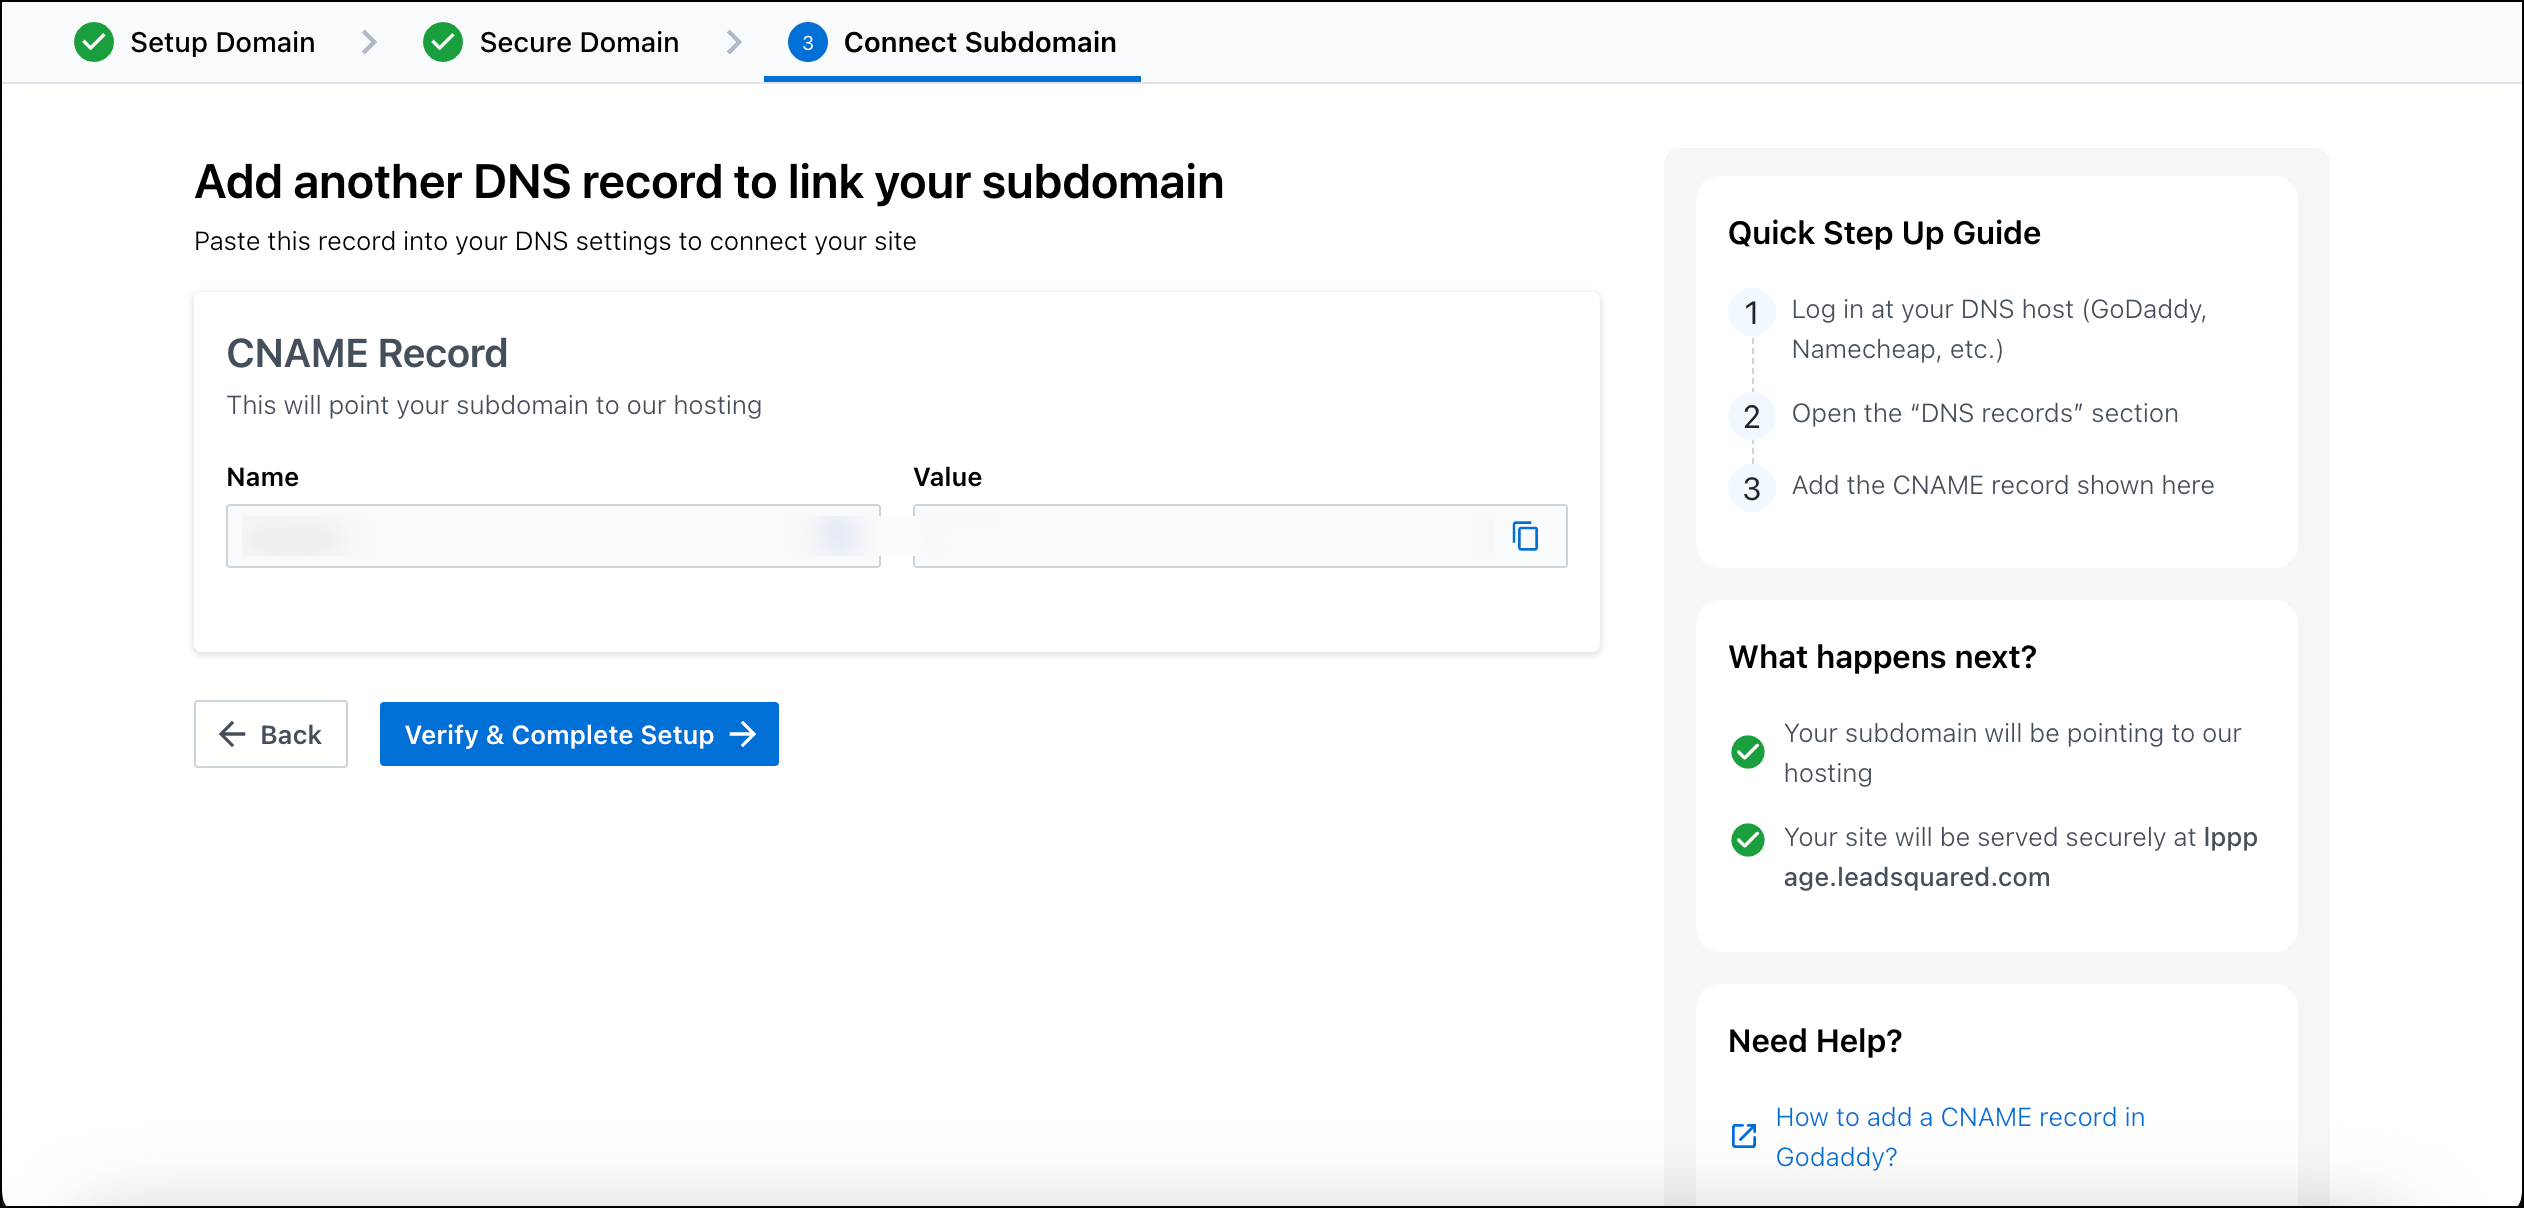
Navigate back to your LeadSquared account and on the Landing Page Pro Connect Domain page, click Verify & Complete Setup.
7. FAQs
1. Should I enable auto-renewal for my SSL certificate?
Yes. We strongly recommend enabling auto-renewal for your SSL certificate through your hosting service provider during the CNAME setup process. If auto-renewal is not enabled by your hosting provider, the SSL certificate will expire, and your URL will become inaccessible. You will then need to manually complete the setup process again to restore access.
2. What should I do if I change my DNS provider?
If you switch to a new DNS provider, you must reconfigure the entire setup process. Delete the existing DNS records from your previous service provider and create the required records again with the new provider to ensure proper domain validation and SSL functionality.
Any Questions?
Leave us a comment below. We’d love to help you out!


