1. Feature Overview
The Bulk Delete Data feature allows you to delete system & core activities, and custom activities from your account in a single action. This feature lets you efficiently manage your storage by removing older data that your business no longer requires.
2. Prerequisites
- To enable this feature, contact your account manager, or write to support@leadsquared.com.
- You must be an admin to access this feature.
3. How it Works
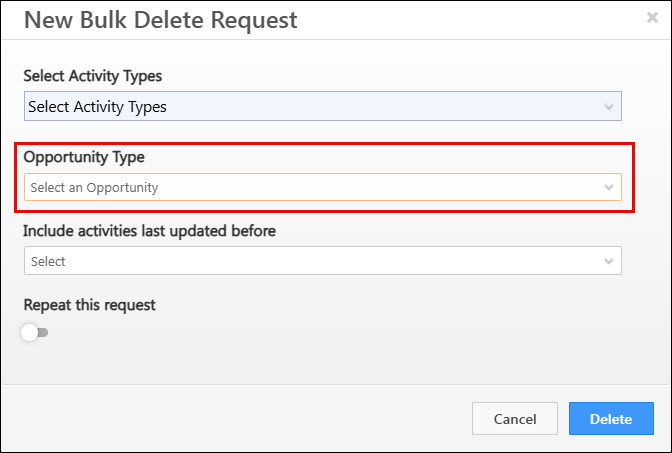
- In the first step, create a bulk delete request and select the custom activity you want to delete. You can either delete the activities under all entities or a particular Opportunity Type.
- Select a date range (30 days, custom range, etc.) outside of which you want to delete this activity.
- Only activities modified outside the selected date range will be deleted.
- Activities modified within the date range will remain in your account.
- For example, suppose today’s date is April 30th and you want to delete the “Document Collection” activity, and you select a 30-day date range. In that case, only activities modified before April 1st (more than 30 days ago) will be deleted. Activities modified within the last 30 days, regardless of their creation date (such as a Document Collection activity posted on February 15th but modified on April 18th), will remain in your account.
4. View Activity Distribution by Activity Type Report
Before you bulk delete the activities, you can navigate to the Activity Distribution by Activity Type report and view the count of activities in each activity type. This helps you make better decisions and avoid mistakes.
- Navigate to Analytics from your LeadSquared Dashboard.
- In the search bar, look for “Activity Distribution by Activity Type”.
- In the report, under Activity Created On dropdown, select the relevant date range and click Apply. For instance, if today’s date is March 31, 2025 and you select Last 90 Days, all the activities created between January 1, 2025 and March 31, 2025 will be displayed.
5. Create Bulk Delete Data Request
To export and delete data –
- Navigate to My Profile>Settings>Data Management and Privacy>Bulk Export & Delete Data.
- On the Bulk Delete Data grid, click New Request.
- On the New Bulk Delete Request popup, from the Activity Type dropdown, select the activity type you want to delete.
- From the Activities with ‘Modified On’ date older than dropdown, select the date range for which you want to delete the activities. Only activities modified outside the selected date range will be deleted.
- For instance, if the current date is April 30th and you select 30 days, activities modified before April 1st will be deleted.*
- You can also select Custom and enter a custom date range to delete activities modified outside this range.
- Once you’ve entered the relevant information, click Delete.
Note:
- *Activities modified within the last 30 days, regardless of their creation date (e.g., Document Collection activity posted on February 15th but modified on April 18th), will remain in your account.
- You can select only one custom activity type at a time.
- Core Activities, Service CRM Ticket Activities and Account Activities will not be displayed in the Activity Type dropdown.
On the Confirm popup –
- You’re shown a summary of what you’ve selected to be deleted, which includes –
- The activity type you’ve selected
- The data that will be deleted (All Activity field data and All Activity & CFS Attachments)
- Before proceeding with data deletion, click the checkbox.
- This is to confirm your understanding of region-specific compliance guidelines.
- Then, click Confirm and Proceed.
Repeat Delete Request
You can set a delete request to run on a recurring basis. This allows data associated with a specific entity to be automatically deleted at regular intervals. To configure a recurring delete request –
- After selecting the data you want to delete, enable the Repeat this request toggle on the New Bulk Delete Request popup.
- From the Repeat every dropdown, choose how often the delete request should run.
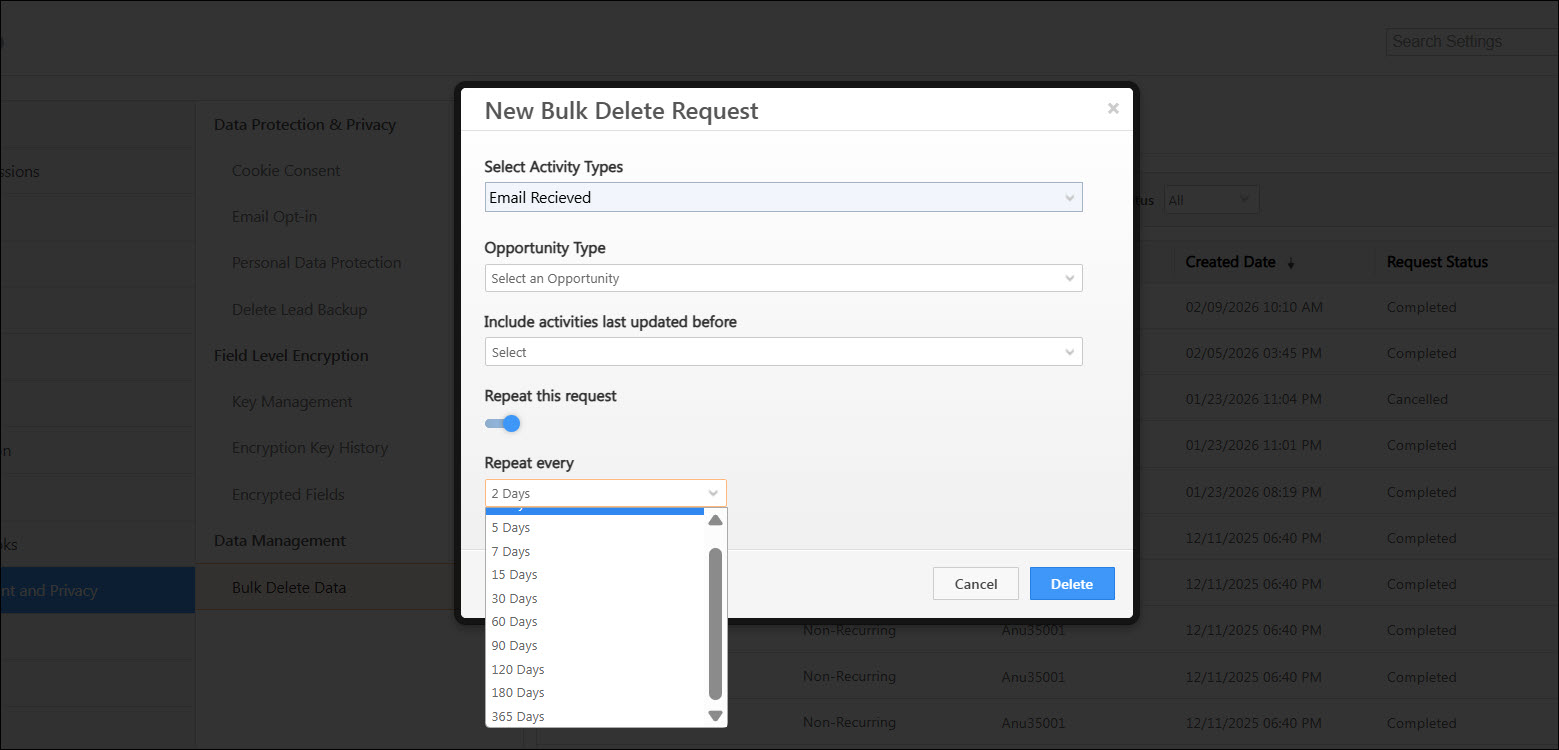
6. Bulk Delete Data Under a Particular Opportunity Type
You can bulk delete activity data for a specific Opportunity Type without affecting Lead data. While creating the bulk delete request, select the required Opportunity Type from the dropdown and complete the remaining steps as described earlier. Only data associated with the selected Opportunity Type will be deleted.
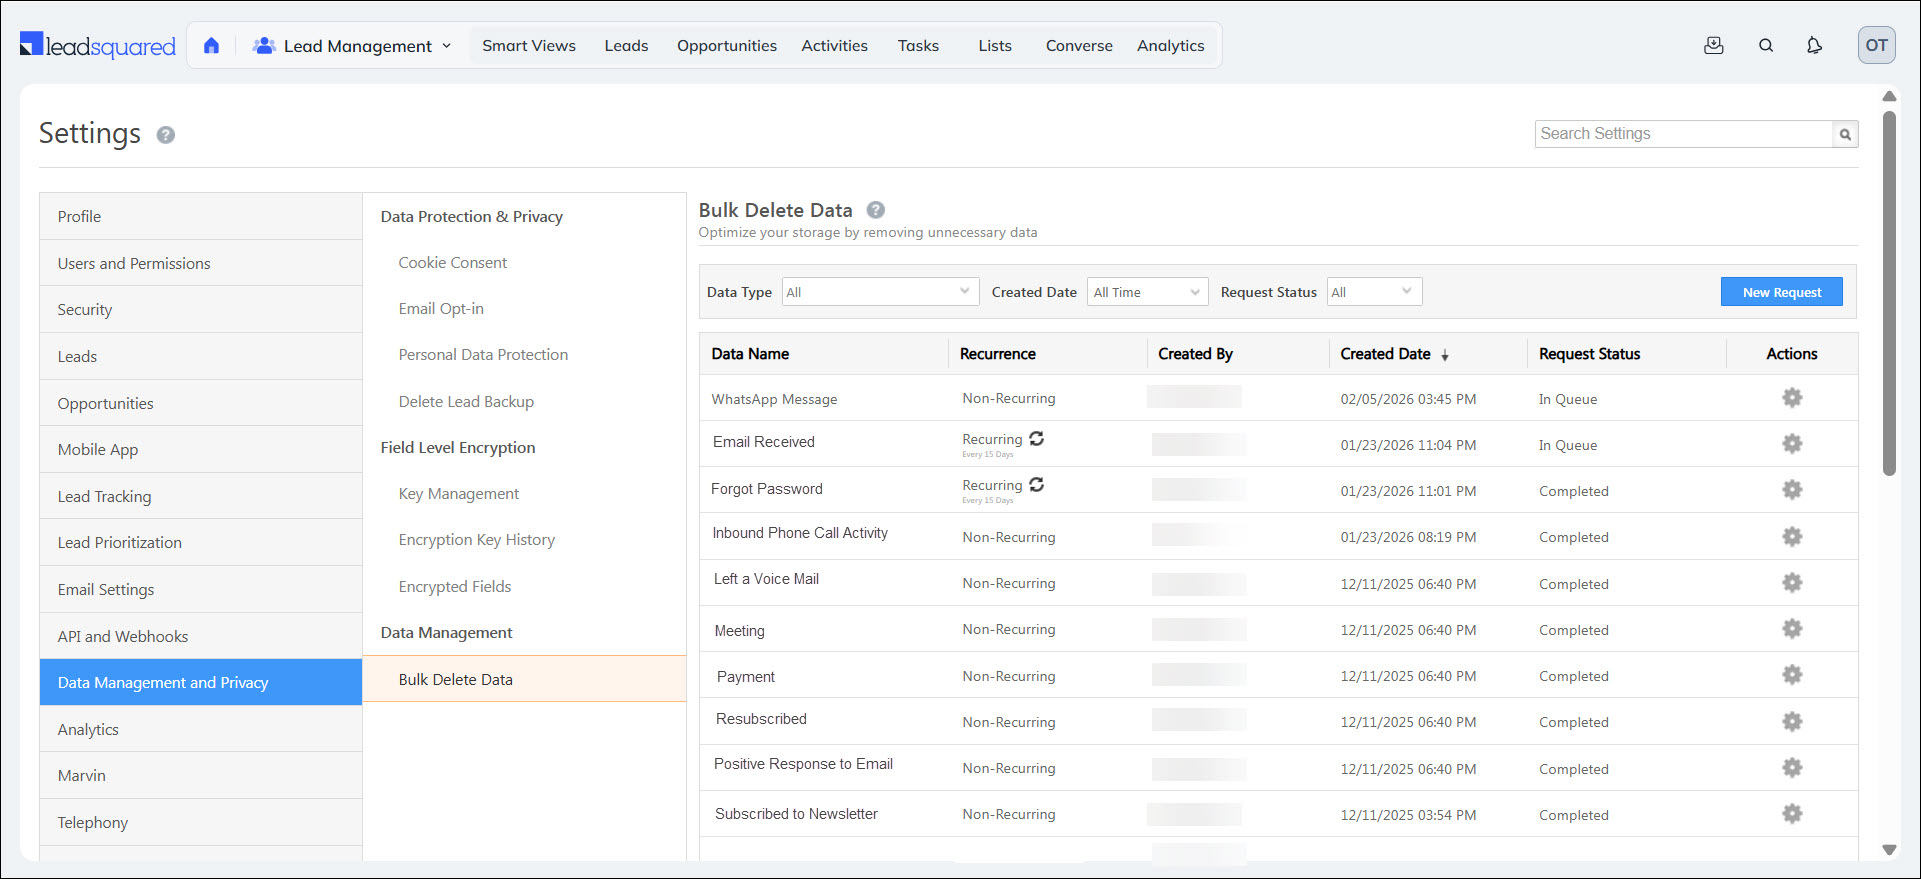
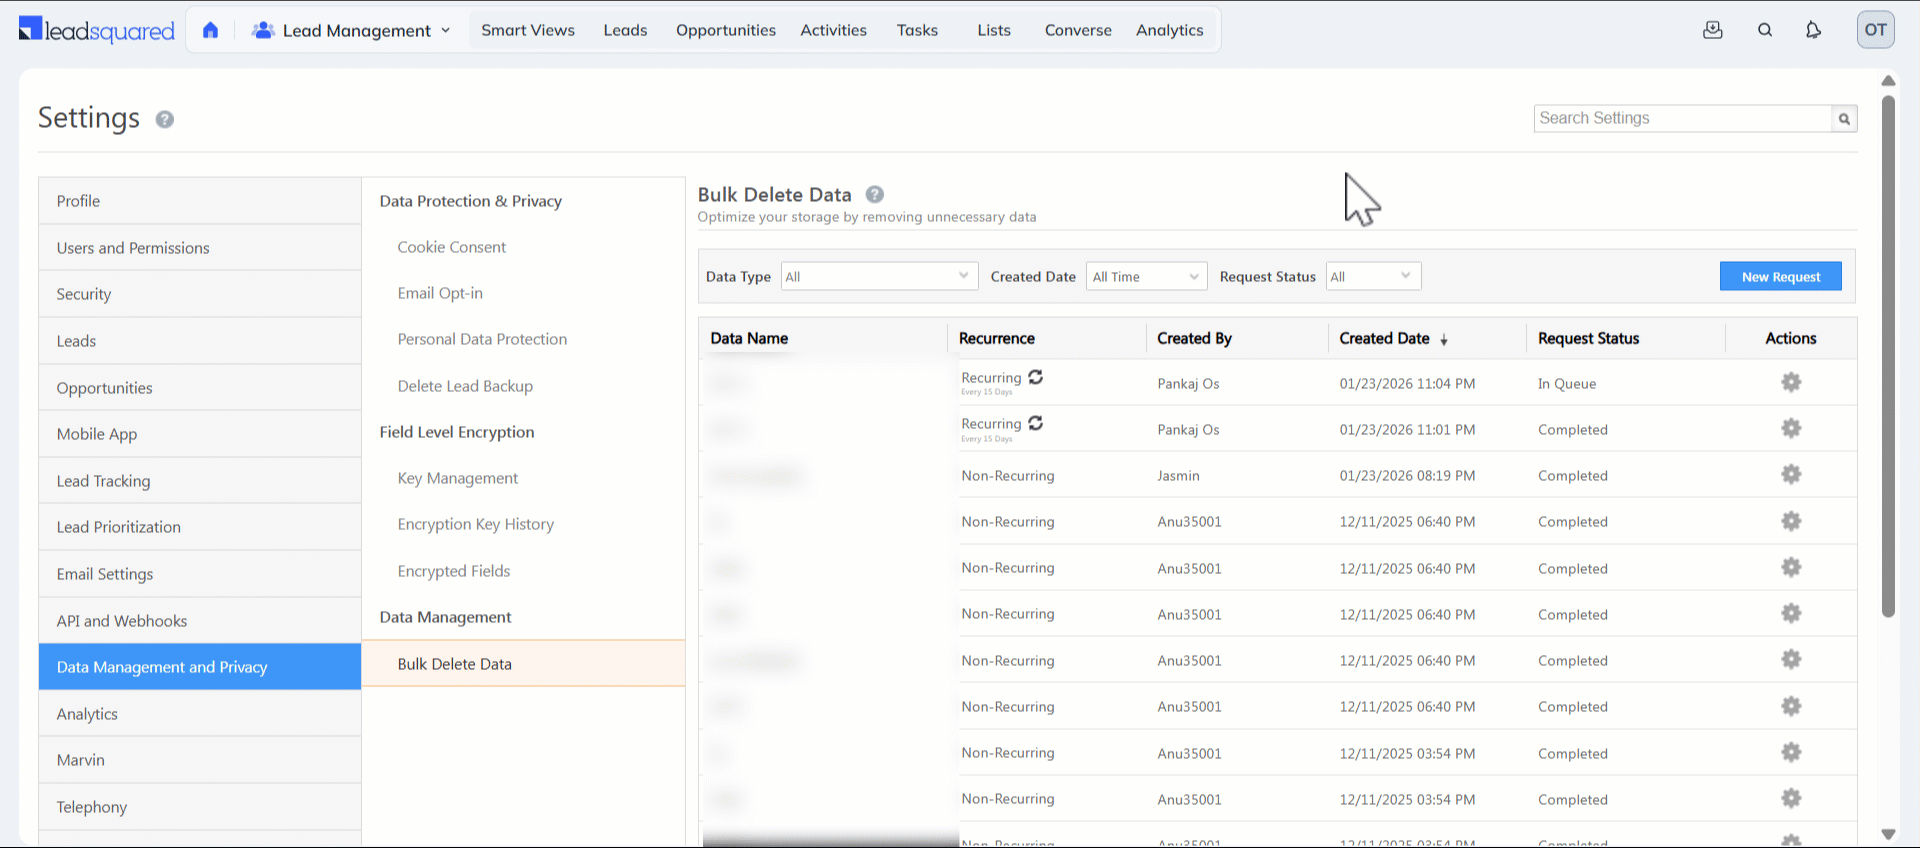
7. Bulk Delete Data Grid
After creating the request, it will appear on the Bulk Delete Data Grid with the following details –
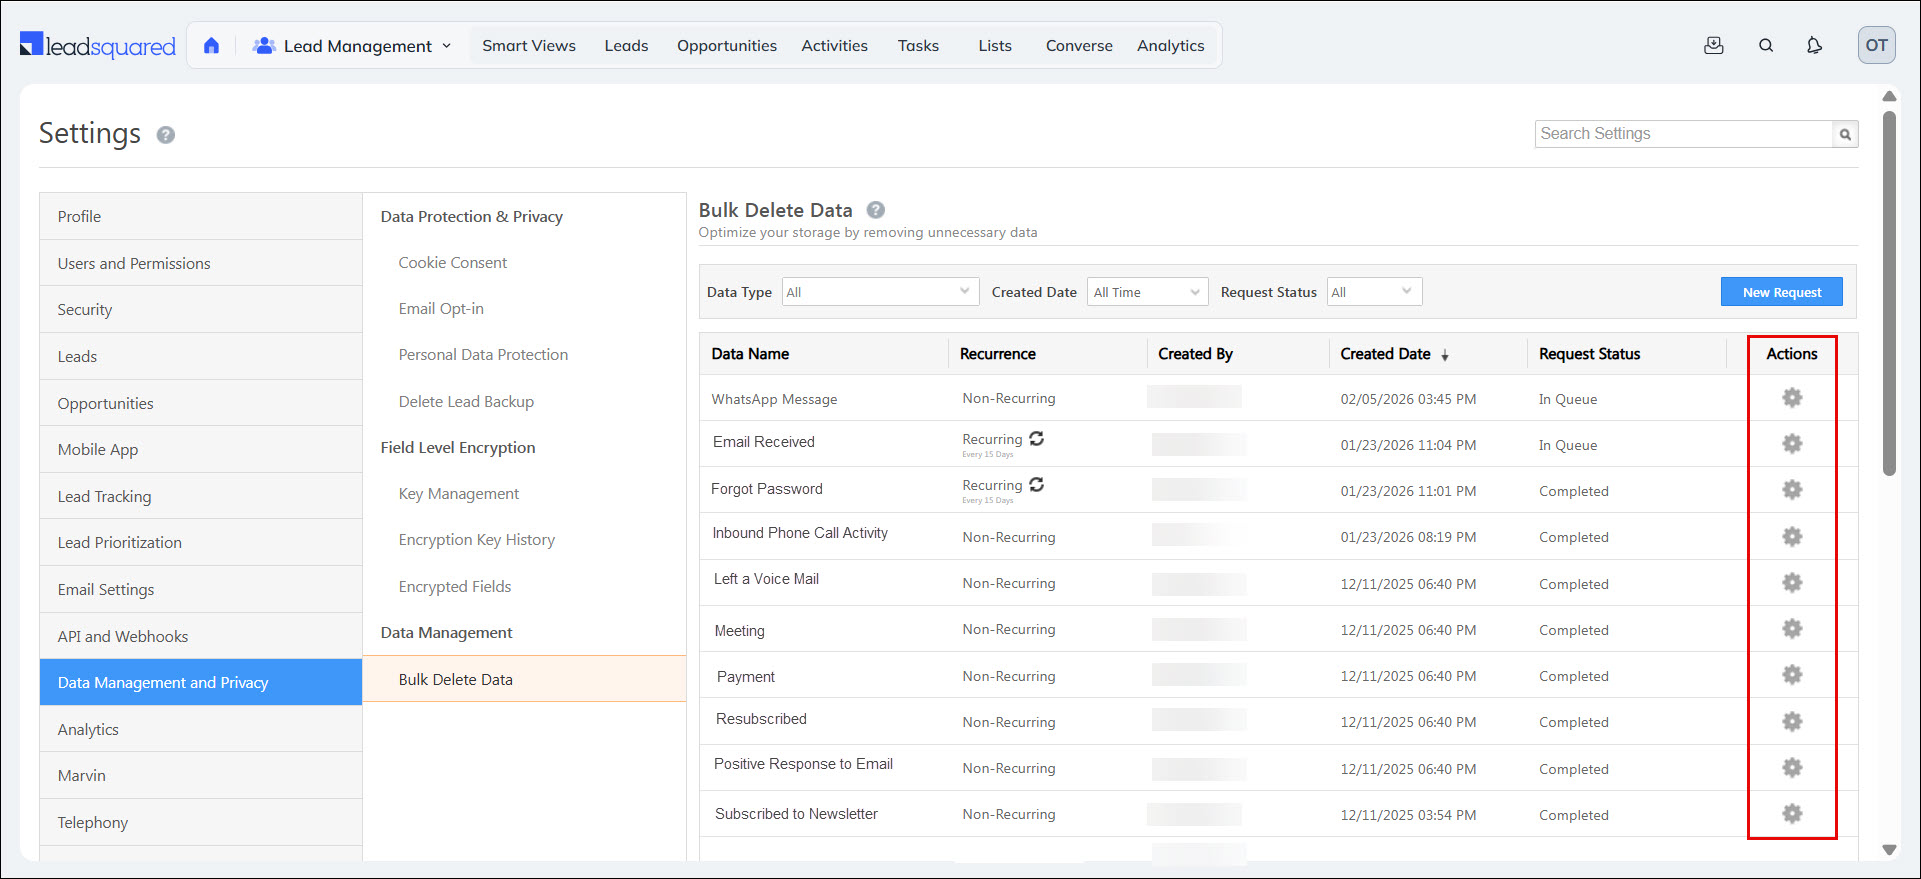
| Element | Description |
| Entity Name | Name of the activity. |
| Recurrence | Indicates whether the bulk delete request is set to run once or repeat automatically at a defined interval |
| Created By | The name of the user who created the request. |
| Created Date | The date and time when the request was created. |
| Status | The status of the request –
|
You can also perform the following actions from the actions grid –
7.1 View Report
Once the request is completed, you can download and view a report anytime.
- On the Bulk Delete Data grid, under Actions, click the
 gear icon.
 - Select View Report. The report will be automatically downloaded as a CSV file to your device.

7.2 Revoke Request
All requests are processed during off-business hours. You can revoke the requests you’ve made when it’s in the ‘In Queue’ status.
- On the Bulk Delete Data grid, under Actions, click the gear icon.
- Select Revoke, and on the Revoke Request popup, click Cancel Request.
8. Errors
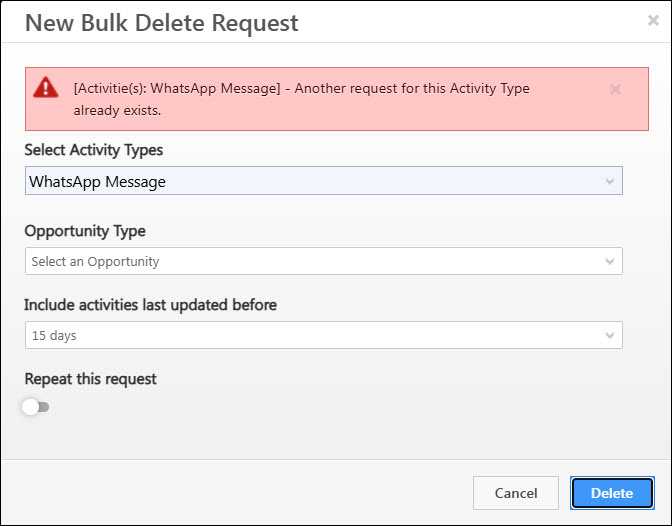
8.1 Another Request Already Exists
You can create only one request at a time for a single activity type. For example, in the image below, “WhatsApp Message” cannot be processed because an existing request to delete the this activity is already in the queue. Attempting to create another request for the same activity type will result in an error message – “Another request for this Activity Type already exists.”
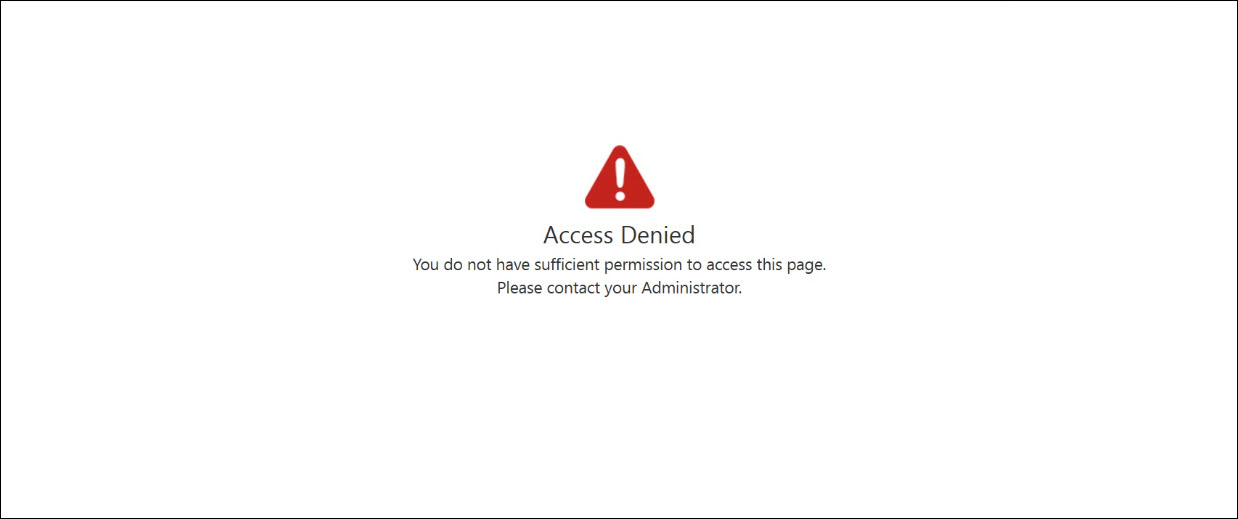
8.2 Access Denied
Only admins have access to the Bulk Delete Data page. If users with other roles attempt to access the page, they will see an “Access Denied” error message.
Any Questions?
Did you find this article helpful? Please let us know any feedback you may have in the comments section below. We’d love to hear from you and help you out!


