


Get Started
Sales Suite
Field Ops
Marketing
Service CRM
Integrations & Apps
FloStack
Google Ads Lead Form Connector
1. Feature Overview
The Google Ads Lead Forms connector allows you to collect leads directly from your Google Ads. Attach a form to your campaigns and generate leads for your business in real-time on LeadSquared, by setting up webhooks and field mapping for each form. View detailed analytics and reports to measure the effectiveness of your campaigns. Some of the benefits are –
- Receive Leads in Real-Time: Set-up web-hooks for each form to receive leads in real-time from your Google Ads campaigns.
- Analytics and Reports: Analyse and measure the effectiveness of each campaign with detailed reports and analytics.
- Field Mapping: Gather more information from your leads with advanced field mapping for both standard and custom fields.
- View Logs: Detailed logs for each transaction and API request to avoid Lead Leakage.
2. Prerequisites
- You must be an Administrator of LeadSquared.
- You must have an active Google Ads account.
3. Installation
Install the Google Ads Lead Form Connector from the LeadSquared App Marketplace.
- On the main menu, navigate to Apps>Apps Marketplace and search for Google Ads Lead Form Connector. You’ll also find the connector on the left panel, under Online Ads.
- Click Install.
- Once installed, hover your cursor over the
 icon, then click Configure.
4. Configuration
Configure webhooks on Google Ads to push the lead data to LeadSquared, on events such as lead creation, lead updates, etc.
4.1 Sync Webhooks on LeadSquared
- On the Configure Google Ads Lead Form Connector pop-up, click the Create Form button.
- Under Form Name, provide a relevant name for your form.
- Create a custom Google Key. You can create a key with any type of characters, within the limit of 50 characters.
- Under Webhook URL, click Copy to Clipboard.
- Once you’re done, click Save.
- To edit the Google Key, click the
 icon.
icon. - To delete an existing webhook, click the
 icon.
icon. - To copy an existing webhook, click the
 icon.
icon.
4.2 Field Mapping
- Phone Number and Email fields are present by default.
- Click Add Custom Mapping to add more lead fields.
- Under Google Form Field, from the drop-down, select the corresponding field for each of the Lead Field.
- Click the
 icon to save your lead field.
 - To make a field searchable (the first field that is searched for, which will mark the lead unique), click the icon, and ensure the
 icon is selected.
 - To remove the searchable feature from a field, follow the previous step, and un-check the icon.
- To edit and change a Google Form Field, click the icon.
- To delete a field, click the icon.
- Once you’re done, click Save.
Note:
- If required, you can create your own custom field (if you have selected Custom Question in Google Ads) under Google Form Field by manually entering the values. To know more, refer to Google Lead Form Webhook – Implementation.
- We suggest you make the same field searchable that you have marked unique in your LeadSquared account. This helps prevent duplicate leads.
- To know more about how the search key functionality works, refer to Capture Leads.
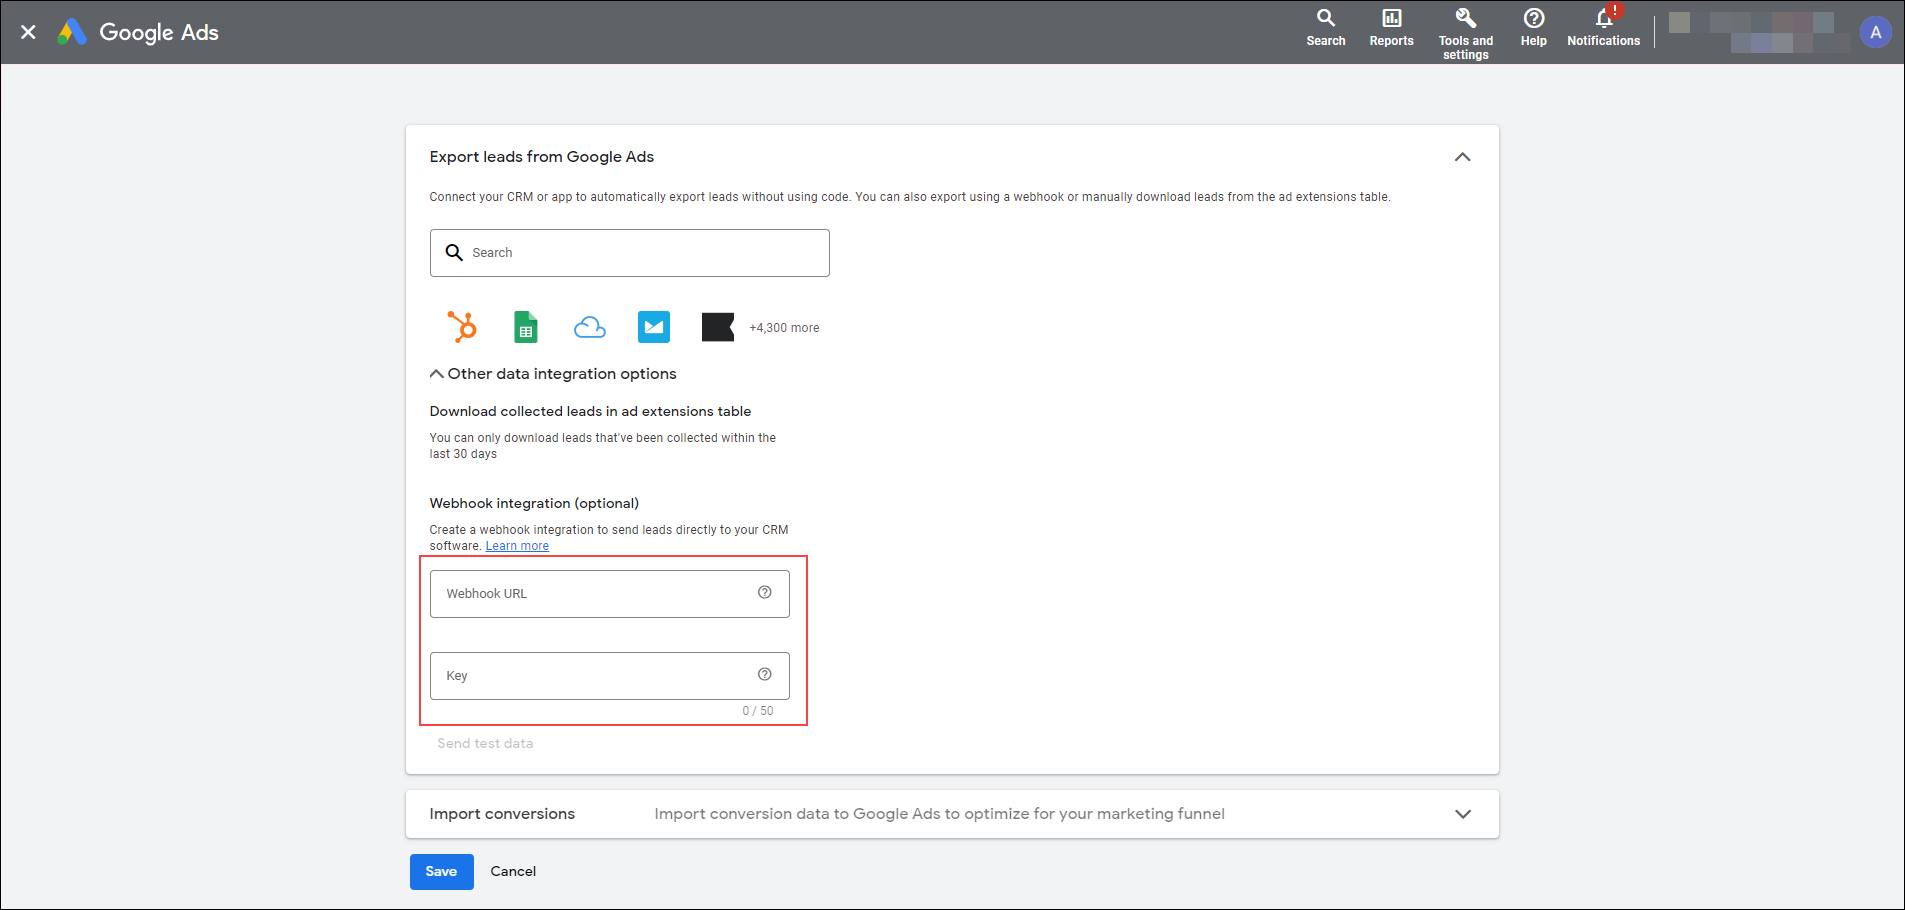
4.3 Sync Webhooks on Google Ads
- To create a Lead Form Asset on a new campaign or an existing campaign, refer to About lead form assets.
- Once you’ve created a form, ensure you pass the LeadSquared Webhook URL and Secret Key in the relevant fields. To know more, refer to the Set up a webhook integration for a lead form section in the About lead form assets article.
- Once the form is ready, Send Test Data to LeadSquared, and then Test and Publish the form.
5. Test and Publish Form
Once you’ve completed the above steps, you can test the webhook to see if it’s capturing data accurately.
- Click Send Test Data.
- You should get a confirmation once the data is successfully sent to LeadSquared.
- On the Manage Leads page, check if a lead with the test information has been created.
- If a lead is successfully created, you can go back to the Google Ads page and click the Save button present at the bottom of the page.
- Your Google Ads Lead Form Connector is now live.
6. Lead Form Report
Once the connector is live, you can view the logs and analytics of all the submissions you’ve received.
6.1 View Logs
- From the LeadSquared main menu, navigate to Apps>Adwords Lead Form Report, and select Logs.
- You can view the logs for different timeframes (such as for a day, week, month, custom dates, etc.).
- You can view the Form Name, End Point, Called On date, and Request Status.
- Click on a Lead Form to view its request and response.

6.2 View Analytics
- From the LeadSquared main menu, navigate to Apps>Adwords Lead Form Report, and select Lead Creation Chart.
- You can view the analytics for different timeframes (such as for a day, week, month, custom dates, etc.).
- For the selected time-frame, you can view the number of
- New Leads – New lead who’s been created in the system through the form.
- Updated Leads – If there’s an existing lead in your system, that contains the same information (such as phone number, email address, etc.), then the lead fields in which data was captured for the first time will get updated.
- Failed – If there’s an instance when the field mapping is not correct between LeadSquared and Google (such as incorrect Key, webhook, etc.) or when there’s a server error (such as 404 error, 500 error, etc.), then the lead details get captured on the Google form, but won’t be successfully mapped to your LeadSquared account. Such instances would show up as Failed.
- Total Events – The total of all the above events is reflected under Total Events.
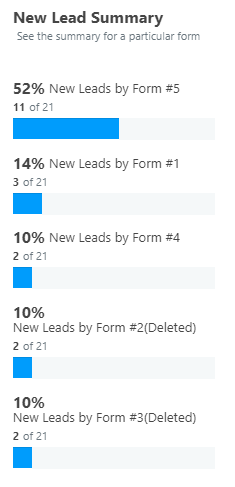
New Lead Summary
This section provides information about the new leads created by individual forms. Only the top-five forms, in terms of performance, which created maximum leads, gets displayed here. In this summary, you can only view New Leads details, and not Updated Leads or Failed leads details.
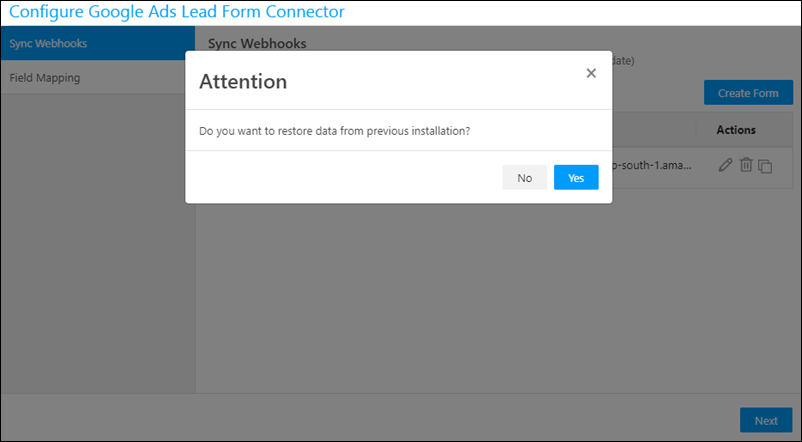
7. Reinstallation
After you uninstall the connector and then decide to reinstall it, you can retrieve the data that was previously captured. This option appears after you install and configure the connector, on the Sync Webhooks pop-up.
8. Troubleshooting
1. Data for a particular field is not being captured from my Google Lead Ads form to LeadSquared.
This may happen when the field in your Google form is not mapped to the corresponding field in LeadSquared. Check the ‘Field Mapping’ section of the connector configuration. If the field is not mapped, click Add Custom Mapping, and add the schema against the appropriate lead field. If this doesn’t fix the issue or if the field is mapped correctly but data still isn’t captured, contact support@leadsquared.com.
Any Questions?
Did you find this article helpful? Please let us know any feedback you may have in the comments section below. We’d love to hear from you and help you out!