


Get Started
Sales Suite
Field Ops
Marketing
Service CRM
Integrations & Apps
FloStack
How to Import Accounts?
You can import accounts to LeadSquared through a CSV* file. Here are some things you need to consider before beginning the import process –
- You can only import accounts pertaining to one account type (e.g., colleges, partners, vendors, etc.).
For example, you can import multiple entries of a ‘College’ account type activity but you can’t import both ‘College’ and ‘Vendor’ account types with one CSV file. - How the fields in your CSV will match the fields of that account type. You’ll have to do the mapping after uploading the file.
*Max file size allowed – 10 MB. Max rows allowed 25000.
To learn more about accounts, see Account Settings.
Prerequisites
- The Accounts Feature must be installed and at least one account type should be available.
- The Account Name field is mandatory. You must include it in the CSV file you upload.
Import Accounts
1. Download the Sample CSV File
- On the Manage Accounts page, click the Import Accounts button.
- The Import Account wizard will appear. Click the Download Sample CSV link.
The sample file will now be downloaded (to the downloads folder or any location you’ve configured for your browser’s downloads). View the file to understand how to structure the CSV you want to upload.
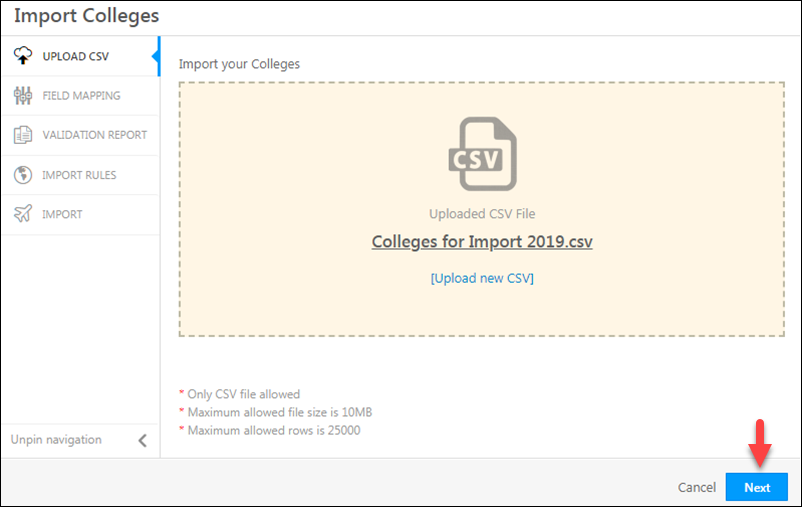
2. Upload Your CSV File
- On the Import Account wizard, either click the select a file from your computer link or directly drag and drop the CSV file into the area demarcated by the dotted line.
- Once the file has been uploaded, click Next.
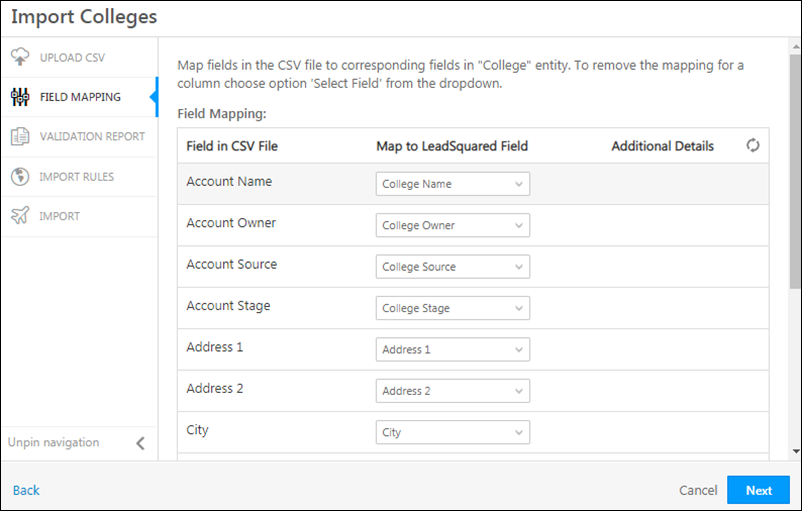
3. Map the CSV File Columns to the Account Type Fields –
- Map the fields in the CSV file to the account type fields. Choose the appropriate field in the CSV that matches the identifiers in the account type fields (For example, College Name, College Owner, College Source, etc.).
- Click Next when you’re done.
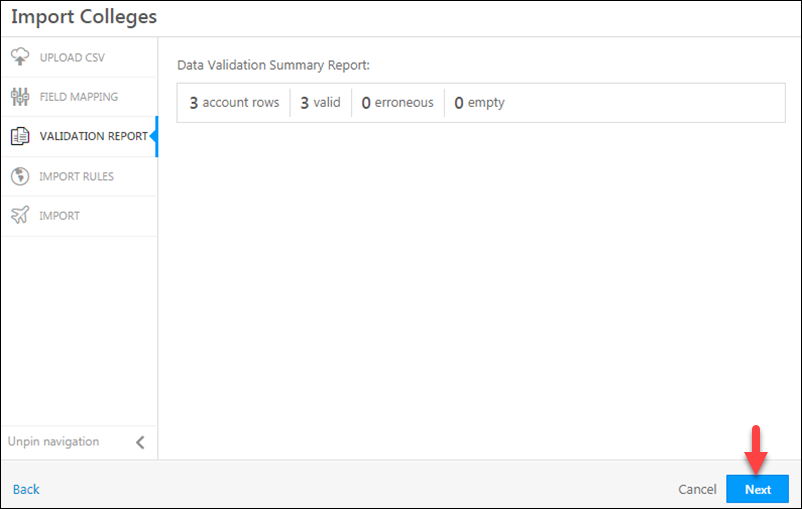
4. Review the Validation Report
The validation report will show you errors in your mapping configurations. You can –
- Fix these errors and re-upload the CSV
or - Ignore the errors and continue. If you do so, accounts won’t be created for the rows which contained errors.
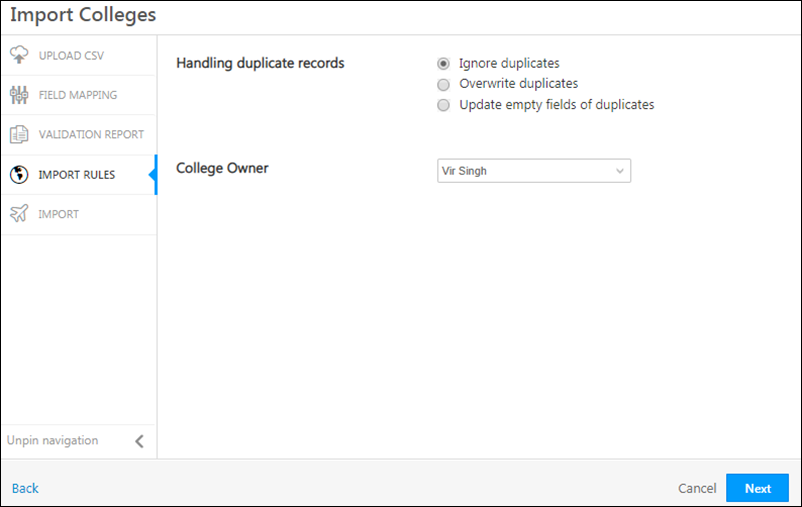
5. Set Import Rules
Set import rules on how you want to handle duplicates –
- Ignore duplicates
If you select this option, duplicate records will not be imported. This is the default option that is pre-selected. - Overwrite duplicates
If you select this option, the CSV file data will overwrite the data in your LeadSquared account. - Update empty fields of duplicates
With this option, only empty fields of the duplicate records in LeadSquared will be updated with the data in the CSV file.
You can also set the default owner –
- If the account specified in your CSV is missing an owner, the selected user will be assigned as the account owner.
- It won’t be overridden if you’ve mentioned an account owner in your CSV file (for example, that user X is the account owner for account A1).
Click Next when you’re finished.
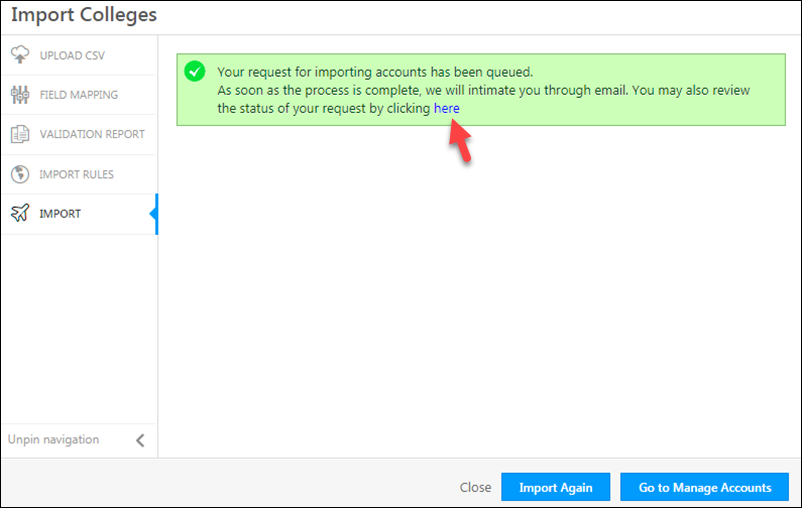
6. Check the Status of Your Import
Your import request is now successfully queued. Click the link shown below to view the status of the import. You’ll also be notified by email once the import is complete.
You can now choose to import another file or proceed to the Manage Accounts page.
Here’s an example of the email you’ll receive in your inbox. Click the link to download a summary report CSV.
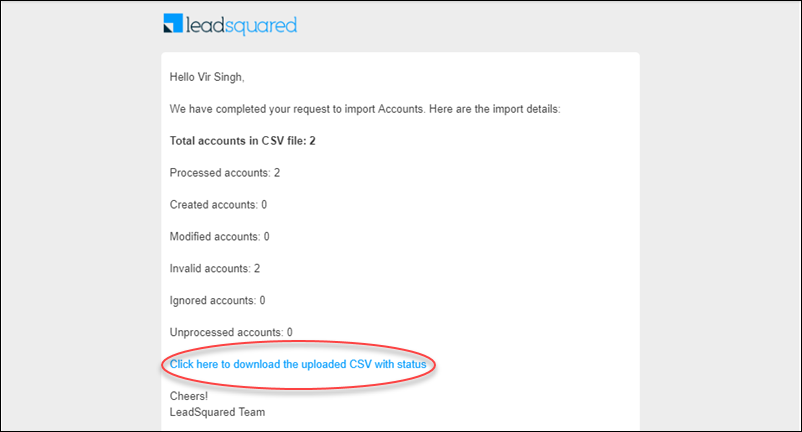
The “Import Status” and “Import Message” columns give you details on what happened with each account.

Any Questions?
If you have trouble importing accounts or wish to give us feedback on this article, feel free to post a comment below.