


Get Started
Sales Suite
Field Ops
Marketing
Service CRM
Integrations & Apps
FloStack
Account Settings
1. Feature Overview
If you have multiple partners, vendors, suppliers, etc., you can create accounts for them and manage all your B2B relationships in one place. The process is simple –
- Enable the accounts feature
- Create and configure account types
- Add or Import accounts under each account type
- Add leads to your accounts
- Add activities on your accounts
Note: If you’re familiar with this article, also see –
2. Prerequisites
The accounts feature is not available by default. To get it enabled, contact us at support@leadsquared.com.
3. Enable the Accounts Feature
After you contact us and get the feature enabled,
- From your main menu, navigate to My Account>Settings>Accounts>Account Settings.
- On the Account Settings page, alongside Enable Accounts, click Yes.
- On the confirmation pop-up, click Proceed.
4. Create and Configure Account Types
You’ll see 2 account types available by default – Customers and Partners. You can’t delete the Customers account type, but you can rename and customize it.
To create a new account type –
- Click Create.
- Give the account type a Name, Plural Name and Description, then click Next.
- Now configure the account type fields.
- You can change the Display Name of any field.
- To make more changes to an existing field, click Configure. You can make the field Mandatory, Unique and/or Sortable by clicking the respective checkboxes.
- To add a custom field, click Add Field. Add a Name, Schema Name, and configure a Type for the custom field. If you configure the Type as Dropdown/Searchable Dropdown/Multiselect Dropdown* click the settings
 wheel that appears alongside and type in the dropdown options. Click the delete
  icon if you wish to remove the custom field.
 - Click Next.
- Finally, customize the account creation form.
- Drag and drop fields from the Available Fields column into the form sections.
- You can also edit
 and delete sections by hovering your cursor over the section header and clicking the respective icons.
 - Drag and drop fields within a form section to display them in the order you like.
- To add a new form section, scroll down and click Add Section.
- Click Save.
Note:
- * You can also create dependent drop-down fields. The process is the same for lead and activity dependent drop-downs. see How to Add a Dependent Field to a Custom Activity for more details.
- You can configure up to 3 fields as Unique.
While configuring the fields for an account type, be sure to customize the Stage field to your liking. Click the settings![]() icon alongside the field.
icon alongside the field.
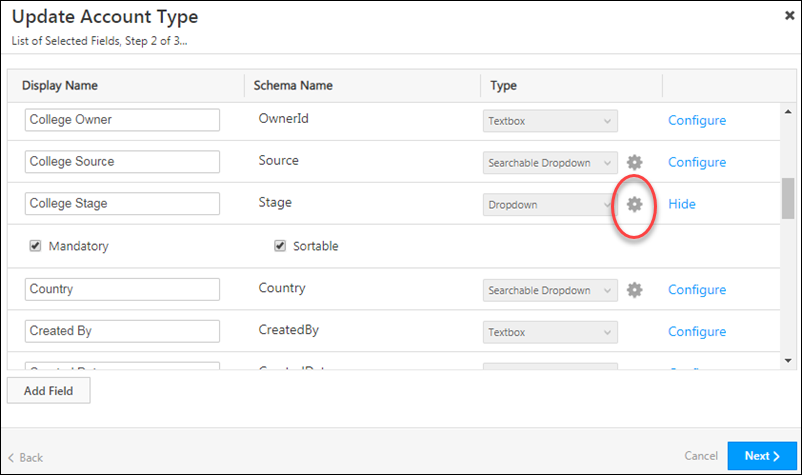
Then add/edit/delete active and inactive stages for the account type.

Once you’ve created an account type, it’ll show up on your main menu under Leads>Accounts.
5. Add or Import Accounts Under Your Account Types
To import accounts through CSV, see How to Import Accounts.
You can also add accounts under any of the account types you created –
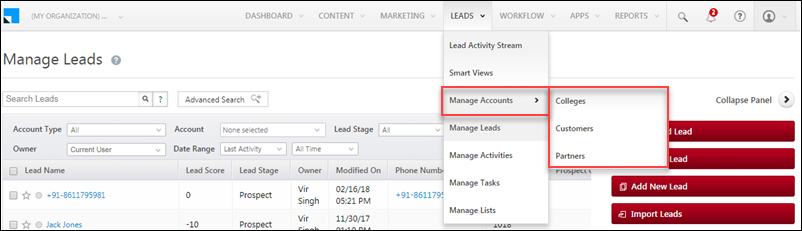
- Navigate to Leads>Manage Accounts and click the account type you want to add an account under.
- On the Manage Accounts page, click Add <Account Type Name>.
- Fill in all mandatory fields in the add account type form.
- Click Save and Add New to create the next account or click Save and Close to proceed.
6. Assign Existing Leads to Your Accounts
The quickest way to assign leads to an account is to use the bulk update feature –
- On the main menu, navigate to Leads>Manage Lead.
- Select the leads you want to add to an account by clicking the checkbox alongside the Lead Name column.
- Hover your cursor over the Actions menu, then click Bulk Update.
- From the Lead Field drop-down, select Account.
- In the New Value field, select an existing account or select Add New Account.
- Click Update.
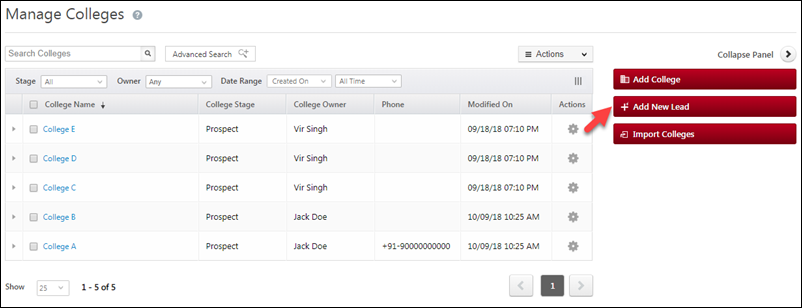
You can also add leads from the Manage Accounts page. On the main menu, navigate to Leads>Manage Accounts and click the account type name.
On the Manage Accounts page, click Add New Lead.
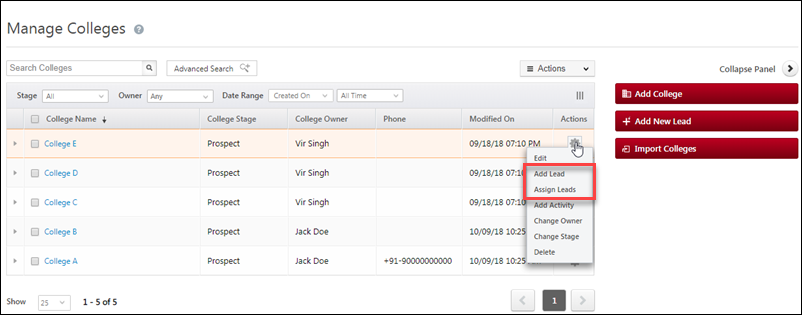
Alternatively, you can also use the list actions by hovering your cursor over the actions![]() wheel, and then clicking Add Lead to add new leads or Assign Lead to assign existing leads.
wheel, and then clicking Add Lead to add new leads or Assign Lead to assign existing leads.
7. Post Activities on Accounts
See How to Add Activities to Accounts
Any Questions?
Was this article helpful? Did you find everything you needed to set up the accounts feature? Please let us know in the comments below and we’ll get back to you asap!