1. Feature Overview
In Universal Data Sync (UDS), Actions are the building blocks of a workflow. When a trigger initiates a workflow, one or more actions are executed sequentially or conditionally to perform tasks such as API calls, transformations, or returning a custom response to the API caller.
2. Prerequisites
- You must be an Administrator user, or access must be shared to you by an Admin user
- The Universal Data Sync Connector is a paid feature. To enable it on your account, contact your account manager, or write to support@leadsquared.com.
- Before creating actions, you must select a trigger for your data flow. For more information, see Select a Trigger.
3. Action Types
At present, UDS supports the following action types:
- Templated Actions – Predefined, ready-to-use actions that don’t require you to deal with API complexities. Simply map the fields and proceed.
- Lead Template Actions:
- API Action – Custom actions that let you connect to any external API by configuring the request and handling the response manually.
- Return Response Action – Used to send a custom response back to the webhook caller. Ideal for webhooks or synchronous integrations.
4. How to Add an Action
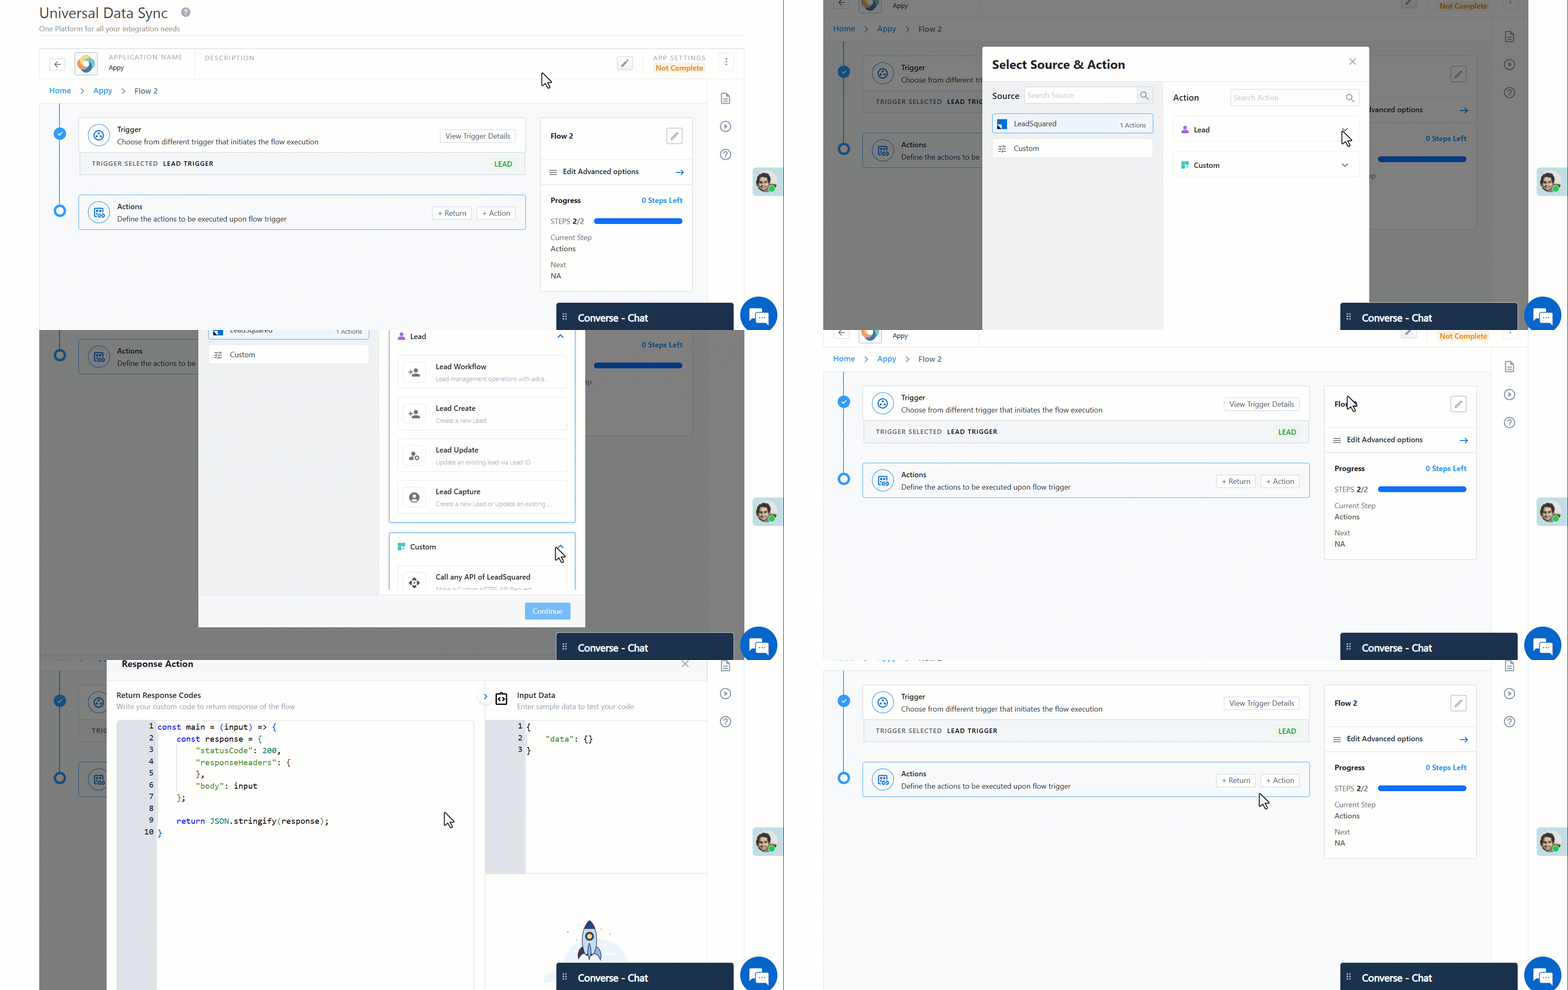
- Click on + Action on panel and select form available action and complete the configuration.
- Click on + Return (or use the + icon) to add a Return Response card
5. Action Conditions
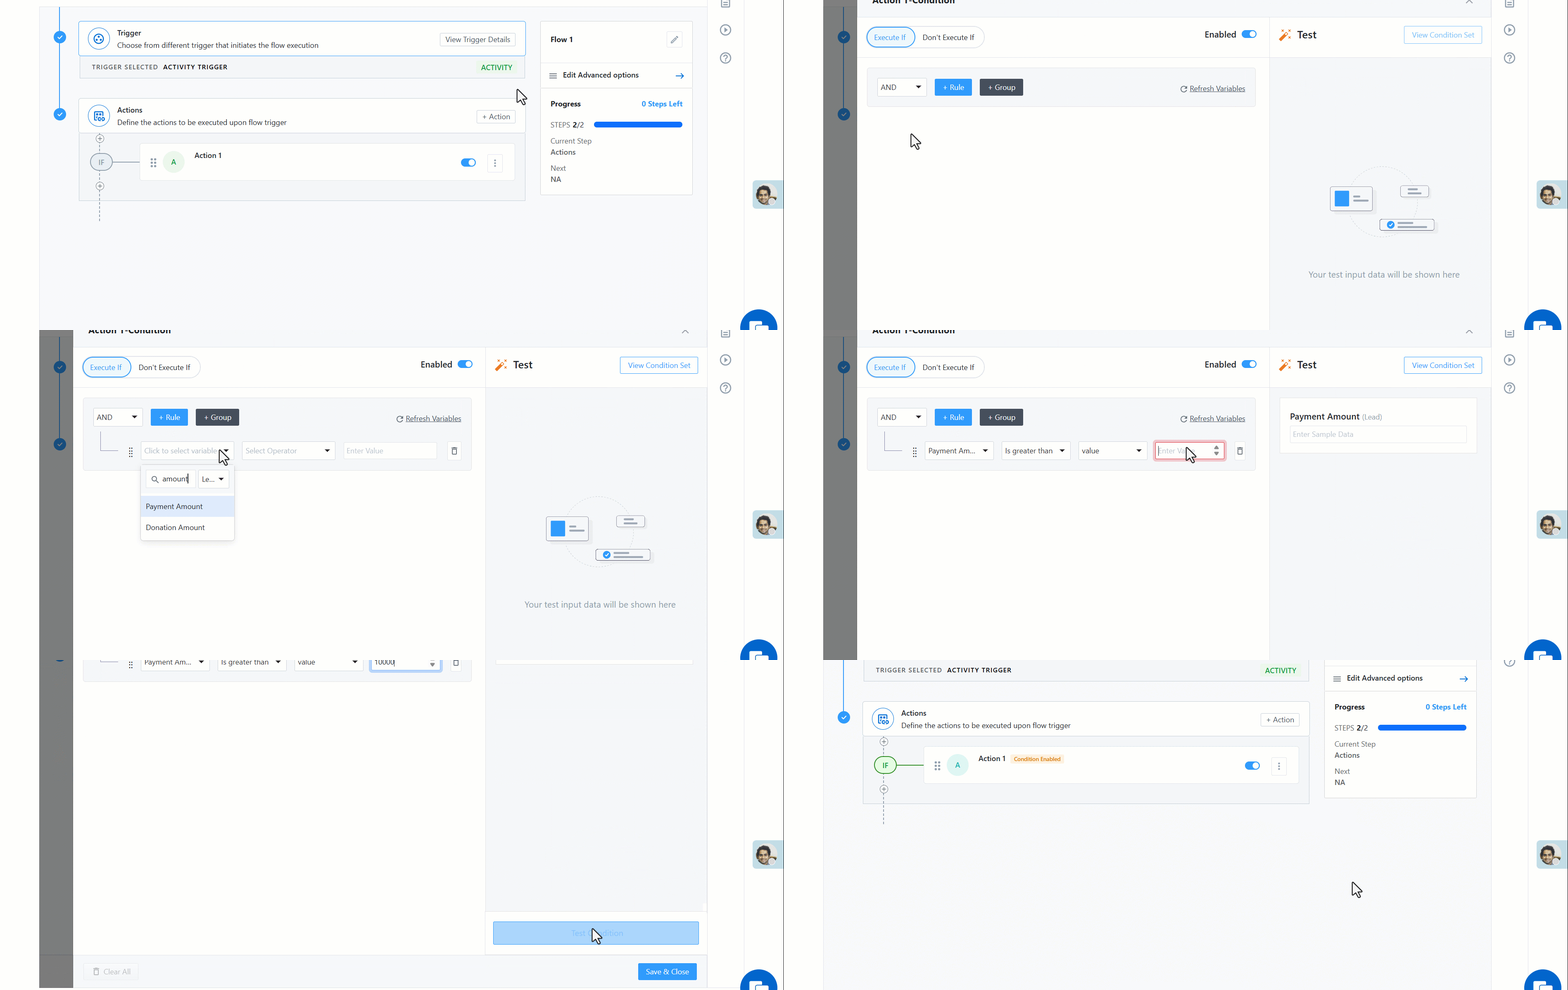
Conditions can be configured for each action to determine whether it should execute based on incoming data or system variables. These conditions are evaluated at runtime using context variables.
Example Condition:
lead.mx_Payment_Amount > 10000
This condition ensures the action only executes if the payment amount is greater than 10,000.
6. Rearrange Actions
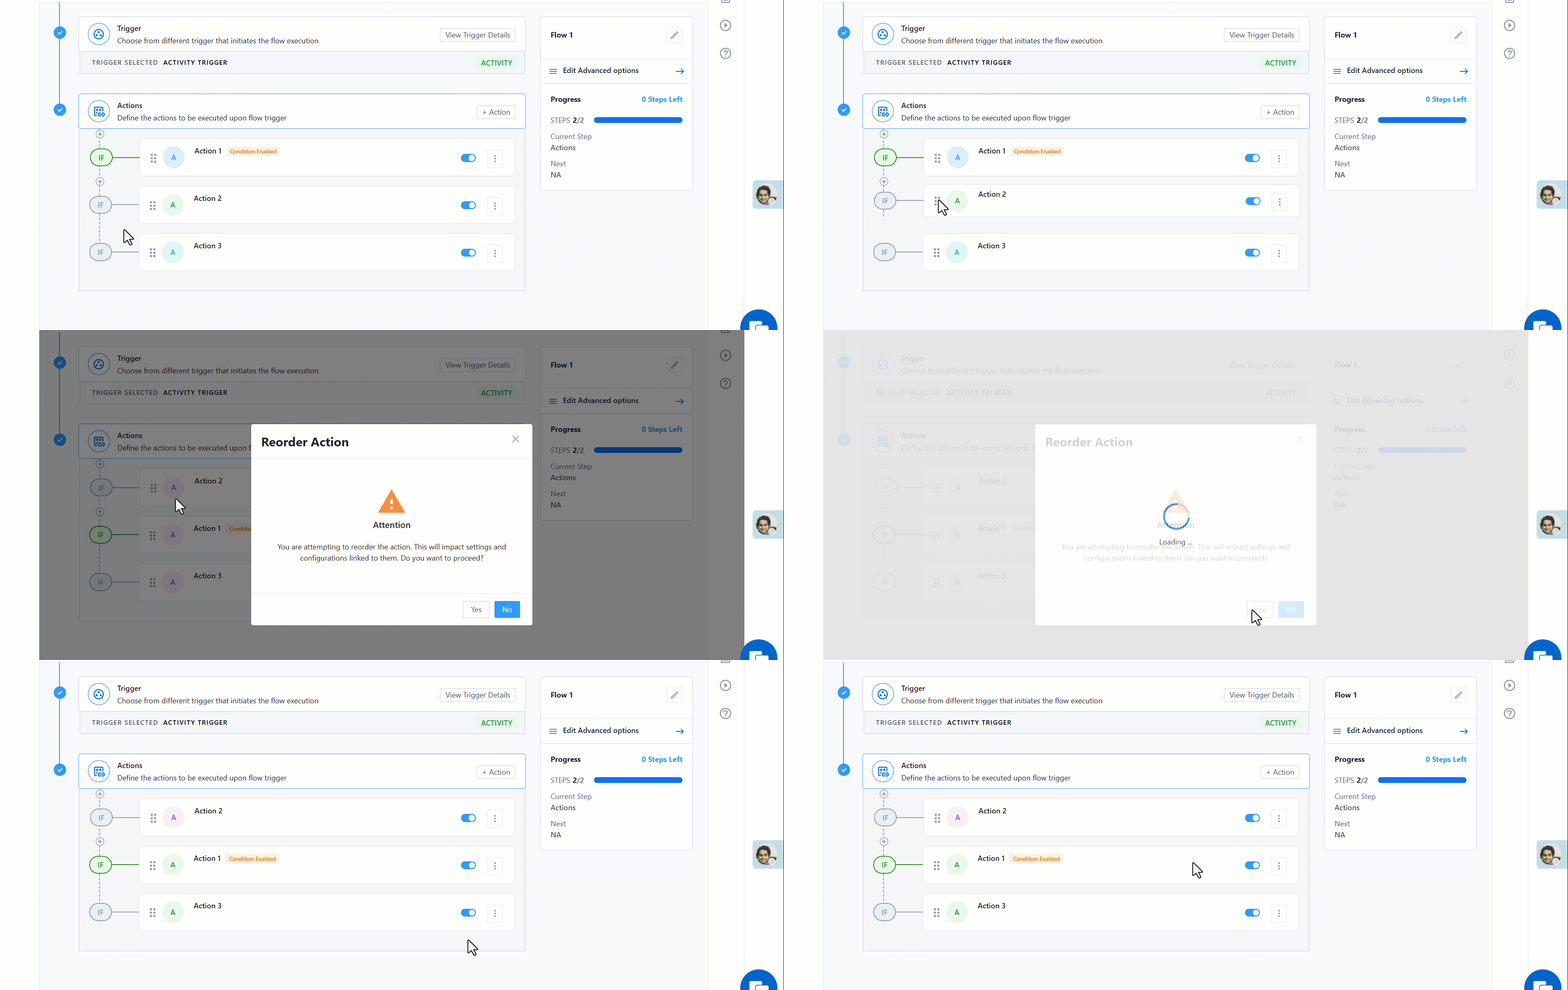
You can rearrange the sequence of actions within a flow by dragging and dropping them. This allows you to control the exact order in which tasks execute. Rearranging actions is especially important in synchronous flows, where execution order impacts the response logic.
7. Action Controls
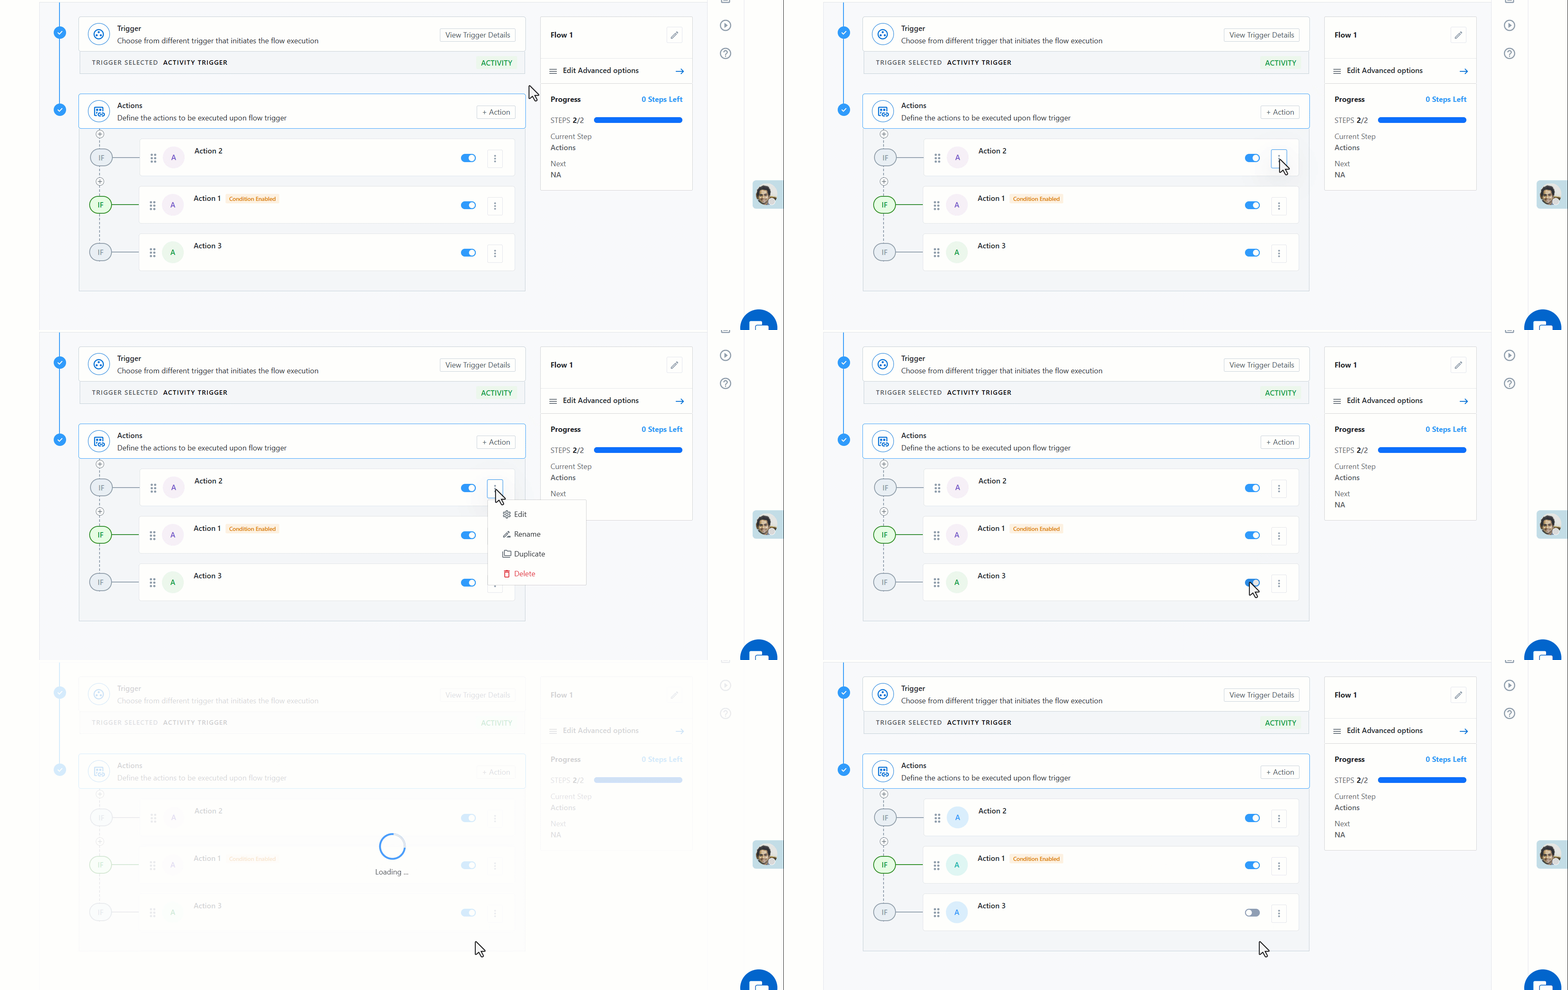
The following controls are available for managing actions:
- Disable – Skips execution of the action for new requests. Requests already received will continue to be processed even after the action is disabled.
- Edit – Modify the configuration of the action
- Rename – Edit the name and description of the action. Some of the templated actions may not support renaming. Renaming an action will affect the response mappings in other actions that reference it.
- Duplicate – Clone the action with the same configuration
- Delete – Remove the action from the workflow
Even when renaming is restricted, descriptions of actions can always be edited to improve readability.
8. Action Advanced Options
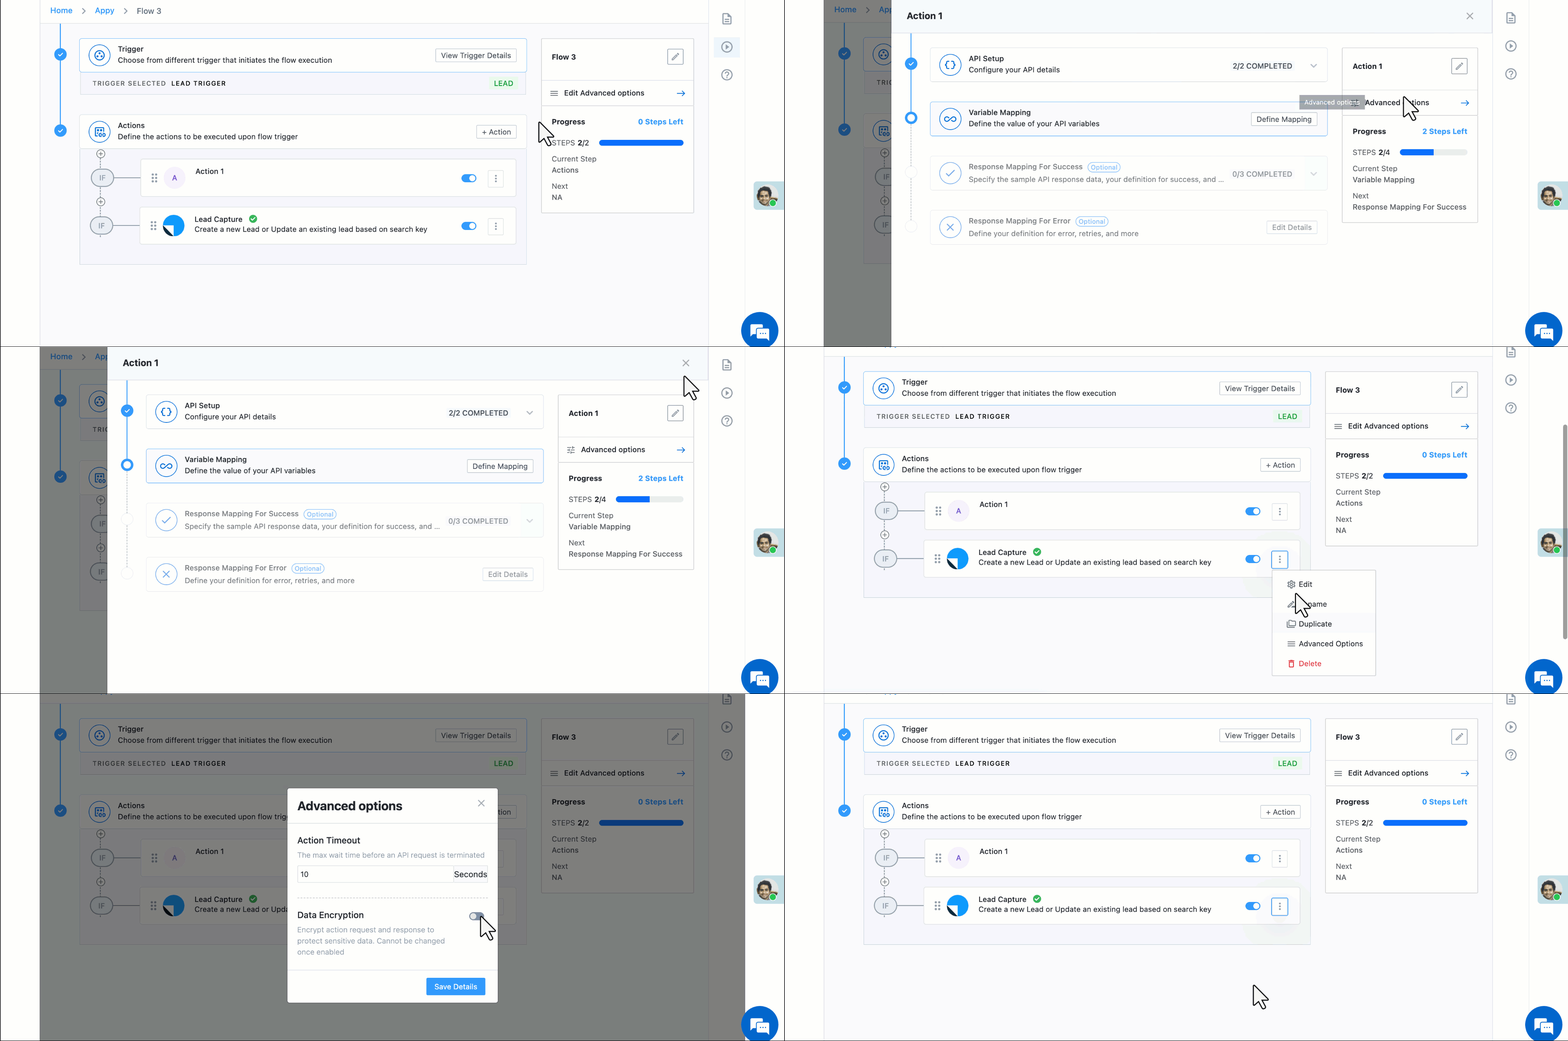
The Advanced Options section in UDS Actions provides additional configuration settings that control how an action is executed. It currently includes two options: Action Timeout and Data Encryption.
You can find this option either by opening the actions’ configuration page, or if it’s a lead action template, you can find it under the action controls.
8.1 Action Timeout
The Action Timeout setting defines how long an action will wait for a response from the connected API before timing out.
- Default Timeout: 10 seconds
- Maximum Timeout: 30 seconds
If the API does not respond within the configured duration, the system considers it a timeout and automatically retries the request up to two times.
For example, if the timeout is set to 10 seconds and the first request doesn’t receive a response, the system will retry the call twice more. This ensures reliability when interacting with slower APIs while maintaining optimal flow performance.
Note: Increasing the timeout beyond the default value may lead to longer execution times and overall flow slowness. It’s recommended to keep APIs optimized to respond within 10 seconds.
8.2 Data Encryption
The Data Encryption option allows users to encrypt the request and response data for an action. This is particularly useful when dealing with sensitive information, such as Aadhaar verification, eKYC, or PAN checks.
- When enabled, all request and response data for that action will be encrypted.
- Encrypted data will not be visible in logs or during flow execution review.
- Once enabled, encryption cannot be disabled for that action.
This option helps ensure data privacy and compliance when handling sensitive business or personal information within UDS flows.
9. Execution Behavior
The execution pattern of a flow varies depending on whether the Return Response card is used.
| Scenario | Execution Behavior |
|---|---|
| No Return Response Action | Entire flow executes asynchronously |
| With Return Response Action | Pre-return actions are synchronous; post-return are asynchronous |
This pattern ensures that critical sync responses (like lead IDs or acknowledgments) can be delivered instantly, while less time-sensitive operations are queued.
10. Recommendations While Creating API Actions
- Store credentials at the app level using global variables to ensure reusability across multiple flows.
- Avoid hard-coding credentials directly in the action configuration to maintain security and portability.
- Use system variables wherever possible when working with LeadSquared APIs to leverage built-in context and reduce manual effort.
Any Questions?
Did you find this article helpful? Please let us know any feedback you may have in the comments section below. We’d love to hear from you and help you out!


