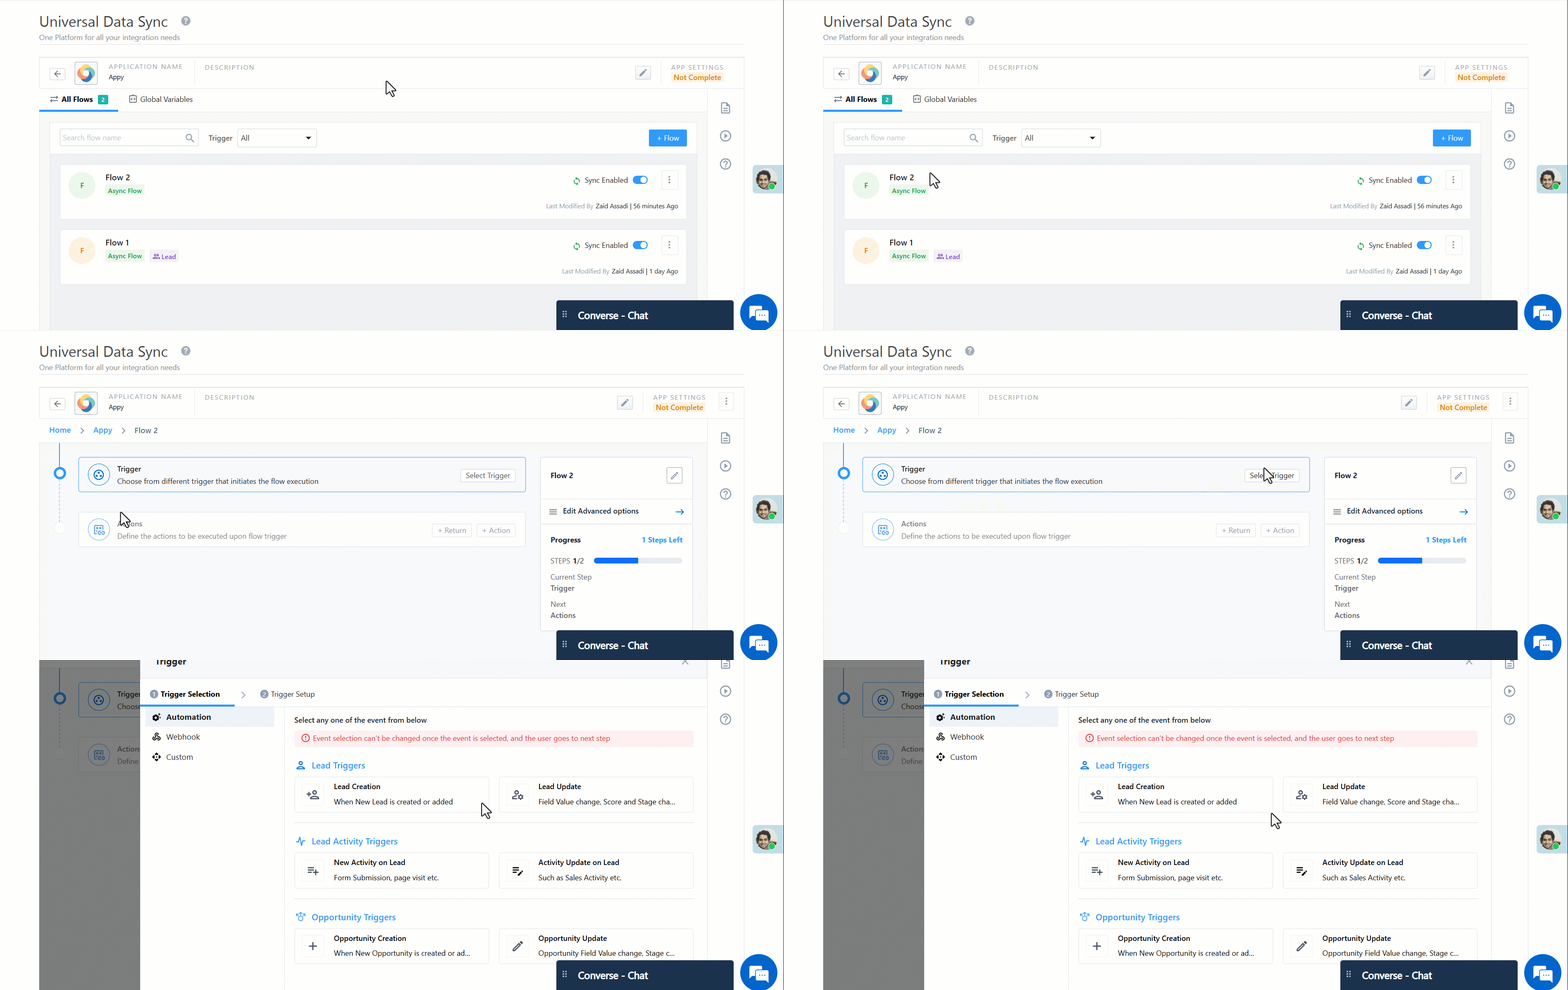
1. Feature Overview
With UDS, you can create an application and configure multiple data flows within it. Each data flow consists of two key components:
- Trigger
- Action
A trigger is the starting point of a data flow—it initiates execution whenever a specific event occurs and then actions are performed.
This document provides an overview of the various trigger options in UDS, along with relevant configuration details. You can choose from the following trigger types in UDS, depending on your use case:
- LeadSquared Webhooks
- LeadSquared Automation
- Custom / HTTPS Trigger

2. Prerequisites
- You must be an Administrator user, or access must be shared to you by an admin user.
- The Universal Data Sync Connector is a paid feature. To enable it on your account, contact your account manager, or write to support@leadsquared.com.
- You must first create and name your data flow before selecting a trigger. For more information, see Create a Data Flow.
3. LeadSquared Webhooks
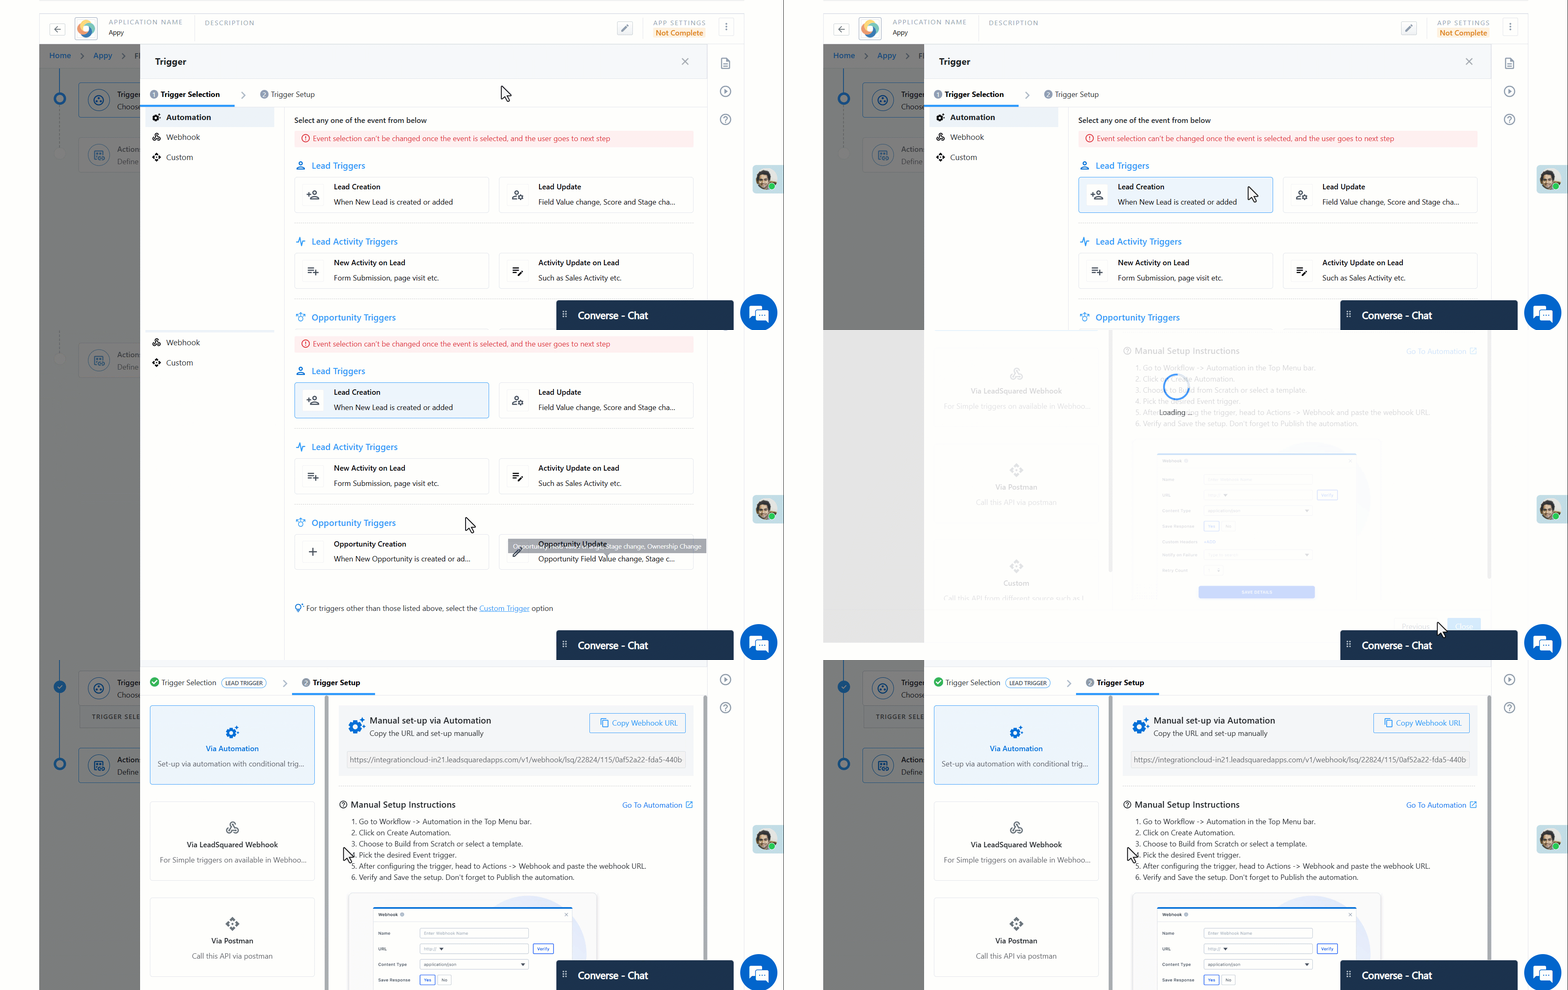
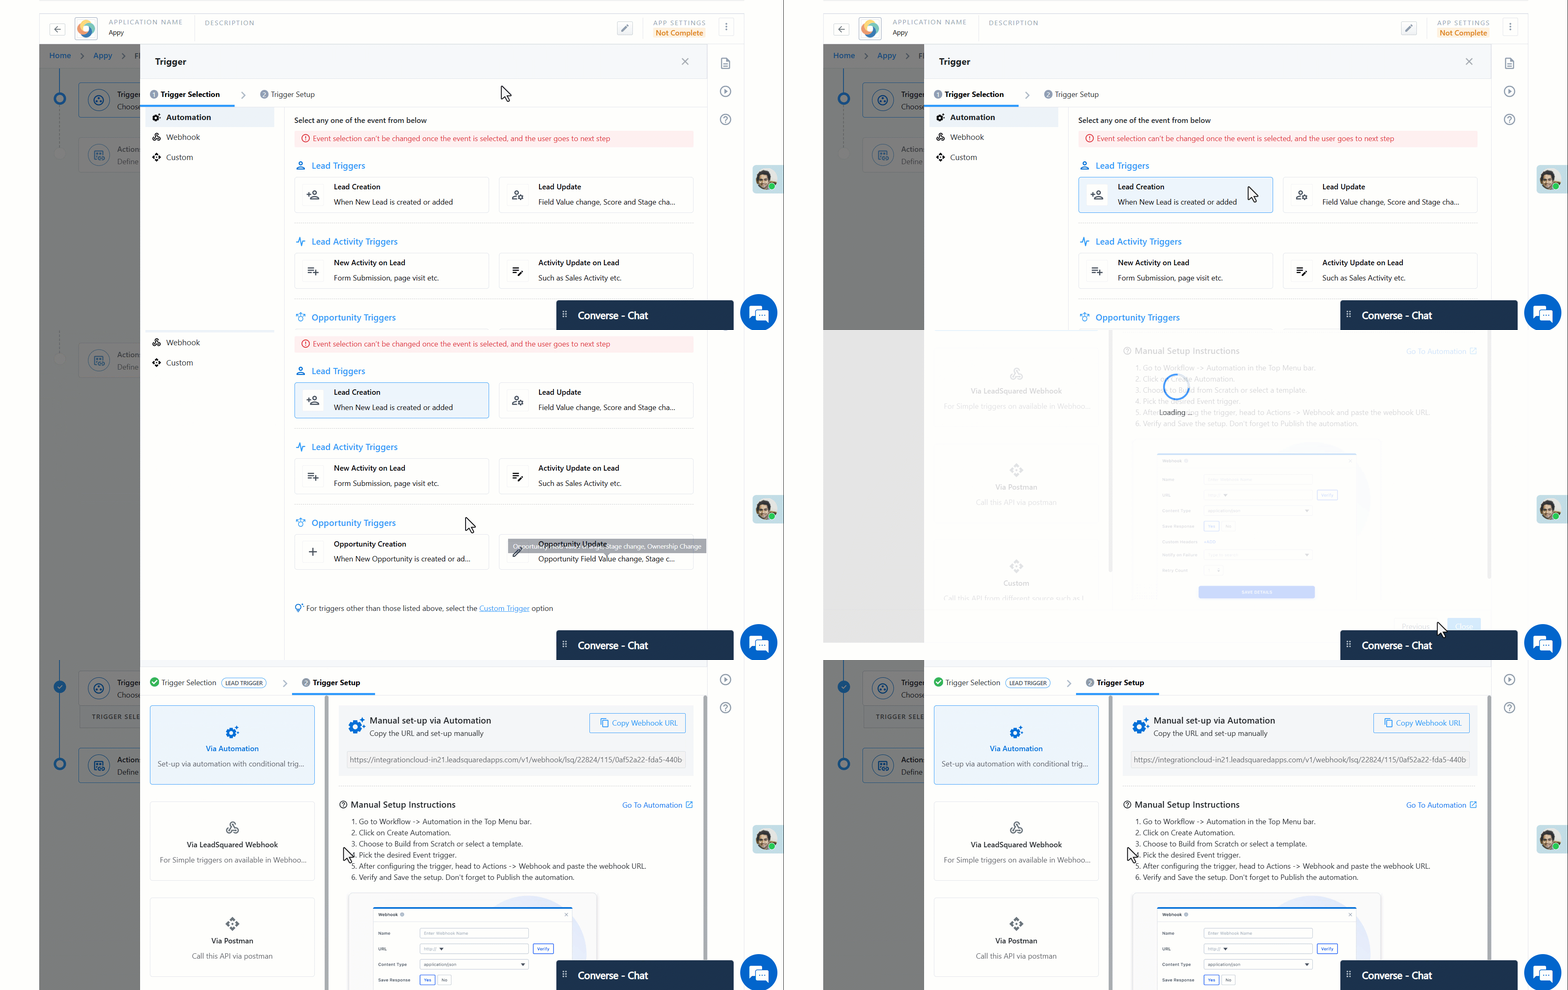
Use this option to initiate a workflow based on standard LeadSquared webhook events such as:
- Lead Created
- Lead Updated
- New Activity on Lead{select the activity}
- Activity Updated on Lead{select the activity}
- Opportunity Created
- Opportunity Updated
Once you have selected the trigger, you can save and move to the next page where you will get the UDS end point which can be configured inside Leadsquared webhooks. Follow the setup instruction mentioned next to webhook URL to configure the UDS webhook on the mentioned event.
Note:
- For any trigger event other than the above, use the Custom Trigger option.
- If there’s a mismatch between the event selected in UDS and the actual event on which data is received, your workflow will enter an error state.
- UDS Webhook endpoint only supports, GET & POST method for invocation.
- ickey in the webhook url is the authentication parameter for the webhook. Without it or if passed incorrect, the call will fail.
- A new ickey is generated on page refresh, but old keys remain active.
- ickey value can be also passed in the header or as x-access-token.
- Webhooks are restricted to be called directly from the browser or UI due to security reasons.

4. LeadSquared Automations
Choose this option if you want to start a workflow from within a LeadSquared Automation. You can trigger flows on the same events listed above:
- Lead Created
- Lead Updated
- New Activity on Lead{select the activity}
- Activity Updated on Lead{select the activity}
- Opportunity Created
- Opportunity Updated
Once you have selected the trigger, you can save and move to the next page where you will get the UDS end point, which can be configured on Leadsquared webhooks. Follow setup instruction mentioned next to webhook to configure on mentioned event.
Note:
- For any trigger event other than the above, use the Custom Trigger option.
- If there’s a mismatch between the event selected in UDS and the actual event on which data is received, your workflow will enter an error state.

5. Key Difference for Leadsquared Wehook and Automation
While both Webhooks and Automations can trigger a UDS flow, Automations offer more control. You can define complex conditions, add filters, and decide when and what data to send to UDS—making it ideal for advanced workflows.
6. Custom / HTTPS Trigger
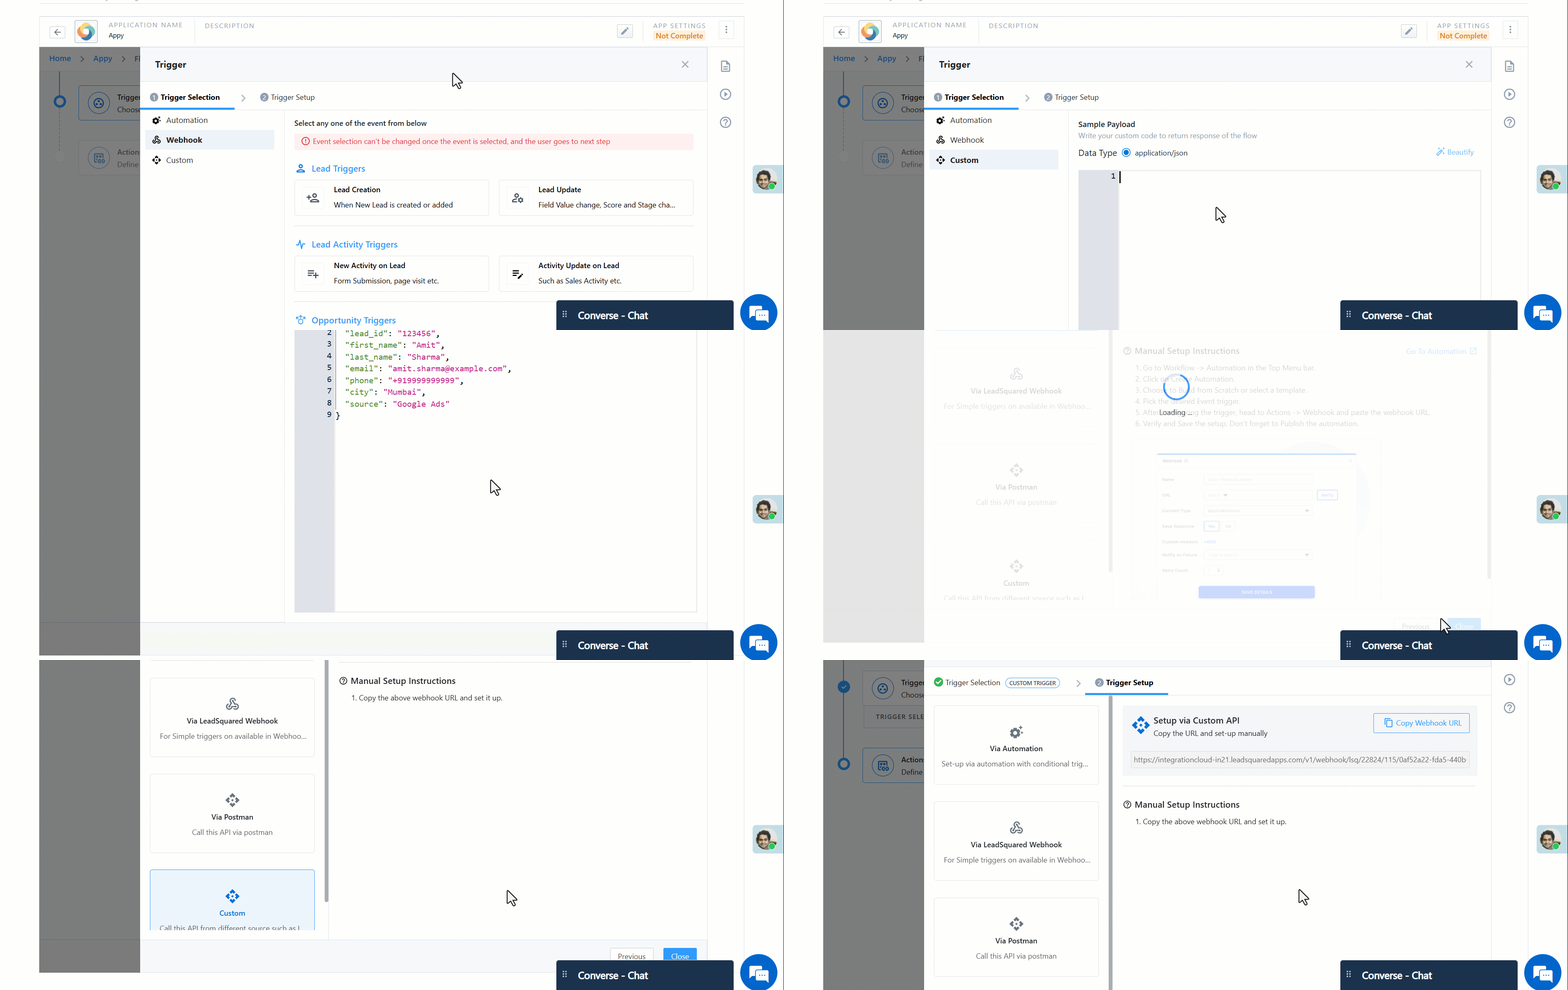
Use this option when you want to trigger a UDS flow from any system. You can make an HTTPS request to the UDS-generated webhook URL. Here You’ll need to manually provide a sample payload. This sample payload will act as a reference for mapping during action configuration.
Once you’ve selected the trigger, you can save and move to next where you will be able to get the UDS end point which can be configured at your source system.

7. FAQs
1. Can I use the Custom trigger even if my event is Lead Create in Leadsquared, which is already available under the LeadSquared Automation trigger?
Yes, you can. However, there are a few differences to consider:
- LeadSquared Automation/webhook Trigger: UDS automatically resolves the payload structure and LSQ field mapping during action configuration. You don’t need to provide any additional sample data.
- Custom Trigger: You’ll need to manually provide a sample payload that represents the data sent to the webhook. Based on this, UDS will generate the mapping fields for use in your actions.
Use the Custom trigger when you want more flexibility, want to capture any data point received over webhook and dealing in high volume.
8. Next Steps
Once you’ve configured a trigger, configure the actions you wish to execute.
Any Questions?
Did you find this article helpful? Please let us know any feedback you may have in the comments section below. We’d love to hear from you and help you out!


