1. Feature Overview
LeadSquared’s Topbar Widget is a lead conversion tool that you can add to your website or landing pages to direct the lead’s attention to your marketing offers. This widget is easy to design and connect to your website. You can specify the web pages you want to display this widget on and it does not require any changes to be made on your website.
2. Prerequisites
- The website domain on which you want to add the Topbar Widget should be associated with your LeadSquared account.
- The LeadSquared Tracking Script should be added on the relevant web pages.
3. Create a Topbar Widget
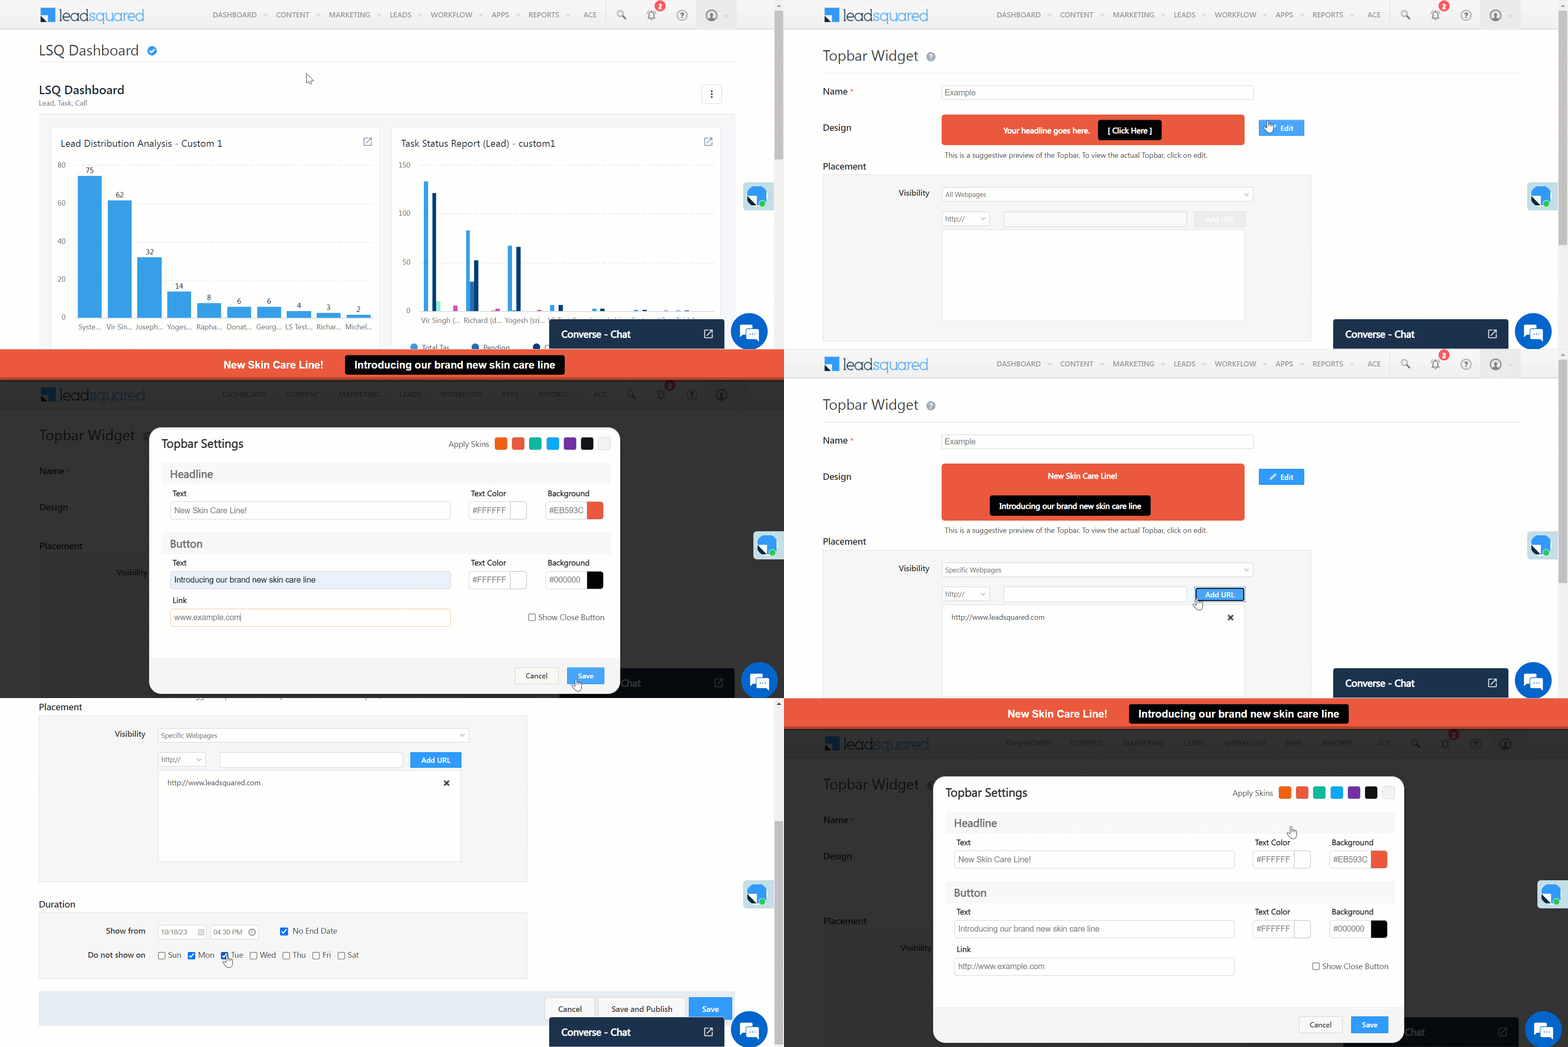
- From the main menu, navigate to Marketing>Website Widgets. On this page, hover your cursor over Create Widget and click Topbar.
- In the Name field, enter the name for widget. This is an internal name that you can use to identify the Topbar later.
- Click Edit to set up a message and create the design for the Topbar.
- On the Topbar Settings pop-up window, under Headline, enter the text you want to display in the Topbar. You can select different colours for the text and background of the widget.
- Under Button, enter the text you want to show on the button and the URL in the Text and Link fields respectively. You can also configure the colour of the button’s text and background.
- After configuring the design, click Save.
- The design displayed on the pop-up window is in a compressed format. To view how the topbar will be displayed on the web page, once you save the design, click Edit again.
- Under Placement, click the dropdown alongside Visibility and select where you want to display the widget –
- All Webpages – Displays the widget on all the webpages of the website and in all the Landing pages.
- Specific Webpages – Displays the widget on specific pages that are added. Add URLs in the text field below the dropdown and click Add URL. Make sure to enter the complete URL (for example, www.leadsquared.com).
- Exclude on Specific Webpages: Displays the widget on all the pages excluding the pages which are added in the exclusion list. To exclude URLs, enter them in the text field below the dropdown and click Add URL. Make sure to enter the complete URL.
- Under Duration, you can configure the duration of the widget displayed on your website. You can also choose to display them on specific dates.
- Once you’re done, click Save and Publish.
Note: You don’t have to make any changes on your website for the widget to go live.

Any Questions?
Did you find this article helpful? Please let us know any feedback you may have in the comments section below. We’d love to hear from you and help you out!
Was this Helpful?
Let us know if you liked the post and help us improve.


