


Get Started
Sales Suite
Field Ops
Marketing
Service CRM
Integrations & Apps
FloStack
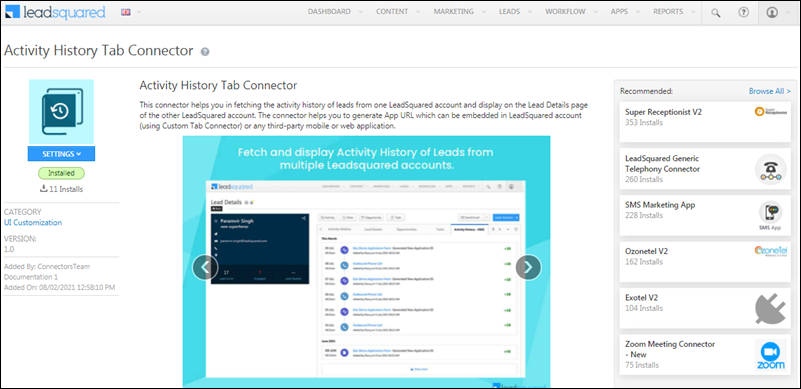
Activity History Tab Connector
1. Feature Overview
If you have common leads across multiple LeadSquared accounts, use the Activity History Tab Connector to view their activity history in the same account in real-time (without switching between different accounts).
The connector fetches and displays Phone Call activities and Custom Activities posted on common leads across your LeadSquared accounts. You can also display these activities on third-party mobile or web applications.
To know more about the connector, please refer to Activity History datasheet.
2. Prerequisites
- You must be the administrator of your LeadSquared account to install and configure this connector.
- This is a paid feature. To enable it, please reach out to your account manager, or write to support@leadsquared.com.
- If you want to display activities between two LeadSquared accounts, the Custom Tab Connector must be installed and configured on the account in which you want to display the activities.
3. How it Works
Once this connector is installed and configured, an app URL is generated. This URL must be configured using the Custom Tab Connector in the account you want to display the activity history in. You can also use the URL to render the activity history page in a third-party application.
On the LeadSquared account where you want to display the activities –
- Install and configure the Activity History Tab Connector.
- Add the API Access Key and Secret Key of the second account, from where you want to fetch activities.
- Select the activities you want to display, along with the unique lead field (the search key), and Save the details. The app URL is generated.
- On the Custom Tab Connector, create a new tab and add the app URL. To know how to create a custom tab, please refer to Custom Tab Connector.
- Navigate to the Lead Details page. You can view the list of activities that are fetched for all the common leads.
To display these activities outside LeadSquared, you can similarly embed the Activity History Connector app URL on any third-party application.
4. Install the Connector
On the LeadSquared account in which you want to display the activities –
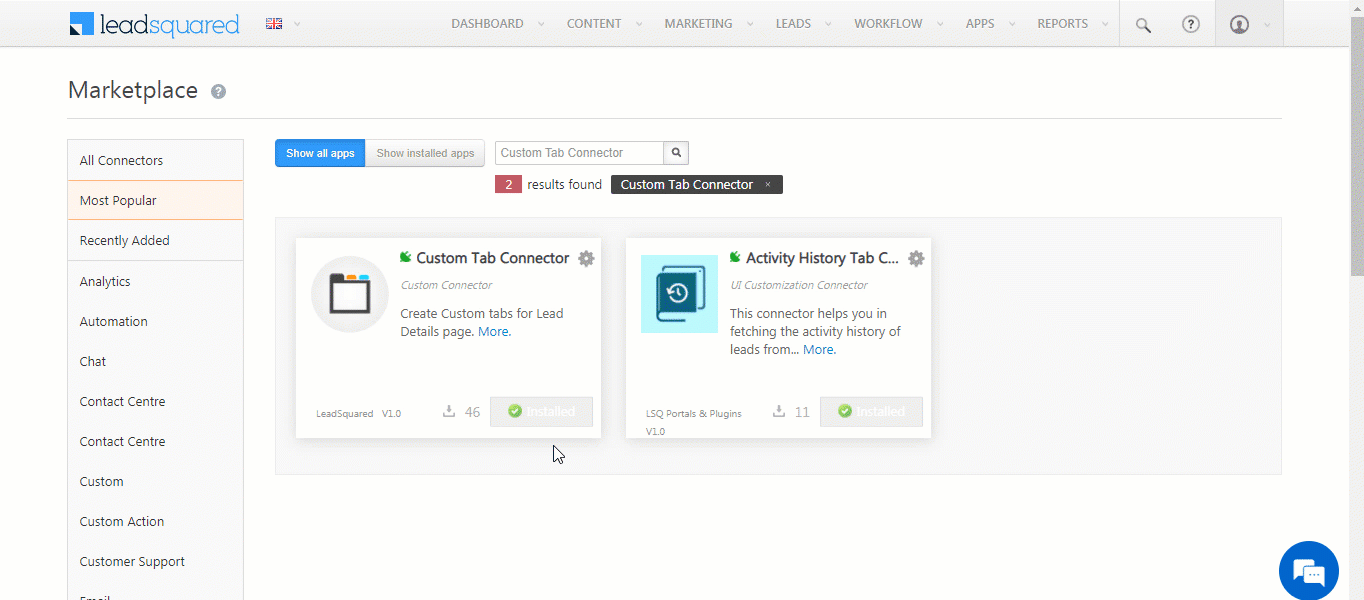
- From the main menu, navigate to Apps>Apps Marketplace.
- Search for Activity History Tab Connector, and click Install.
- Alternatively, you can find the connector on the left panel, under UI Customization.
- Once installed, hover your cursor over
 , and click Configure.
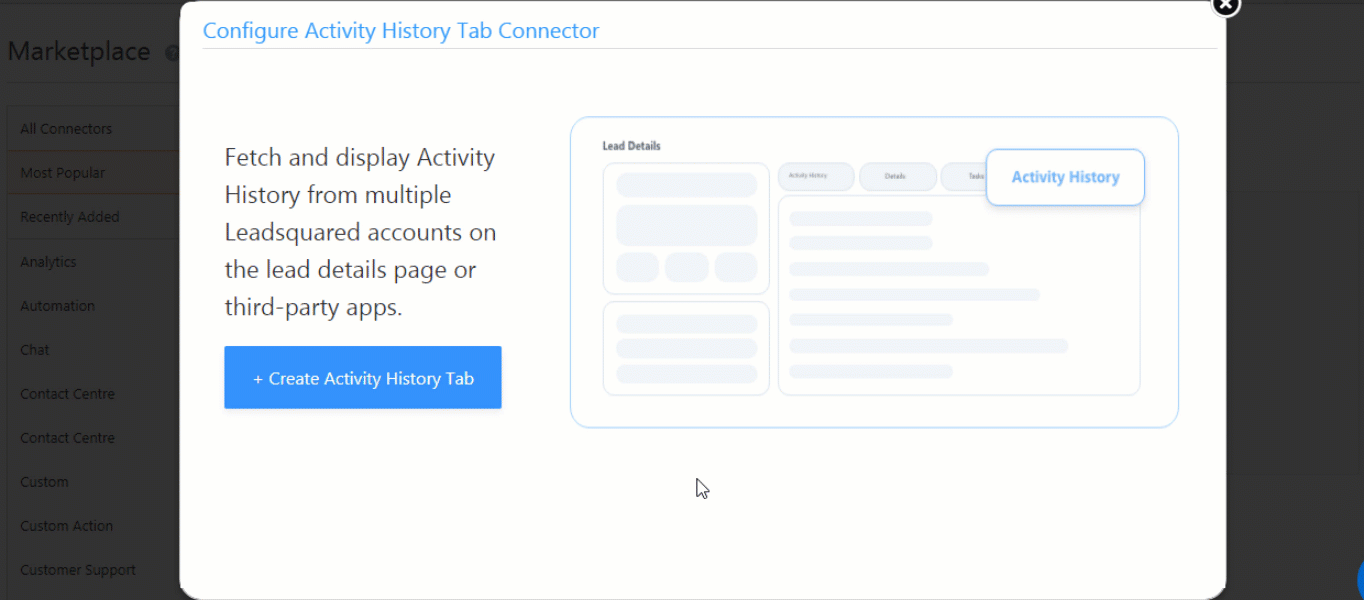
5. Configure the Connector
After the connector is installed, add the API Access Key and Secret Key of the second account, from where you want to fetch the activities.
- On the Configure Activity History Tab Connector pop-up, click Create Activity History Tab.
- On the Activity History Tab on Lead Details screen, provide the following details –
- Tab Name – A display name for the tab.
- Access Key & Secret Key – The API Access Key and Secret Key of the second account. To obtain these keys, navigate to My Profile>Settings>API and Webhooks>API Access Keys.
- Select Unique Field – Select the unique lead field which will be used to identify common leads between both accounts. You can choose between Email Address and Phone.
- Select Activity Types – Select the activity type you want to display on the custom tab. You can select both activity types.
- Once you’re done, click Save. You’ll get a message stating the “App URL Created Successfully”. Copy and save this URL.
6. Create Custom Tab
In order to display the activities added to common leads, create a custom tab.
- Navigate to Apps>Apps Marketplace, and search for the Custom Tab Connector.
- Hover your cursor over
 , and click Configure.
 - On the Configure Custom Tab Connector pop-up –
- Title – Enter the display title for the custom tab.
- URL – Paste the app URL you copied in the previous step.
- From Show Tab In, choose where you want to display this tab.
- Once you’re done, click Save.
7. View Activities
- Navigate to the Manage Leads page, and click on any common lead present in both accounts.
- On the Lead Details page, click the custom tab you created in the previous step.
- Here, you can view the list of activities that were posted on this lead in the second account.
Any Questions?
Did you find this article helpful? Please let us know any feedback you may have in the comments section below. We’d love to hear from you and help you out!