A custom tab allows you to fetch and display data from external sources on the lead or account details pages. Here are some examples of what you can achieve with custom tabs –
- Show all support tickets associated with a lead stored in external systems (e.g., Zendesk, FreshDesk, etc.)
- Display the list of products added to lead’s cart on an E-commerce site.
- Create a tab for the real estate properties a lead may be interested.
- View the list of invoices generated for a particular account
- Set up a news feed tab for a specific account
Prerequisites
- You must be an Administrator user of your LeadSquared account.
- If you want to create a custom tab on the account details page, you must first enable the accounts feature.
Installation
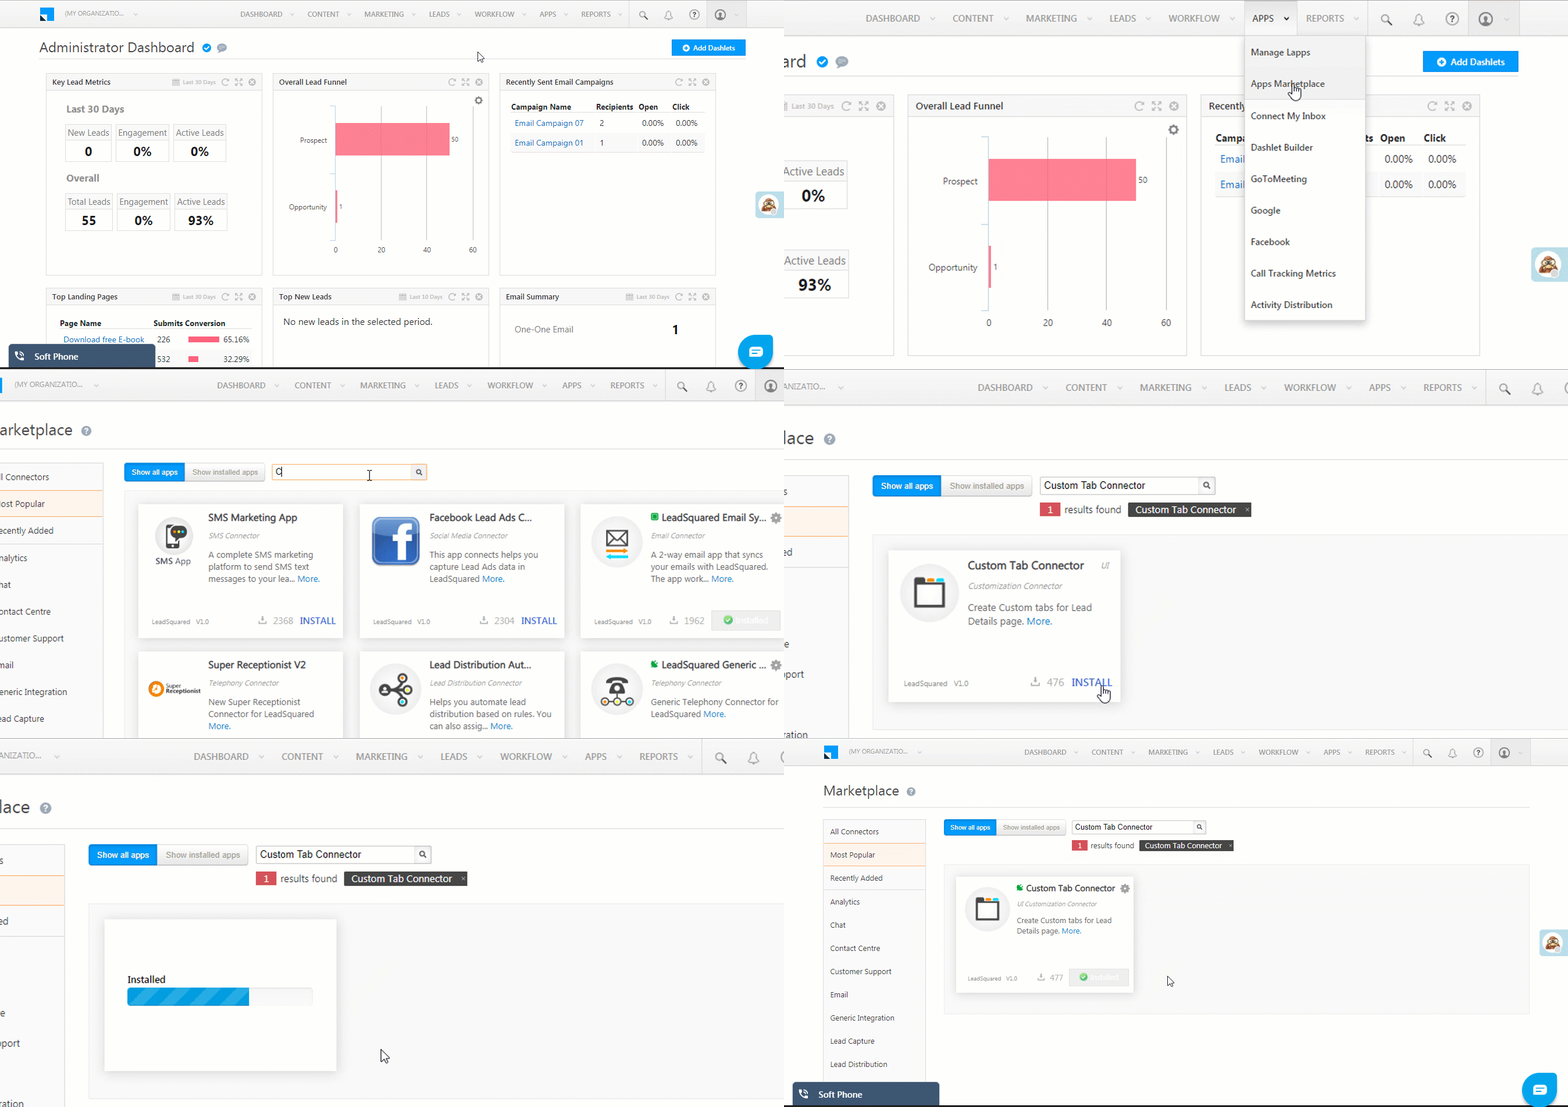
You must install and configure the Custom Tab Connector from the Apps Marketplace to create custom tabs.
- On the main menu, navigate to Apps>Apps Marketplace.
- In the search box, enter ‘Custom Tab Connector’.
- Click Install

Configuration
Once the connector is installed –
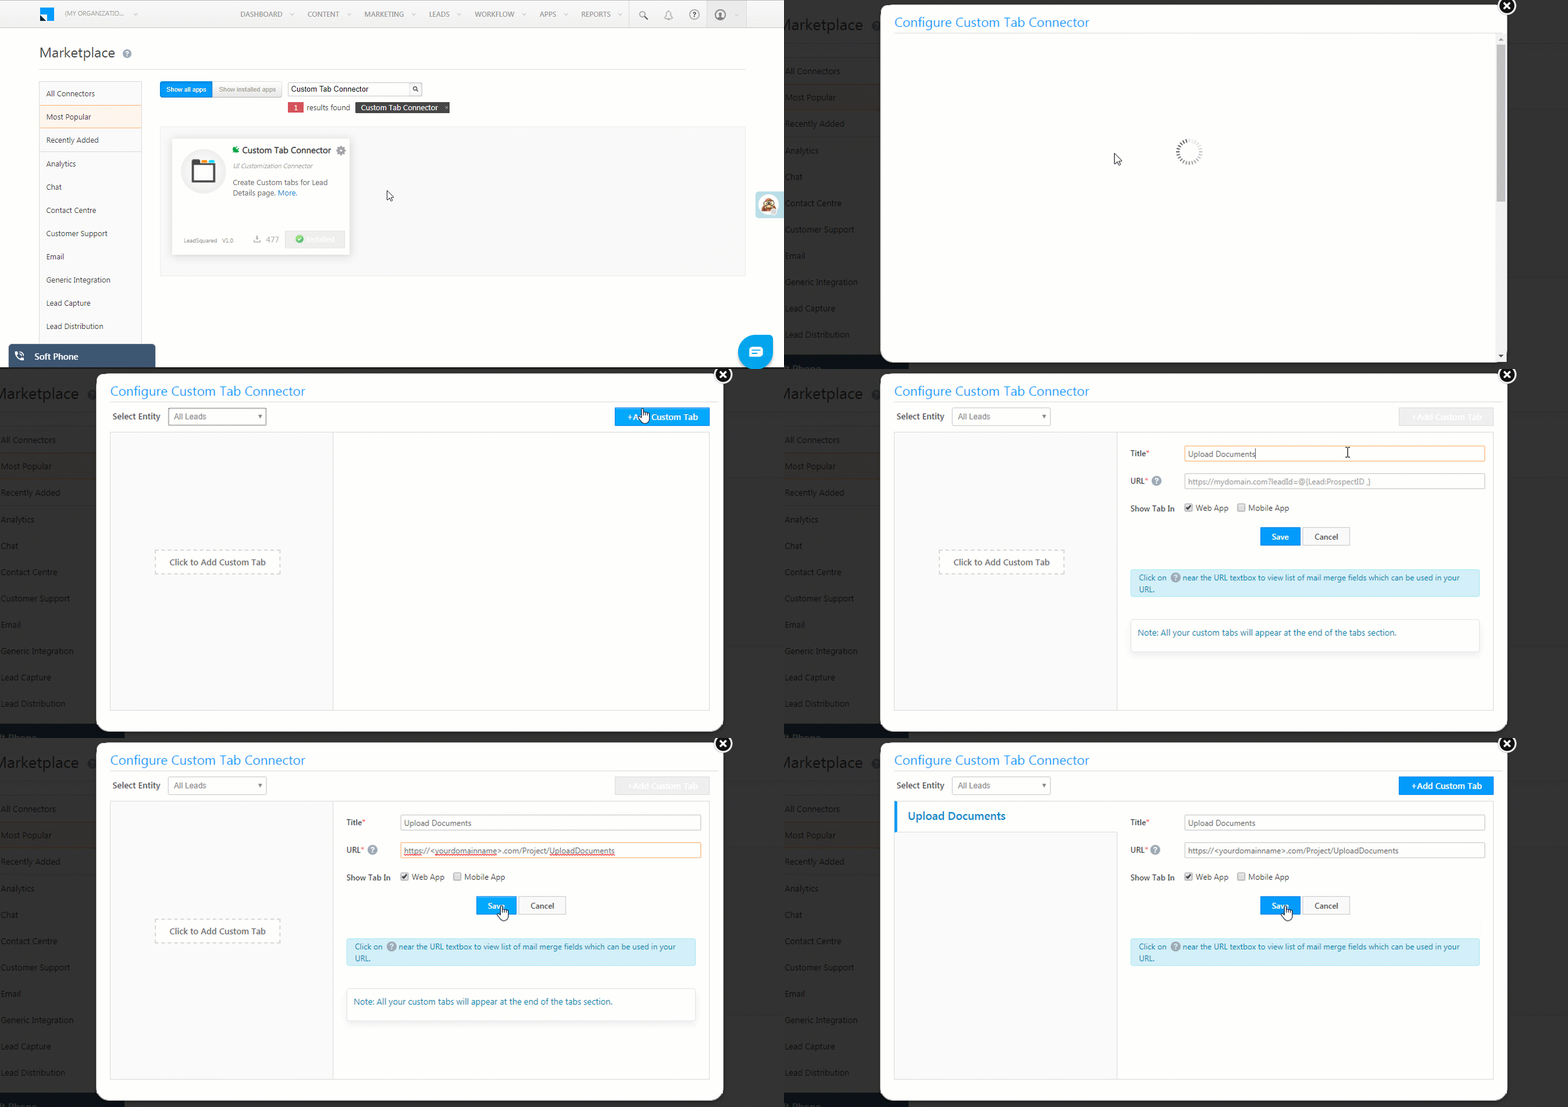
- Hover your cursor over the settings
 wheel, then click Configure.
 - On the Configure Custom Tab Connector pop-up, use the Select Entity drop-down to choose where you’d like to create the custom tab, then click Add Custom Tab.
- You can either select All Leads to create a custom tab on the lead details page.
- Or you could select an account type to create a custom tab on the account details page for all accounts of the chosen type.
- Enter the following details
- Title: This will be the display name of the custom tab.
- URL: Enter the HTTPs URL which will be rendered as a custom tab.*
- Show Tab In: You can display the tab on the Web App or the Mobile App.
- Click Save.
*The URL should be of an application (it will be most likely a custom application that you create) that accepts LeadSquared lead merge fields as parameters and passes it to an external application (like a support system, another CRM or marketing system, or another LeadSquared account) to get the data. You will then need to render the response in HTML so it can be displayed in the custom tab. For example – https://<yourdomainname>.com/Project/UploadDocuments
Click the help ![]() icon to view the list of mail merge fields you can use in your URL.
icon to view the list of mail merge fields you can use in your URL.

View Your Custom Tab
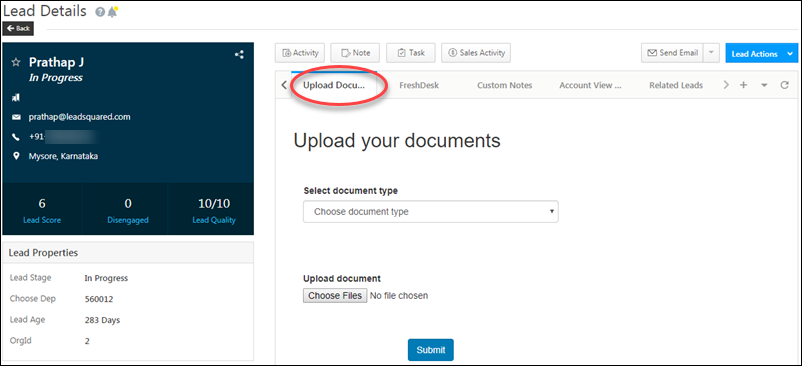
You can now view your custom tab on the Lead Details or Account details page depending on where you configured it. the example below shows an ‘Upload Documents’ tab where users can upload identification documents for leads.

Any Questions?
Please feel free to ask questions or share your feedback in the comments section below.


