Feature Overview
The default templates for auto check-in and auto check-out don’t extend to the mobile app. If you want to set up notifications/reminders and auto check-in/check-out on your LeadSquared mobile app, you have to configure webhooks as instructed in this article.
If you’re new to the auto check-in/check-out feature, see Auto Check-In/Check-Out Guide.
Adding Webhooks
You can create an automation from scratch, but we recommend using the ready-made templates auto-check in and check-out templates. You can edit the templates, add and remove cards and customize it to suit your requirements.
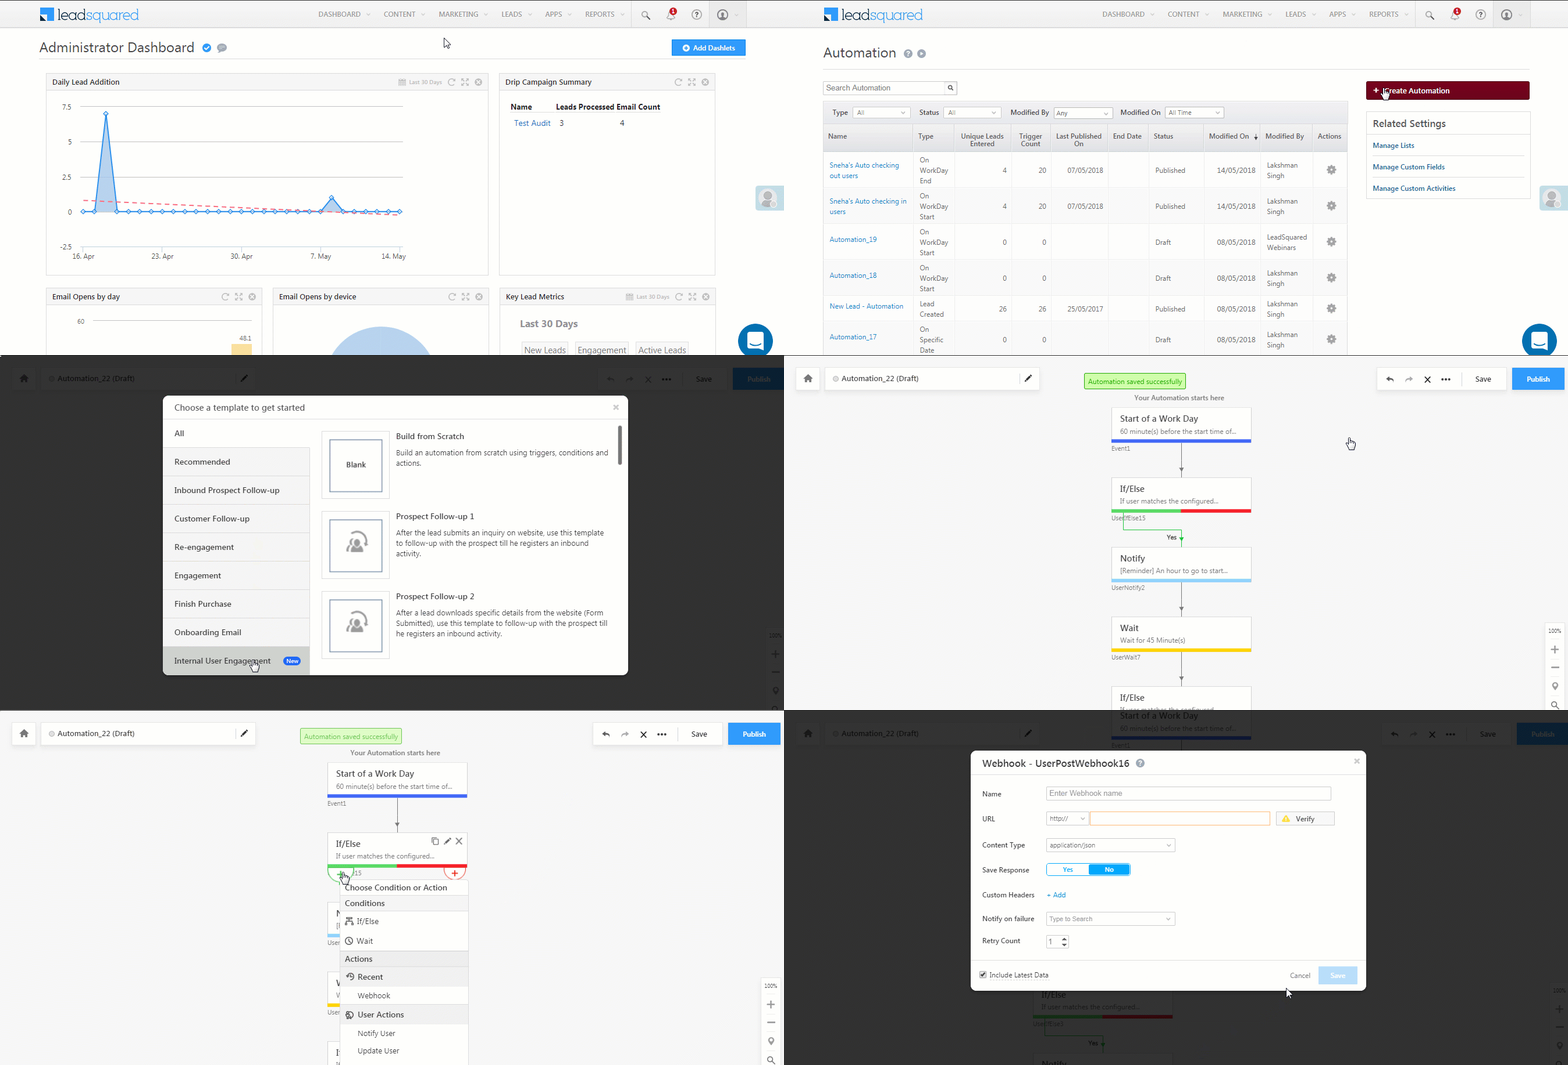
- Navigate to Marketing>Automation on the main menu of your LeadSquared account, then click Create Automation.
- Select the Auto Check-in or Auto Check-out template.
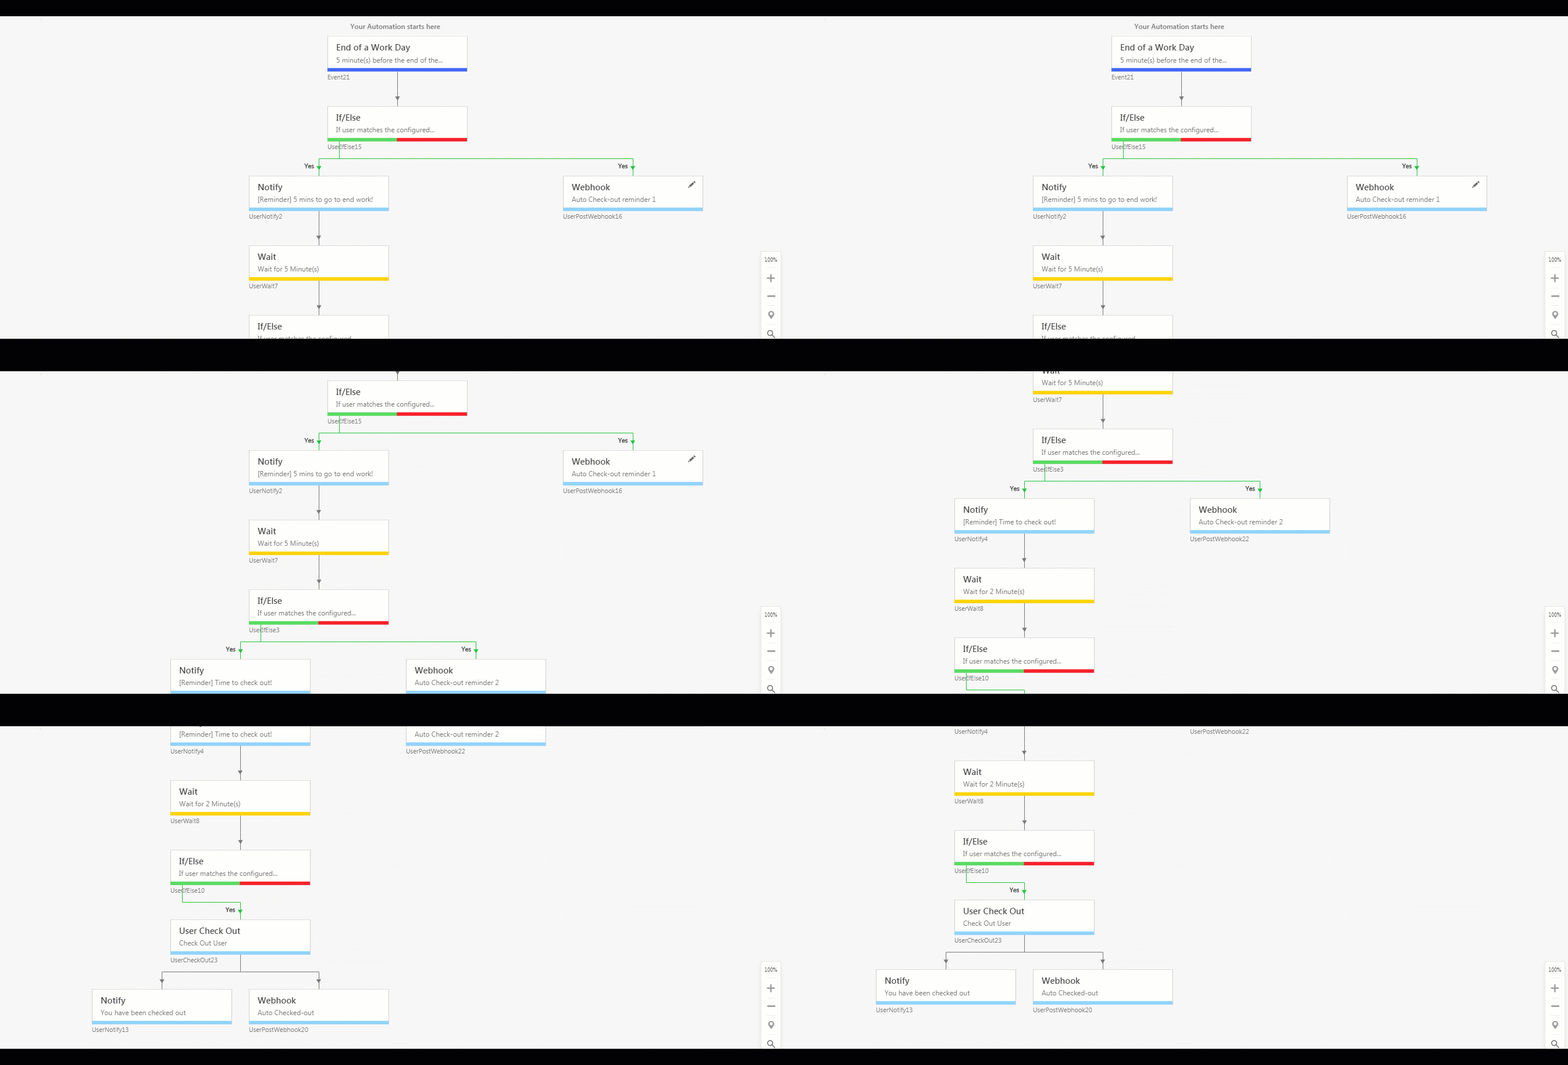
- Now add webhooks after every If/Else card (following the ‘Yes’ path). In this way, you can configure the webhooks to send mobile notifications (alongside the web notifications) and auto check-in/check-out users on mobile. Add a webhook by clicking the
 icon below the If/Else card and then selecting Webhook, under User Actions.

The webhooks you can add are detailed below.
- The ‘Request Type’ can be on of –
- AutocheckInReminder
- AutocheckIn
- AutocheckOutReminder
- AutocheckOut
- The ‘Title’ and ‘SubTitle’ of the webhook are configurable. You can add any text here to customize the notification.
- The ‘20%’ characters are used to add spacing between the text.
- You must pass your LeadSquared access and secret keys. You can find them by navigating to My Account>Settings>API and Webhooks.
Reminder to check-in
https://mobile-notifications.leadsquared.com/PushMobileMessage.aspx?RequestType=AutocheckInReminder&Title=Reminder%20to%20check-in%21&SubTitle=Your%20scheduled%20time%20to%20begin%20work%20is%20nearing.%20Tap%20on%20check%20in%20now%20to%20start%20your%20work%20day%20early&accessKey=@{User:AccessKey , }&SecretKey=@{User:SecretKey , }
Auto check-in
https://mobile-notifications.leadsquared.com/PushMobileMessage.aspx?RequestType=AutocheckIn&Title=Checked%20in%21%20&SubTitle=Your%20work%20day%20has%20begun.%20Location%20tracking%20is%20now%20active&accessKey=@{User:AccessKey , }&SecretKey=@{User:SecretKey , }
Reminder to check-out
https://mobile-notifications.leadsquared.com/PushMobileMessage.aspx?RequestType=AutocheckOutReminder&Title=Reminder%20to%20check-out%21&SubTitle=Your%20scheduled%20time%20to%20end%20work%20is%20nearing.%20Tap%20on%20check%20out%20now%20to%20end%20your%20work%20day%20early&accessKey=@{User:AccessKey , }&SecretKey=@{User:SecretKey , }
Auto check-out
https://mobile-notifications.leadsquared.com/PushMobileMessage.aspx?RequestType=AutocheckOut&Title=Checked%20out%21%20&SubTitle=Your%20work%20day%20has%20ended.%20Location%20tracking%20is%20now%20inactive&accessKey=@{User:AccessKey , }&SecretKey=@{User:SecretKey , }
Notify Auto check-out
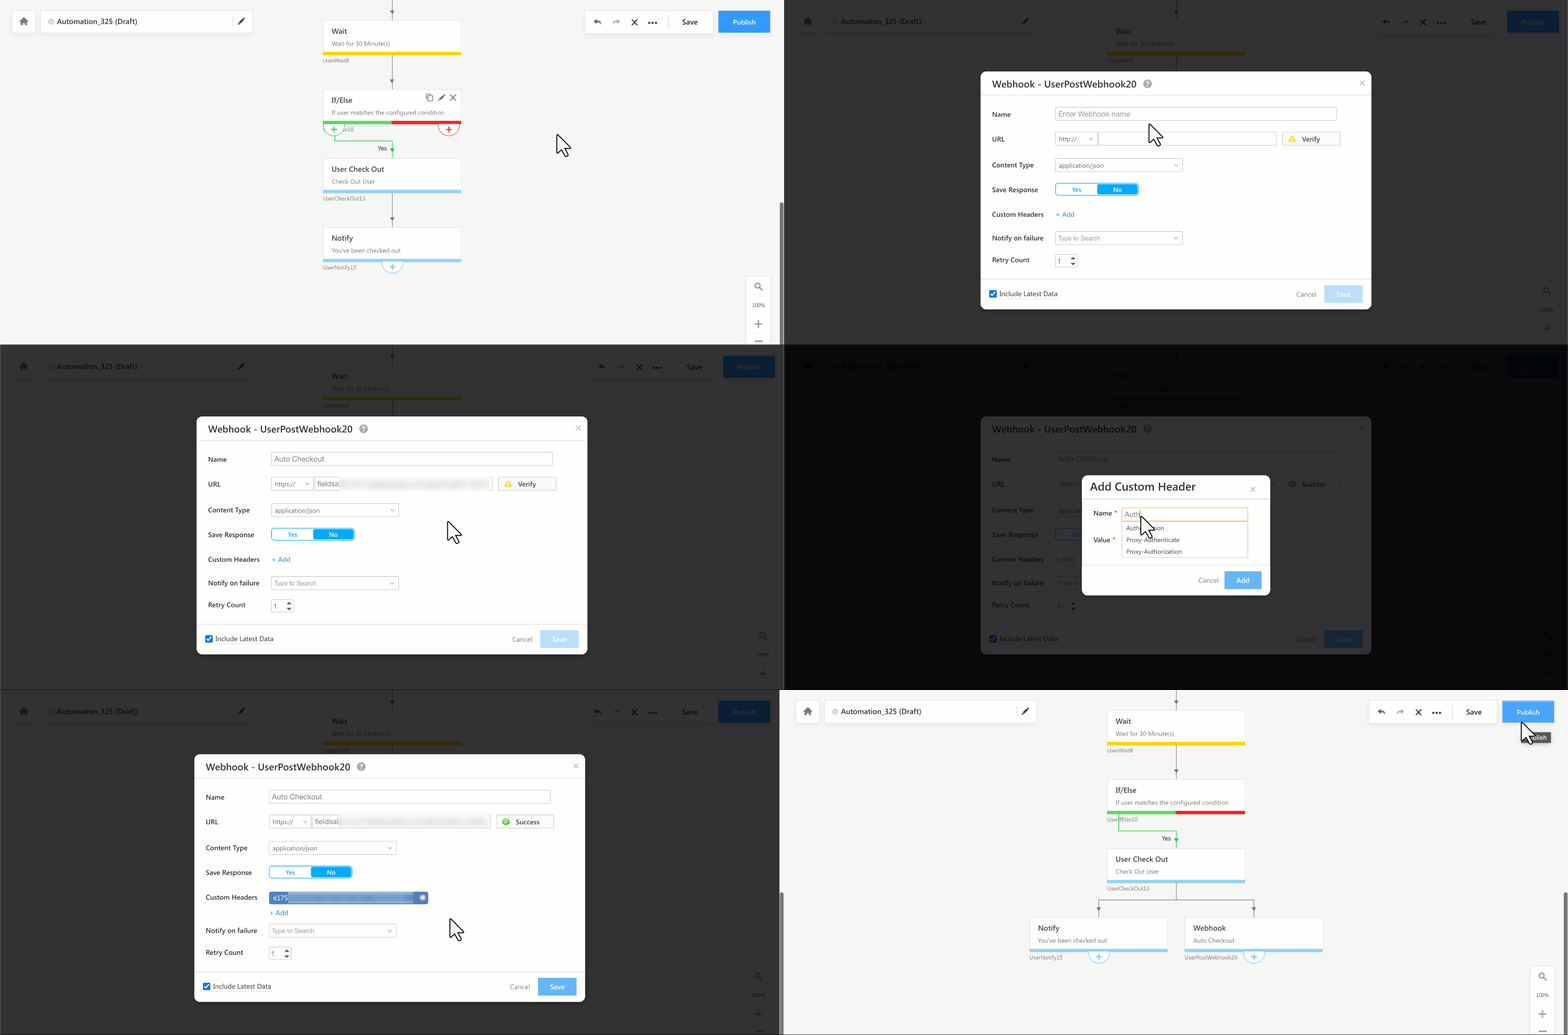
After setting up the automation for user check-out, configure the Webhook on the User Check Out card, to notify users who have been checked out. To set up the Webhook, enter the following details –
- Name of the Webhook
- URL Type: ‘https://’
- Webhook URL: fieldsales-in21.leadsquared.com/api/location-feed/v1/Enter ORG ID here/events/checkout
- The Org ID included in the URL refers to the organisation ID, which is the same as your LeadSquared Account Number. You can find this ID at the bottom of your screen. To know more, see How do I find my LeadSquared Account Number?
Once these details are entered, click Verify to validate the URL.
- Custom Header Name: Authorization
- Custom Header Value:
- Go to https://fstm-in21.leadsquared.com/.
- Navigate to Journeys>Settings>Advanced.
- Alongside Field Sales Token for Automation, click Copy.
- Paste the content under Custom Header Value.
- On completing all the steps mentioned above, click Save.
- Lastly, Publish or Republish the Automation for Check-Out with the newly added Webhook.

Sample Automation with Webhooks


