


Get Started
Sales Suite
Field Ops
Marketing
Service CRM
Integrations & Apps
FloStack
Electronic Health Record (EHR-HL7) Connector
1. Feature Overview
An Electronic Health Record (EHR) is a digital way to store and keep track of a patient’s medical health records. The EHR-HL7 Connector follows HL7 standards to retrieve patient information from EHR systems, and populate this in corresponding lead and activity fields in LeadSquared. The connector also transfers existing lead data from your LeadSquared account to EHR systems. This connector facilitates patient registration (lead creation) and appointment management through your LeadSquared account.
Note:
- This connector is currently available only for customers in the US.
- This connector is only for customers who work in the healthcare domain.
2. Prerequisites
- Before you install and configure this connector, contact your account manager or write to support@leadsquared.com to build a channel for this connector to transfer information between LeadSquared and your EHR system.
- You must be the Administrator of your LeadSquared account to install and configure this connector.
- This is a paid feature. To enable it, reach out to your account manager, or write to support@leadsquared.com.
3. How it Works
Before you install this connector, ensure the necessary channels are created for this connector to function as intended. Once the channels are created, install the connector to transfer lead and activity data between your EHR system and LeadSquared.
Once the connector is installed, build connector flows. This connector flow transfers patient health records and appointment activities from your EHR system to LeadSquared, and lead and activity data from your LeadSquared account to your EHR system.
- Each connector flow can be built only for a specific event type (e.g., ADT – A08 “Update Patient”, SIU – S15 “Notification on Appointment Cancellation”, etc.).
- You can build multiple such flows. Note that each flow only allows data to be transferred uni-directionally (one-way). Add a Message Template for each event type, in order for your EHR system to communicate with LeadSquared, and vice versa.
Once the Message Template is added, map HL7 fields in the message template to the corresponding LeadSquared lead/activity fields. This will begin the data transfer process between the two systems.
4. Install the Connector
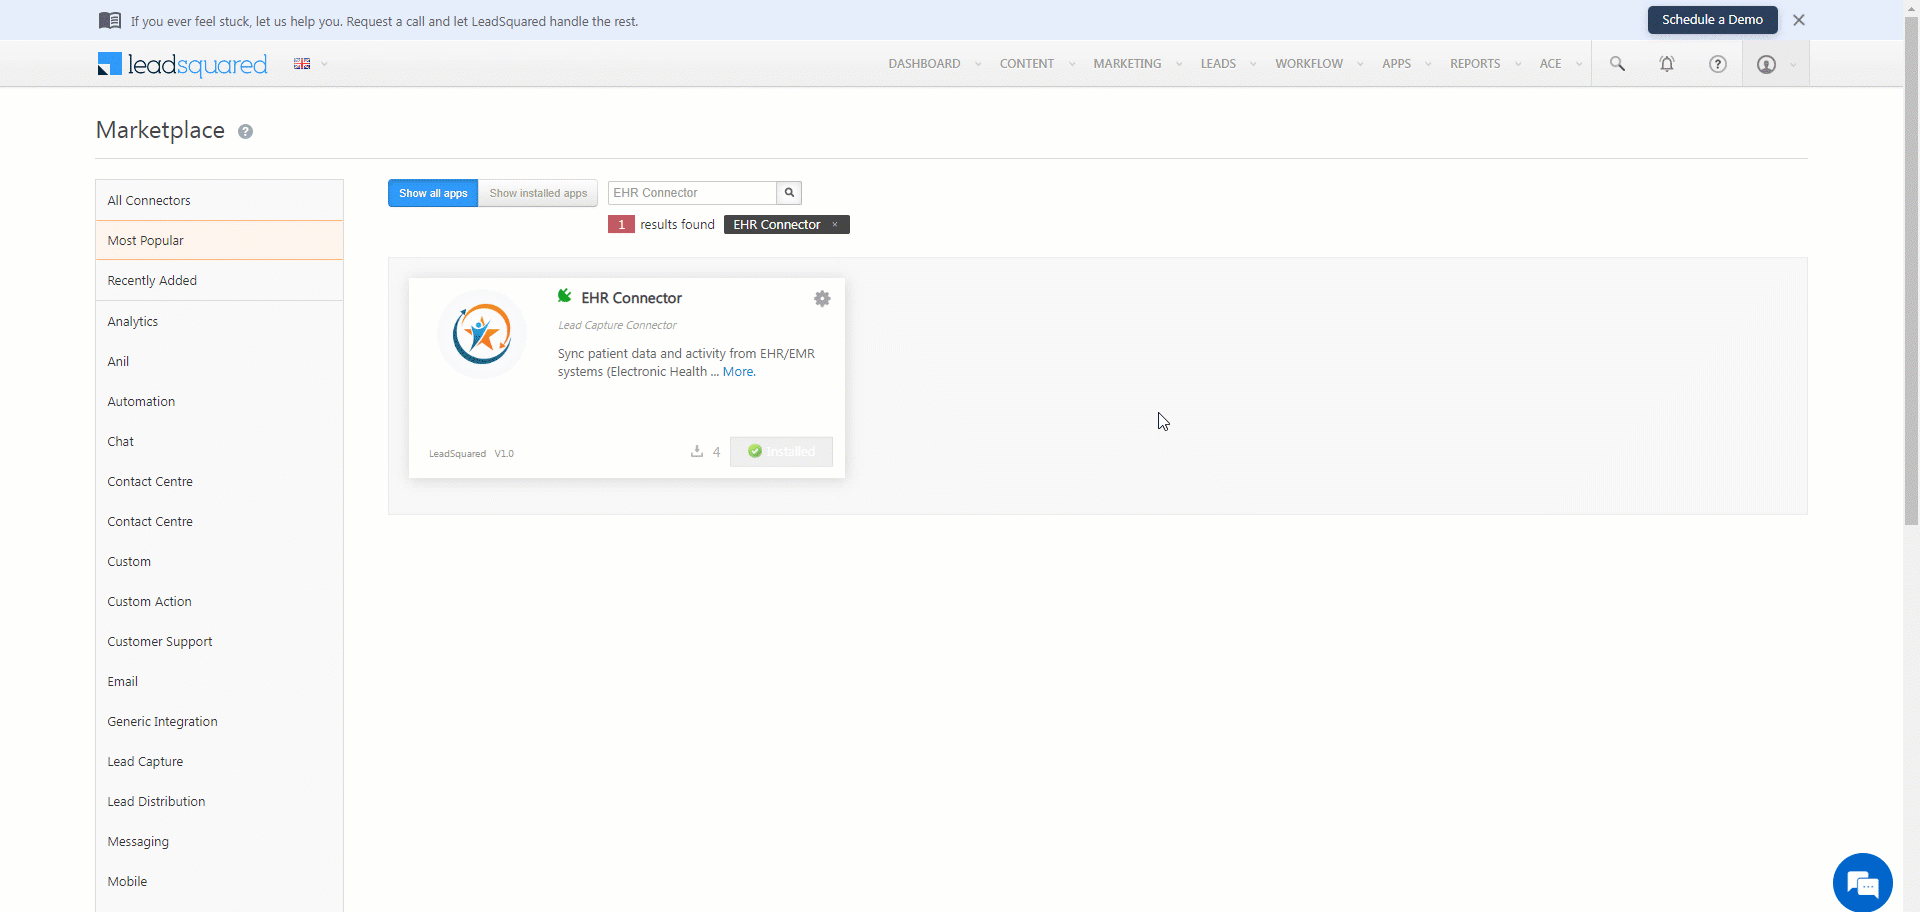
- Navigate to Apps>Apps Marketplace.
- Search for the EHR-HL7 Connector, and click Install.
- Alternatively, you can find the connector on the left panel, under Lead Capture.
- Once installed, hover your cursor over
 , and click Configure.
 - On the Configure EHR-HL7 Connector pop-up, from the Select User Role(s) dropdown, select the LeadSquared user roles to whom you want to grant connector access
- Once you’re done, click Save.
5. Create EHR System to LeadSquared Connector Flow
Once you’ve installed the connector, create flows to determine the data flow direction between your EHR system and LeadSquared. Each flow will only support one operation (e.g., Lead Create in LeadSquared, Update Activity in LeadSquared, etc.). To create flows –
- Navigate to Apps>EHR-HL7 Connector Configuration.
- Click the Create Flow button.
- Alongside Flow Type, select EHR to LeadSquared. Existing patient/appointment data from your EHR system gets captured and synced with your LeadSquared account.
- From the Select Entity dropdown, select the LeadSquared entity type you want to sync between your EHR system and LeadSquared. The available options are Lead or Activity.
- Depending on the Flow Type selected, the following options are displayed –
- Select Sync Behaviour – Lead – This option shows up if you’ve selected Lead as the entity type. Configure the connector to perform the following actions when data is transferred from your EHR system to LeadSquared –
- Capture (Create and Update existing) Record – Patients (leads) that only exist in your EHR system (but don’t exist as leads in your LeadSquared account) will get created in LeadSquared. Leads that exist in both your EHR system and LeadSquared accounts will get updated.
- Create only new record – Patients (leads) that only exist in your EHR system (but don’t exist as leads in your LeadSquared account) will get created in LeadSquared.
- Update only existing record – Leads that exist in both your EHR system and LeadSquared accounts will get updated.
- Do Nothing – When this option is selected, no action will be performed when a lead is created or updated in your EHR system.
- Select Sync Behaviour – Activity – This option shows up if you’ve selected Activity as the entity type. Along with configuring the sync behaviour for Leads (for which you can refer to the options listed above), configure the connector to perform the following actions when data is transferred from your EHR system to LeadSquared –
- Capture (Create and Update existing) Record – Activities (e.g., appointments, etc.) that only exist in your EHR system (but don’t exist as activities in your LeadSquared account) will get created in LeadSquared. Activities that exist in both your EHR system and LeadSquared accounts will get updated.
- Create only new record – Activities (e.g., appointments, etc.) that only exist in your EHR system (but don’t exist as activities in your LeadSquared account) will get created in LeadSquared.
- Update only existing record – Activities that exist in both your EHR system and LeadSquared accounts will get updated.
- Do Nothing – When this option is selected, no action will be performed when an activity is created or updated in your EHR system.
- Select Sync Behaviour – Lead – This option shows up if you’ve selected Lead as the entity type. Configure the connector to perform the following actions when data is transferred from your EHR system to LeadSquared –
- Once you’re done, click Save & Configure.

5. Create LeadSquared to EHR System Connector Flow
Once you’ve installed the connector, create flows to determine the data flow direction between your LeadSquared account and EHR system. Each flow will only support one operation (e.g., Patient Creation in EHR system, Update Appointment in EHR system, etc.). To create flows –
- Navigate to Apps>EHR-HL7 Connector Configuration.
- Click the Create Flow button.
- Alongside Flow Type, select LeadSquared to EHR – Existing lead/activity data from your LeadSquared account gets synced with your EHR system.
- From the Select Entity dropdown, select the LeadSquared entity type you want to sync between your EHR system and LeadSquared. The available options are Lead or Activity.
- Depending on the Flow Type selected, Select the LSQ Webhook Event. Configure the LeadSquared webhook to perform either of the following actions –
- Lead/Lead Activity Create – When selected, the webhook transfers the details of a new lead or an activity from your LeadSquared account to your EHR account, where a new lead (patient) or a new activity (e.g., appointment) is created in the EHR system.
- Lead/Lead Activity Update – When selected, the webhook transfers the details of any lead or activity from your LeadSquared account to your EHR account, and the lead’s (patient) or activity’s (e.g., appointment) details are updated in the EHR system.
- Once you’re done, click Save & Configure.
6. Configure the Connector
After the connector flow is set up, configure the Flow to transfer data between the EHR system and LeadSquared.
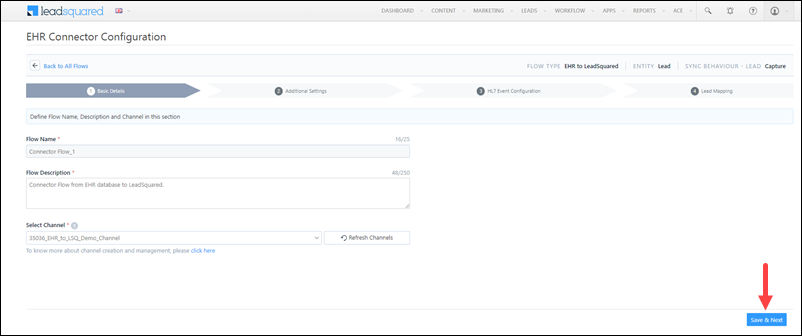
6.1 Basic Details
Enter the following details for the Flow –
- Flow Name – A display name for the Flow Type created.
- Flow Description – A description of the Flow Type created.
- Select Channel – From the list of channels created for your LeadSquared account, select a channel type. To create a channel, contact your account manager, or write to support@leadsquared.com.
Once you’re done, click Save & Next.
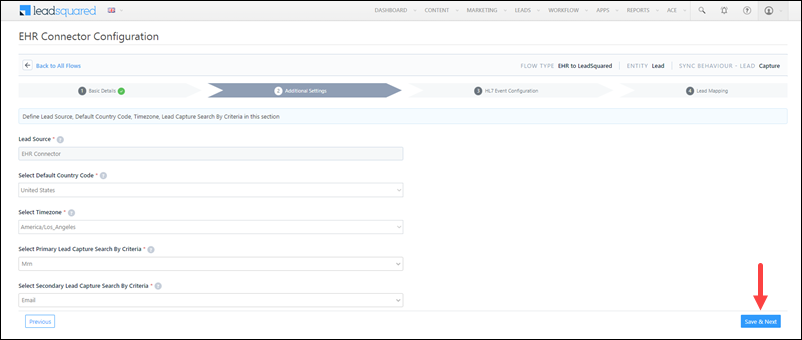
6.2 Additional Details
Enter the following additional details –
- Lead Source – Enter the lead source through which the leads are captured (e.g., EHR connector, etc.). This detail will be displayed on the Lead Details page, under Lead Source.
- Select Default Country Code – If the lead’s mobile number is captured without a country code, then the default country code that’s selected from the dropdown will be added to the lead’s mobile number.
- Select Time Zone – Select a preferred timezone you want our backend system to follow when transferring data.
- Select Primary Lead Capture Search By Criteria* – To avoid duplicate leads, you must select one unique lead field (e.g., Mrn, Patient Id, email Id, mobile number, PAN number, etc.) as the search key. This will be used to identify the leads pulled from your EHR system. To know how to mark a LeadSquared lead field as unique, please refer to How to Make a Custom Field Unique.
- Lead Capture Secondary Search By Criteria – If lead identification and capture through the primary Search By criteria fails, it will be re-attempted using the secondary Search By criteria.
Once you’re done, click Save & Next.
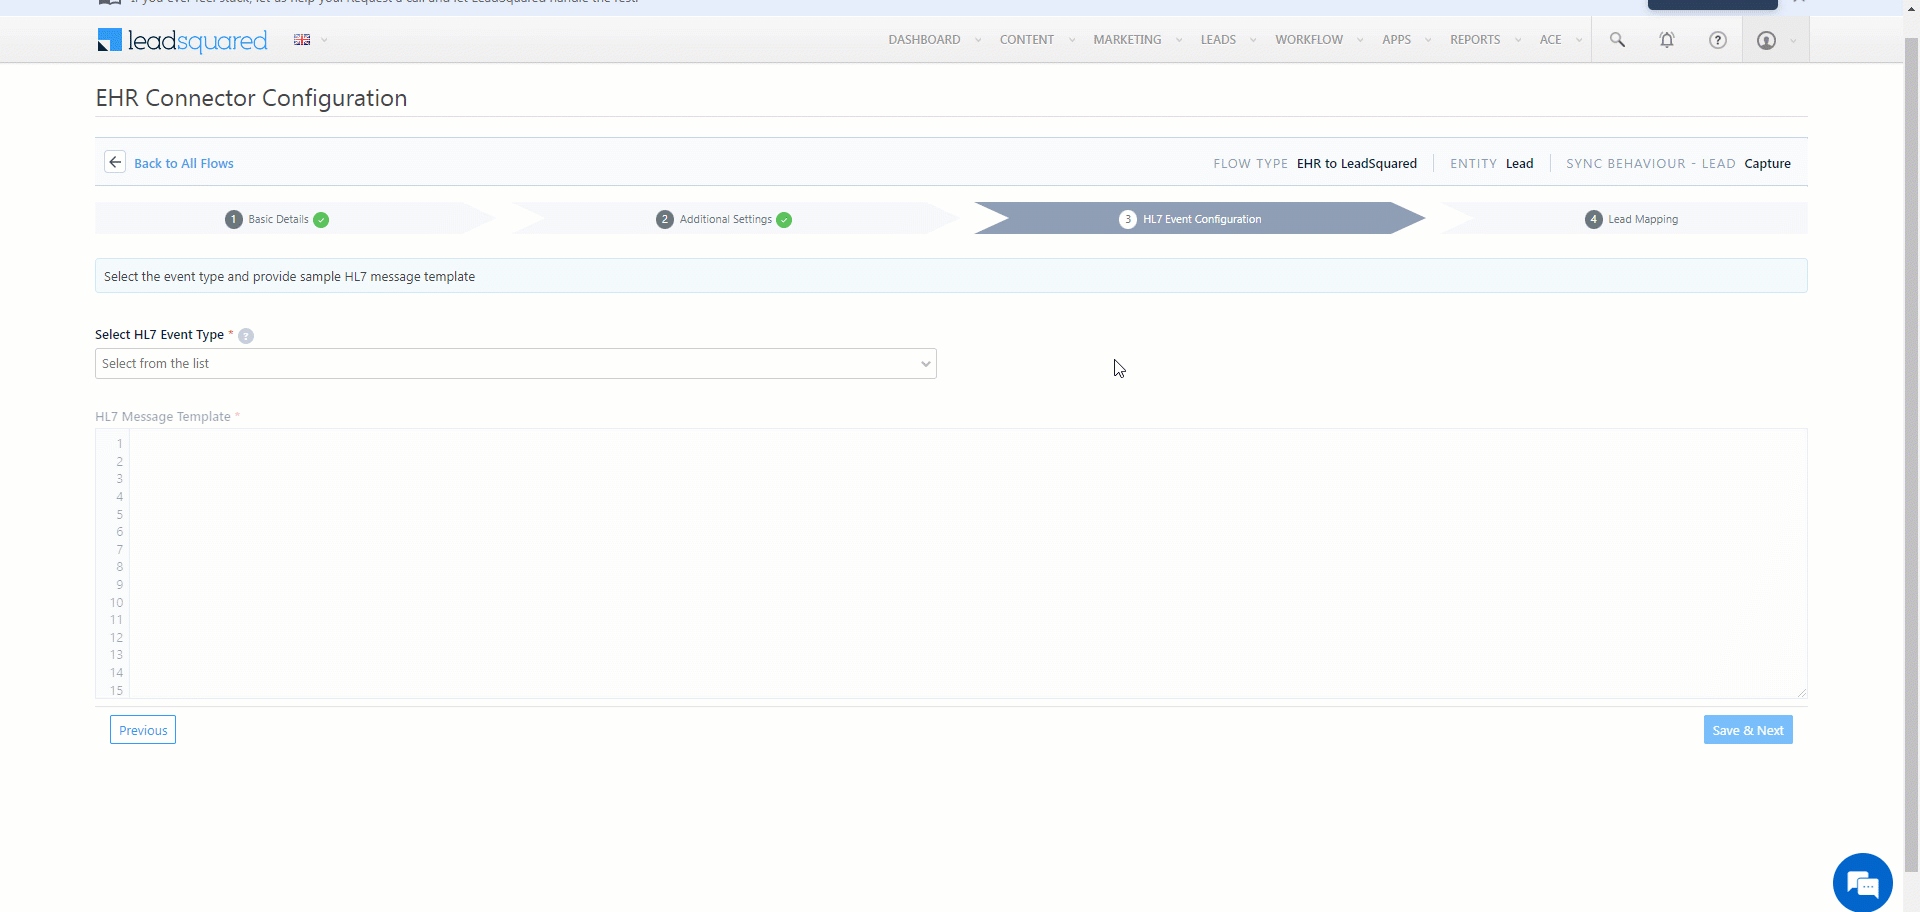
6.3 HL7 Event Configuration
Select the event type (e.g., ADT – A04 “Register Patient”, SIU – S12 “Notification of New Appointment Booking”, etc.) for the flow you’re building.
- Here, from the HL7 Event Type dropdown, select the event type for which you’re building the Flow Type.
- Once the event type is selected, add the corresponding HL7 Message Template, which is used to transfer data between your EHR system and LeadSquared. This template will also be used to map the corresponding lead and activity fields in LeadSquared. To know more about these templates, refer to HL7-Definition V2.
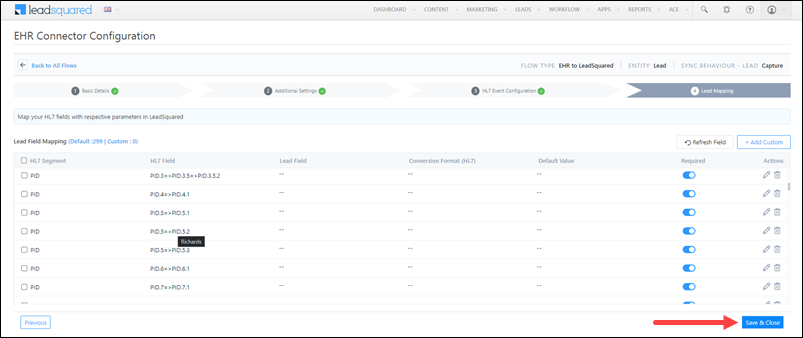
6.4 Lead/Activity Mapping
On the Lead/Activity Mapping screen, based on the event selected and the Message Template that is passed, map the HL7 fields present in the template to the corresponding LeadSquared lead/activity fields. To know how to transform data present in the Message Template, refer to Message Delimiters.
Once you’re done mapping the fields, click Save & Close. The connector will now transfer patient and lead information between your LeadSquared account and EHR system.
Note:
- A Custom Field should be created to capture and map the Mrn field (or any other patient identifier field) that was selected as a Search Key. To create a custom field, click the Add Custom button.
- To view the existing value of a specific field in an HL7 Message Template, under HL7 Field, hover your cursor over the field.
Any Questions?
Did you find this article helpful? Please let us know any feedback you may have in the comments section below. We’d love to hear from you and help you out!