1. Feature Overview
You can create landing pages to capture leads and lead inquiries using the LeadSquared Portals feature.
2. Prerequisites
- You must be an admin user.
- You must have the Forms feature enabled on your account.
- You must have the Portals feature enabled on your account, please write to support@leadsquared.com.
3. Create a Lead Capture Form with De-Duplication Enabled
Create a dynamic form and specify a search key (unique field like email, phone number, etc.). The search key is used to check if a lead with that particular field value (email, phone, etc.) already exists in your account, and identify duplicates. Next, specify how you want to handle duplicate leads (update all fields, don’t update any fields, etc.) –
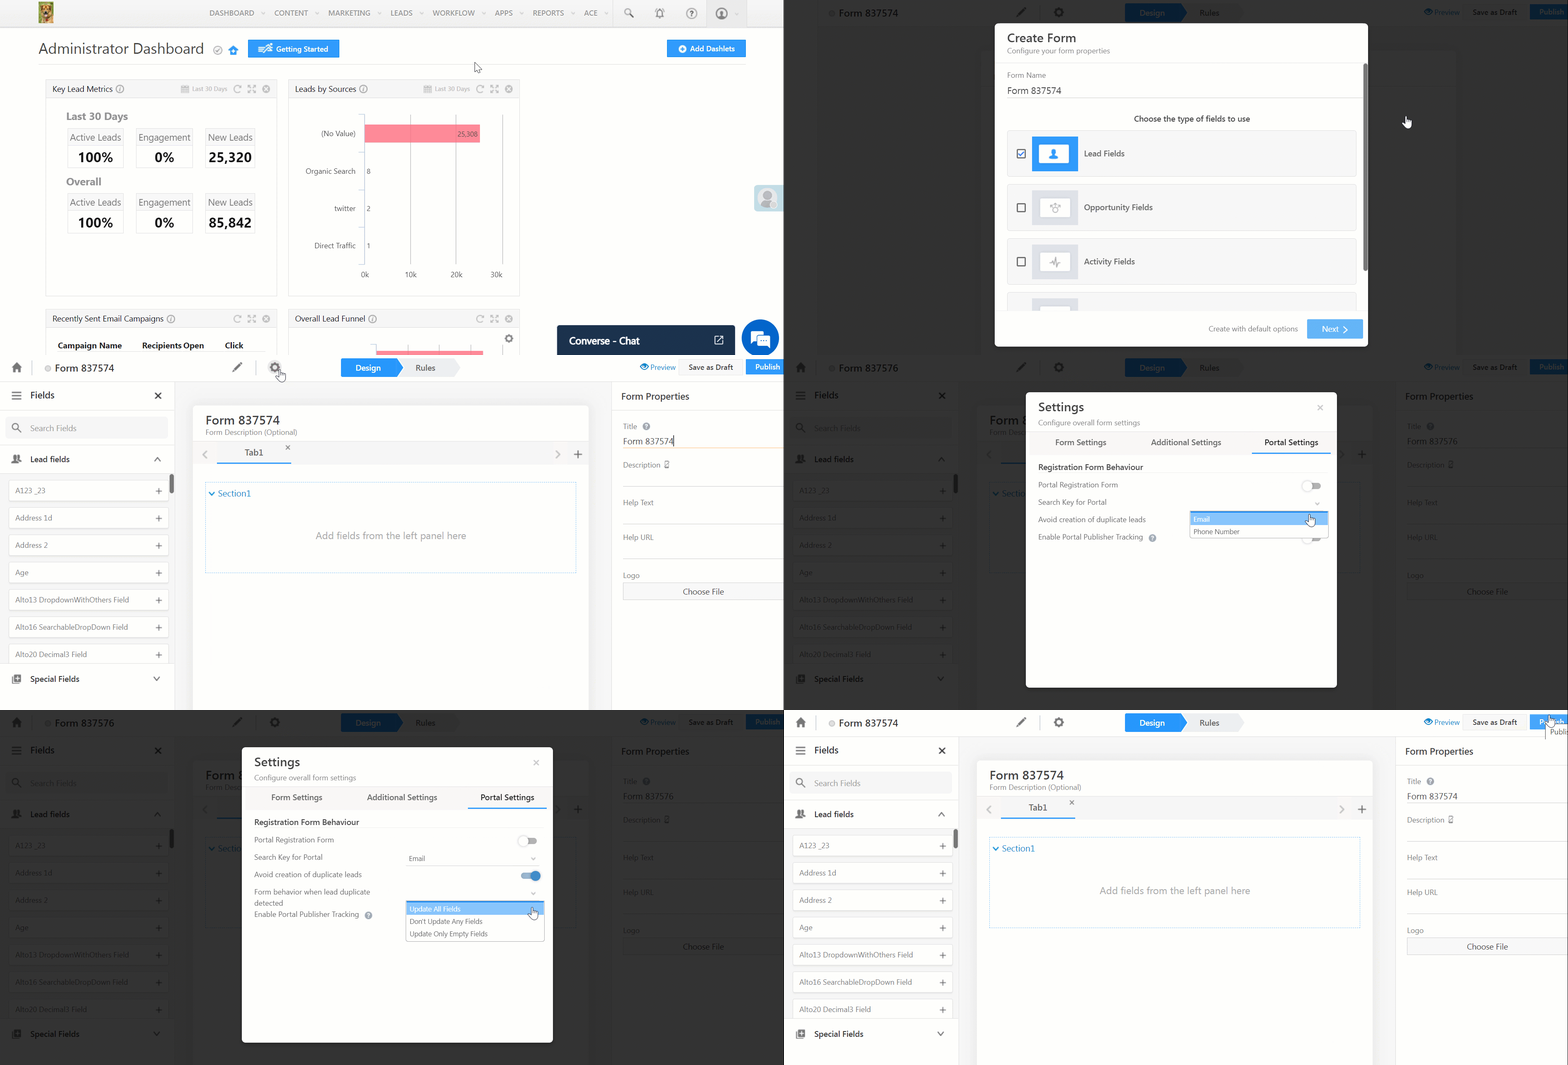
- Navigate to Workflow>Manage Forms and click Create Form.
- Click
 and select Portal Settings.
 - Enable Avoid creation of duplicate leads.
- Next to Form behaviour when lead duplicate detected, click the dropdown and select a de-duplication strategy.*
- Enter other relevant details and create the form.
- Click Publish.
| *De-duplication strategy | How it works |
| Update All Fields | Updates all the fields of the duplicate lead |
| Don’t Update Any Fields | Accepts the form submission without errors and doesn’t update any fields |
| Update Only Empty Fields | Only updates the fields of the duplicate lead that are empty or not present. |

4. Add Form to the Portal
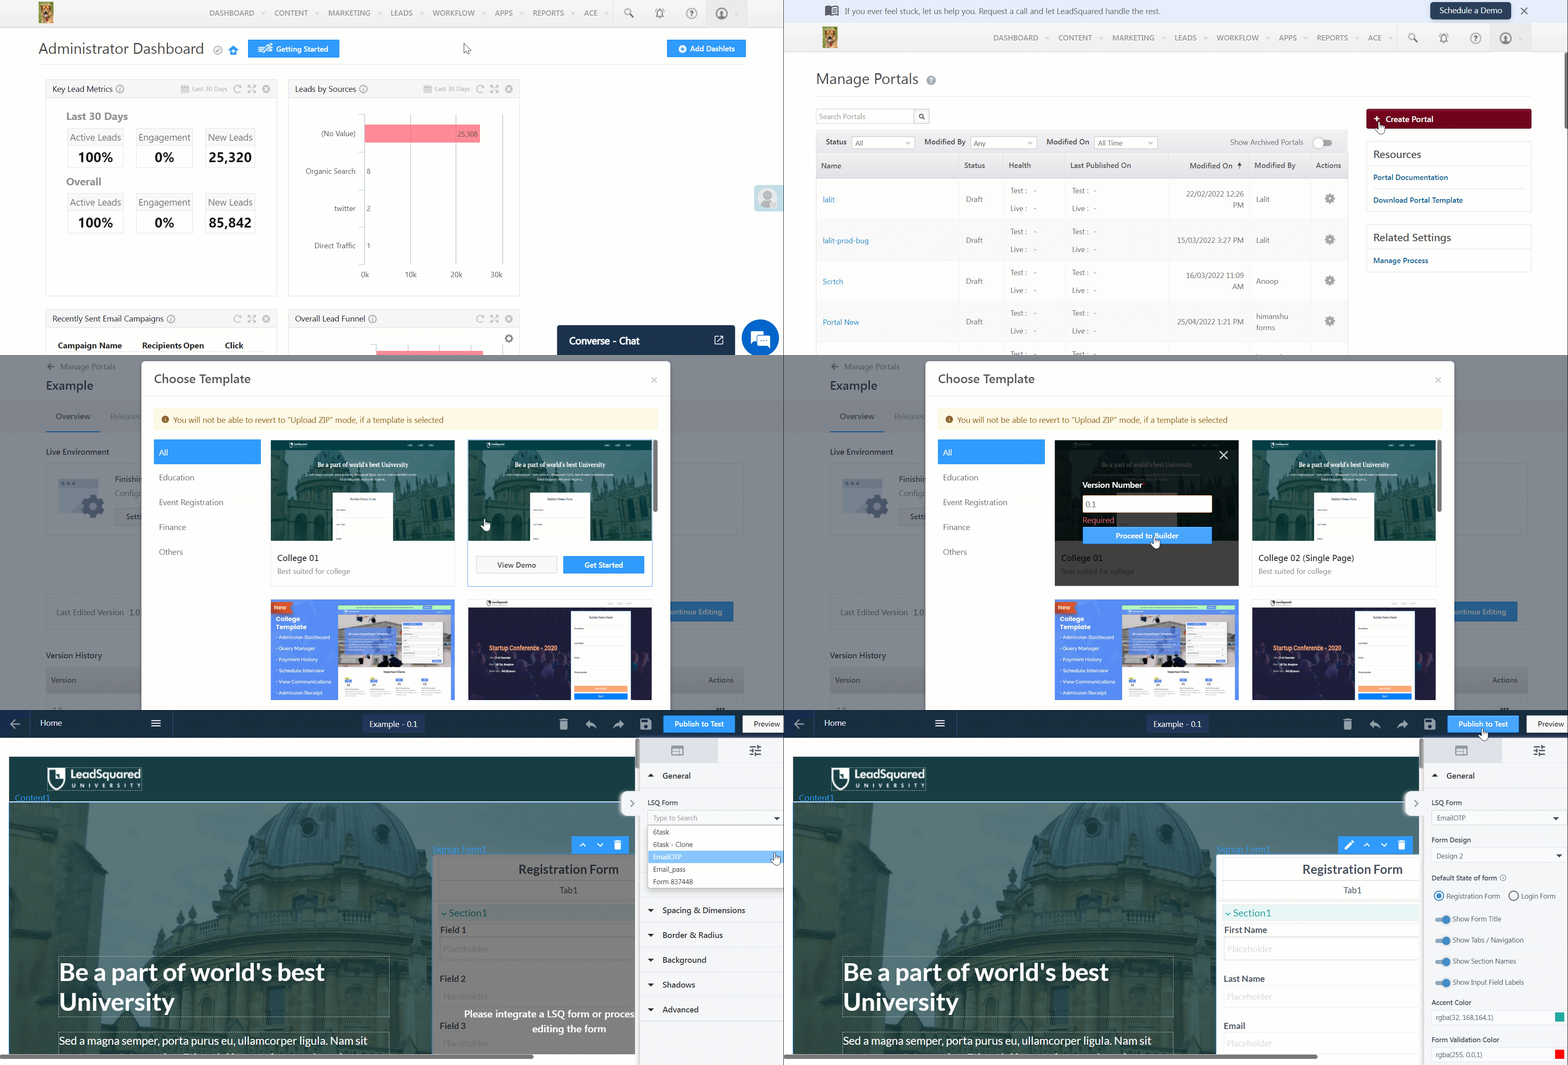
- Navigate to Workflow>Manage Portals and click Create Portal.
- Enter the name and description of your Portal.
- Click Select Template and choose a single page or landing page template from the available options.
- Click Proceed to Builder.
- Under General Settings, click the LSQ Form dropdown and select the form you created.
- Customise the portal based on your requirement and click Publish to Test.

Any Questions?
Did you find this article helpful? Please let us know any feedback you may have in the comments section below. We’d love to hear from you and help you out!


