


Get Started
Sales Suite
Field Ops
Marketing
Service CRM
Integrations & Apps
FloStack
How to Show Activity Status in Portal Dashboard
1. Feature Overview
Portals allow users to fill out complex application forms (e.g. course application, loan application, scholarship application, etc) and track the status of their applications. They can also be configured to enable users to perform different actions based on the status of the application. To learn more about portals, see LeadSquared Portals and Portal Management.
A user’s application will go through several stages like Initiated, Applied, Processing, Approved, Rejected, etc.
This feature can be used to –
- Show payment transaction status & history
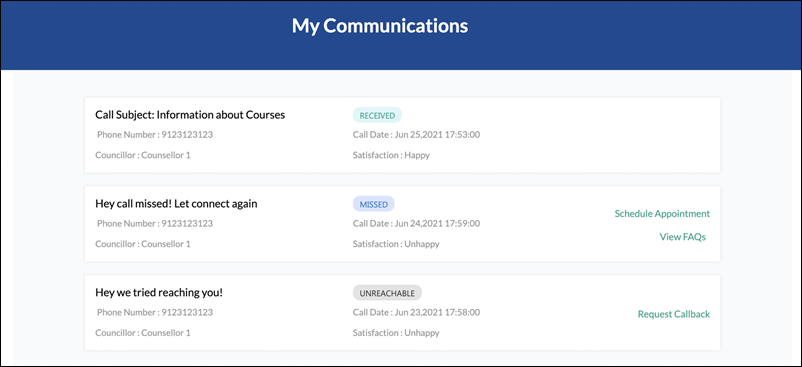
- Show communication status & history
- Show loan application status & history
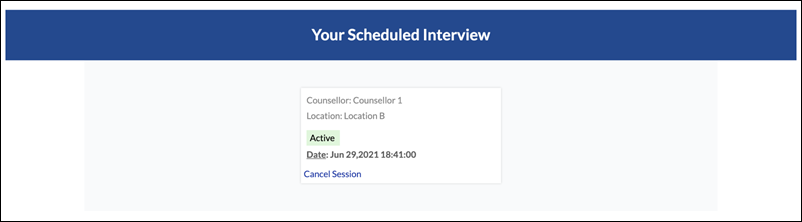
- Show interview or counseling status & history
Let’s configure a portal dashboard to show the statuses of all the application activities, relevant information with respect to each activity status and configure rules to route users to specific actions.
2. Prerequisites
- An Activity: To track the actions (status, information, selections, etc) carried out by the user/lead on the application Form. Here, status will be a dropdown field with the following items: Active, Processing, Approved. To learn more about activities, see Manage Activities.
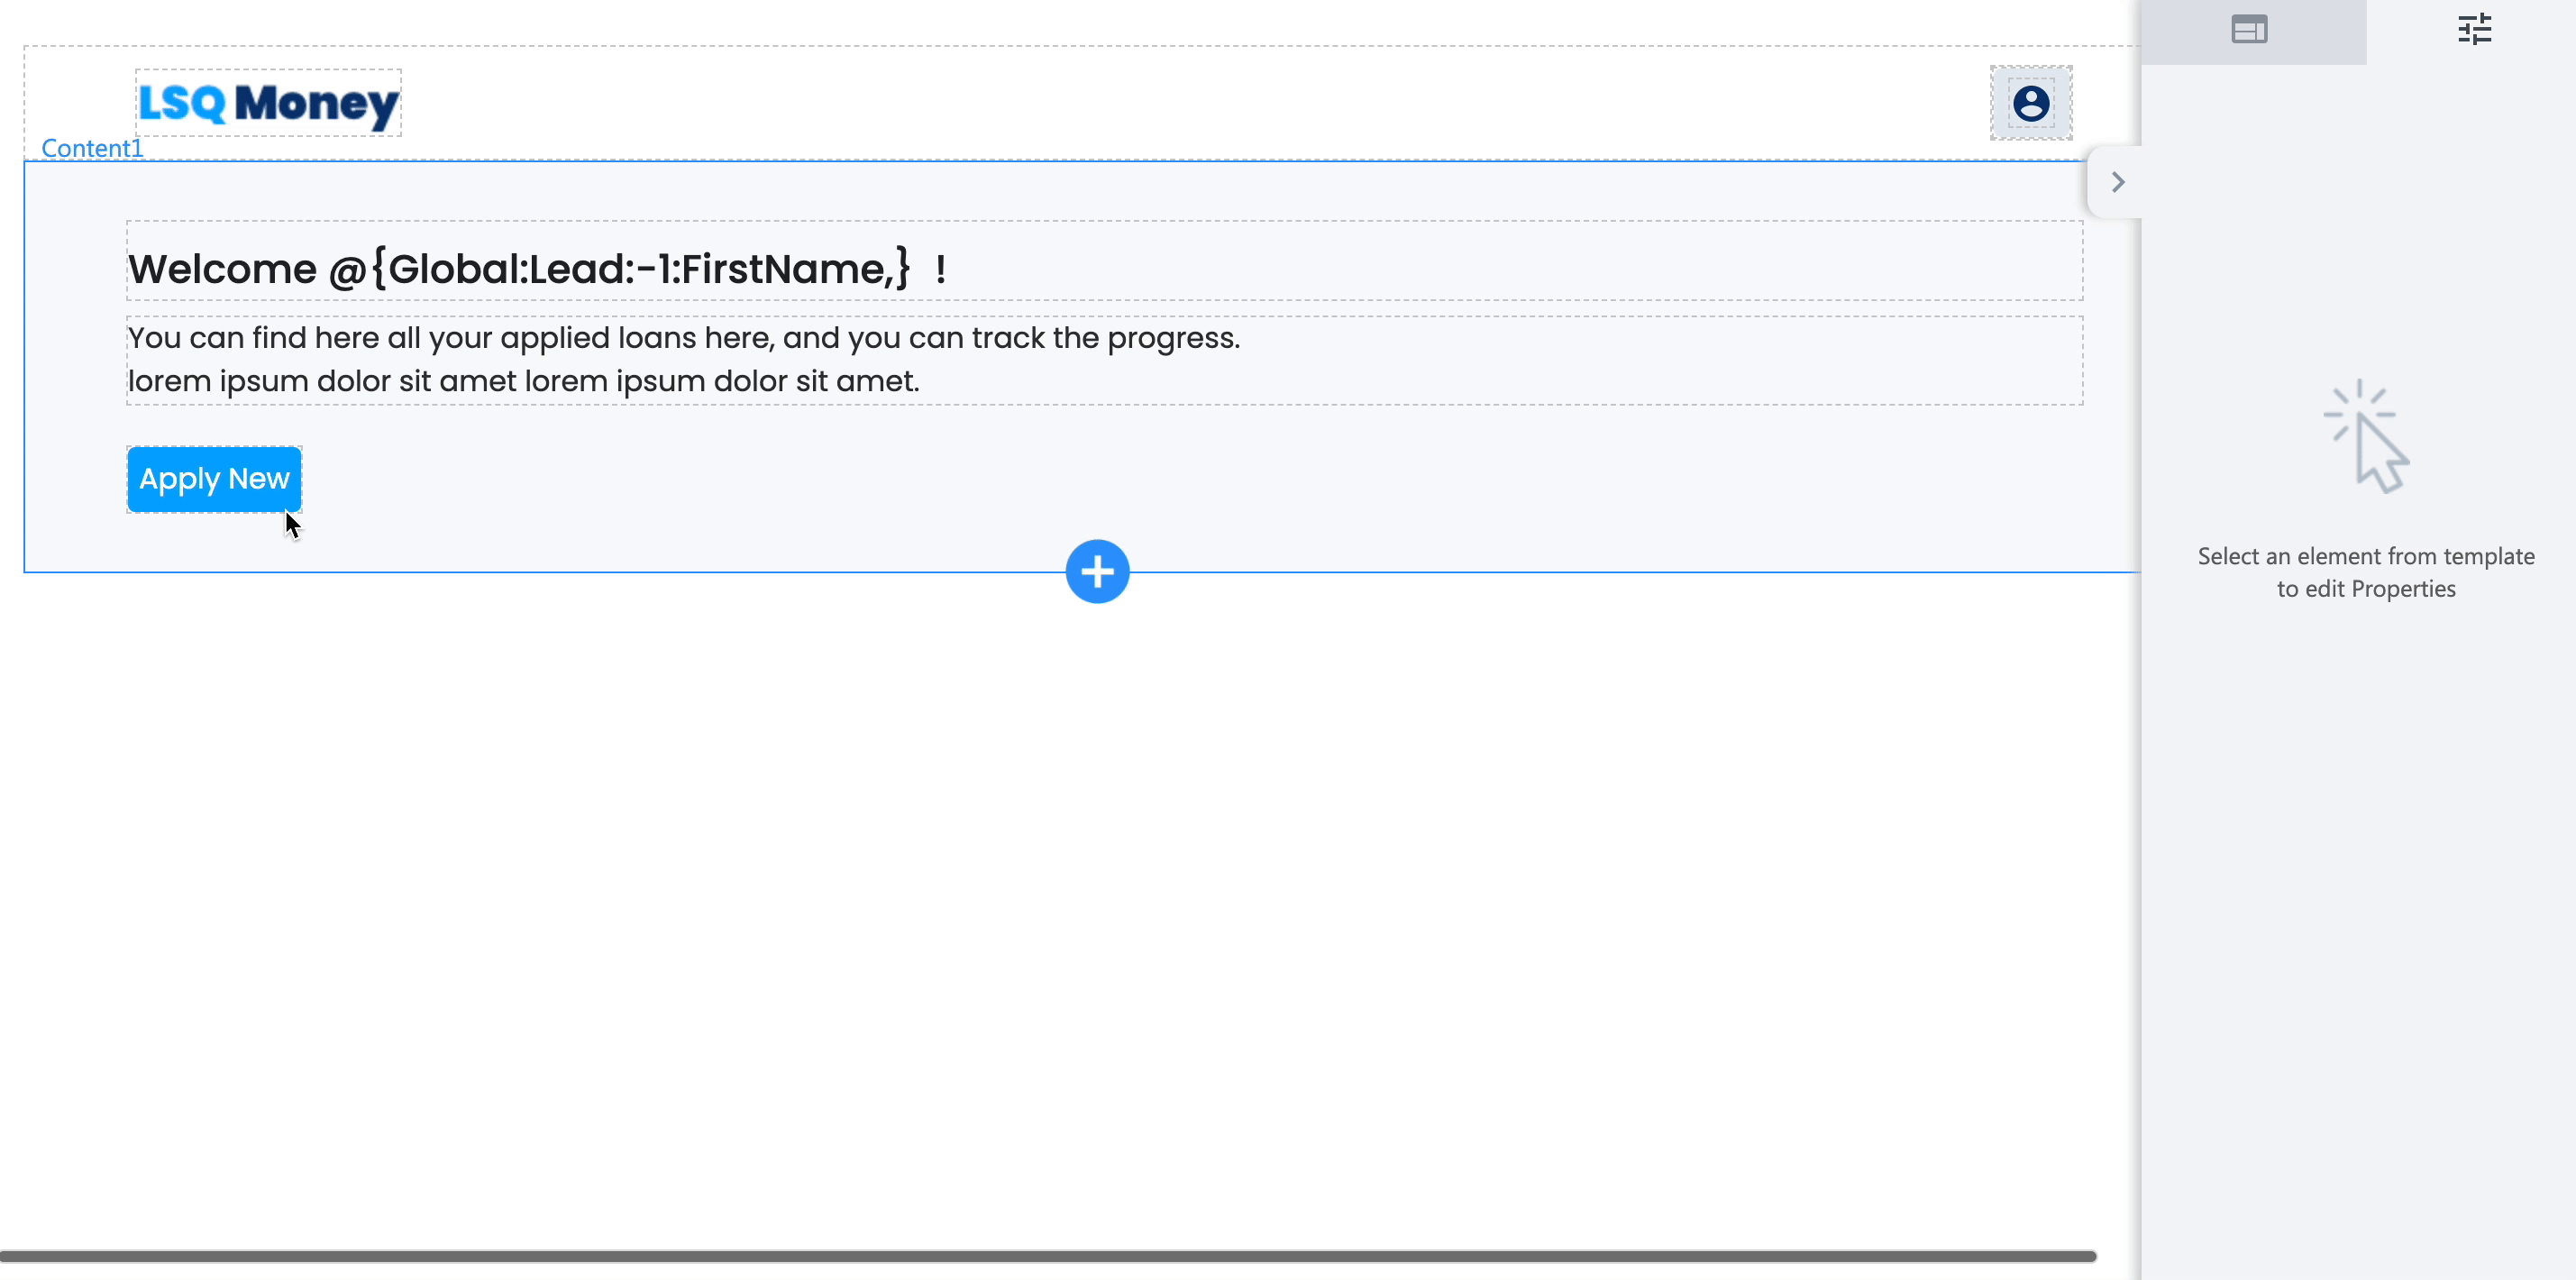
- You must have a Portal with a Dashboard page.
- Navigate to Workflow>Manage Portals.
- Select the Portal you need to view and click Continue Editing.
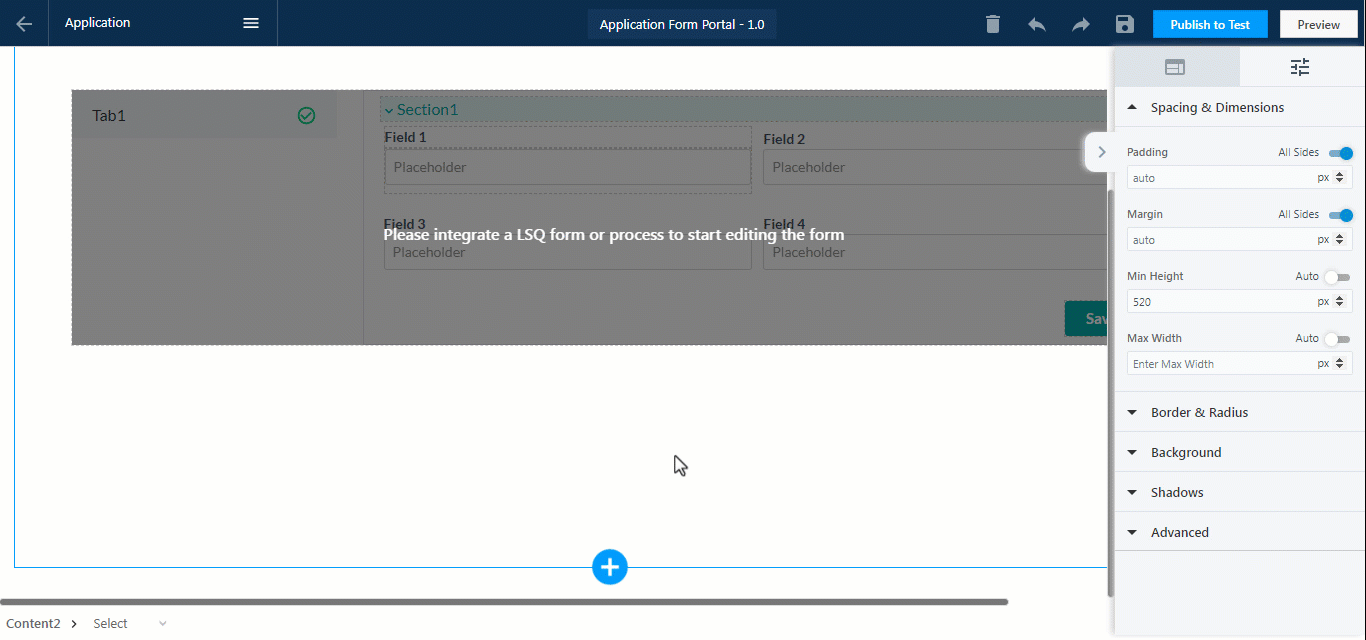
- Click
 to add a new block and select Application from the Prompt. Pick a design that suits your use case.
 - Once the block is added, click it and configure it from the Component Drawer.
- Expand the General settings and select Activity from the Integrate dropdown.
- Select the activity from the Activity dropdown below it.
4. Create UI State for Every Activity Status with Actions
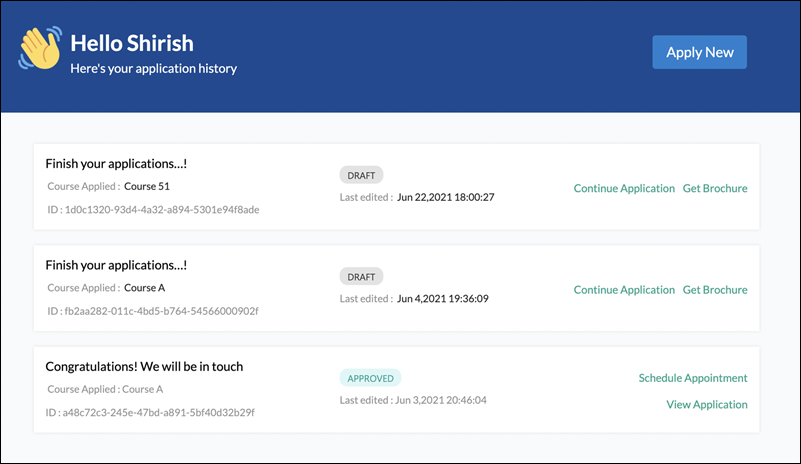
You can track every status of the lead’s activities and take necessary actions on them. Let’s configure our integrated activity so that we can display the necessary information and link actions on every activity status. In this example, our activity goes through three status changes – Active > Processing > Approved. Every status change is displayed to the user.
There are three items we need to figure out before we proceed – display trigger or rule for each state, the UI for each state, and the actions (if any) required on each state.
- ACTIVE:
- Trigger: When activity status is active.
- Display: The application ID, date of modification, status, and such.
- Action: Direct the user to finish their pending application.
- PROCESSING:
- Trigger: When activity status is processing.
- Display: The application ID, date of modification, service selected, payment status, agent assigned and such.
- Action: Direct the user to view their application in PDF format.
- APPROVED:
- Trigger: When activity status is approved.
- Display: The application ID, date of modification, status, and a congratulations message.
- Action: Download the digital on-boarding kit.
Now, let’s look at how to configure each application activity state to reflect the above items.
- Click on the first component to edit the text and add activity-specific items using mail-merge fields.
- To configure the display rules or triggers, expand General settings and switch to Configuration tab.
- Click on Display Rules to open the prompt and configure the rule If Status is ‘Active’ Show and save.
- Click on the button in the component to configure the Action for the button.
- By opening the Component drawer, Configuration tab, General > Action on Click/Tap > Link Page (Application Page) Clone this item for other activity states and configure the triggers, and actions in similar fashion.
- Expand the General settings and under Action on Click/Tap, click Link Page.
- Clone this item for other activity states and configure the triggers, and actions in similar fashion.

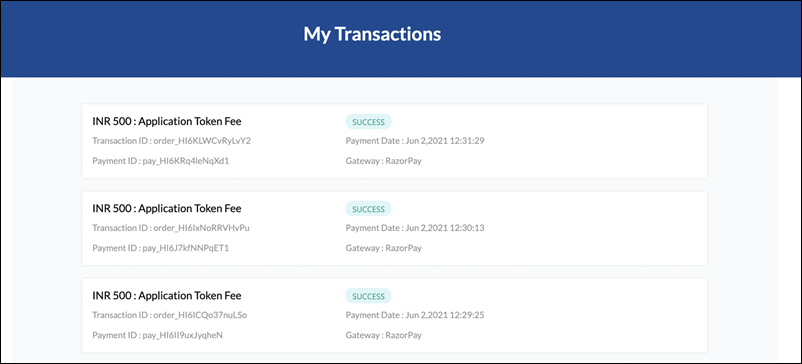
5. Payment Transactions
Leads can track their payments better in Portals with the help of the Payment Transactions Application block. It reduces the custom design efforts and improves the user experience for the lead. You can use it as a dashboard for Payment tracking across use cases involving a Payment Activity.
- Add a block and select the Application tab.
- Select the Payment Transactions block.
- Select the newly added block and select payment activity under Activity Name.
- Configure Rules and mail-merge fields as mentioned in the previous sections.
Any Questions?
Did you find this article helpful? Please let us know any feedback you may have in the comments section below. We’d love to hear from you and help you out!
activity history not visiable
Hi, Pritilata. Could you please detail your issue in an email to support@leadsquared.com? We’ll get back to you quickly and help you resolve it.