


Get Started
Sales Suite
Field Ops
Marketing
Service CRM
Integrations & Apps
FloStack
Google Retargeting Connector
1. Feature Overview
When a lead interacts and shows interest in your product or service, on your website or landing pages, LeadSquared captures these leads, along with their details (such as name, phone number, email Id, etc.). Google retargeting (or remarketing) enables you to mount a sustained marketing campaign that shows only relevant ads to these leads, about the specific offering they’re interested in.
Through LeadSquared’s Google Retargeting Connector, you’ll be able to automatically send the list of leads who’ve shown interest in a particular product or service, from LeadSquared to Google Ads. These leads will get ads only for those specific products or services.
Some of the benefits of Google retargeting are –
- Narrows down the target audience of a Google ad, to focus on only the list of leads who’ve shown interest in that specific product or service.
- Reduces manual effort and time spent in populating Google Ads with the list of leads who’ve shown interest.
- Up-sell and cross-sell products and services to existing customers, by showing them relevant ads.
- Gather more information from your leads with advanced field mapping for both standard and custom fields.
- Reduces the overall cost of a campaign, while increasing its efficiency, relevance and impact.
- Analyse and measure the effectiveness of each campaign with detailed reports and analytics.
To know more about what the Google Retargeting Connector offers, please refer to Google Retargeting with LeadSquared.
2. Prerequisites
- You must be an Administrator of your LeadSquared account.
- This is a paid feature. To enable it, please write to support@leadsquared.com.
- You must have an active Google Ads account.
- To use this feature, your Google Ads account must fulfill a list of requirements that meet Google’s Customer Match policy.
3. How it Works
To push leads from LeadSquared to your Google Ads account, using the Google Retargeting Connector connector, you’ll have to complete the following steps –
- Install the connector on LeadSquared
- Configure the connector on LeadSquared
- Connect your Google Ads account(s)
- Create an audience list
- Map relevant fields to the list
- Sync the list with Google Ads
- View the list on your Google Ads account
4. Installing the Connector
To install the Google Retargeting Connector on your LeadSquared account –
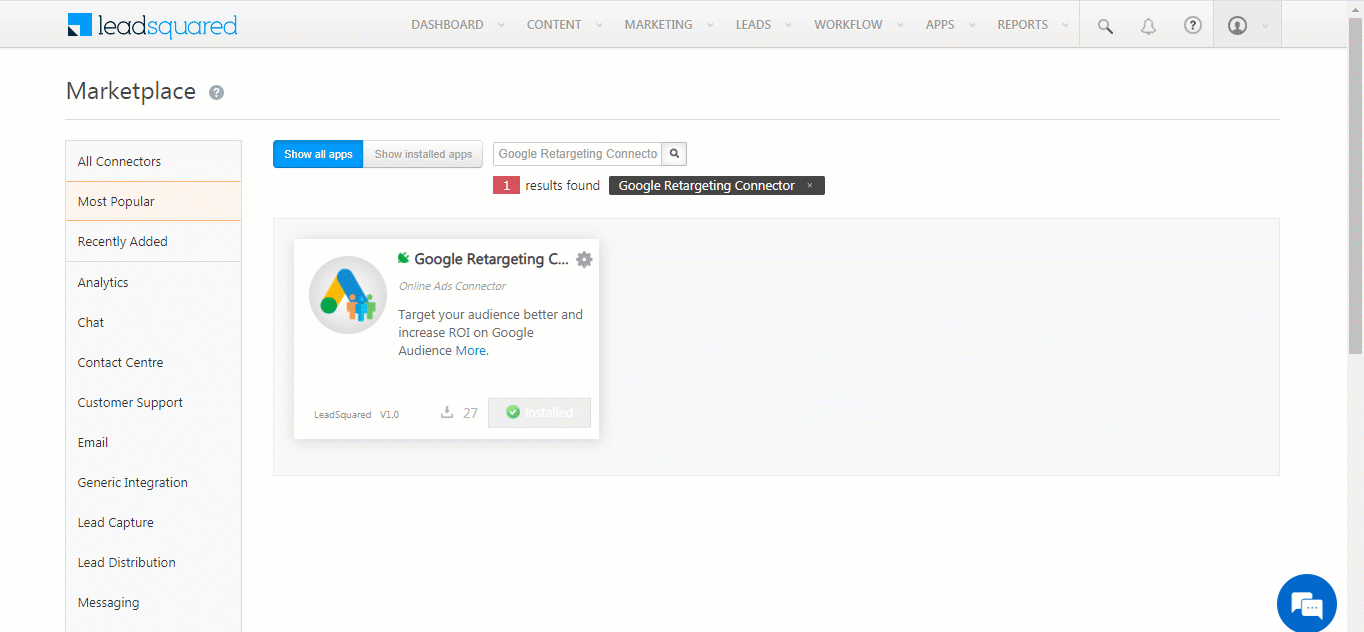
- From the main menu, navigate to Apps>Apps Marketplace and search for Google Retargeting Connector.
- You’ll also find the connector on the left panel, under Online Ads.
- Click Install.
- Once the connector is installed, hover your cursor over the
 icon, then click Configure.
 - On the Connector Access screen, you can choose to give access to all your marketing users, or only specific marketing users.
- If you choose Specific Marketing Users, from under Specific Users, you can select the marketing users from the dropdown list.
- Once you’re done, click Save.
5. Configuring the Connector
5.1 Connect Ad Accounts
Once the connector is installed, connect your Google Ads account(s) to LeadSquared.
- Navigate to Apps>Google Retargeting.
- On the Connect Ad Accounts page, click Connect Accounts.
- On the Choose an Account window, choose the Google account to which your Google Ads account is linked.
- Give LeadSquared access to your Google account by clicking Allow. Once you get a successful message, please close the Google window.
- On the Select Account(s) to be added pop-up, from the available Google Ads accounts, select the list of accounts you want to add. You can add multiple accounts.
- Once you’re done, click Select.
- Once you get a “Successfully Saved” message, click Next.
Note: To delete an existing account, against the account name, click the ![]() icon, and on the Delete Account pop-up, click Yes.
icon, and on the Delete Account pop-up, click Yes.
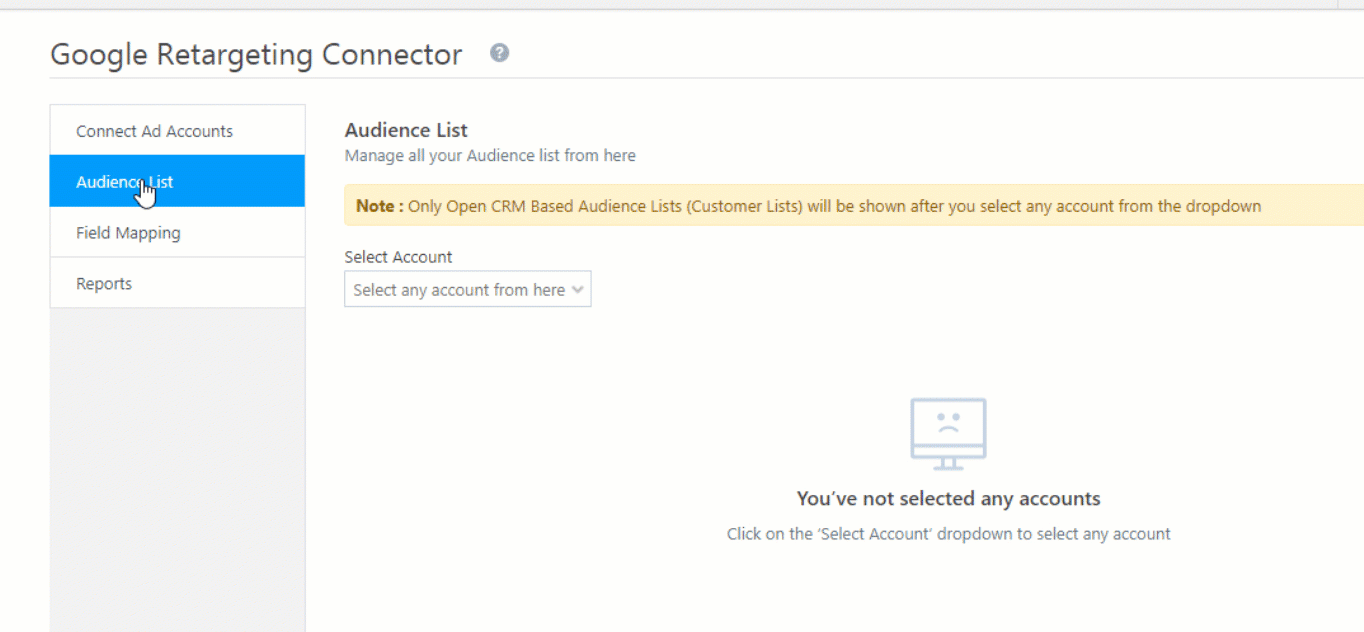
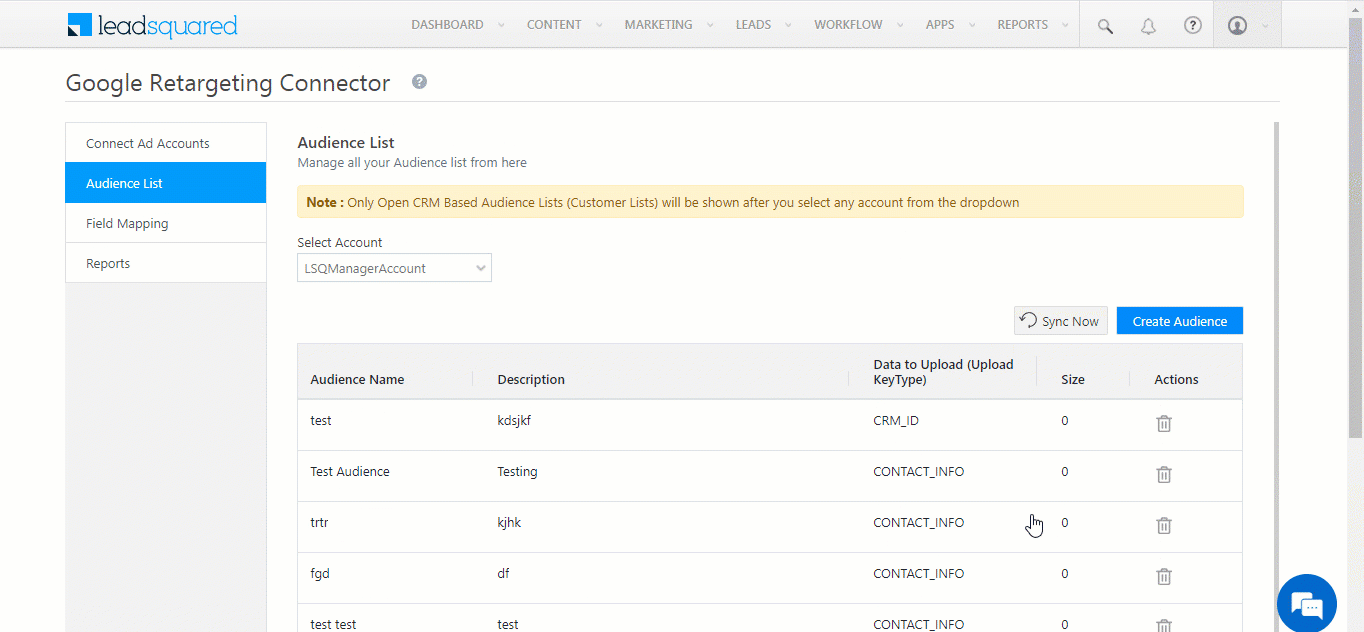
5.2 Create an Audience List
To create an audience list from the list of leads –
- On the Connect Ad Accounts page, click Audience List.
- Under Select Account, from the available dropdown, select the account under which you want to create the list, then click Create Audience.
- On the Create Audience List pop-up, enter a name and description for the list.
- Under Data to Upload, you can select the data type that should be uploaded to the list. You can choose from –
- Email address, phone number, and/or mailing addresses.
- User IDs
- Mobile Device ID
- Once you fill in the necessary details, click Done. You’ll get a message saying, “Created Successfully.”
Note: To delete an existing list on the Create Audience List pop-up, against the list name, click the ![]() icon, and on the Delete Audience pop-up, click Yes.
icon, and on the Delete Audience pop-up, click Yes.
5.3 Field Mapping
To map lead fields from LeadSquared to the lead fields on the Google Audience List –
- On the Connect Ad Accounts page, click Field Mapping, and then click Add Custom.
- Under Google Audience List fields, click the dropdown to select a field from the list of available fields.
- Similarly, under Lead Field, select a corresponding field in LeadSquared from which you want to push data.
- Once you’re done, click the
 icon, and then click Save. You’ll receive a “Field Mapping saved Successfully” message.
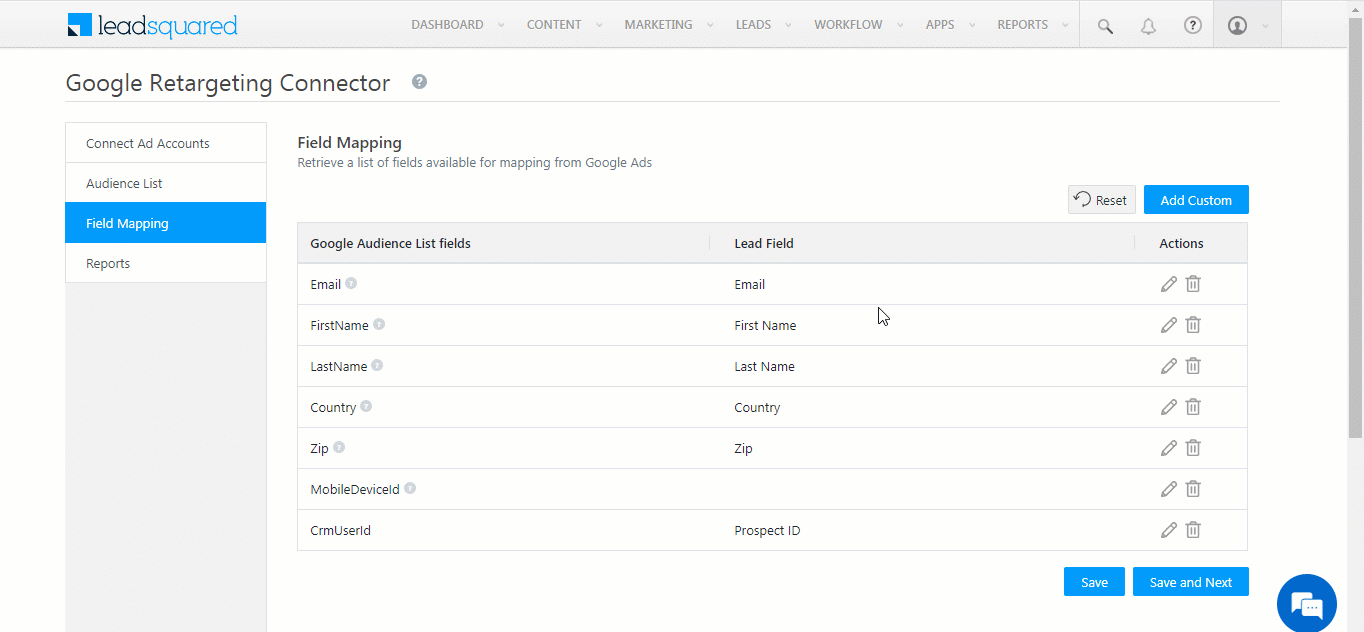
Notes:
- Along with Email and Phone fields, it is mandatory to map the following fields to the relevant LeadSquared lead fields –
- First Name
- Last Name
- Country
- Zip
- To edit an existing field, click the
 icon.
icon. - To delete an existing field, click the
 icon.
icon.
5.4 Sync Lists
After successfully mapping lead fields, to sync your LeadSquared lists to Google Ads –
- To populate lead details on this list, navigate to Leads>Manage Lists.
- Against the list from which you want to pull the lead details, hover your cursor the
 icon, and click Google Retargeting.
 - On the Google Retargeting pop-up, select the Google Ad account, and the Custom Audience List that you created, then click Done. You will receive a message stating your request has been submitted successfully.
Notes:
- You can pull lead details from a particular LeadSquared list, and map it to your Google Audience List only once every 12 hours.
- It will take between 6-12 hours for the leads to reflect in your audience list on your Google Ads account.
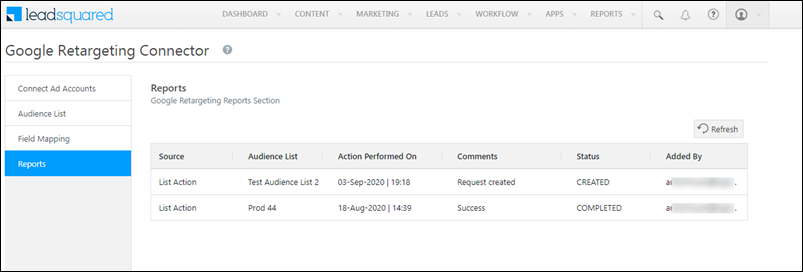
5.5 View Reports
Under Reports, you can view the details of a list that’s been pushed from LeadSquared to Google Ads.
6. View the List on Google
After you’ve successfully created the list, you can view it on your Google Ads account. To do this –
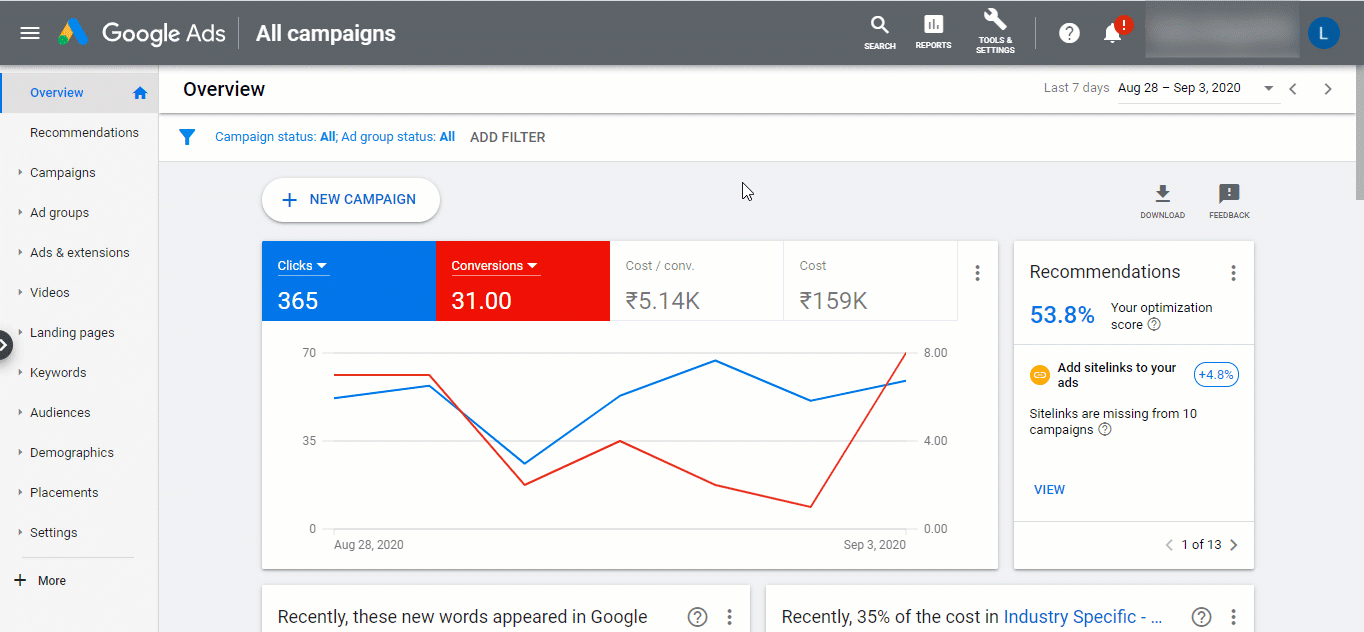
- From your Google Ads home page, navigate to Tools & Settings>Shared Library>Audience Manager.
- Under Audience name, you’ll find the list that’s been pushed from LeadSquared to Google Ads.
Any Questions?
Did you find this article helpful? Please let us know any feedback you may have in the comments section below. We’d love to hear from you and help you out!
How can I track the conversion that happens on these leads via Google ad?
Hi, Spoorthi. The primary purpose of this connector is to transfer existing lead data from LeadSquared to Google’s Audience List. It does not create leads in LeadSquared. However, if any of your customers click on a Google ad, their data is captured through the Google Ads Lead Form Connector. Hope this helps.