1. Feature Overview
You can pre-populate Forms or Sign-Up Forms so the user can directly submit them and skip filling in different fields. This can be achieved by passing relevant data via query parameters. To know more about Portals, see Portal Management.
2. Query parameters
API Query parameters can be defined as the optional key-value pairs that appear after the question mark in the URL. They are extensions of the URL that are utilized to help determine specific content or action based on the data being delivered. Query parameters are appended to the end of the URL using a ‘?’. The question mark sign is used to separate path and query parameters.
If you want to add multiple query parameters, an ‘&’ sign is placed in between them to form what is known as a query string. It can feature various object types with distinct lengths such as arrays, strings, and numbers.

3. Pre-populate data in Forms
To pass data to the Forms for the respective fields, we need to send the data in query parameters as key-value pairs. Here, the value is the actual value that must be populated in the Form field and the Key is the identifier of the field where the value must be populated. This key must adhere to a specific format –
{Entity Prefix}_{Activity or Opportunity Code}_{Schema Name}={Value}
This format has three components to it –
- Entity Prefix: A single letter representing the type of the entity.
- For Lead field – L
- For Activity field – A
- For Opportunity field – O
- Activity or Opportunity code if any (not applicable for lead field)
- Schema Name: the schema name of the field you are trying to pre-fill
Some examples are –
- For Lead fields: L_FirstName
- For Activity fields: A_200_mx_Custom_1
4. Capturing UTM Data
Portals, Landing Pages Pro, and Widgets can capture UTM parameter values from URLs.
To enable this, append any of the following UTM parameters to your Portals, LPP, or Widgets link:
- utm_source
- utm_medium
- utm_campaign
- utm_term
- utm_content
Example:
https://leadsquared.com/?utm_source=google&utm_medium=social&utm_campaign=sale&utm_term=term&utm_content=buy
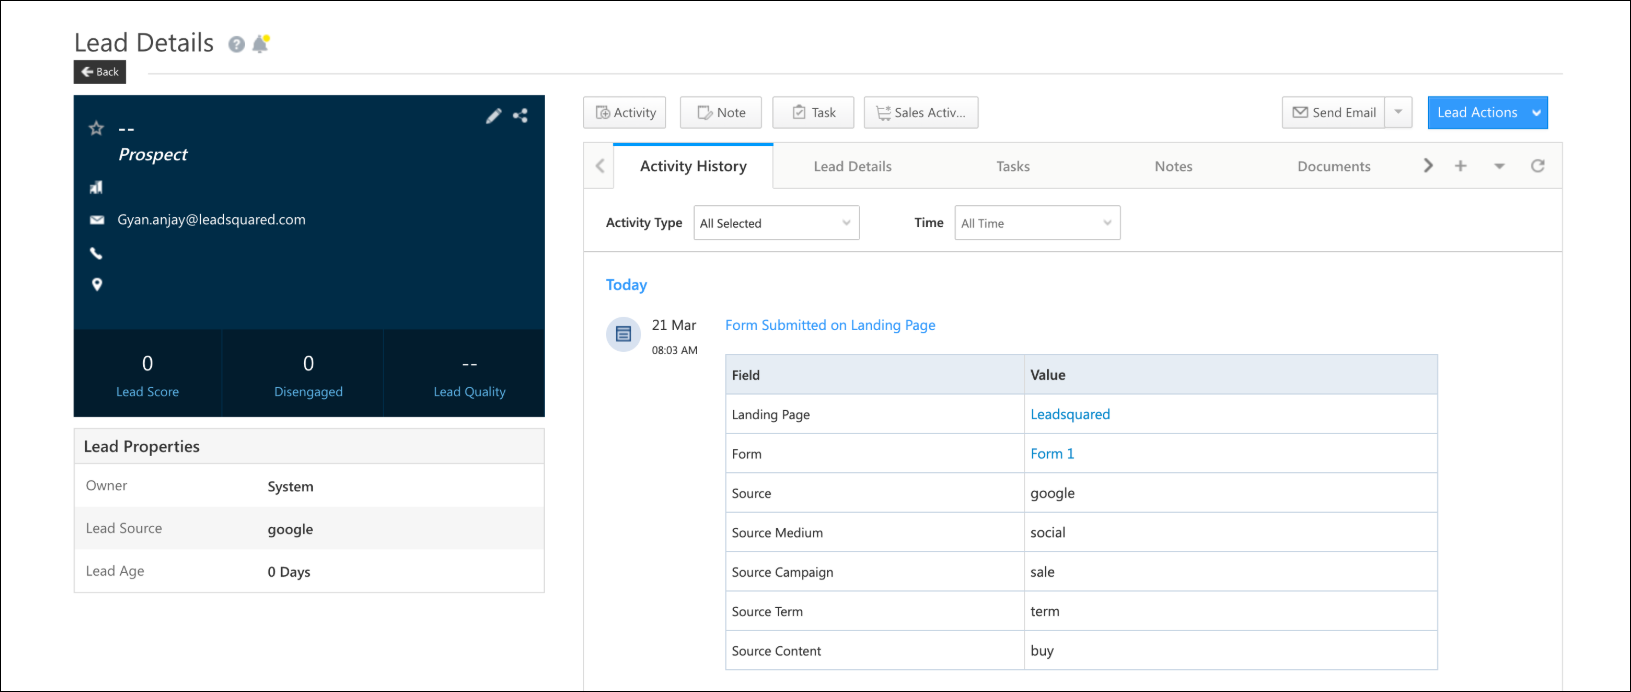
When a lead submits the form, the captured UTM values are available in the respective activity, such as the Form Submitted on Portals, Landing Pages, and Widgets activity on the lead details page.
Any Questions?
Did you find this article helpful? Please let us know any feedback you may have in the comments section below. We’d love to hear from you and help you out!


