


Get Started
Sales Suite
Field Ops
Marketing
Service CRM
Integrations & Apps
FloStack
Mavis DB – Forms Integration
1. Feature Overview
Mavis DB enables you to create databases where you can store master data (for courses, programs, projects, etc.) right inside your LeadSquared account. Integrating Mavis DB with our dynamic forms makes all the data within these databases easily available in your lead/customer-facing forms. By integrating Mavis DB with your LeadSquared forms, you can pull data from Mavis based on rules (and real-time user inputs) to populate fields within your forms.
- To create a Mavis database using APIs, see Mavis APIs.
- To create a Mavis database using the LeadSquared web application UI, please refer to Mavis Database.
- To know how to create a form, please refer to How to Create a Form.
2. Example Use Case
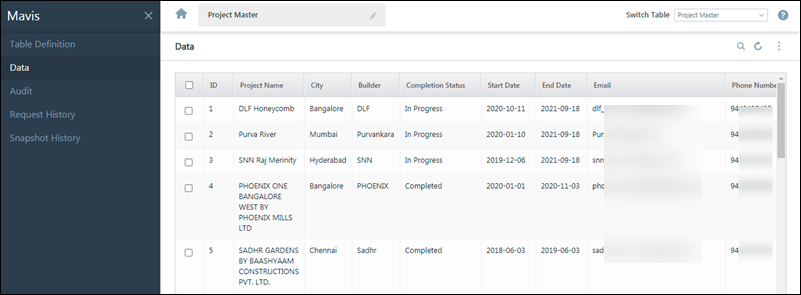
Let’s look at the example of a pan-India real-estate builder. The builder has created a Mavis database with columns for cities, localities within each city, the name of each project, so on.
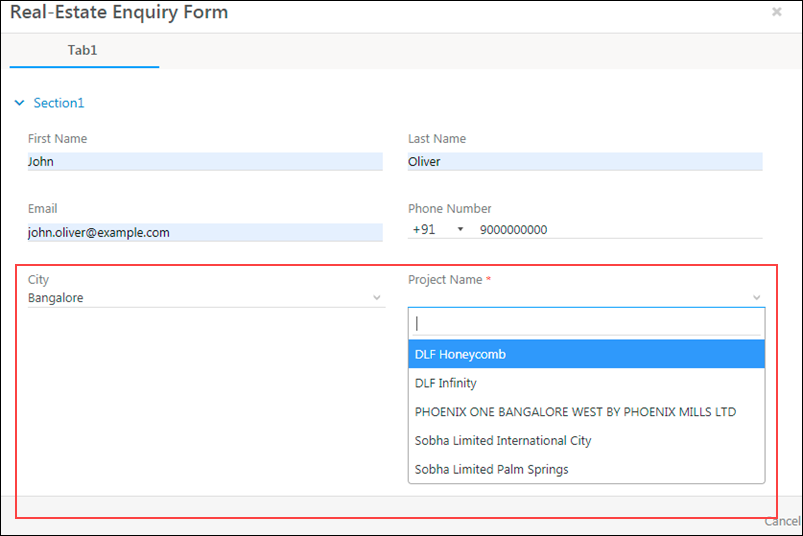
When a lead fills an enquiry form, and clicks on the “City” field, all the cities (Mumbai, Bangalore, etc.) are pulled from the Mavis database and shown as options in the corresponding form field.
In addition, if the lead chooses Bangalore from the city field, then using rules, all the real-estate projects in Bangalore can also be displayed.
2. Prerequisites
- Mavis DB should be enabled on your account. To get this feature, please reach out to your account manager, or write to support@leadsquared.com.
- You must create a Mavis database from where data can be pulled.
- The field within your LeadSquared form, and the corresponding column within Mavis DB, should be of the same datatype.
- You must create a dynamic form.
3. How it Works
Let’s look at how to fetch the “City” and “Project Name” fields from Mavis DB and populate the corresponding fields in the LeadSquared enquiry form.
- First, create a database, and tables within the database to store the data.
- To create a Mavis database using APIs, see Mavis APIs.
- To create a Mavis database using the LeadSquared web application UI, please refer to Mavis Database.
- Next, create a LeadSquared form, with all the fields for which you want to fetch data from Mavis.
To know how to create a form, please refer to How to Create a Form. - Next, set-up rules on the relevant form fields, to fetch data from the Mavis database.
This article covers form rules that integrate with Mavis DB. To learn more about form rules, see How to Create a Form. - Preview and Publish your form.
After you’ve added all the necessary rules, preview and publish the form.
4. Integrate Mavis with Forms
In this example, we’ve created a lead enquiry form where the “City” field is being integrated with the corresponding column from Mavis DB.
4.1 Set Rules
- On the Forms Designer screen, add the field you want to integrate with Mavis. We’ll add the “City” dropdown field to the form, to show the list of cities in which the builder has properties.
- Click Rules, then click Add Rules. Choose if you want All the conditions to be met, or Any conditions to be met.
- From the Select Condition dropdown, we chose Form, and selected On Load from the parallel dropdown. This ensures that when the form loads, the form fields integrated with Mavis show up.
- To set up the actions, we’ve chosen to Set Value of the Field – City from the respective dropdowns.
- Next, from the Set dropdown, we selected Set Options From Mavis DB (for non-dropdown field types, select Data From Mavis).
- From the parallel dropdowns, select the database, table, and column from which you want to fetch the data.
Preview the form, and click Publish.
4.2 Add Filter Conditions
Filter conditions enable you to create queries where you can pull data from multiple columns based on some logic. To continue with our example, we want the “Project Name” form field to show only those real-estate projects available in the selected city.
In this example, we’ve added a “Project Name” field in our form and set up a rule to integrate it with a Mavis column and populate the corresponding data.
- After creating the rule, click Add Filter Conditions. We’ve added the “Project Name” field, which is dependant on the “City” field, and so we’re selecting the “Project Name” field.
- On the Add Filter Condition(s) pop-up, from the All dropdown, choose if you want All the conditions to be met, or Any.
- Then, from the Select dropdown, select the field based on which you want to create the filter (City in this case).
- To dynamically fetch the values of this field based on the user’s input in the “City” field, we’ve checked the
 against Mail Merge. In our example, this will ensure that only real-estate projects listed under the specified city will show up in the “Project Name” dropdown.
 - Click Set Conditions. All the conditions that have been added will be saved to the form.
Preview the form. Once you’re done adding all the conditions, click Publish.
Note: If there are duplicate values present in your Mavis column, check the ![]() against Show distinct values only. This will ensure that repeat values are removed, and only unique values are shown as options in your form. This is applicable only for dropdown fields.
against Show distinct values only. This will ensure that repeat values are removed, and only unique values are shown as options in your form. This is applicable only for dropdown fields.
Any Questions?
Did you find this article helpful? Please let us know any feedback you may have in the comments section below. We’d love to hear from you and help you out!