1. Feature Overview
The Object Types Associations feature allows you to link one Object Type with another. This helps you model real-world relationships between different entities (patients, students, dealers, invoices, loans, etc.) inside LeadSquared. This makes it easier to view and manage complex relationships across your data.
Why Use Associations?
- Healthcare: Associate a patient with a clinic, or a patient with multiple clinics.
- Education: Associate students with a high school, or multiple students with a single school.
- Manufacturing: Link dealers, distributors, wholesalers, and manufacturers together.
- Finance: Associate customers, loans, and nominees.
- Documentation: Treat invoices or purchase orders as objects, and associate them with customers, dealers, or manufacturers.
Example: If a loan is created as an object, it can be linked to both a customer and a nominee. When viewing the customer’s record, you’ll see all loans procured by that customer. When viewing the nominee’s record, you’ll see all loans linked to that nominee.
2. Prerequisites
- You must have Object Types enabled in your account. Reach out to support@leadsquared.com to get this enabled.
- You must be an Admin to set this feature up.
3. How It Works
- Configure the Association – Create a Unidirectional or Bidirectional Association between two Object Types, depending on how you want them to interact.
- Add the Association Field – Include the association field in the Object Form so users can link objects while creating or updating a record.
- Add Tab in Object Details View – Ensure that the ‘Associations’ tab is configured in the Object Details View Customization.
- Associate Objects – While adding or editing an object via forms, select the related object using the association field. Or from the object details page, add the associated object.
- Manage Associations – Open the Details Page of any object to view its associated records. From here, you can perform actions such as adding, editing, and managing linked objects.
4. Unidirectional & Bidirectional Associations
There are 2 types of associations – Unidirectional serves most use cases, while Bidirectional is used for more complex workflows.
Unidirectional Association (Customer → Loan)
In a unidirectional association, the link is created from only one side.
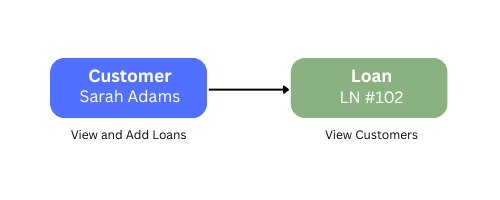
How it works:
- From the customer record, you can add a new loan.
- However, from the loan record, you can’t add a new customer (since the link is Customer → Loan).
Actions users can take on each object type depend on –
- Ownership of the objects
- Permission Template settings
- Sales Group Configurations
- Object Sharing
To learn more, see Permissions for Associated Objects.
Bidirectional Association (Customer ↔ Loan)
In a bidirectional association, the relationship can be created from either side.
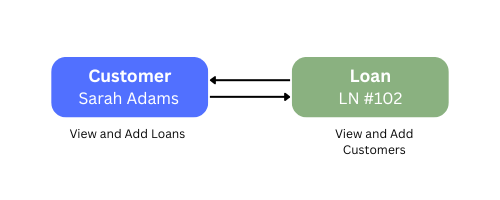
How it works:
- From the Customer page, you can add a new loan.
- From the Loan page, you can also add a new customer (since the link is Customer ↔ Loan).
Just like unidirectional, all actions on both objects are allowed based on the users’ permissions.
5. Create Associations
Object Type Associations can be configured as either Unidirectional or Bidirectional, depending on how you want objects to interact with each other.
To Associate Object Types –
- Navigate to Settings>Objects>Object Types.
- Click the Actions icon alongside the relevant object type and select Manage Associations. Let’s take Customer as the object type in a Financial Service Industry scenario.
- On the Manage Associations popup, click Create New.

Unidirectional Associations
A unidirectional association is a one-way relationship between two object types. When you create it, the association is visible from the primary and associated object’s details pages.
- From the Associated Object Type dropdown, select the object type you want to associate the current object type with. For instance, you select Loan object type to be associated with Customer object type.
- Select 5 Loan object fields and an identifier among them to be displayed in the Customer details page. These are the only fields that will be mapped and displayed on the object details page.
- Then, select 5 Customer object fields and an identifier among them to be displayed in the Loan’s details page. These are the only fields that will be mapped and displayed on the object details page.
- Then, set the maximum number of associations that can be created.
- Click Save.
Bidirectional Associations
A bidirectional association is established when you create associations in both directions between two object types. In other words, once you associate Customer with Loan, you also create a reverse association from Loan back to Customer. Here, both objects hold the association equally.
Once you create a unidirectional association, create the reverse association by repeating the process.
6. Create Forms & Processes
Once associations are set up, add the relevant Associated Object fields to your forms so users can link related records while filling out the form
For example, while creating a loan object, you can associate both the customer and the nominee in the same form.
- Navigate to Workflow>Manage Forms and click Create Form.
- Select For Inside Sales/Portal from the Choose Purpose popup.
- Name the form and select the relevant Object Type for which you want to create the form. Click Next.
- Choose the type and flow of the form.
- Search and add the relevant object fields in the form. The associated object types can be added here directly.
Once the form is configured, incorporate it in the process
- Navigate to Workflow>Process Designer and click Create Process.
- On the popup, select At Specific Work Area.
- Then, select the relevant object type and click Continue.
- In the Choose starting point popup, select the relevant work area and click Save.
- In the Process Designer, click the plus icon and select Show Form under Actions.
- In the Show Form popup, select the relevant form and configure it as required. Click Save and select Publish on the Process Designer.

7. Configure Object Details View
Once the associations are created, add the Associations tab to the object details page.
- Navigate to Settings>Objects>Object Details View.
- Select the relevant Object Type from the dropdown and click Create.
- Configure the details as required. To learn more, see Customize Object Details View.
- Under Tabs, ensure Associations is selected. Configure the other details and click Save.
- Then apply this view to your users.

8. View Associations on Object Details Page
On the Object Details page, you can view Associated objects in a grid format under the Associations Tab. If an object type has multiple associations, for example, if a Customer is associated with both Loan and Nominee, separate tabs will be displayed for each association. You can select a tab to view the relevant grid.
Unidirectional Associations
In a Unidirectional Association, one object acts as the child and the other as the parent. The association flows only in one direction.
Example: Customer → Loan
- From the Customer Object Type, we associate a Loan Object Type
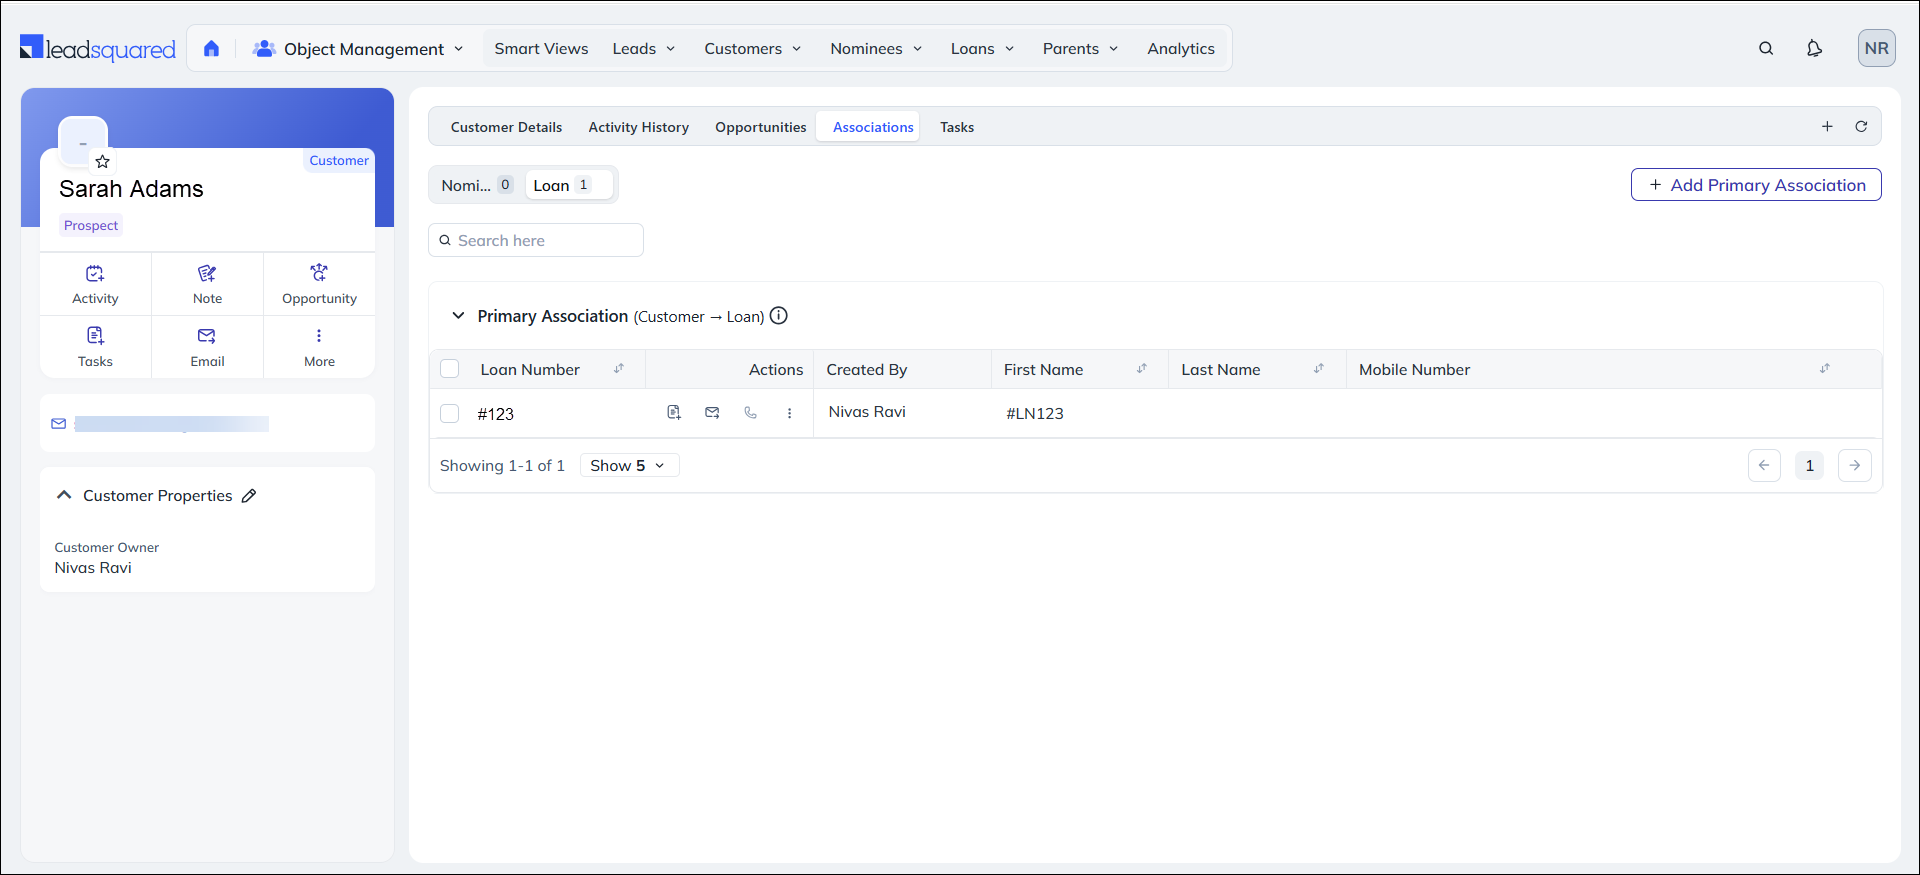
- For Customer Sarah Adams, we associate Loan #LN123
What you see:
- On Customer Sarah Adams’ Associations tab:
- List of Loans associated with Sarah (Loan #LN123 appears as a Primary Association).
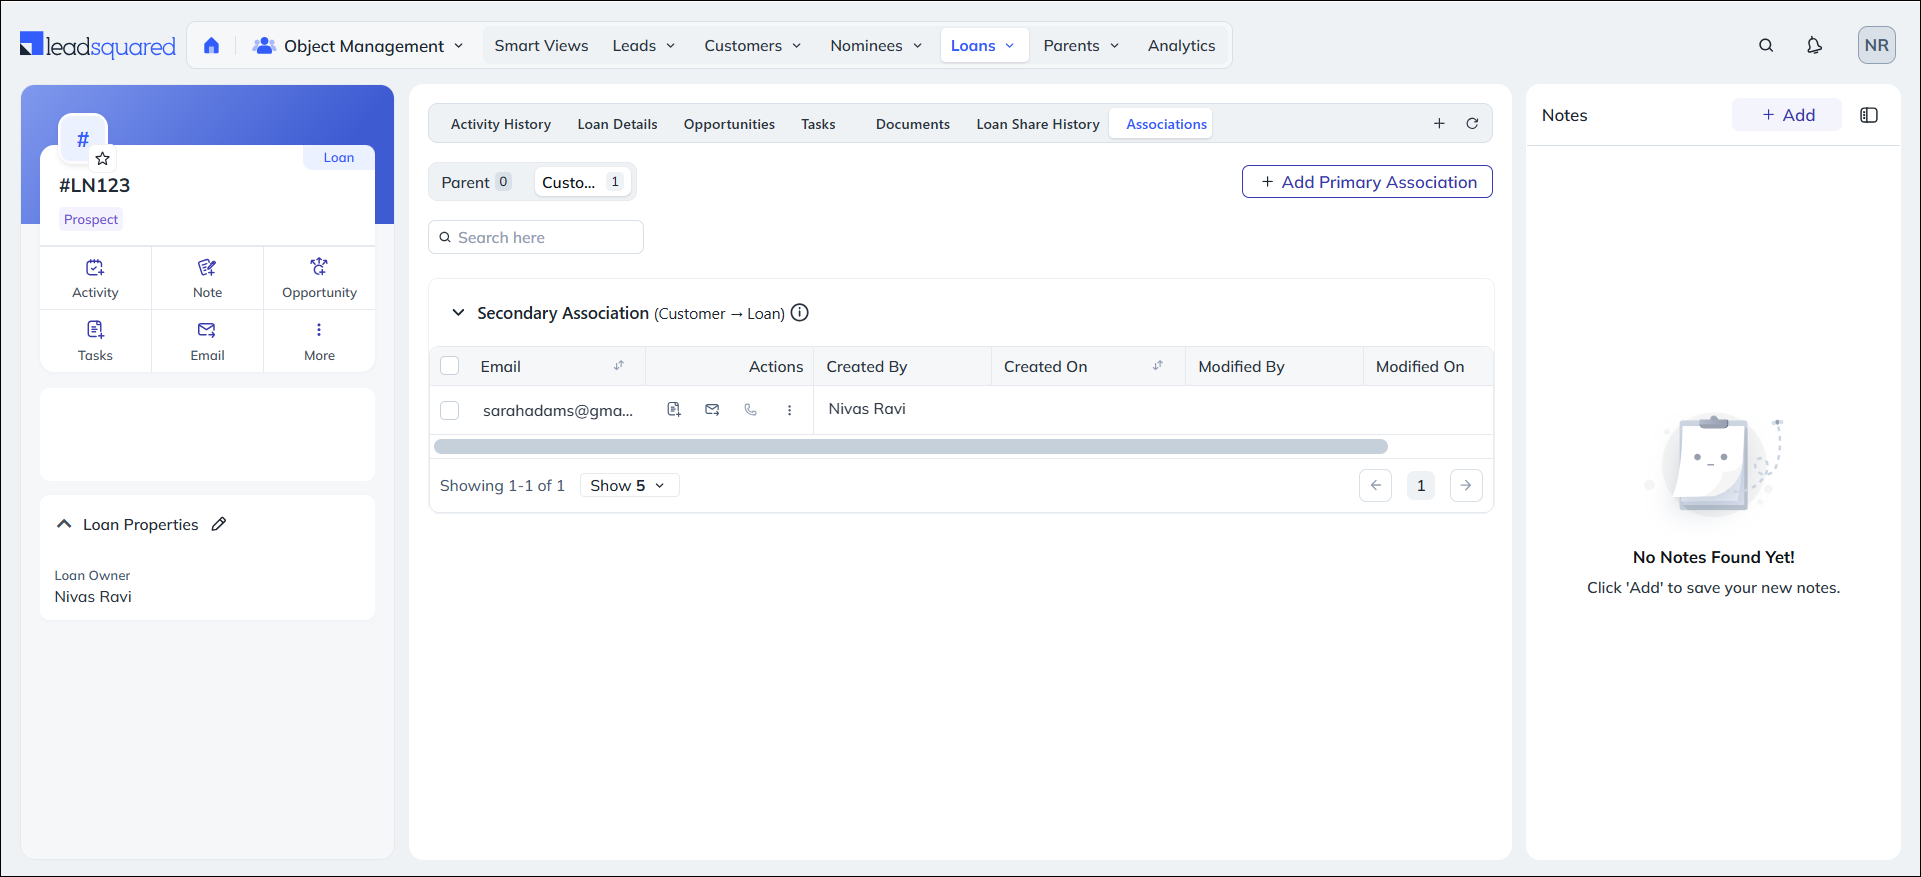
- On Loan #LN123’s Associations tab:
- List of Customers where Loan #LN123 is associated (Sarah Adams appears as a Secondary Association).

Bidirectional Association
In a Bidirectional Association, associated object types show up in the primary or secondary association tabs, depending on where the association was added from.
9. Add Associations on Object Details Page
You can directly associate objects from the Object Details Page. This is helpful when objects are created individually and are not associated through the form.
If you have only one associated object type, click Add Primary Association and select the relevant object. Click the checkbox alongside the relevant objects to select multiple objects from the dropdown. If you have multiple object type associations, select the relevant tab and Add Primary Associations.
10. Permissions for Associated Objects
A Sales User’s ability to view, update, or remove associations depends on their ownership of the parent record or the access provided through object sharing (lead sharing), permission templates and sales group configuration.
Access to associated objects is controlled by the permissions on the parent record:
- Users with View access can see associated objects.
- Users with Modify access can update or remove associations.
- Ownership of the parent record automatically provides full access.
In short, the higher the access level on the parent record, the more control the user has over its associated objects.
Let’s take Sales User George as an example here.
Note:
- Admins and Managers can access and modify all objects.
- To learn more about lead sharing, see How To Share Leads for a Limited Duration.
| Scenario | View Associated Object | Perform Actions | Remove Associations |
| Parent Object Owner is Sales User George | |||
| Associated Object Owner is not Sales User George | Yes | No | Yes, since this depends on the permission of Parent Object rather than Associated Object |
| Associated Object Owner is Sales User George | Yes | Yes | Yes |
| Parent Owner is not Sales User George | No | No | No |
| Parent Object Shared with View Access | |||
| Associated Object Owner is not Sales User George | Yes | No | No |
| Associated Object Owner is Sales User George | Yes | Yes | No |
| Associated Object is also shared with View Access | Yes | No | No |
| Associated Object is also shared with Modify Access | Yes | Yes | No |
| Parent Object Shared with Modify Access | |||
| Associated Object Owner is not Sales User George | Yes | No | No |
| Associated Object Owner is Sales User George | Yes | Yes | Yes |
| Associated Object is also shared with View Access | Yes | No | Yes |
| Associated Object is also shared with Modify Access | Yes | Yes | Yes |
11. Actions Related to Associations from the Object Details Page
You can perform actions on an associated object directly from the Object Details Page of the object it is linked to. For example, if Loan #LN102 is associated with Sarah Adams and appears in the Associations tab, you can take actions such as editing the loan, adding tasks or activities, sending emails, making calls, and performing other supported actions on the #LN102 object directly from Sarah Adams’ details page.

To remove an existing association –
- On the Object Details Page of the relevant object, select the Associations Tab.
- Click the Actions icon alongside the relevant object under Primary or Secondary Associations.
- Select Remove Associations from the dropdown.
- On the Remove Associations popup, click Yes.

12. FAQs
1. How is this different from Activities?
Activities can only be associated with one lead or object. Associations let you link one object with multiple objects at once.
2. Can I make associations mandatory?
Yes. When adding association fields to forms, you can mark them as required.
3. How many fields can I display in the Associations tab?
You can display up to 5 fields.


