1. Feature Overview
In LeadSquared Service CRM, configuring the business working hours defined in your organization’s policies is mandatory. This ensures that all SLAs defined in LeadSquared follow your organization’s working hours.
By default, a business hours option (called Calendar Hours) is configured in your account. You can edit this to ensure it reflects the hours defined in your policies. If required, you can create custom business hours (e.g., for teams handling different products, for different user types, etc.).
For example, assume the Business Hours are defined as Monday to Friday, 9 AM to 5 PM, and the first response SLA is defined as 3 hours. If a ticket is created at 4 PM on Wednesday, the first response must be sent to the customer by 11 AM the next day.
Note:
- The SLAs in LeadSquard follow these Business Hours, and NOT the 24-hour daily cycle.
- The business hours in Service CRM are not related to the Workday Templates in the LeadSquared Sales CRM.

2. Prerequisites
- Service CRM is a paid feature. To enable it, contact your account manager, or write to scsupport@leadsquared.com.
- You must be a Service CRM Admin to configure Business Hours in your account.
3. Configure Business Hours
Once you log in to LeadSquared (https://login.leadsquared.com/), to define your business hours –
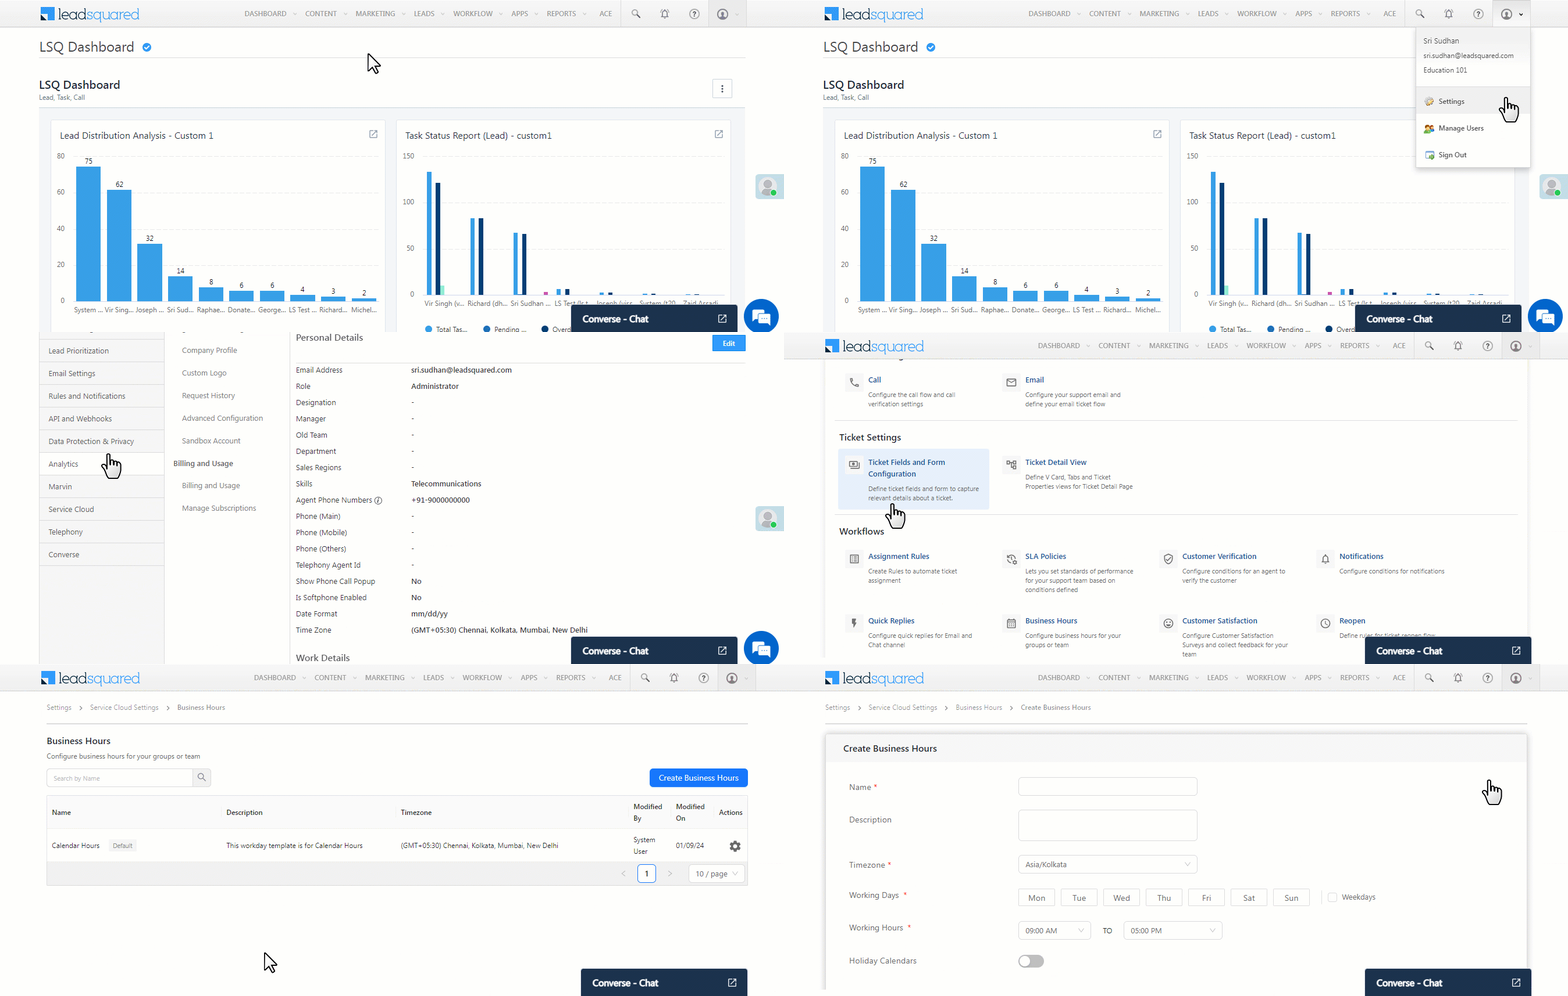
- Navigate to My Profile>Settings>Service Cloud.
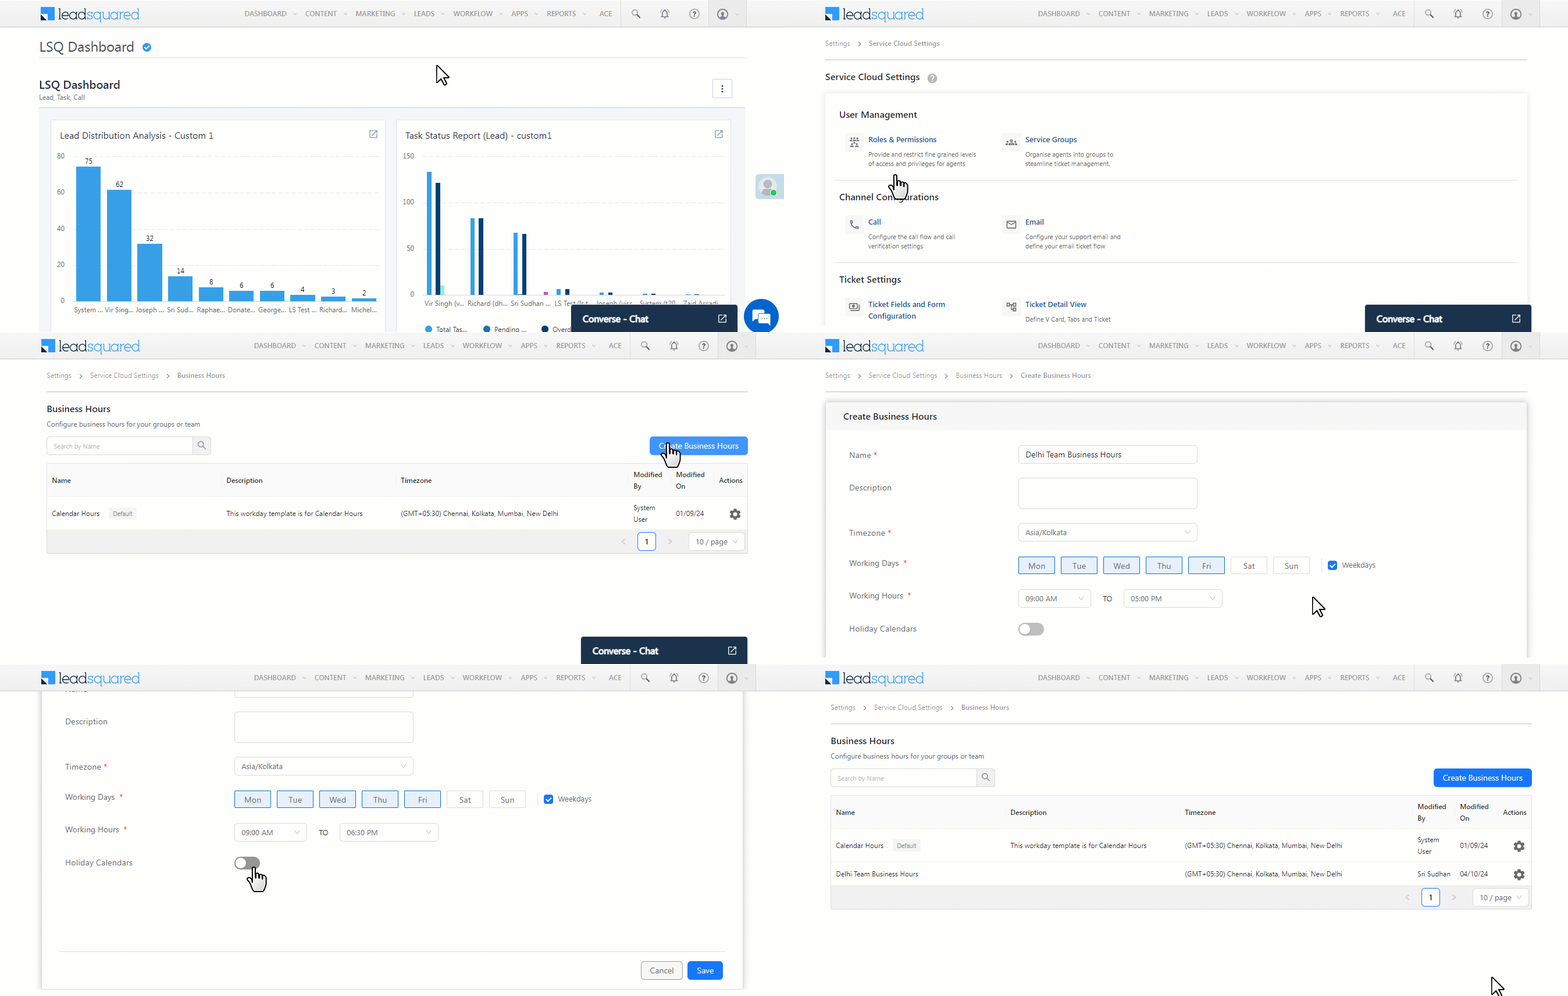
- On the Service Cloud Settings page, under Workflows, click Business Hours.
- On the Business Hours page, to create a new set of hours, click the Create Business Hours button.
- Alternatively, to edit the default Calendar Hours, click
 , and then click Edit.
- Alternatively, to edit the default Calendar Hours, click

4. Add/Update Business Hours
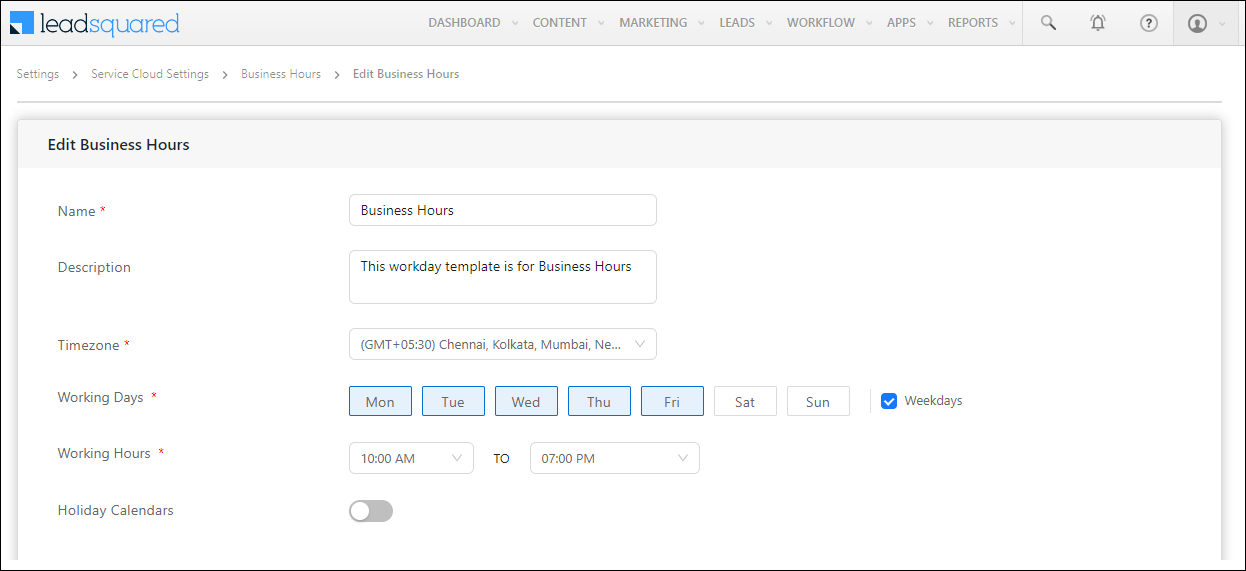
The steps to edit existing business hours and create new ones are the same. You’ll have to enter (or update) the following details on the Create/Edit Business Hours page –
- Name – Enter an internal display name (e.g., Loan Team Hours, Mutual Funds Team Hours, etc.).
- Description – Enter a description for the hours you’re configuring. This is optional.
- Timezone – Select the timezone you want the business hours to follow.
- Working Days – Select the working days. If you enable the checkbox alongside Weekdays, Monday to Friday is selected by default.
- Working Hours – Select the daily working hours. These hours can extend beyond the calendar day. For example, you can choose the starting hour as 04:00 PM, and the ending hour as 01:30 AM the next day (which totals to 9.5 hours).
- Holiday Calendars – To follow the Holiday Calendars configured in Service CRM, enable the slider, and from the dropdown, select a calendar.
- Alternatively, click Create Holiday Calendar to add your calendar. To know more, refer to Holiday Calendar.
Once you’re done, click Save. The Business Hours are now live.

5. Other Actions
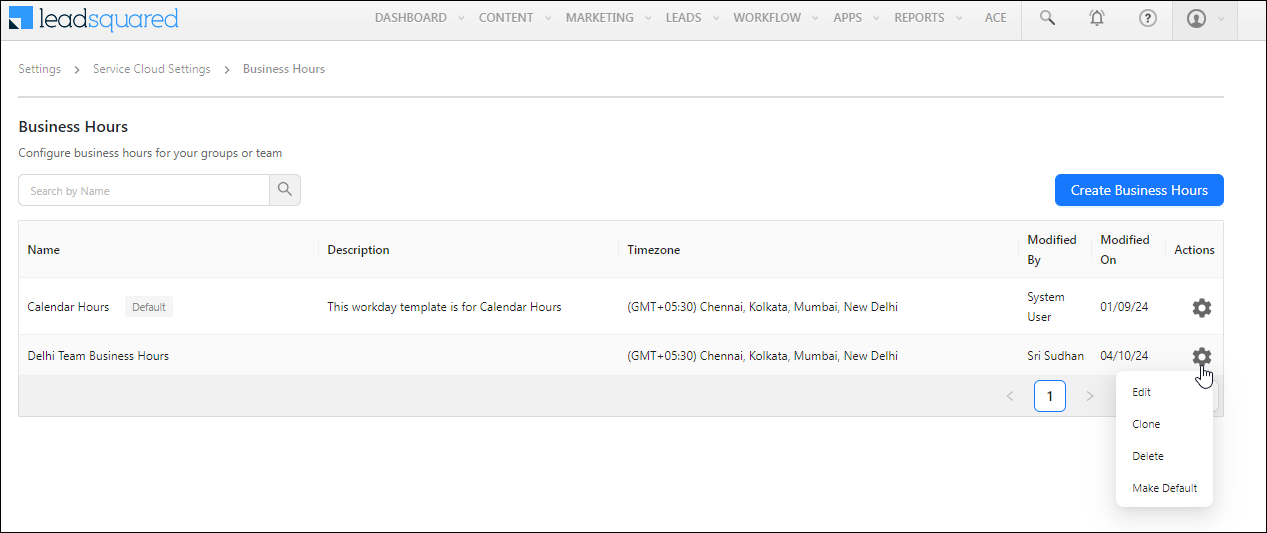
On the Business Hours page, under Actions, alongside a published calendar, click ![]() to perform the following actions –
to perform the following actions –
- Edit – Let’s you update the working hours and other details on existing Business Hours.
- Delete – Deletes* existing Business Hours.
- Clone – Duplicates existing Business Hours.
- Make Default – This sets the default Business Hours for your entire organization, applying to all users in LeadSquared’s Service CRM.

Any Questions?
Did you find this article helpful? Please let us know your feedback in the comments section below. We’d love to hear from you and help you out!


