1. Feature Overview
You can create different task types according to the requirements of your business. You can add these tasks to Leads and Opportunities. An example of a task that can be added on a lead is “Mail Health Insurance Policy Documents”, while a task that can be added to an opportunity is “Inspect Vehicle for Motor Insurance”. You also have the flexibility to configure reminders, fields and forms for each task type.
This article shows you how to create and configure different task types. Once you’ve created and configured a new task type, you can then create tasks of that type for your users. For more information on that, see Create Tasks and Schedule Reminders.
2. Prerequisites
- You must be an Admin user to create and customize task types.
- To add tasks on opportunities, you must have opportunities enabled on your account. To enable it, please write to support@leadsquared.com
3. Task Type Categories
All task types fall under 2 categories – Appointments and To Dos.
| Appointments | To Dos |
| Have a definite start and end date and time (14 November 2018 2.p.m to 4 p.m.). | To dos don’t have a specific start and end time. You can configure to dos to be completed within a certain date range (tomorrow, this week, this month, etc.) but don’t have to define a specific time (2 p.m. to 4 p.m.). |
| Examples of appointments include meetings, webinars, demos, presentations, etc. | Examples of to dos include follow ups on old leads, cold calls, in-field address verification, and any task that you don’t have to specify an exact time for. |
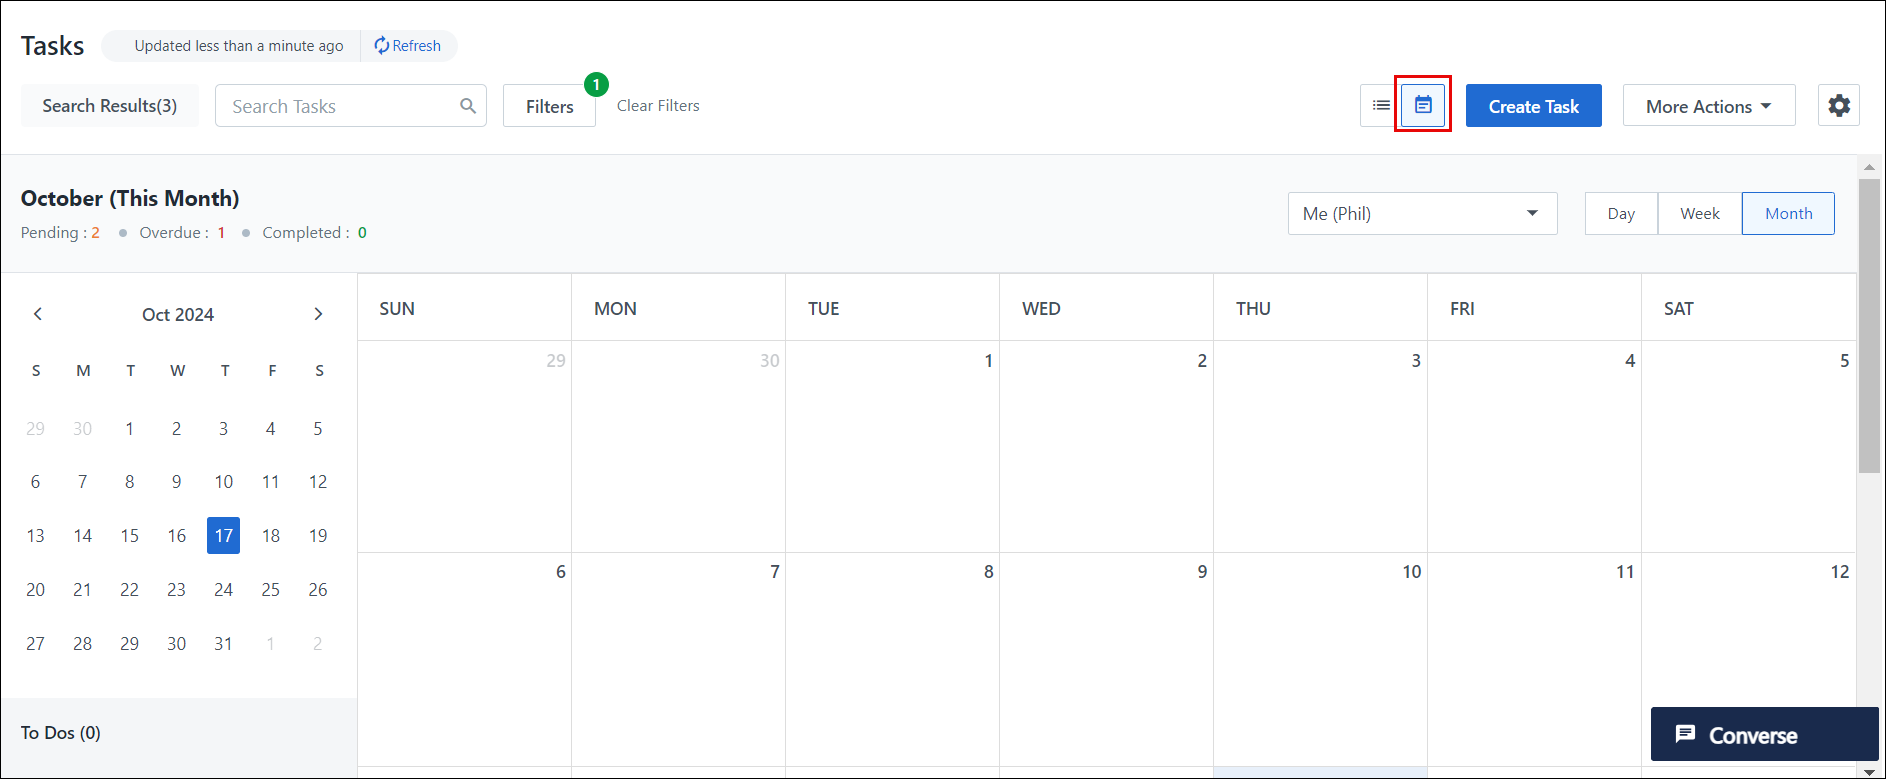
| Show up on both the classic list and calendar views on the Manage Tasks and Smart Views pages. | Shows up on the classic list view and on the right pane in the calendar view. |
4. Configure Task Types
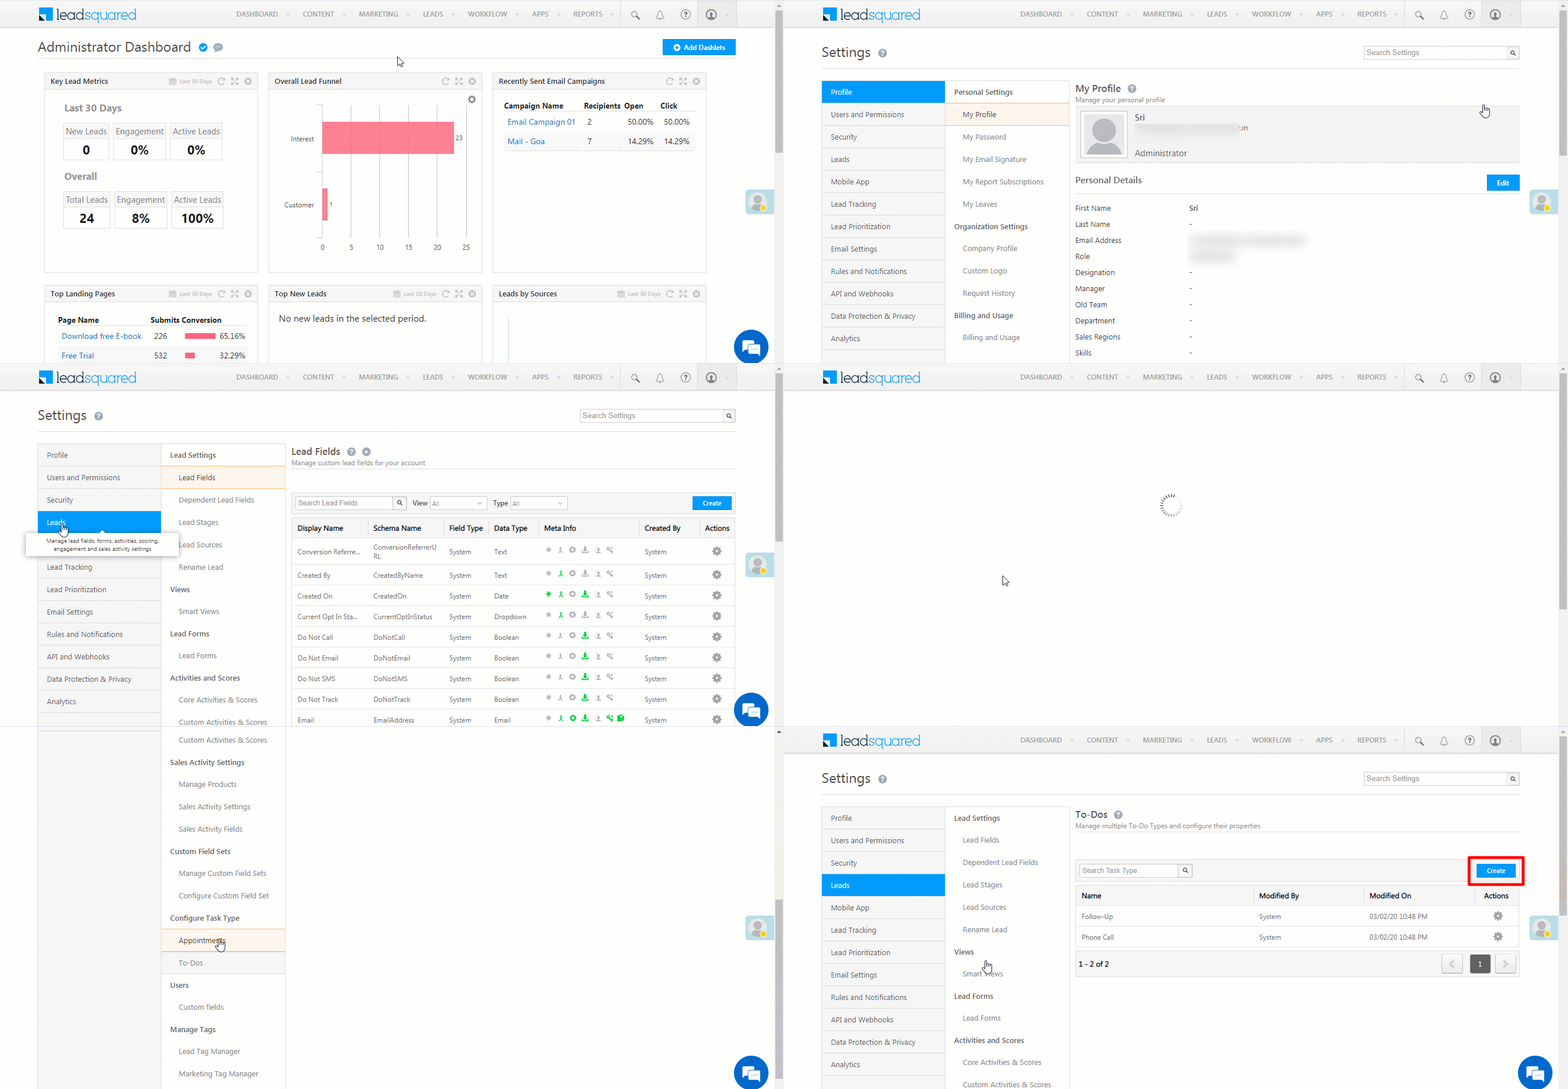
- To create and edit appointments, navigate to My Account>Settings>Leads>Configure Task Types>Appointments.
- For to dos, navigate to My Account>Settings>Leads>Configure Task Types>To Dos.
4.1 Set a Task Type as Default
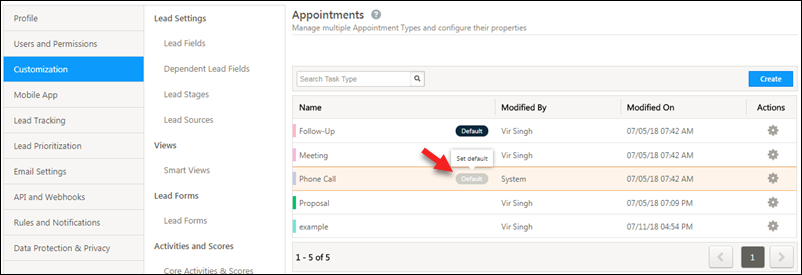
When you click the Create Task button on the Manage Leads page, the default task type that you’ve configured will get created.

To set a task type as default, hover your cursor over the task type row and click the Default button that appears.
4.2 Other Actions
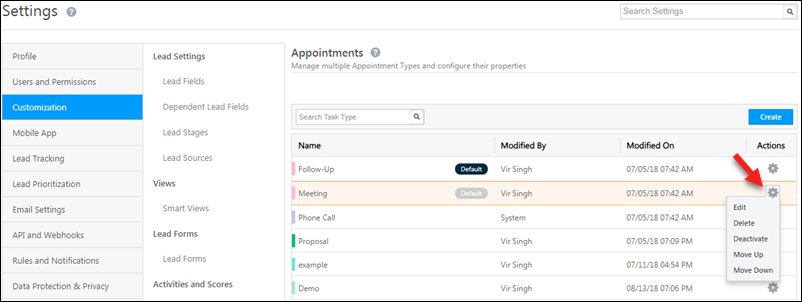
Hover your cursor over the settings ![]() wheel alongside a task type to edit, delete, deactivate, move up or move down a selected task type.
wheel alongside a task type to edit, delete, deactivate, move up or move down a selected task type.
5. Create a New Task Type
- Click Create. The Create Task Type wizard has 3 tabs – Configure, Task Fields and Form Layout.
- On the Configure tab, enter a name for the task and select a colour (to match the urgency of the task for example).
- You can enable calendar invites for the organizer, lead owner or for leads. The invites are sent as .ics files. You can also set the content of the email being sent by clicking the corresponding Set Content link. The .ics file can be used by clients supporting iCalendar formats like Outlook, Google Calendar, Apple Calendar, Lotus Notes etc.
- Set additional details like default duration, location (if you want to track the location users are creating/editing tasks from), priority, reminders and open completed tasks.
- Click Save.
- On the Task Fields tab, you’ll see a number of system created task fields. You can’t delete them but you can choose to mark them as mandatory/non-mandatory. You can also create new custom fields by clicking Add Field, setting a name and data-type (number, text, date-time, dropdown). Next, click Save.
- On the Form Layout tab, drag and drop the fields you want to display in the task create form. Click Add Section to add multiple sections to the form.
- Click Save when you’re done.
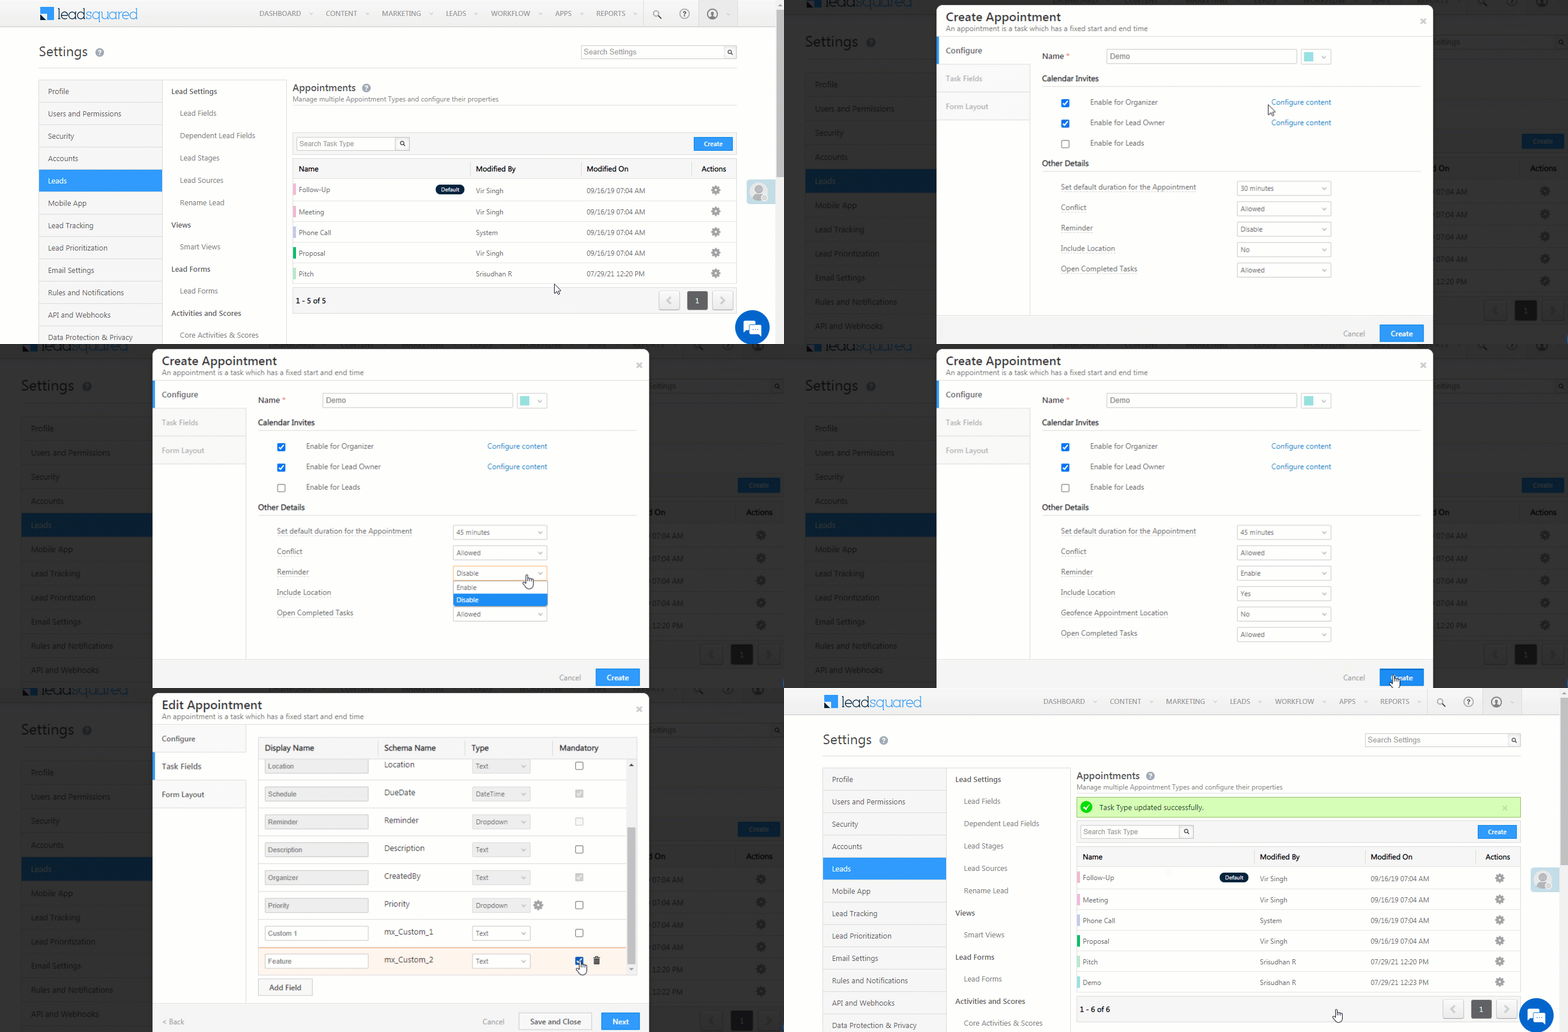
The following options are available while creating a task type –
| Details | Description |
| Set default duration for the Appointment | Select a default duration for the task from the dropdown. This can be overwritten at the time of task creation. |
| Conflict | Allows you to create more than one task in the same time slot. If you choose Not Allowed, you’ll receive the following error message when trying to create a new task – “This appointment conflicts with another one on your calendar! Change the ‘schedule time’ to create appointment.” |
| Reminder | A reminder is sent via email, before a task is due. The default reminder is sent 15 minutes before the task time, but this can be overwritten at the time of task creation. |
| Include Location | This allows you to add a location to the task, using maps. |
| Geofence Appointment Location | If you’ve selected “Yes” for Include Location, then you can geofence the appointment. This means the task can only be completed within the geofencing radius. |
| Open Completed Tasks | Allows you to re-open a completed task. |
6. Creating a Task From the Leads Details Page
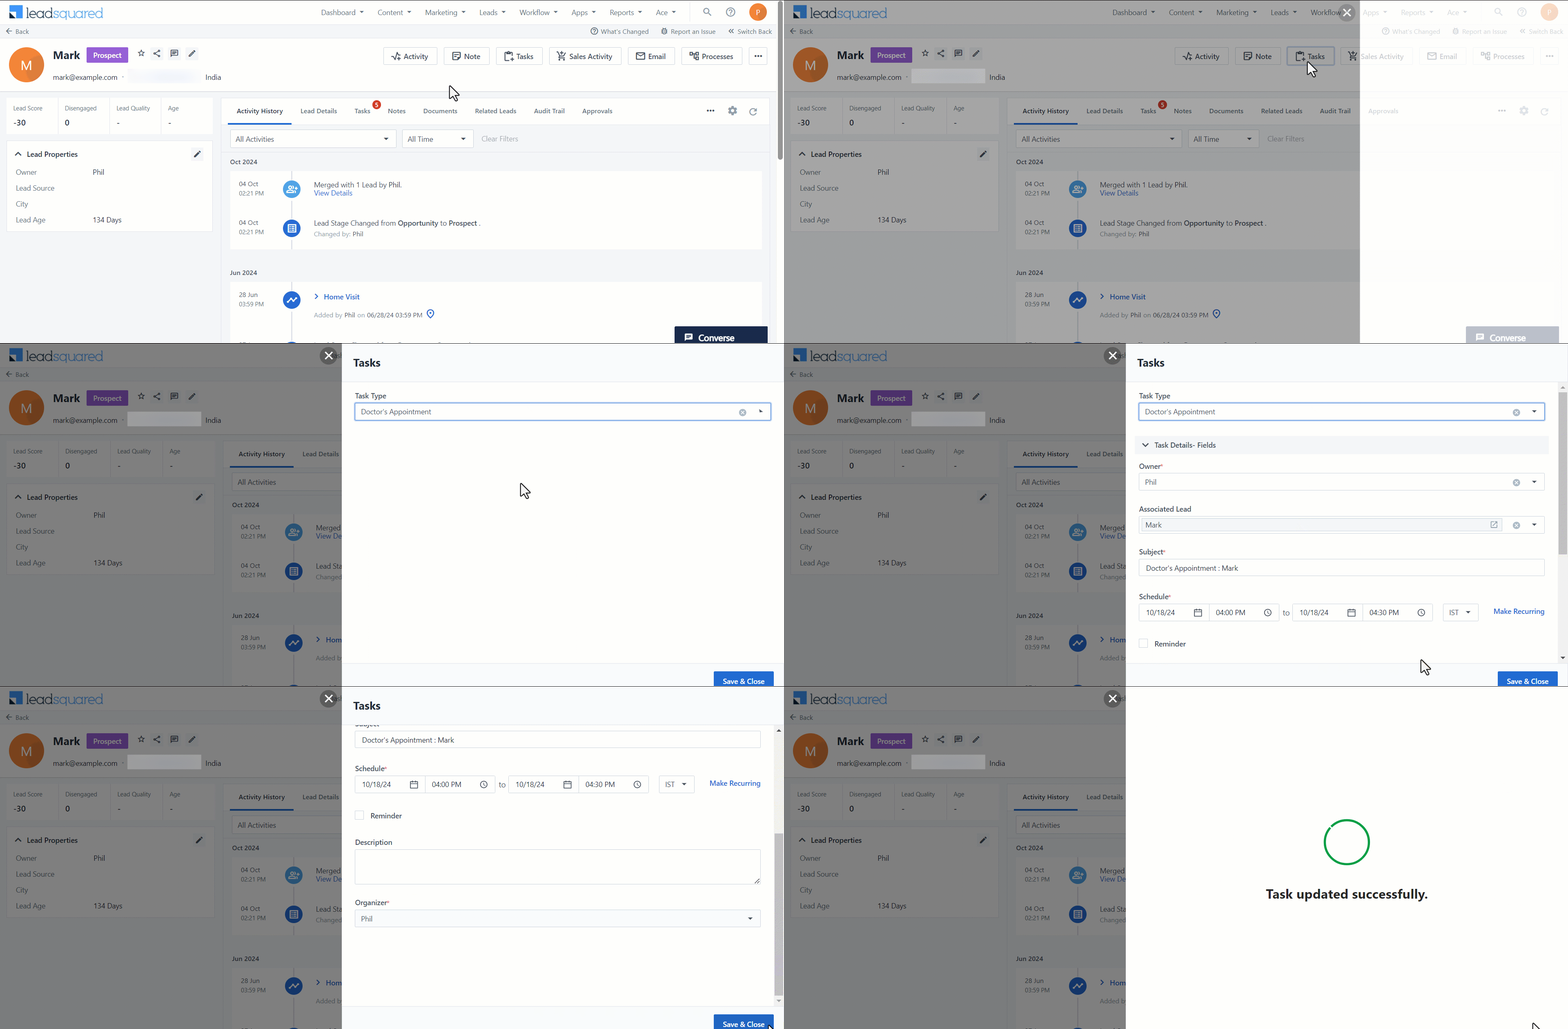
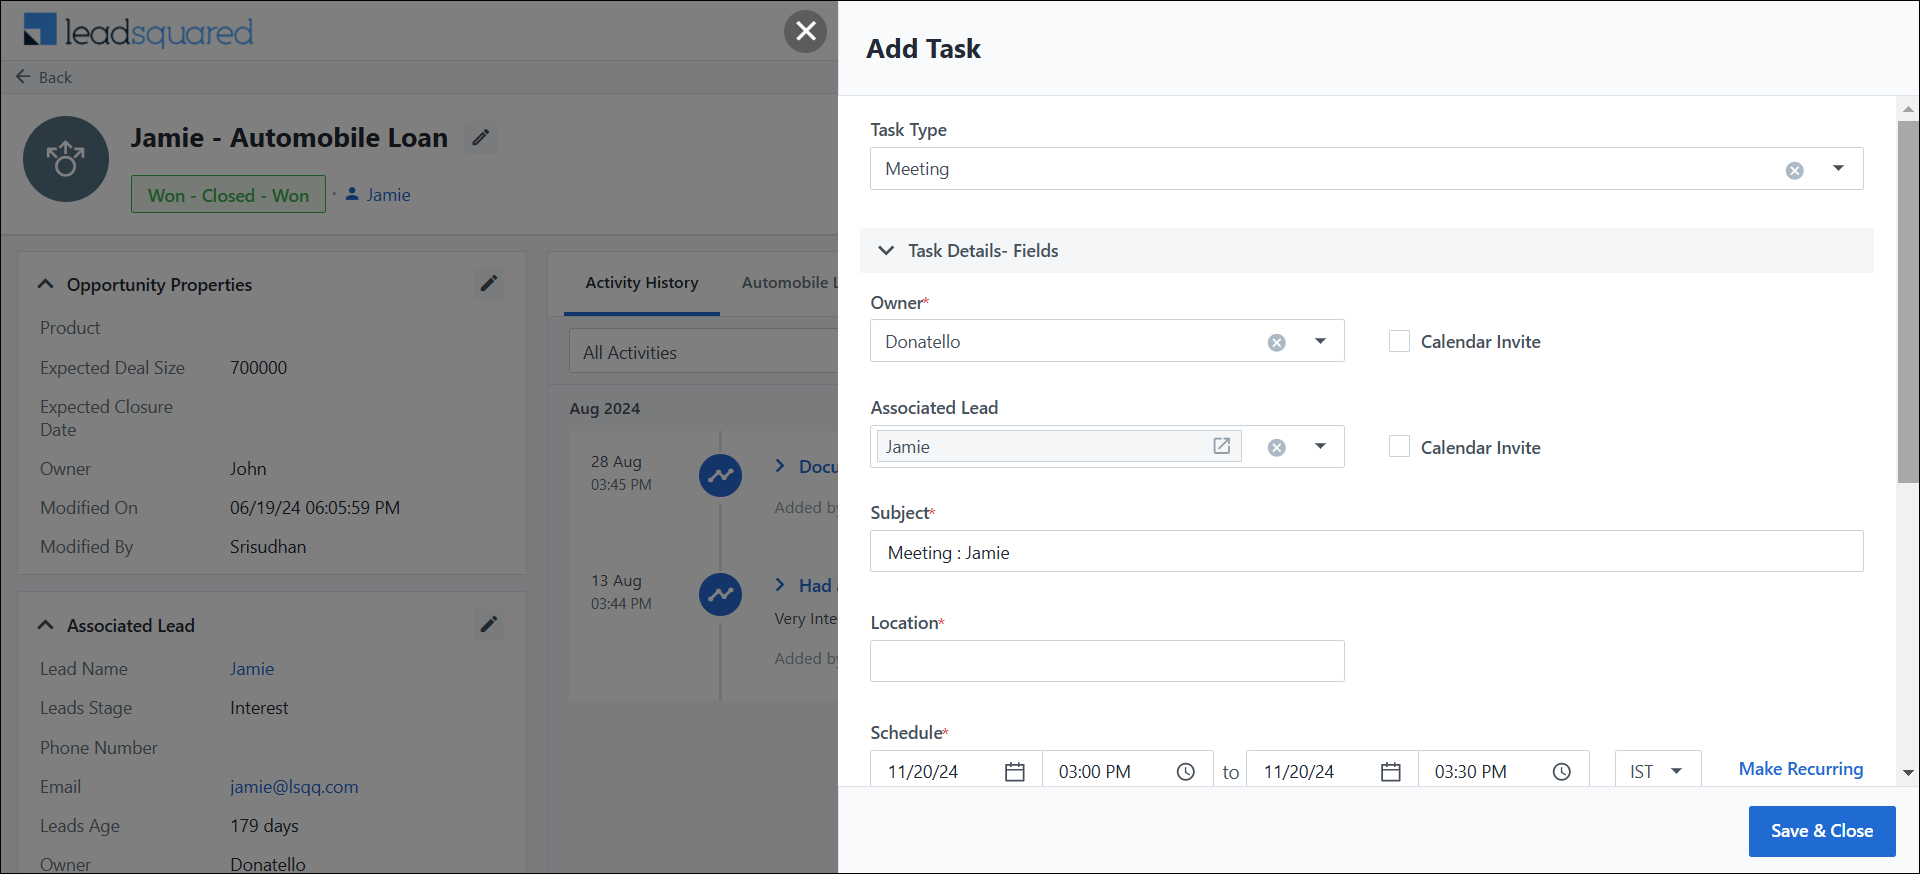
After configuring a task type, you can create a task from the Lead Details page, on the lead as well as on an opportunity. For more information, see How to Create a Task.
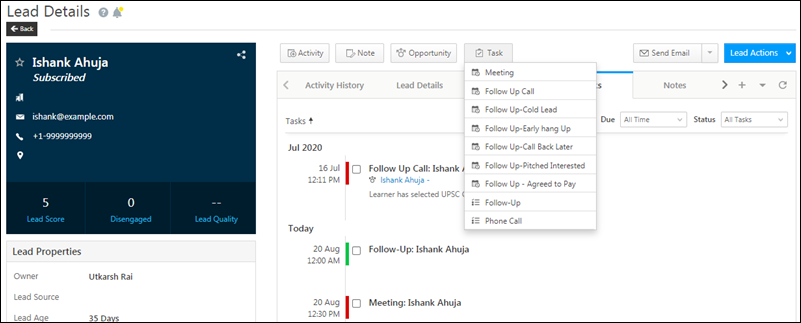
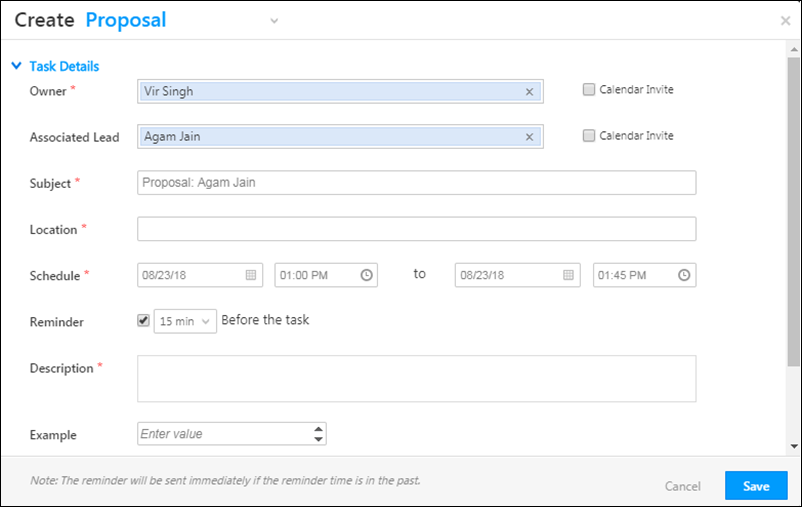
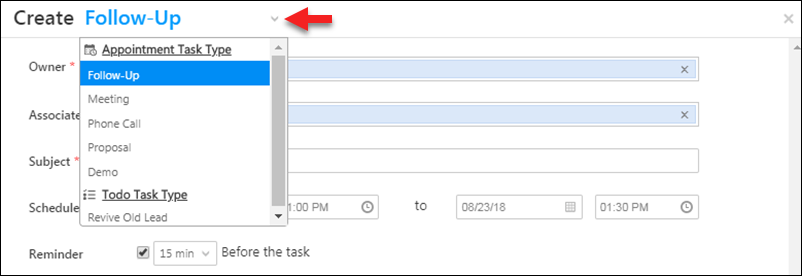
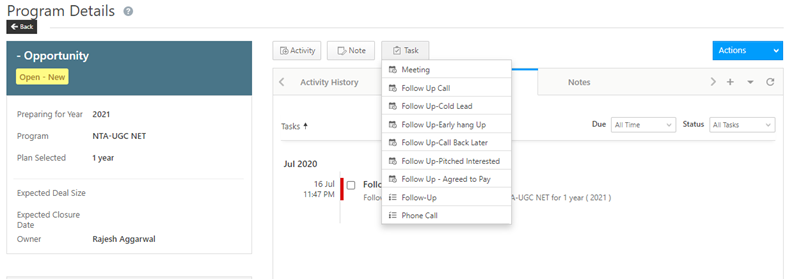
You can also create a task of a different type by clicking the![]() icon –
icon –
7. Creating a Task From the Manage Tasks Page
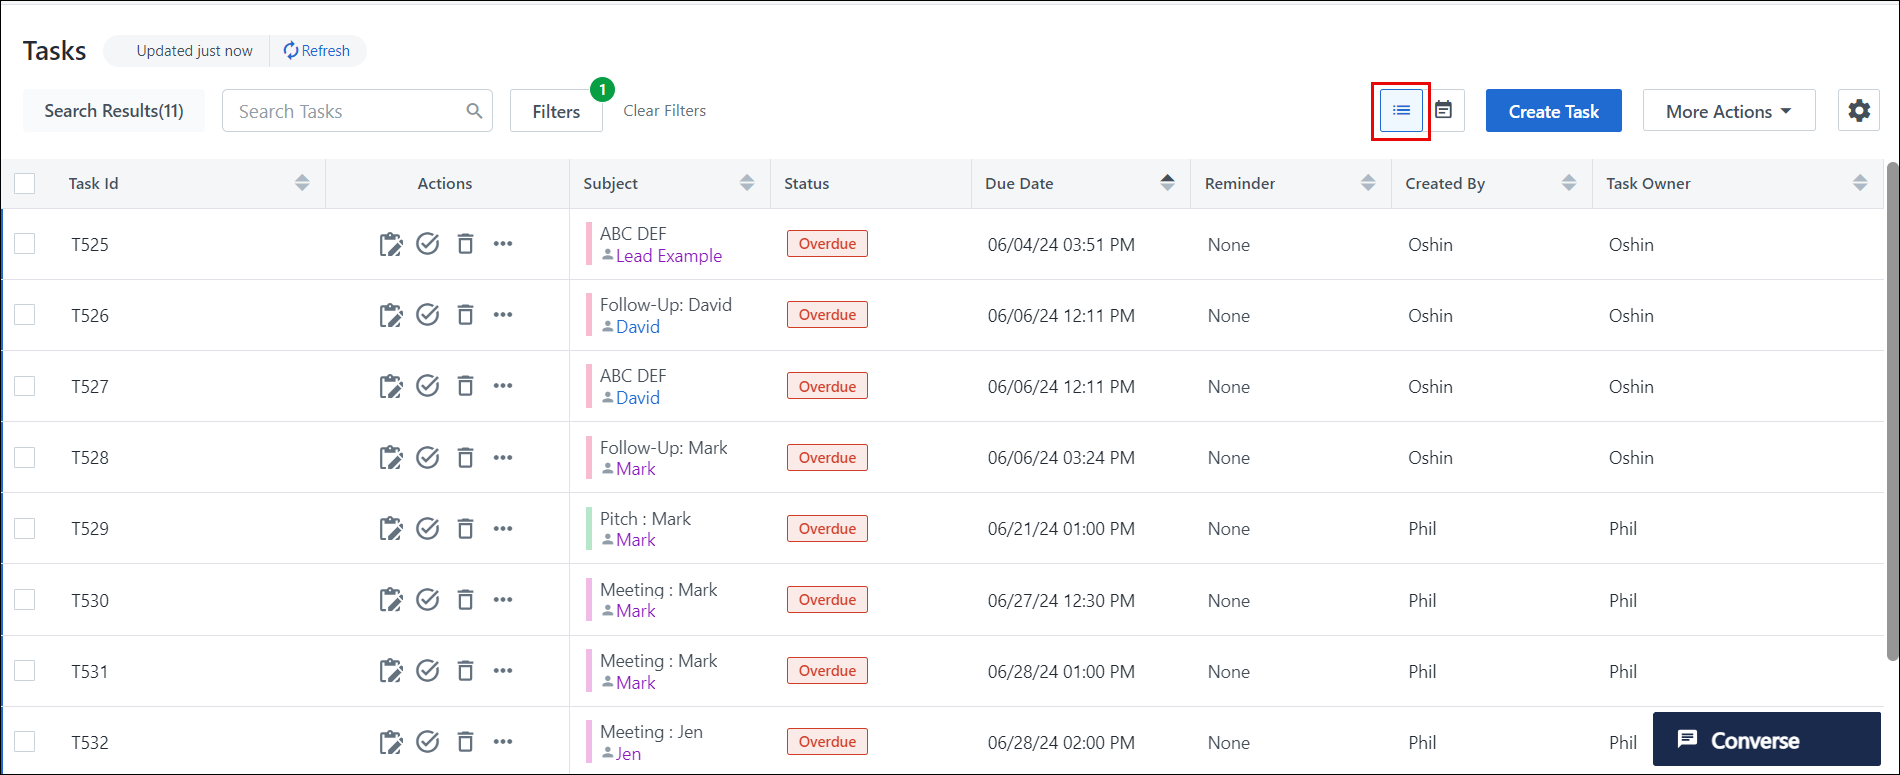
Navigate to Leads>Manage Tasks. To create a task from the classic list view, click the Create Task button.
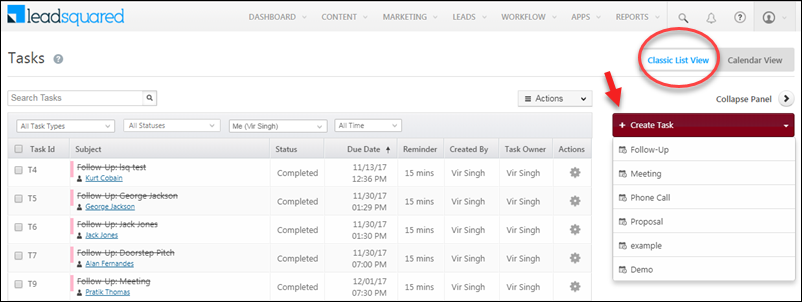
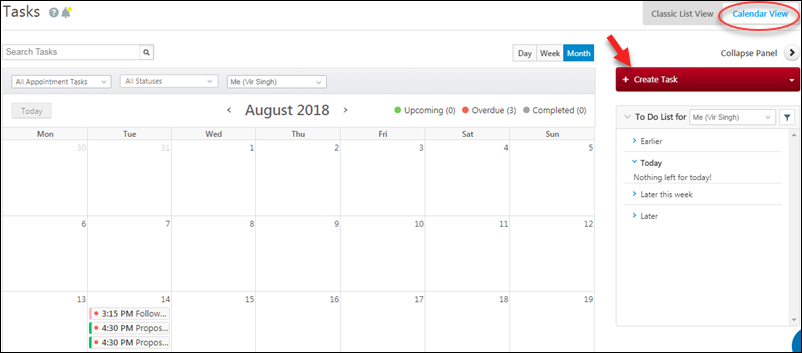
If you’re on the calendar view, you can click the Create Task button or even double-click on a date slot to create a task for that date (month view).
8. Creating Tasks from the Opportunity Details Page
Tasks can also be added to leads from the Opportunity Details page. To know more, refer to How to Create Tasks and Schedule Reminders?
Any Questions?
Did this article give you what you were looking for? Have any unique use cases you’d like to share? We’d love to hear from you in the comments sections below.


How can we remove cancel task option in mobile app.
Hi Niharika.
You cannot remove the Cancel Task option as it is not customizable. However, the option would be restricted if you have restricted Task Edit option via Permission Template.