1. Feature Overview
A trigger defines when leads enter your automation.
Note:
- Once an automation is triggered 50 times for a lead within a single day, it will automatically terminate. This is done to prevent any potential looping.
- For information on data posted by each trigger, see Automation Triggers – Data Posted.
- The User Trigger lets you decide when users, not leads, enter your automation (see Triggers in User Automation).
- To enable opportunities on your account, please write to support@leadsquared.com.
- To perform bulk updates through automation, contact your billing team or reach out to support@leadsquared.com.
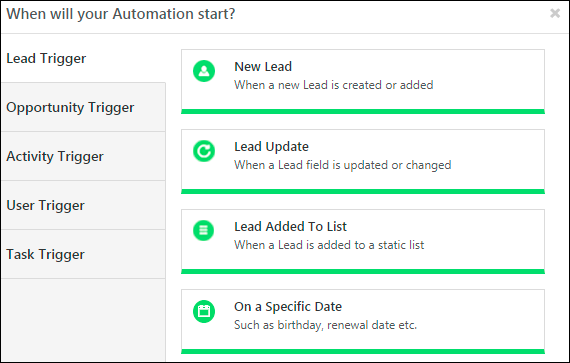
You can choose any of the following triggers –
| Category | Trigger | Example Use Case |
| Lead Trigger | New Lead | Triggers the automation when a new lead is created in your LeadSquared account.
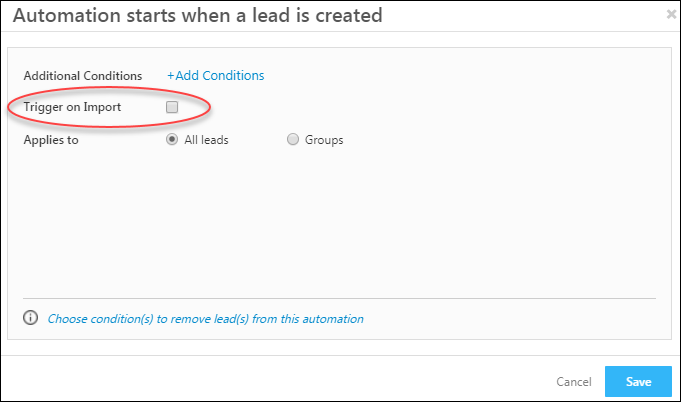
Note: You can also trigger the automation on lead import. There’s a Trigger on Import checkbox available in the lead create dialog box.
|
| Lead Update | Triggers an automation when one or more lead fields are updated.
Note: A Lead Update trigger that updates the Owner will not trigger when the lead owner is changed through the distributed lead card. This is done to improve performance and avoid looping.
|
|
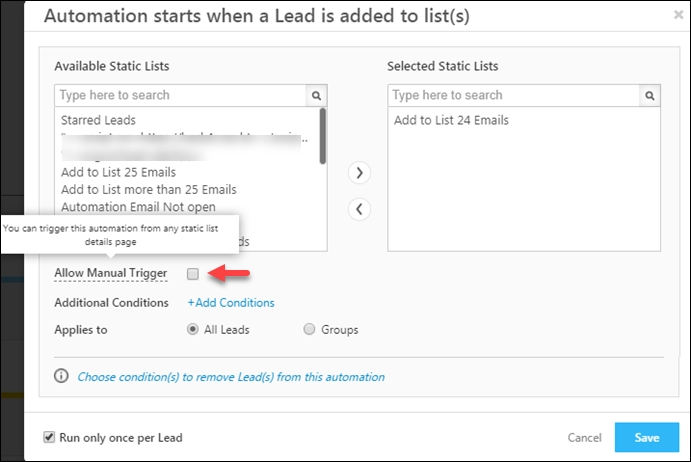
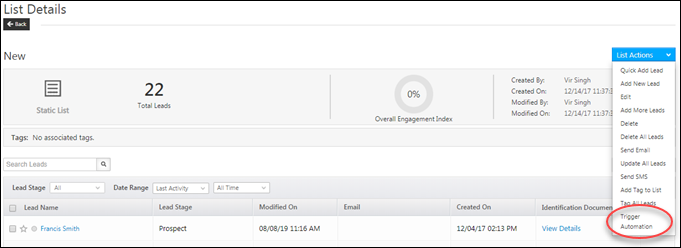
| Lead Added to List | Triggers when a lead is added to a list.
Note:
|
|
| On a Specific Date | Triggers on a chosen date.
|
|
| Opportunity Trigger | New Opportunity | Triggers an automation when a new opportunity is created or added to an existing lead in your account.
|
| Opportunity Update | Triggers an automation when one or more opportunity fields are updated or changed.
|
|
| On a Specific Date | Triggers on a chosen date.
|
|
| Activity Trigger | New Activity on Lead | Triggers when a lead performs an activity or set of activities.
|
| Activity Update on Lead | Triggers when an activity posted on a lead gets updated. This trigger only includes custom and sales activities.
|
|
| New Activity on Opportunity | Triggers when a lead under an opportunity performs an activity or set of activities.
|
|
| Activity Update on Opportunity | Triggers when an activity posted on an opportunity gets updated. This trigger only includes custom activities.
|
|
| New Activity on Activity | Triggers when an activity is posted on an existing activity.
|
|
| Task Trigger | Task Created on Lead | Triggers when a task is created on a lead.
|
| Task Updated on Lead | Triggers when a task is updated on a lead.
|
|
| Task Reminder for Lead | Triggers when a task reminder is created.
|
|
| Task Completed on Lead | Triggers on the completion of a task.
|
|
| Task Created on Opportunity | Triggers when a task is created on an opportunity.
|
|
| Task Updated on Opportunity | Triggers when a task is updated on an opportunity.
|
|
| Task Completed on Opportunity | Triggers on the completion of a task.
|
|
| Task Reminder for Opportunity | Triggers when a task reminder is created.
|
|
| At Regular Intervals | At Regular Intervals | Triggers at defined recurring intervals
|
2. Exit Conditions
After selecting an automation trigger, you can setup exit conditions. Leads will be removed from your automation when these exit conditions are met.
Note: The automation checks to see if the exit conditions are met before executing any action. If they are met, the next action will not be performed on that lead.
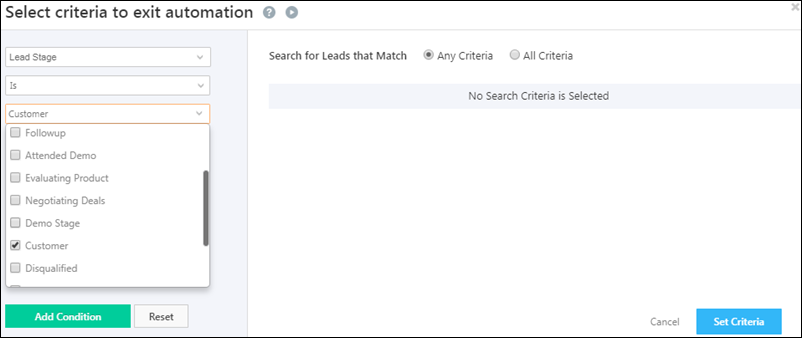
For example, let’s say you want to set up an automation that sends nurturing emails to leads to convert them to customers. You can set up an exit condition so that all leads who become customers (Lead Stage = Customer) are removed from the automation and stop receiving the nurturing emails.
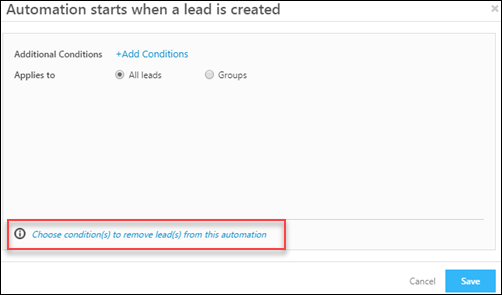
Click the Choose conditions(s) to remove lead(s) from this automation link highlighted below.
Next, select the conditions based on which you want leads to exit the automation.
3. Examples
Example 1: Activity Update on Lead
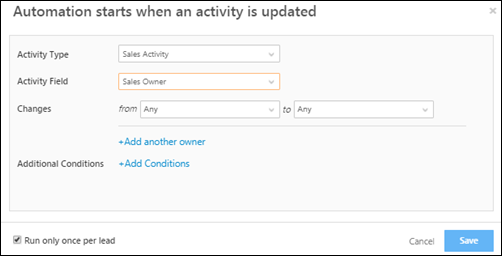
Here’s an example where the Activity Update on Lead trigger is selected.
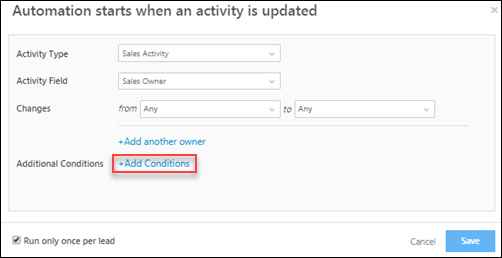
The Sales Activity is selected as the Activity Type and Sales Owner is selected as the Activity Field. The automation starts when the sales owner value changes from ‘Any’ to ‘Any’.
For all automation triggers, you can also set up additional conditions to make your automation more versatile. Using this functionality, you can use multiple conditions to trigger your automation.
As an example, say you want to start your automation when a new lead is created but only if the new lead created is from Bengaluru. You can set this up by adding additional conditions to the automation trigger.
Example 2: On a Specific Date
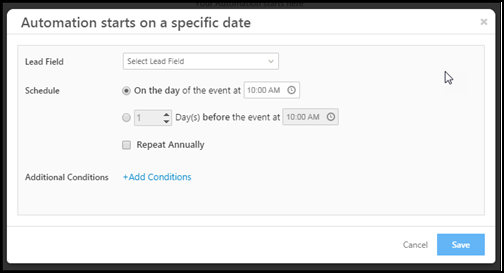
Select this trigger to start your automation on a specific date. The specific date can be the ‘created on’ date of your lead or the date of the first landing page submission. This could be used as a condition to send a welcome email when a lead is created/submits on a landing page.
Note: All timings related to date based triggers automatically reflect the user’s time zone and not Coordinated Universal Time (UTC).
Select the lead field as –
- Created On – This is the date on which a lead is created in your LeadSquared account.
- First Landing Page Submission Date – This is the date on which the first landing page submission of a lead occurs.
- Lead Conversion Date – This is the date on which a visitor is converted into a lead in your LeadSquared account.

You can schedule the automation to start when the date condition is satisfied. You can also specify the time you want to trigger the automation at. You can also use Repeat Annually to trigger the automation on the same day every year.

Note: Additional Conditions can also be provided to check the leads entering into the automation.
![]()
Example 3: Lead Update
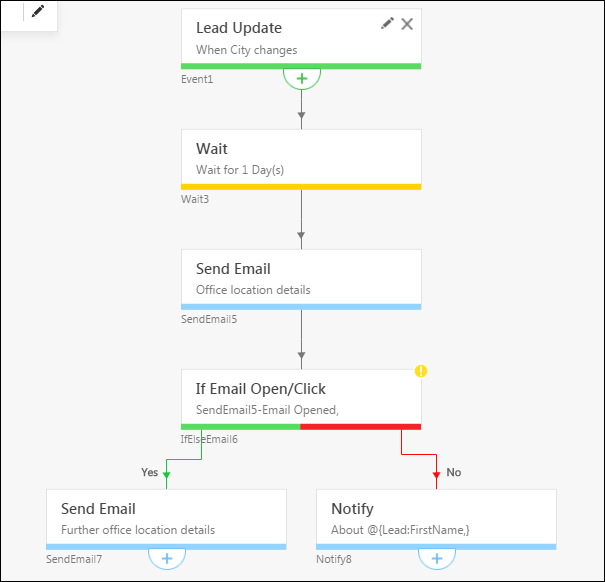
As an example, Lead Update is the starting point of this automation. When the Lead City changes, after a Wait condition of one day, an email is sent to the lead with the details of the location. If the Lead opens the Email, another \email is sent to the Lead with more details. If the email is not opened after one day, a notification is sent to the lead owner to contact the Lead.
Example 4: New Activity on Lead
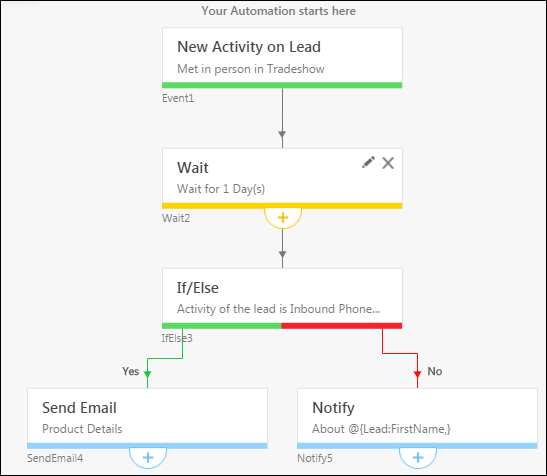
New Activity on Lead is the starting point of this automation. When a lead satisfies the Met in Tradeshow activity, a Wait condition of one day is provided. After one day, if the activity of the lead is Inbound Phone Call Activity, an email is sent to the lead with the product details. If not, the lead owner is notified with the lead name and lead phone number to follow-up.
Example 5: Lead Added to List
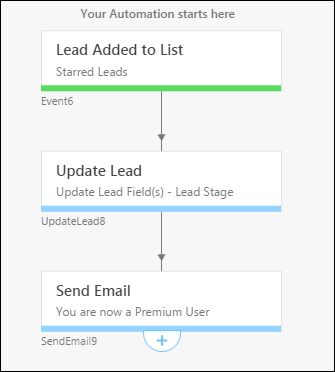
When a Lead is added to a Starred Lead list, the Lead Stage is changed to Premium User. Once the Lead Stage is updated, an email is sent to the lead with the benefits of being a premium user of your product.
Example 6: At Regular Intervals
This automation is set up to post the activity data of certain leads to another application.
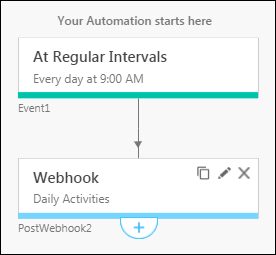
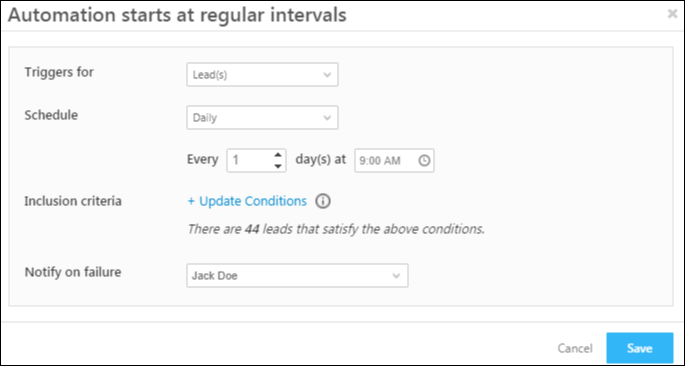
It triggers for leads at 9 a.m. every day and pushes any activity that has been posted on leads the previous day.
Any Questions?
Did you find this article helpful? Please let us know any feedback you may have in the comments section below. We’d love to hear from you and help you out!


Is there anyway to create an automation where if a lead field updates from a to b then a field in a new column gets updated?
Hey, Mehrezad, if I understood your question correctly, yes, it’s possible. For example, you can set up an automation using the Lead Update trigger. When the Lead Stage field changes from Prospect to Engaged, you can select Update Lead under Lead Actions, and then update the Owner to Meherzad. I hope this helps.