1. Feature Overview
The Tech Alpha SMS connector lets you send texts to leads directly from your LeadSquared account. In addition, you’ll be able to –
- Set up automated SMS campaigns with notifications and reminders.
- Eliminate the need to switch between multiple applications to manage your SMS activities.
- Send bulk SMS to multiple leads.
2. Prerequisites
- You must be an administrator user of your Leadsquared account.
- Your account plan must support SMS integration.
- Async APIs must be enabled on your LeadSquared account.
- You must have an active account with Tech Alpha.
- The SMS sender Id, as well as the SMS templates you use, must be DLT approved. To know more, refer to Mandatory DLT Registration for SMS Services in India.
3. How it Works
- To send SMS to your leads using this connector, you must set up the connector by providing your Tech Alpha account details (username, password, and DLT approved Sender ID) in LeadSquared.
- Once you set up the connector, create and configure SMS templates you’ll be using to message your leads. These templates must be DLT approved.
- After these templates are configured, you can send one-to-one SMS, as well as bulk SMS to your leads.
- Additionally, you can also create automations to send SMS to your leads.
4. Install the Connector
To install the Tech Alpha SMS Connector on your account –
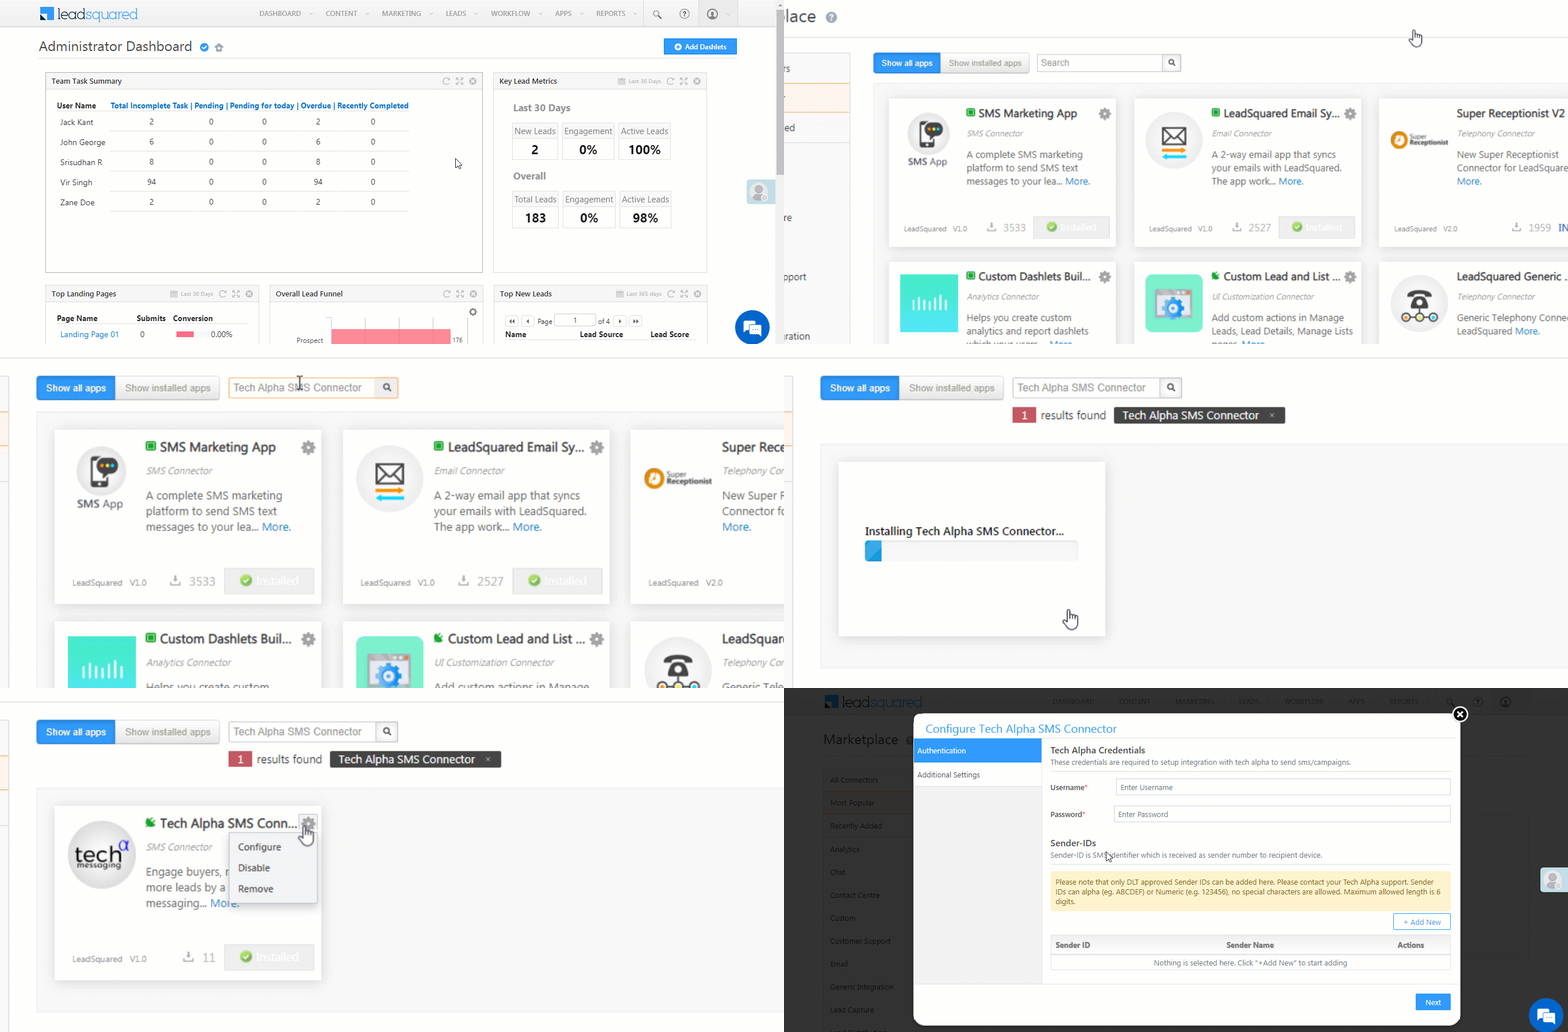
- From the main menu, navigate to Apps>Apps Marketplace.
- Search for Tech Alpha SMS Connector, and click Install.
- Alternatively, you can find the connector on the left panel, under SMS.
- Once the connector is installed, hover your cursor over
 , and click Configure.
5. Configure the Connector
5.1 Authentication
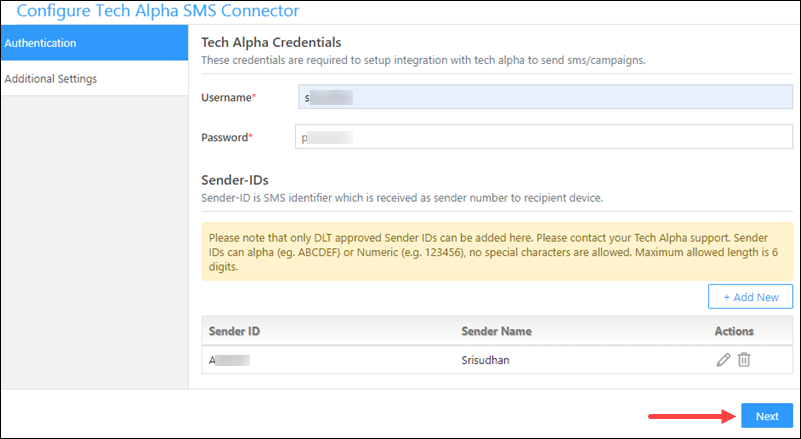
Once the connector is installed, connect and integrate your Tech Alpha account with LeadSquared.
- Enter the following Tech Alpha credentials –
- Username – Your Tech Alpha account username.
- Password – Your Tech Alpha account password.
- Then, add Sender-IDs. To do this, click the Add New button, and enter the –
- Sender ID – Your Tech Alpha sender Id. To get your sender Id, please reach out to your Tech Alpha account manager.
- Sender Name – The name of the SMS sender.
- Once you’re done, click
 . To add more Sender-IDs, click
  .
. - After adding the authentication details, click Next.
Note:
- The Sender-ID must be DLT approved.
- To edit an existing Id, click
 .
. - To delete an existing Id, click
 .
.
5.2 Additional Settings
Enter the following additional details –
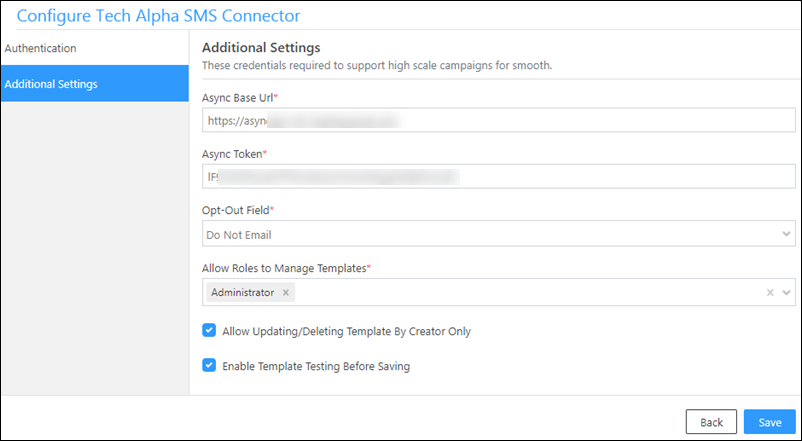
| Property | Description |
| Async Base URL | Enter your LeadSquared account’s Async API URL and API Key. To obtain both these values, navigate to My Profile>Settings>API and Webhooks>Async API.
The Async URL is listed against Your API host, and the API key is listed under API Key. |
| Async Token | |
| Opt-Out Field | From the list of boolean fields available in your account, select an opt-out field. Leads for which the value of the opt-out field is set to ‘True’ will not receive any SMS. |
| Allow Roles to Manage Templates | Select the user roles to whom you want to grant template access. These user roles will be able to create, edit and delete templates. By default, “Administrator” is selected. |
| Allow Updating/Deleting Template By Creator Only | Check the |
| Enable Template Testing Before Saving | Check the |
Once you’re done, click Save.
6. Configure SMS Templates
Once the app is installed, configure the SMS templates.
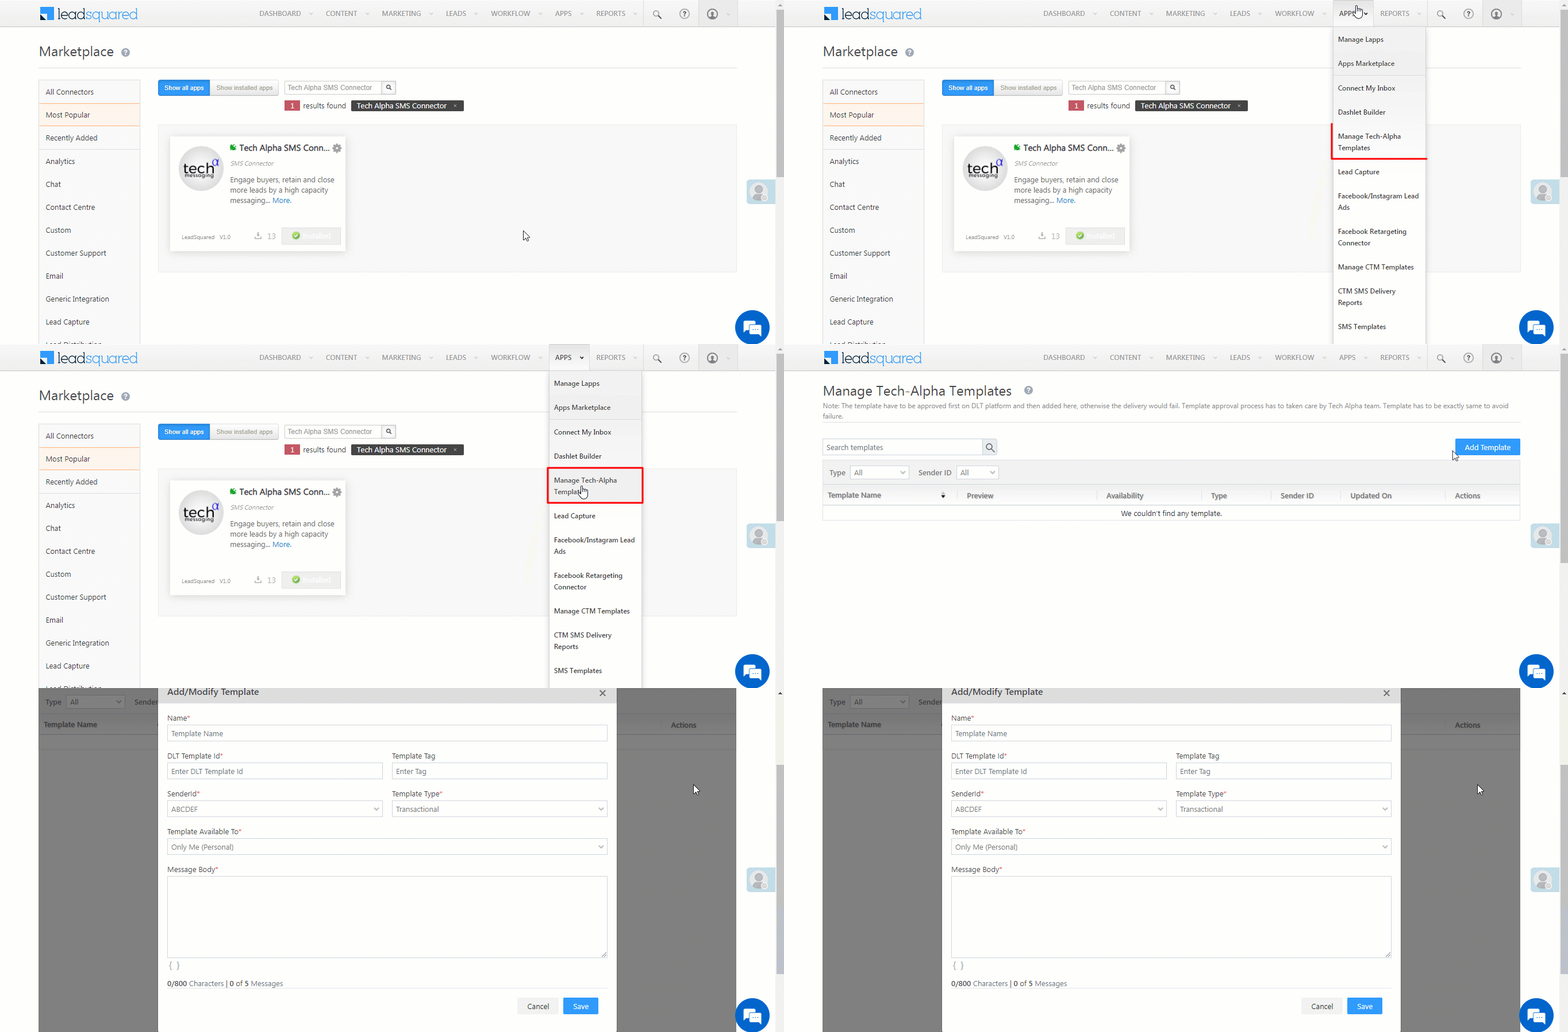
- Navigate to Apps>Manage Tech-Alpha Templates.
- Click Add Template.
- On the Add/Modify Template pop-up, enter the following details –
- Name – A name for the template.
- DLT Template Id – The DLT approved template Id. To get your template approved, and to obtain this Id, please reach out to your Tech Alpha account manager.
- Template Tag – A tag to identify your template. This field is optional.
- SenderId – The DLT approved Sender Id.
- Template Type – Choose if the template is Transactional (order confirmation, account creation confirmation, etc.) or Promotional (ongoing offers, product launches, etc.).
- Template Available To – Choose who you want the template to be available to – Only Me (Personal), Everyone, or Specific Roles.
- If you choose Specific Roles, from the Select Role dropdown, select the user roles for which you want to make the template available.
- Message Body – Enter the DLT approved Template content/message here. To add mail merge fields, click
 . If the approved template contains a mail merge field “{#var#}”, then the LeadSquared mail merge value can only replace “{#var#}”, without changing anything else in the template. For e.g., “Hi {#var#}, hope you’re doing well!” can only be replaced by, “Hi @{Lead:FirstName,}, hope you’re doing well!”.
- Once you’re done, click Save.
If Enable Template Testing Before Saving is enabled, then in the Test Template pop-up, enter the Test Recipient Number, and click Test & Save Template.

7. Send SMS
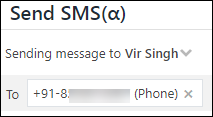
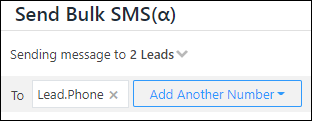
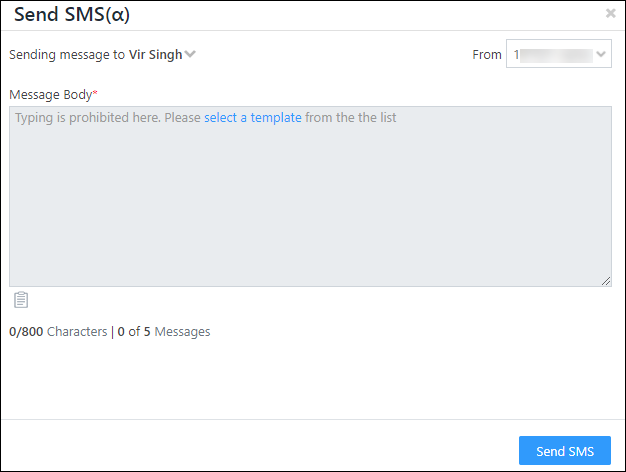
You can send one-to-one as well as bulk SMS to your leads. When you initiate the send text action, you’ll see the following pop-up –
| Field | Description |
| Sending Message to | You can send messages to multiple numbers saved under the lead.
Multiple leads will show up while sending Bulk SMS.
|
| From | You can select from the list of DLT approved Sender-IDs that was provided when configuring the connector.
|
| Campaign Name | This option appears while sending bulk SMS. Enter a campaign name to identify different SMS campaigns. |
| Message Body | Select the message you want to send, from the list of DLT approved templates. You cannot type your own message. |
| Templates |
The list of DLT approved templates available in your account. |
7.1 One to One SMS from Manage Leads Page
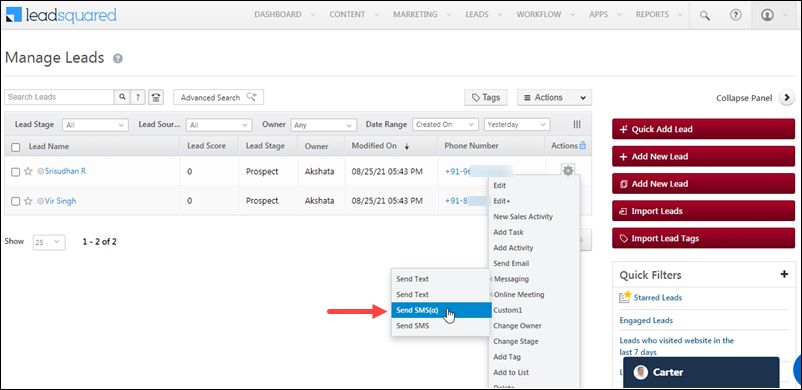
- Navigate to Leads>Manage Leads.
- Against an existing lead, under Actions, hover your cursor over
 .
. - Then, hover your cursor over Messaging, and click Send SMS(α).
- After entering the required details and selecting a template, click Send SMS.
7.2 One to One SMS from the Lead Details Page
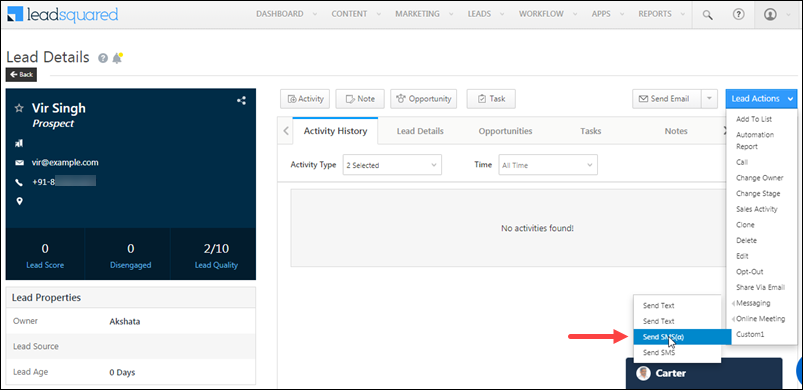
On the Lead Details page –
- Hover your cursor over the Lead Actions button.
- Then, hover your cursor over Messaging, and click Send SMS(α).
- After entering the required details and selecting a template, click Send SMS.
7.3 SMS via Automation
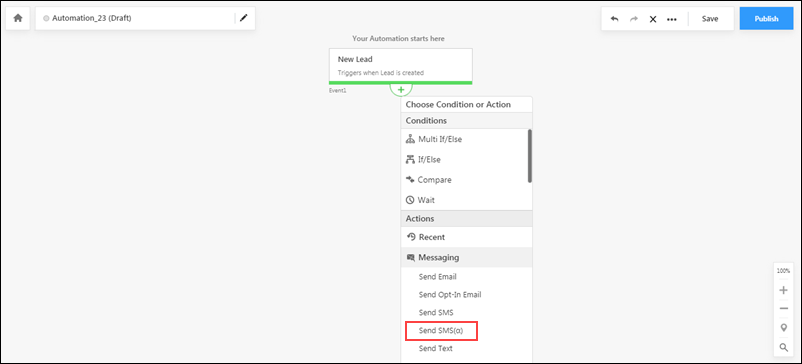
You can also send SMS to leads through automation.
- Navigate to Workflow>Automation.
- Create a new automation, or edit an existing one.
- After selecting the type of automation and the trigger, click the add
 icon, click Messaging, and then click Send SMS(α).
 - After entering the required details and selecting a template, click Send SMS.
For more information, see How to Send SMS through Automation.
7.4 Bulk SMS from Manage Leads Page
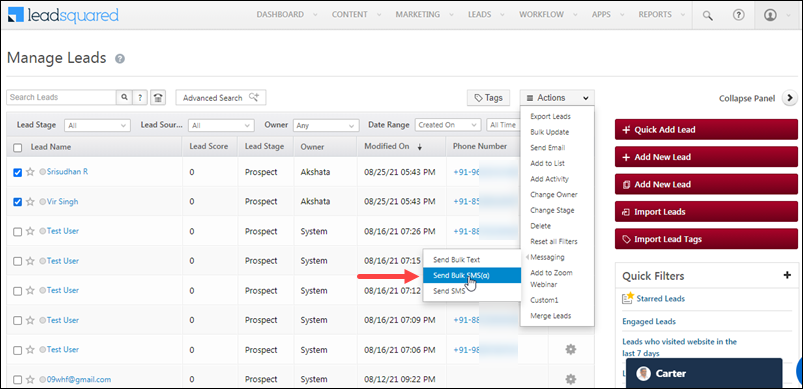
- Navigate to Leads>Manage Leads.
- Select the
 checkboxes alongside the leads you want to send the SMS to.
 - Hover your cursor over the Actions button, then hover it over Messaging, and click Send SMS(α).
7.5 Manage Lists
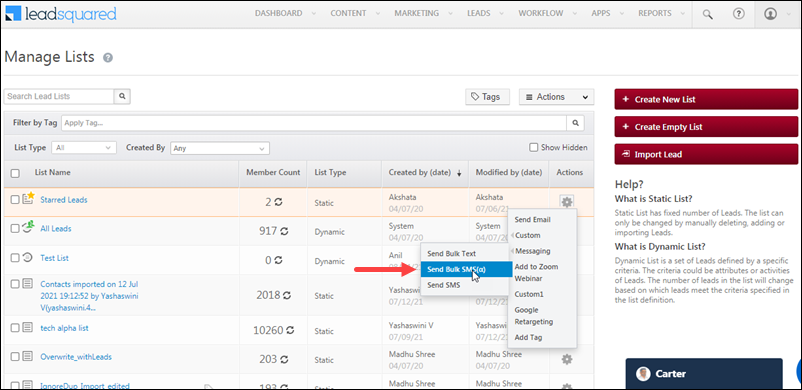
You can send bulk SMS to your lead lists from the Manage Lists page.
- Navigate to Leads>Manage Lists.
- Alongside the list you want to send the SMS to, hover your cursor over
 .
. - From the options available, hover your cursor over Messaging, and click Send SMS(α).
8. SMS Activities
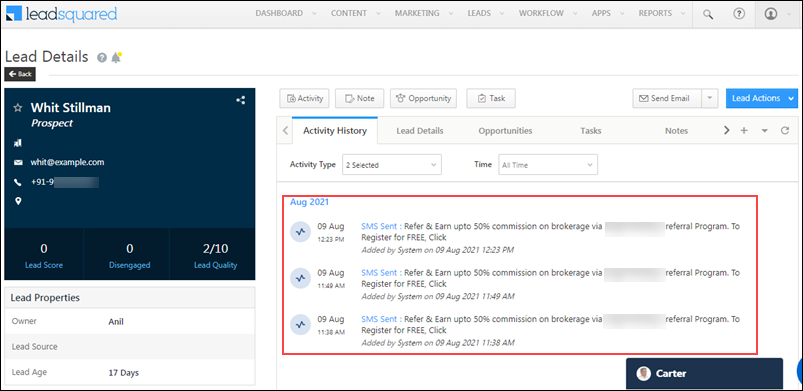
You can track the SMS sent, from the Lead Details and Manage Activities pages. We automatically post SMS Sent activities in real-time.
8.1 Lead Details
To view more details, click the SMS Sent link for each activity.
8.2 Manage Activities
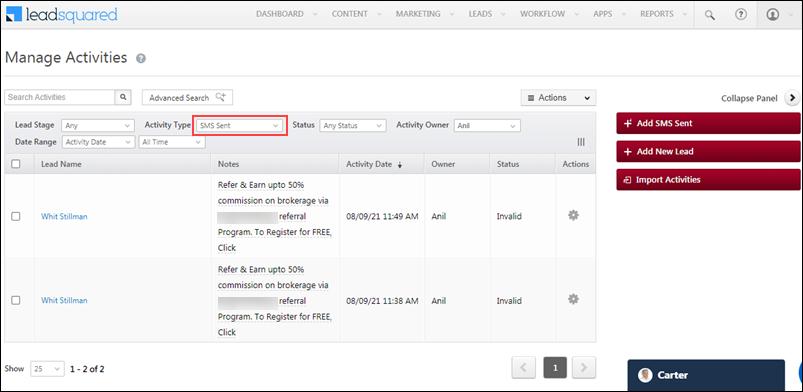
You can also view the list of leads with SMS activities. Be sure to select SMS Sent from the Activity Type drop.
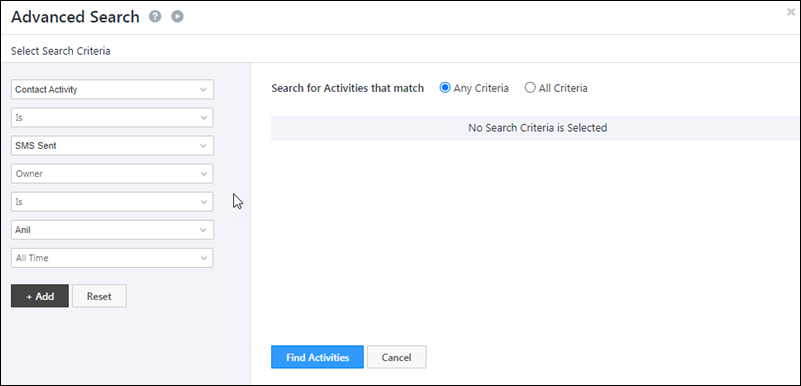
You can use the Advanced Search feature to filter SMS based on different fields, such as campaigns, date-time fields, etc.
Any Questions?
Did you find this article helpful? Please let us know any feedback you may have in the comments section below. We’d love to hear from you and help you out!
