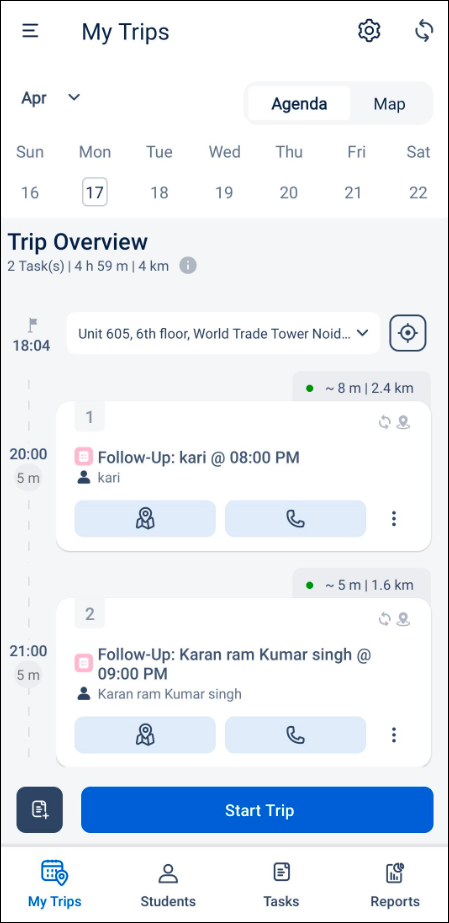
My Trips
My Trips is LeadSquared’s new day planning feature designed to boost users’ productivity by displaying the most efficient route and ensuring the completion of the maximum number of tasks per day. My Trips allows the end user to configure their Start Time, Start Location, End Time, and End Location, depending on which location-based tasks (Appointments & To-Dos) are intelligently planned. On the mobile app, the My Trips option will be displayed on the bottom bar or the side menu based on the Admin configurations made.
Casa – Mobile Home Builder
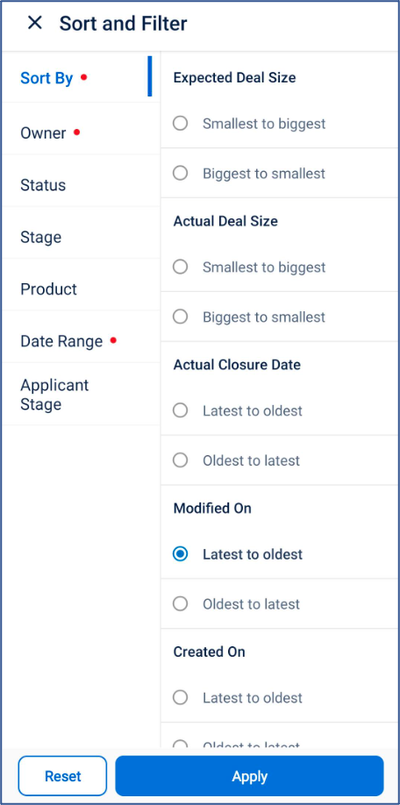
- You can now sort and filter results on the opportunity widget.
- ‘Scroll’ display is now supported on the Launcher widget.
Call Tracking for Opportunities
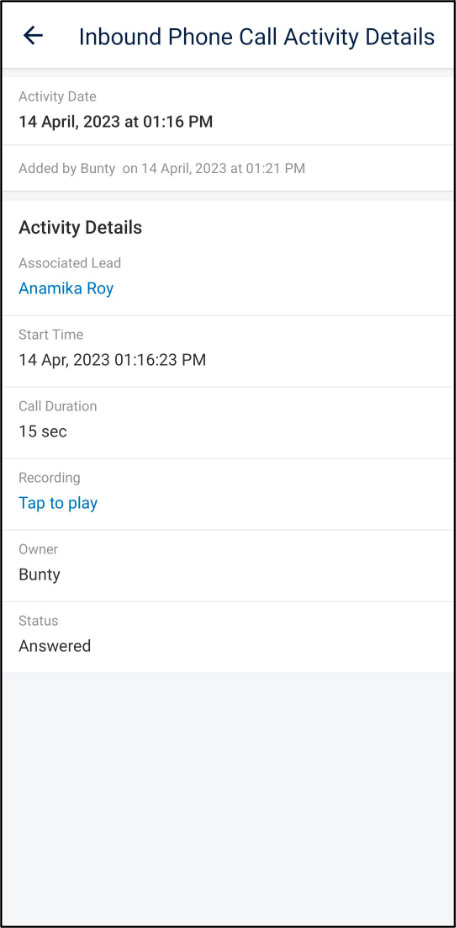
Previously, call tracking was only supported for leads. Now, users can track inbound and outbound calls as activities on opportunities. The call activity can be accessed on the Activity History section of the Opportunity Details page. Outbound call activities are recorded in the Opportunity Details page if the calls are made from –
- Opportunity list.
- Opportunity details.
- Opportunity smart view list.
- Opportunity smart view.
When a user receives an inbound call from the lead, they can post this call on the required opportunity by tapping on the ‘Add details’ button in the lead identification pop-up. If the user doesn’t enter the opportunity details on the lead identification pop-up, they can access the call activities on the side menu under Opportunities: Associate calls.
To enable this feature, navigate to Mobile App Additional Settings and enable Opportunity Call Tracking. For more details on call tracking, refer to LeadSquared Call and SMS Tracker App.
Task Counter
The lead or opportunity task tabs now include a task counter.
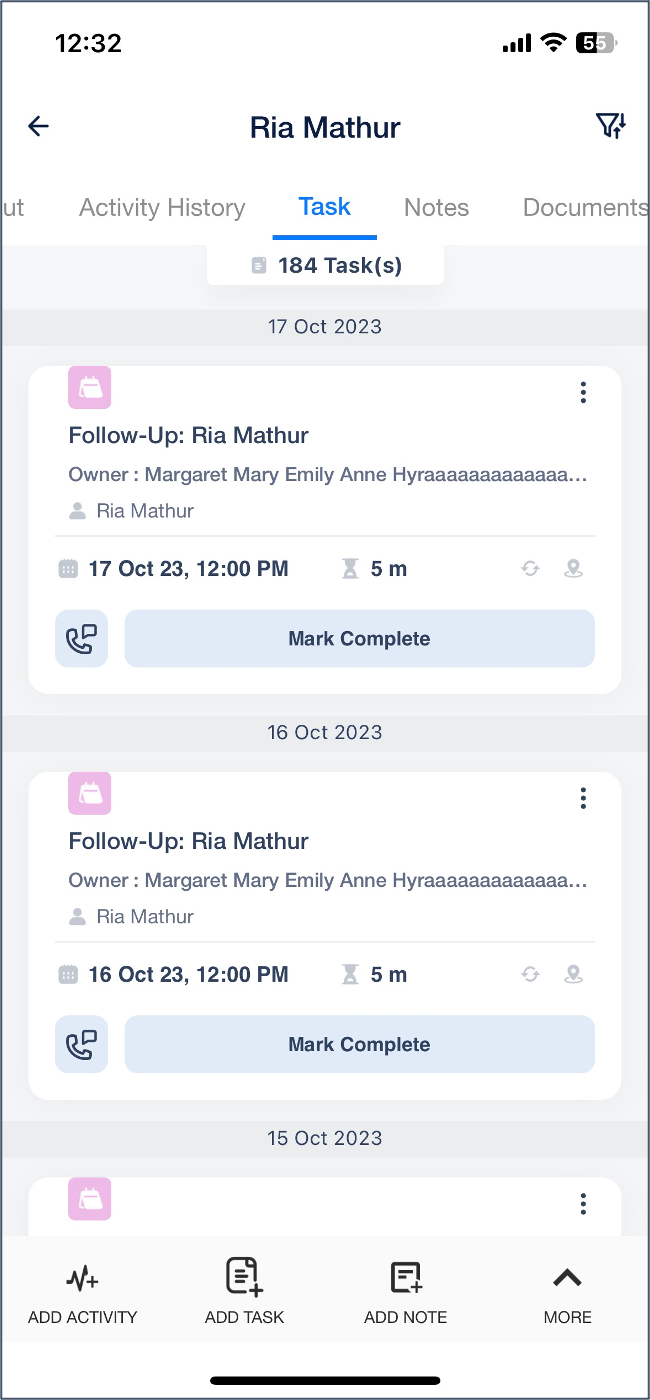
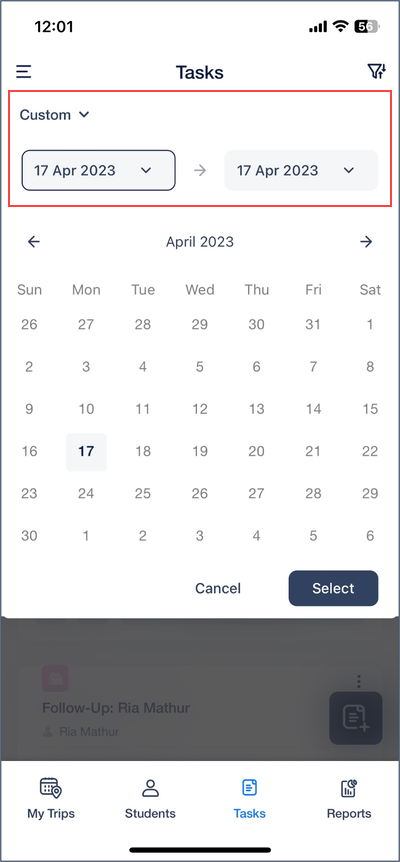
Calendar View and Custom Date Range on Task Grids
The task grid on the mobile app is now displayed in a calendar view. Now, you can also set a custom date range to schedule or view tasks within a specific time period (e.g., you can set the winter holiday season as a date range while selling holiday-themed goods).
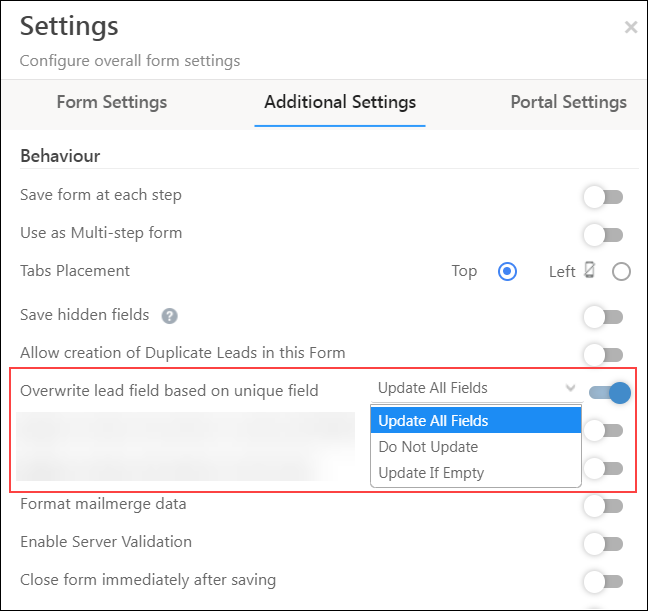
Overwrite Lead Fields Based on Unique Fields in Forms
Admins can configure the behavior for updating lead fields on a dynamic form when a user enters a duplicate value in a unique field. The following options are available to the admin –
- Do not update – Values entered by the user won’t be saved when the form is submitted.
- Update all fields – Users can update the existing values or input new values into empty fields.
- Update if empty – Users can’t update existing values but can input new values into empty fields.
To know more, refer to Overwrite Lead Fields Through Dynamic Forms.
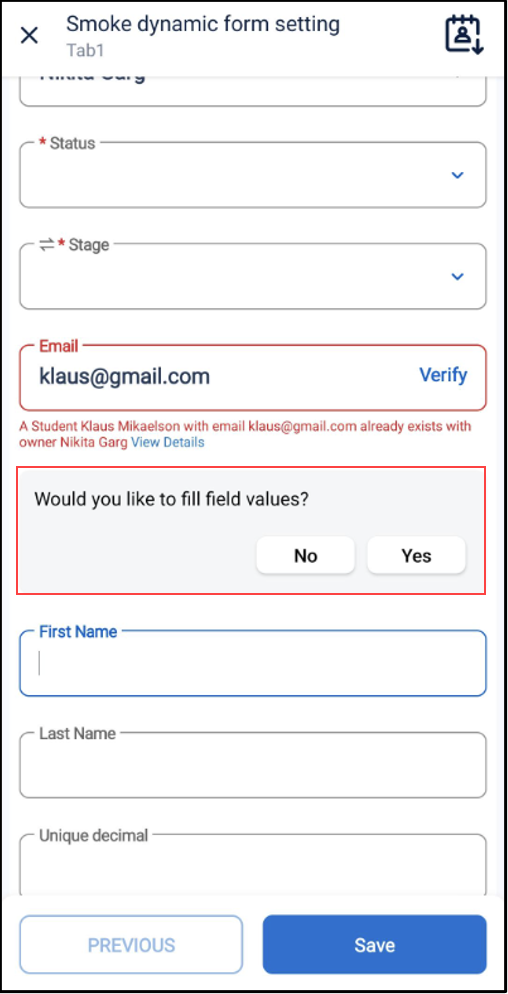
If a duplicate lead is added, an error message is shown along with an option to load the existing details of the lead. If you tap on ‘Yes’, the form reloads and the values in the existing lead fields are shown. If you tap on ‘No’, existing values in the lead fields do not get populated, a duplicate error is displayed and the user will not be allowed to submit the form. Sales users will not get the option to reload the existing lead’s data if they don’t own the lead.
Create Opportunities and Update Leads Without Lead Access
Previously, sales users couldn’t update leads or create opportunities on leads if they didn’t have access to that lead. On the Advanced Configurations page, the Allow Users without lead access to create opportunities setting can be configured to –
- Enable Sales Users to create opportunities on leads they don’t have access to provided that the correct lead identifier is passed. This configuration allows the user to create opportunities on the lead, but not update any lead fields in the dynamic form.
- Enable Sales Users to update or overwrite lead fields provided that the correct lead identifier is passed. When this configuration is enabled, the user will be allowed to add opportunities on the lead and edit lead fields based on the ‘Overwrite lead fields based on unique field’ setting.
If you enable the Allow Non-Lead Owners to create Opportunities setting at form level, the Overwrite lead fields based on unique field setting will be enabled by default.
To know more, refer to Non-lead Owners Can Create Opportunities Through Dynamic Forms.

Offline Data Syncing
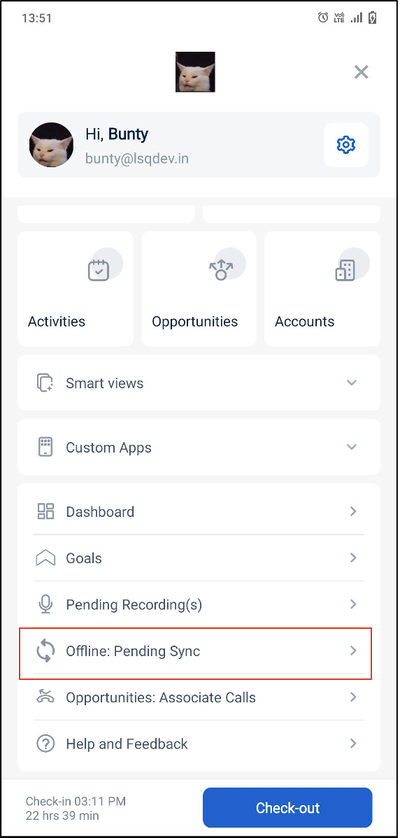
Users can now view offline data that hasn’t been synced to the server under the Offline: Pending sync option in side menu. You can sync the data by tapping the Sync Offline Data button or auto-sync your data by connecting to the internet. The existing sync option on the side menu also syncs offline data.
Reset Password Policy and Force Reset
Admins can set a password validity period for all users while they create the password policy (including minimum length, character requirements, and more). Once the validity period ends, users will have to create new, stronger passwords. Admins can also force users to reset their passwords to ensure that passwords are regularly updated and strengthened. These configurations can be made on the Login Settings page.
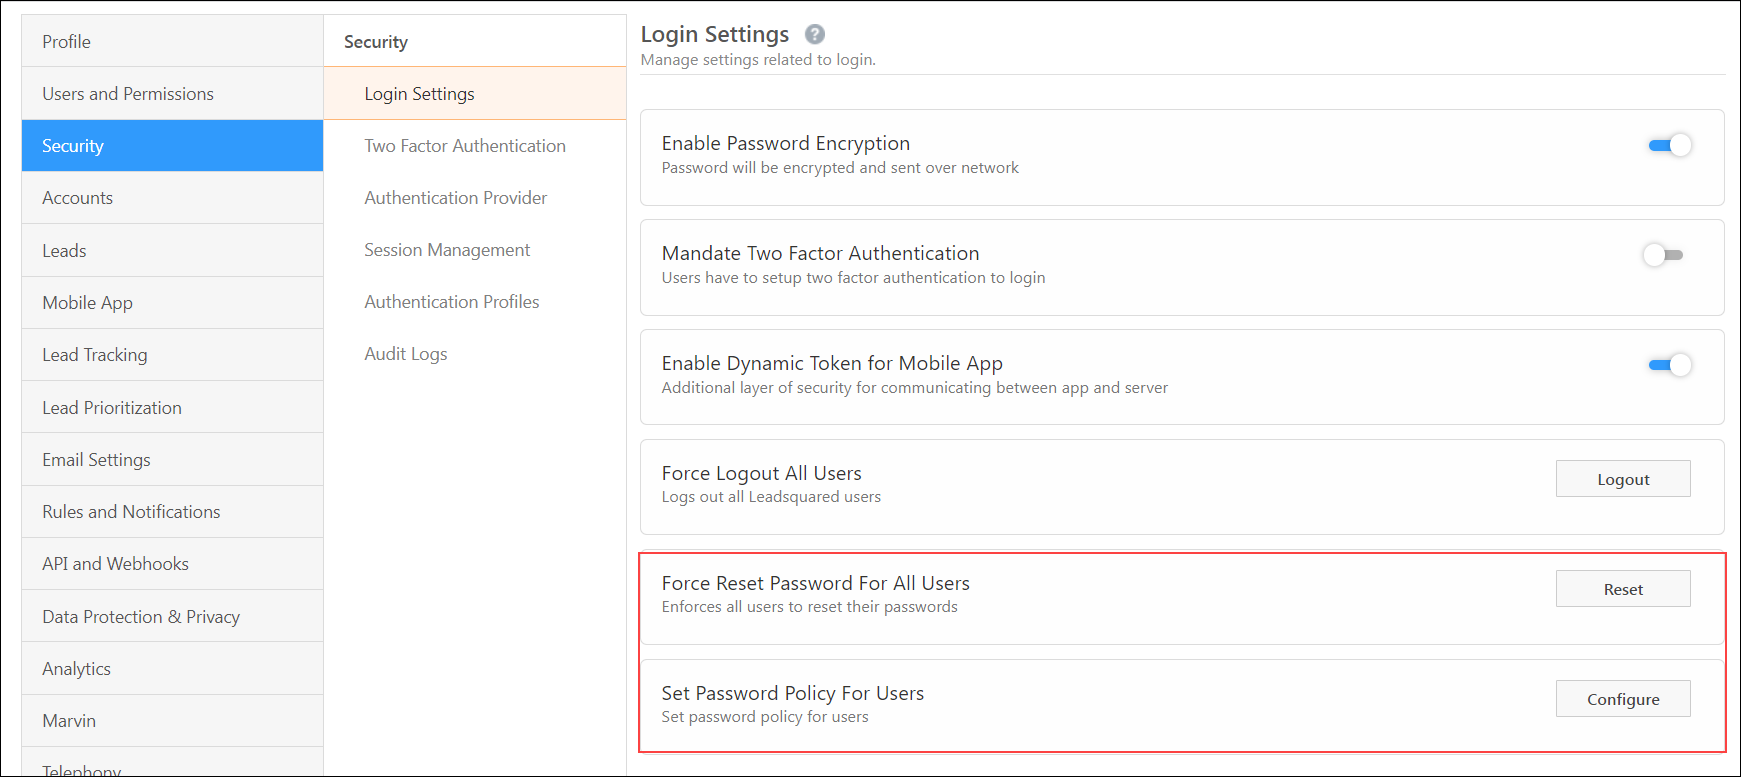
You can force reset password for a specific group of users on the Authentication Profiles page.

To know more, refer to
Smart Views Default Work Area
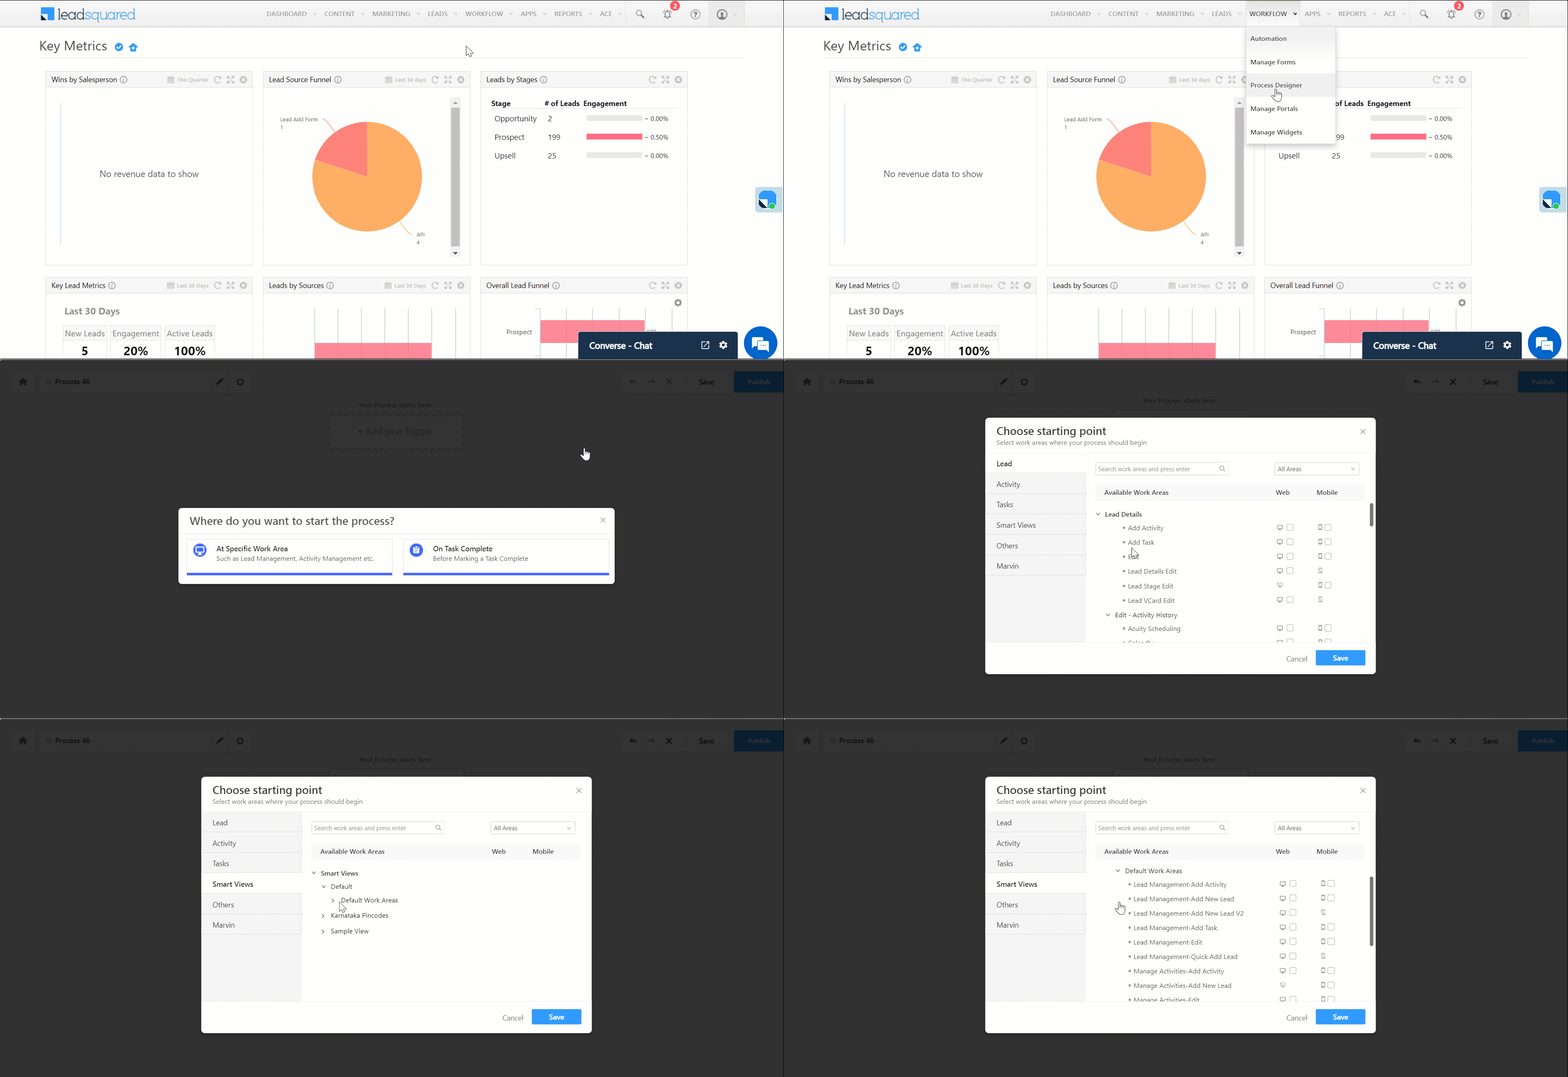
Dynamic forms are now supported in the default work areas in Smart Views. To view the available work areas, on the web app –
- Navigate to Workflow>Process Designer and click Create Process.
- On the pop-up window, select At Specific Work Area.
- On the Choose Starting Point pop-up window, click Smart Views.
- Click the Default Work Areas dropdown.
UI Changes
- You can rename the Save button to display your organisation’s terminology. For example, you can rename the button as “Submit Loan Details”. Previously, the renamed button was only displayed on the web application. Now, it is reflected on the mobile app as well.
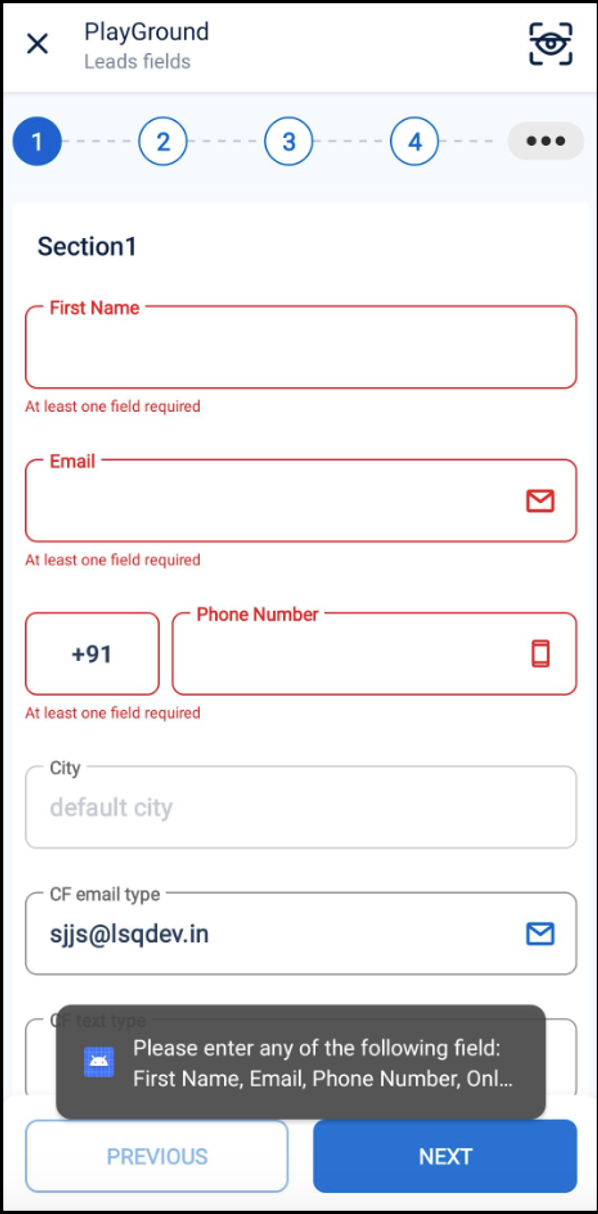
- Previously, if the user hasn’t filled all the identifier details in the form, they’ll receive a notification to fill the relevant fields. Now, an error message is displayed and all the fields that need to be filled are highlighted in the UI.
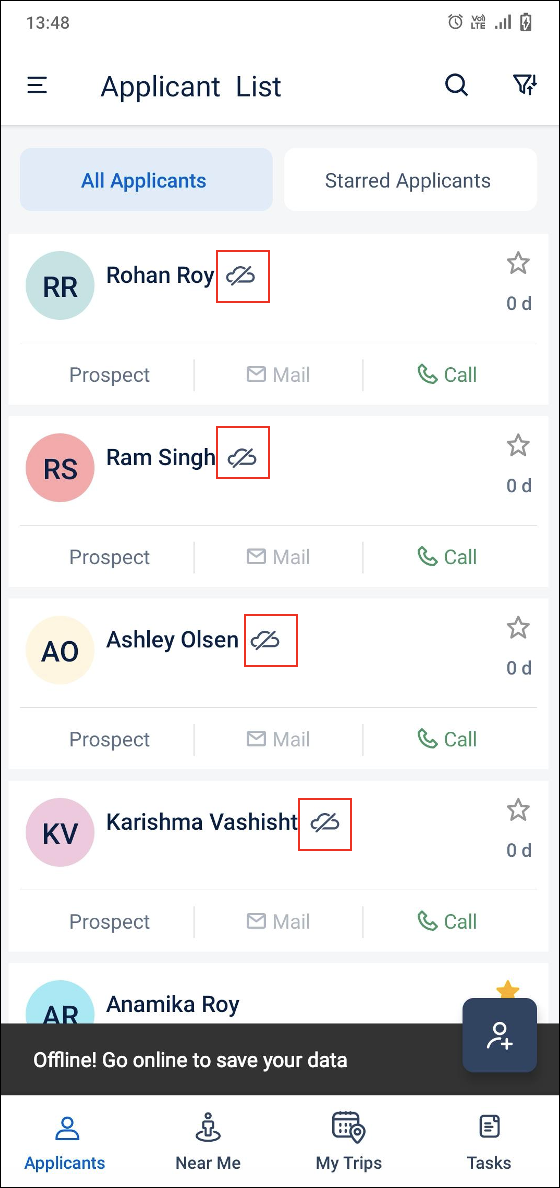
- The offline icon is now displayed on the Lead and Task cards in offline mode.
