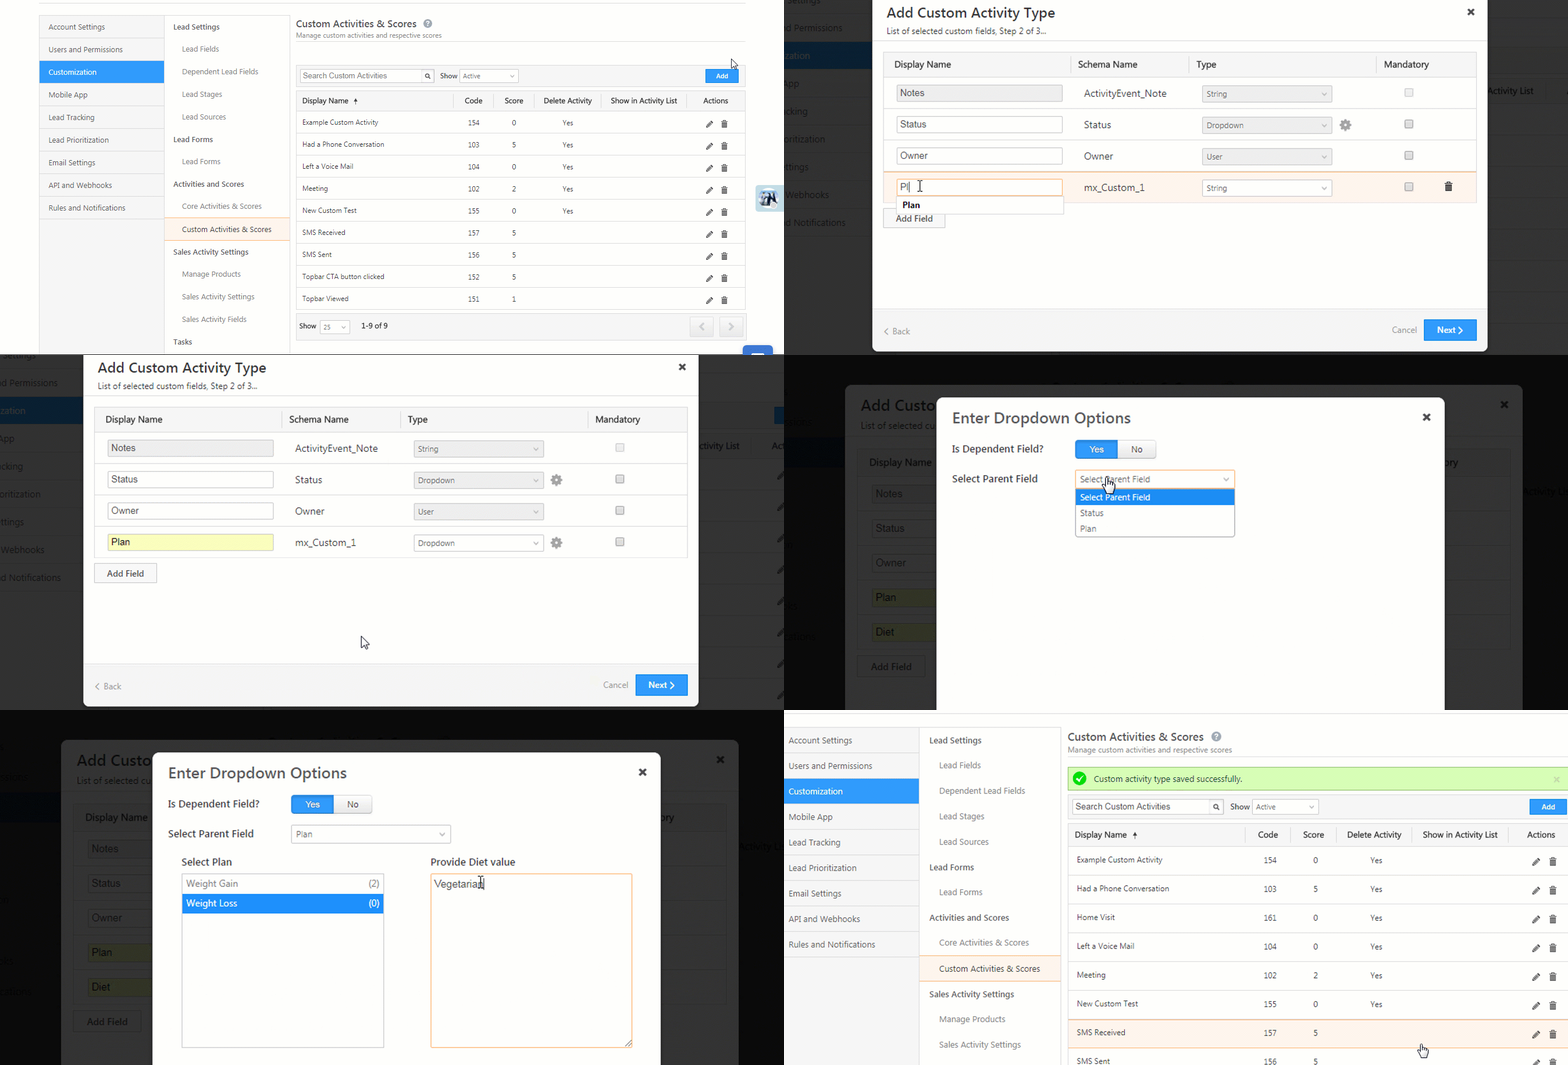
Previously, you could only add dependent fields to leads but now you can add them to custom activities as well. A simple example of dependent fields is Country>State>City.
If you’re new to dependent fields, see Dependent Lead Fields.
This article shows you how to add dependent fields to custom activities. Let’s take an example from the health and fitness industry –
Example Use Case
You run a fitness company where your sales team visits your lead’s houses to pitch your fitness services. You have 2 plans, weight gain and weight loss. Both plans have vegetarian and non-vegetarian diet options. We’re now going to –
- Create a custom activity called ‘Home Visit’.
- Add a field called ‘Plan’ with 2 options ‘Weight Gain’ and ‘Weight Loss’.
- Create a ‘Diet’ field dependent on the ‘Plan’ field. Associate both the ‘Weight Gain’ and ‘Weight Loss’ plans with a ‘Vegetarian’ and a ‘Non-Vegetarian option.
Adding Dependent Fields
- Navigate to My Account>Settings>Leads>Custom Activities & Scores and click the Add button.
- On the Add Custom Activity Type pop-up, enter a name (Home Visit) and description (optional) and click Next.
- Now click the Add Field button. Name the field (Plan) and set the type as Dropdown.
- Click the wheel icon alongside the type field.
- Enter the drop-down options (Weight Gain and Weight Loss)
- Now click the Add Field button again. Name the field (Diet), set the type as Dropdown
- Click the wheel icon alongside the type field.
- Alongside the Is Dependent Field option, click Yes.
- Select the parent field (Plan).
- Enter the dependent options for each plan (Vegetarian and Non-Vegetarian for both plans)
- Click Next. You’ll be directed to the final step of custom activity creation where you can drag and drop to position the fields the way you want them to appear on the activity form.
- Click Save.


