


Get Started
Sales Suite
Field Ops
Marketing
Service CRM
Integrations & Apps
FloStack
Lead Automation Actions – Send to Sub-Automation
1. Feature Overview
This article explores the ‘Send to Sub-Automation’ action. Use it to –
- Keep your main automation brief and simple by sending additional steps to a sub-automation.
- Re-use a standard sequence of steps across different automations.
- Build a large network of automations without running out of automation cards/nodes (Only 50 nodes are allowed in a single automation).
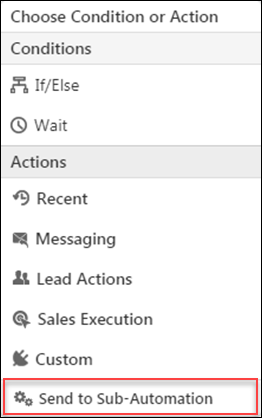
It is available in the Marketing>Automation section as a new action in the automation condition and action card.
Example Use Case
Let’s take a simple example –
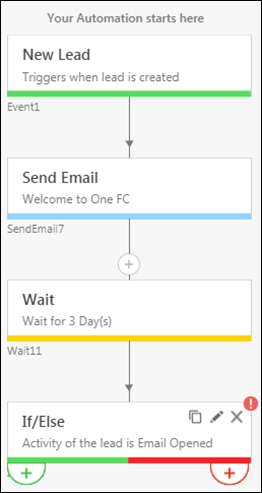
You’re sending out an email to all new leads.
You want to follow one long course of action (Flow A) for leads that open your email and another (Flow B) for those that don’t.
Before you branch out into Flow A or B, your automation may look something like the screenshot on your left.
The green + icon under the If/Else automation card will branch out into Flow A, your positive flow for the leads who opened your email.
The red + icon will branch out into Flow B, the negative flow for leads who didn’t open the email.
The sub-automation feature now lets you send both flows (A and B) to separate sub-automations and keep your parent automation clean. What’s more, you can re-use Flow A and B across any new automations you create.
2. Using Sub-Automations
To access the sub-automation option –
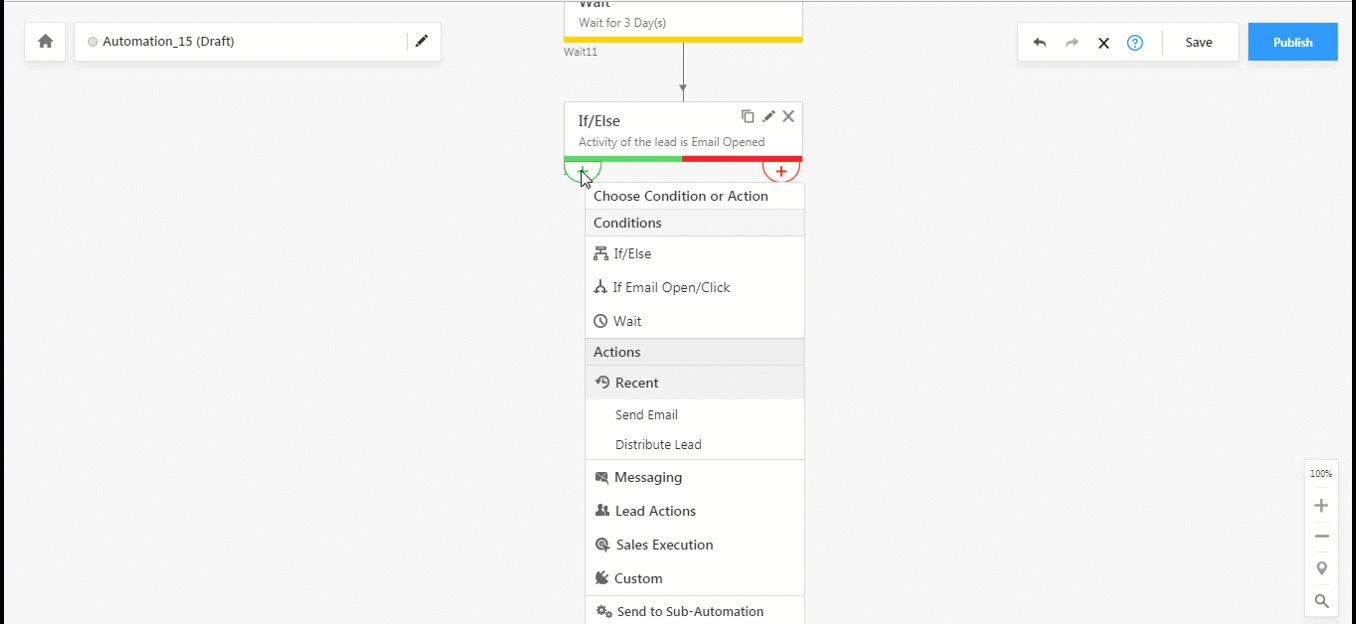
- Click the + icon under an automation card. (the green + icon or the red + icon in our example).
- Under Actions, click Send to Sub-Automation.
- The Send to Sub-Automation pop-up will appear. Any sub-automation you save will be displayed here. For now, click the Create a New Sub-Automation link.
- A new tab will open. Click the icon (+) under the Sub-Automation node to create a sub-automation. From this point in, the process for creating the sub-automation is exactly the same as creating the main automation.
If you’re unfamiliar with creating automations, see How to Create an Automation. - Use the pencil icon in the top left corner to change the name and description of the sub-automation (Flows A and B in our example).
- Once you’ve laid out the steps in your sub-automation Save it if you’re going to edit it later. If you want to use it right away then Publish it. Once published, you’ll be directed back to your main automation.
Points to Remember
- Only published sub-automations will show up in the Send to Sub-Automation pop-up. You can send your main automation to any sub-automation you published previously.
- You can create sub-automations to a maximum of three levels (Main Automation>Sub 1>Sub 2>Sub 3).
- You can create up to 500 sub-automations.