


Get Started
Sales Suite
Field Ops
Marketing
Service CRM
Integrations & Apps
FloStack
Creating Landing Page from external HTML, CSS, Scripts and Images
The External Landing Page feature allows you to create and host landing pages in LeadSquared if you have your own HTML of the landing page, or have purchased a template from marketplaces such as ThemeForest (www.themeforest.net).
Please note that this feature is targeted at HTML developers. You need to have basic HTML/JavaScript development skills to be able to use this feature.
After you click on “Create Landing Page”, select the third option “Use your own Template/HTML” option and click “Next”.
That will take you to Step 2/Build Landing Page. There are two steps to setting up the landing page design/content:
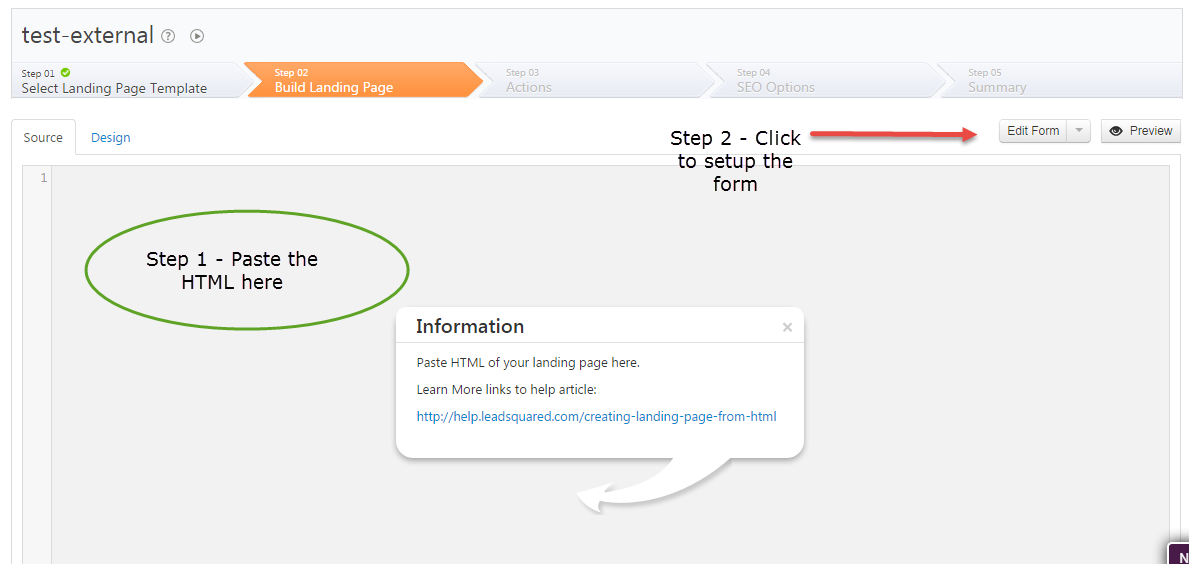
Step 1 – Paste your HTML. Copy the entire HTML of your landing page, which you have built, or purchased from a third party.
The key thing here is to ensure that the path of your images, JavaScript (js) and CSS files is correct. You need to make sure they point to the URL where they are hosted. A good place to host them would be your website. You can also upload and host them in LeadSquared at Content-> Images & Documents.
An illustration of how the URLs of your images/js/css files should be changed:
Suppose your website is http://www.mydomain.com . Assuming that your CSS files are stored in /css location under your website home, JavaScript files are stored in /js location and images are stored in /img location respectively:
If your JavaScript includes look like
<script type=“text/javascript” src=“js/myjsfile.js”></script>
In the HTML you paste in LeadSquared editor, it should change to following if you host it on your website:
<script type=“text/javascript” scr=“http://www.mydomain.com/js/myjsfile.js“></script>
Or similar to following if you host in LeadSquared Content -> Image & Documents :
<script type=“text/javascript” scr=“http://leadsquaredsns.wowpages.co.s3.amazonaws.com/content/documentss/myjsfile.js“></script>
Similarly you would have to change the URLs of your CSS (stylesheet) includes and all the images.
Once your HTML is all set, you need to setup the form.
Step 2 – Setup the Form.
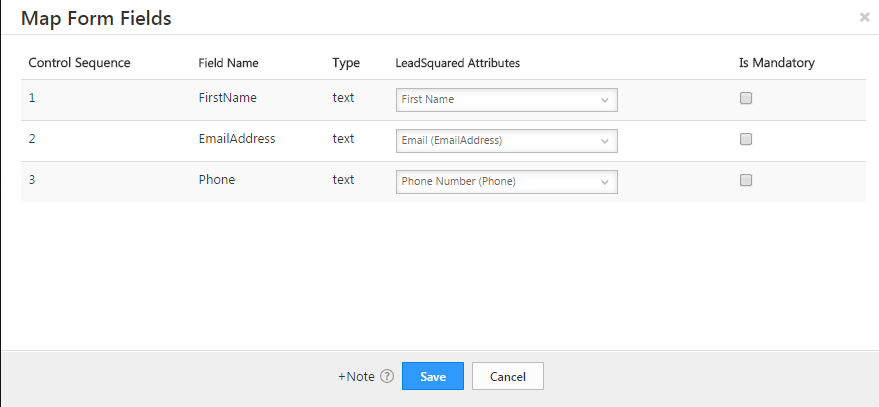
We have made it easy to modify the form in your landing page to make sure it can capture leads in LeadSquared. If there is a form in your HTML, the form editor will be able to pick all the input elements and try to match them with corresponding fields in LeadSquared. The idea here is that each field in your HTML form should correspond to a lead field in LeadSquared.
You can mark fields as mandatory if needed. Important Note – If your current HTML page has any JavaScript code written on form submission, you must remove it, else form won’t get submitted.
This form mapping makes sure that:
1. The fields are mapped to LeadSquared lead fields, so all data is captured.
2. We add necessary scripts required to make sure this page behaves as a landing page and the leads/visitors are tracked for analytics.
Once you setup the form, you can go to Step 3 and setup your actions.