Opportunity Level Check-in/Check-out
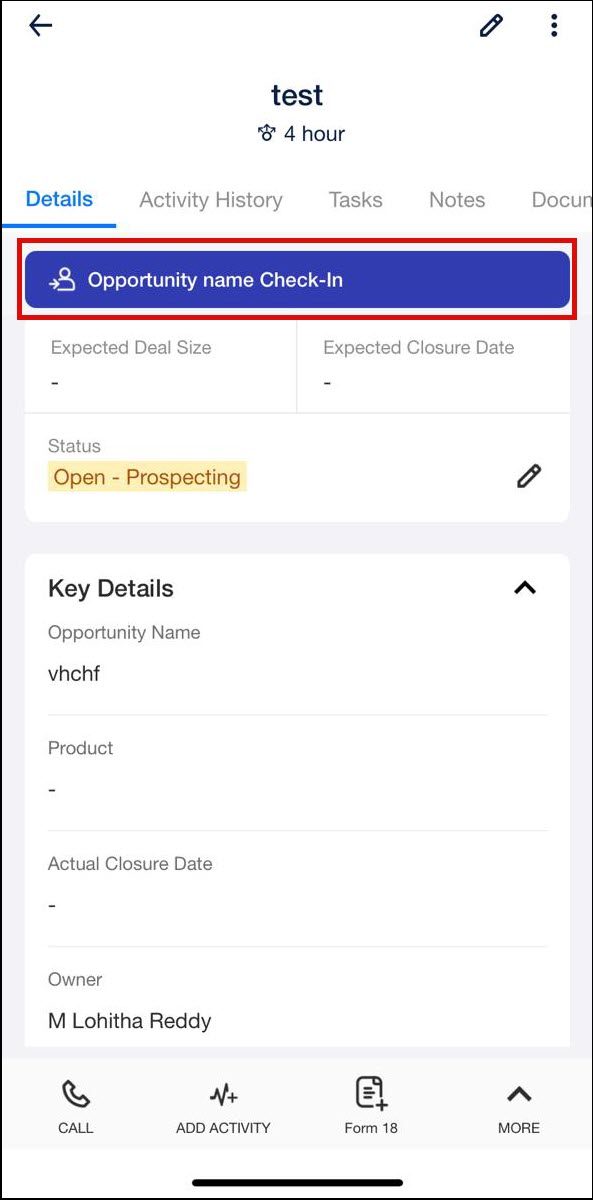
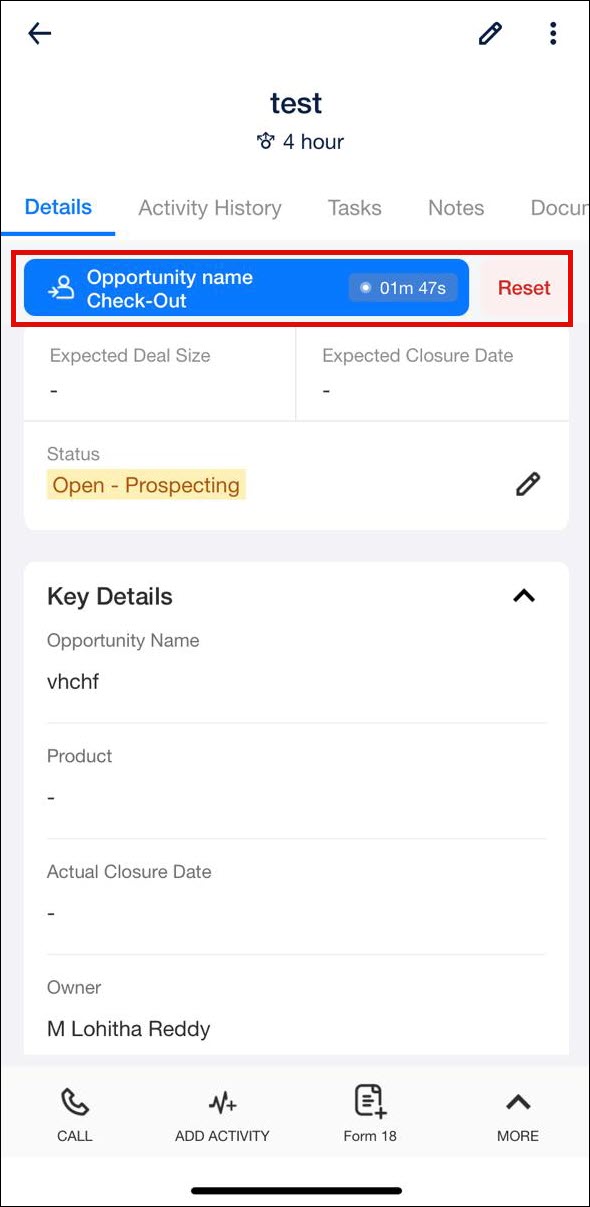
Earlier, sales users had to submit multiple dummy forms to record the time spent with a lead. With the new opportunity level check-in/check-out, the users can directly check in and out directly at the opportunity level. This feature simplifies the process of measuring the time a user spends with a lead. To know more, refer to Lead/Opportunity Level Check-in and Check-out.
Lead Level Check-in/Check-out
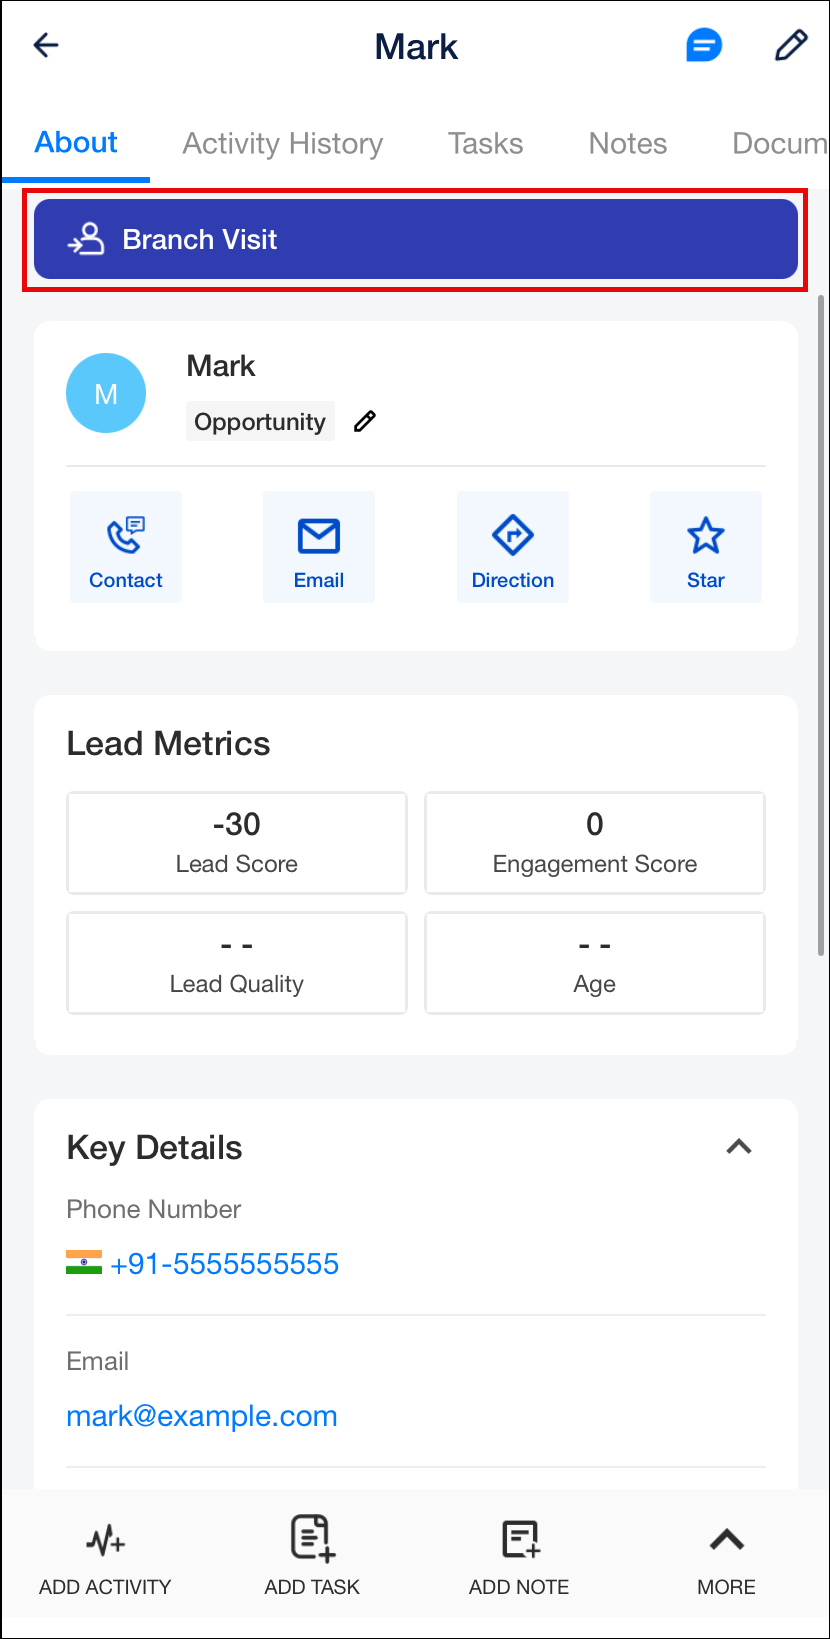
Previously, users had to perform tasks and mark them as complete to calculate interaction duration, which helped managers assess productivity. However, for accounts using activity-based workflows, determining this duration was challenging. Sales users had to submit dummy start and end activities as a workaround, resulting in a cumbersome process involving multiple forms for a single lead visit.
With the new lead-level check-in/check-out feature, users can now directly check in and out at the lead level. The time between lead check-in and check-out will mark the duration of the meeting with the lead. This improvement simplifies the process, accurately measuring the time spent between check-in and check-out actions. To know more, refer to Lead/Opportunity Level Check-in and Check-out.

Journeys Updates
Team-Based Approvals Settings
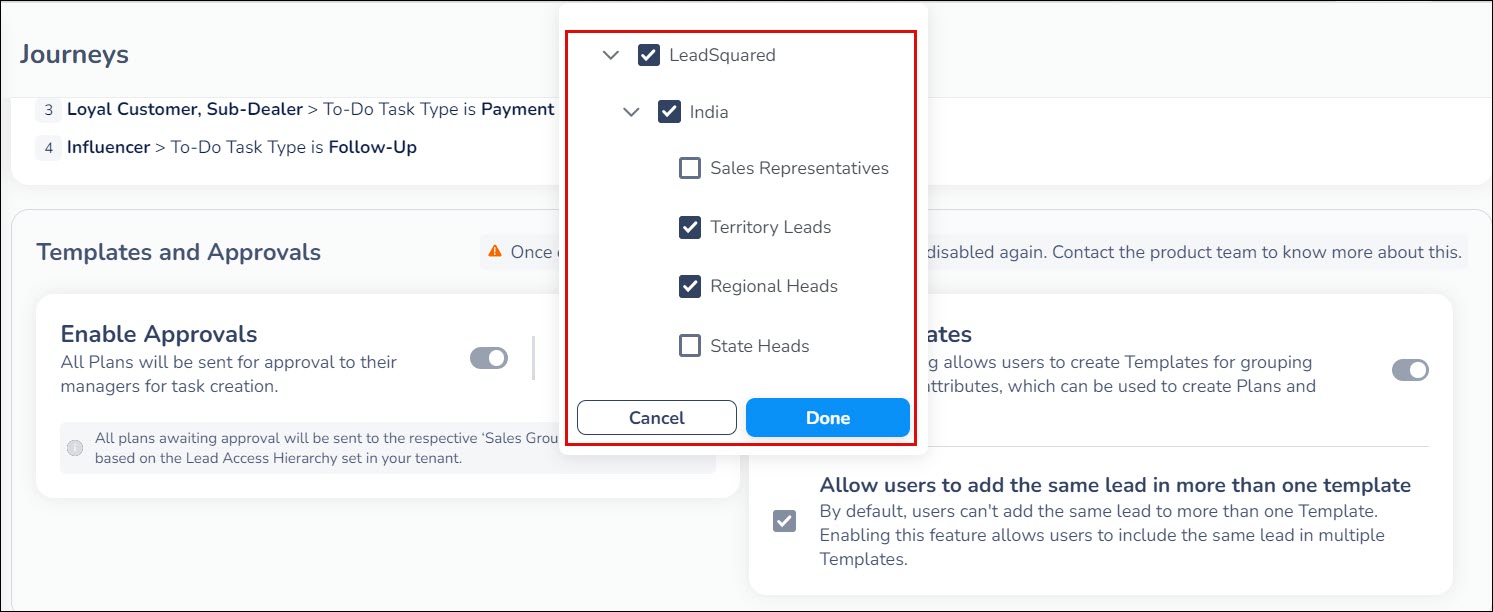
Previously, Approvals were applied to all teams by default. With the new update, the admins can customize this by selecting the teams for which approvals are applied from a dropdown list. Admins can enable approvals for specific teams by navigating to Apps > Journeys > Settings > Journeys on the LeadSquared Web App. This feature ensures that Team-Based Approval Settings are consistently applied when creating, cloning, or editing plans on the LeadSquared Mobile App. When users create or edit plans on the Mobile App, ‘Publish’ or ‘Send for Approval’ tab appears as per the team-based approval settings configured by the admin.
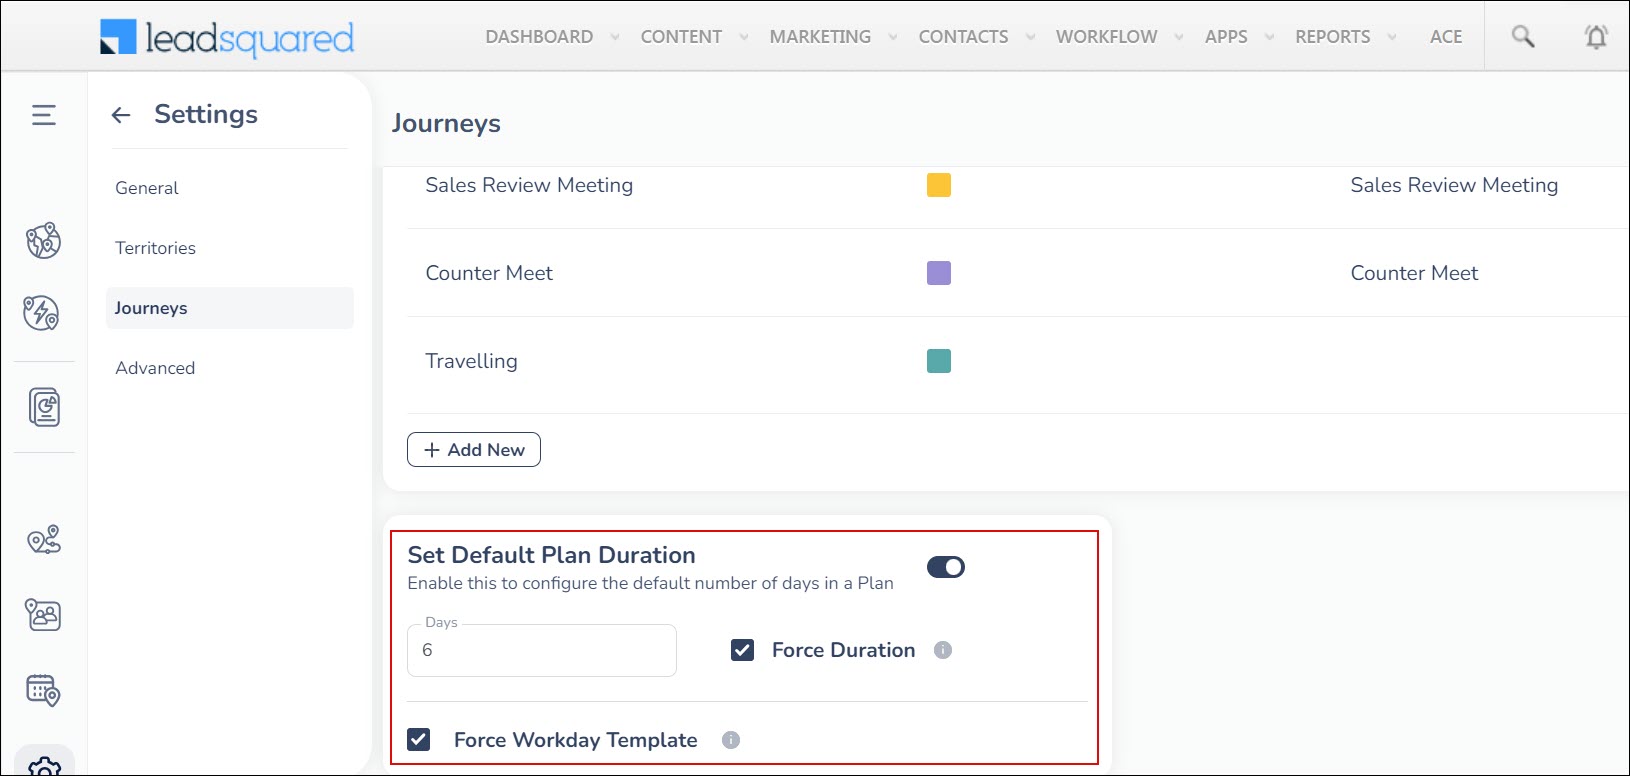
‘Set Default Plan Duration’, ‘Force Duration’ and ‘Force Workday Template’ Settings
This feature allows Admins to set default plan duration and working days for users while creating plans on the LeadSquared Mobile App.
- Setting Default Plan Duration & Force Duration – Admins can enable Default Plan Duration for users to configure the default number of days in a plan. This can be done by selecting a value between 1 to 31 days on the LeadSquared Web App. On your LeadSquared Dashboard, navigate to Apps>Journeys>Settings>Journeys to enable this setting. When a user logs into the LeadSquared Mobile App and selects a start date, the app automatically displays the end date based on the duration enabled by the admin. The user can change the end date as per their requirement. However, if the Default Plan Duration and Force Duration are enabled, the end date becomes non-editable.
- Setting Working Days Template – Admins can enable force workday template on the LeadSquared Web App. When a user creates a plan, the app automatically displays the workday template assigned to the user and makes it non-editable. The users can modify the template if the setting is disabled.
‘Reporting To’ Hierarchy in Journeys
Sales Users who are Reporting Managers in the Lead Access Hierarchy can now view the ‘My Approvals’ Menu Tab. This tab can be accessed through the Navigation Menus or Casa Quick Launchers. This update ensures that users with the relevant hierarchy settings can easily access and manage their approvals.
View Task Load while Creating or Approving a Plan on Mobile
This feature allows users to adjust plans and manage their workload effectively on Journeys. While creating or approving plans on Journeys, users can now view the tasks that are already due on the selected dates. Once the details of the plan are entered, the users can see the number of pending and due tasks for each date. By tapping on a date with pending tasks, the user can cancel or reschedule tasks. Similarly, managers approving plans can view task counts for the selected dates, ensuring comprehensive planning.

CASA Homepage Updates
New SIERA Widget
Previously, when an Admin configured a SIERA URL in a custom tab on CASA, users had to log in again when they tapped on it. This double authentication disrupted the experience for users who were already authenticated in the mobile app. The new SIERA widget allows admins to configure SIERA URLs directly on the mobile app home page. Users will remain authenticated when launching the configured URL, eliminating the need for repeated logins.
Enhanced Security for Password Changes
If the Enforce Password Reset setting is enabled, and an Admin changes the password for a user, the user will now be required to change their password themselves before logging in to LeadSquared mobile app. This additional step ensures that sensitive credentials are protected and the overall security of user accounts is enhanced. To learn more, see Security – Login Settings.
Dynamic Form – Adjustable iFrame Field Height
Users can now adjust the height of iframe fields with a new property called “Height in Mobile,” which allows customization of the iframe display height from 10% to 60% of the screen space. If this property is left blank, the iframe field will retain its existing standard height. This update eliminates the need to navigate to the next screen for a better view, making form interactions more convenient and efficient. To know more about forms, refer to Forms and Processes – Feature Guide.
Opportunities
Search Preference Setting Support
The opportunity list search functionality has been enhanced to support partial searches on lead and opportunity parameters, including first name, last name, email ID, phone number, and opportunity name. To enable this setting, navigate to Settings>Mobile App>Additional Settings>Search on the LeadSquared Web App.
Lead Types
Lead Types in Tasks
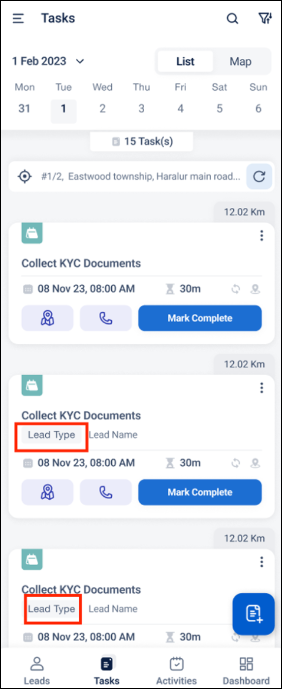
For customers with the feature enabled, Lead types will now appear on the task card beside the lead name in task list, map views, and task cards on My Trips. The Lead types filter option is also introduced to filter out the tasks. When adding a task using default task forms, users will see a Lead types bottom sheet for selection, ensuring tasks are associated with the selected lead type. For dynamic forms and edit option in task details, the appropriate form will launch directly based on the lead type.
Lead Types Support for Lead Stage
Admins can now configure stages for individual Lead Types. By default, all Lead Types will have the existing default stages configured. On mobile, leads will display stages based on the web configuration.
Bug Fixes
- Fixed an issue where LCC’s first and last names did not a space between them.


