1. Feature Overview
Smart Links on Portals allow you to guide customers to resume progress from where they left off.
For example, if a student begins filling out an application for an online course but leaves before completing the payment process, you can send a follow-up email with a customized link for them to continue. Clicking the Smart Link will take them directly to the predefined page in the portal (e.g., the payment page).
Additionally, Portal admins can generate and trigger Smart Links for users to view or edit a student’s application, assisting them in completing their application process or course enrollment journey if needed.
2. Prerequisite
- You must be an Admin user.
- You will need to enable Portals on your account.
- The Portal must be published in the live environment to set up Smart Links.
- You must set up an Automation to trigger emails to leads.
- You must install and configure the Custom Lead and List Actions Connector to make Smart Links accessible for your users.
3. Navigate to Smart Links on Portals
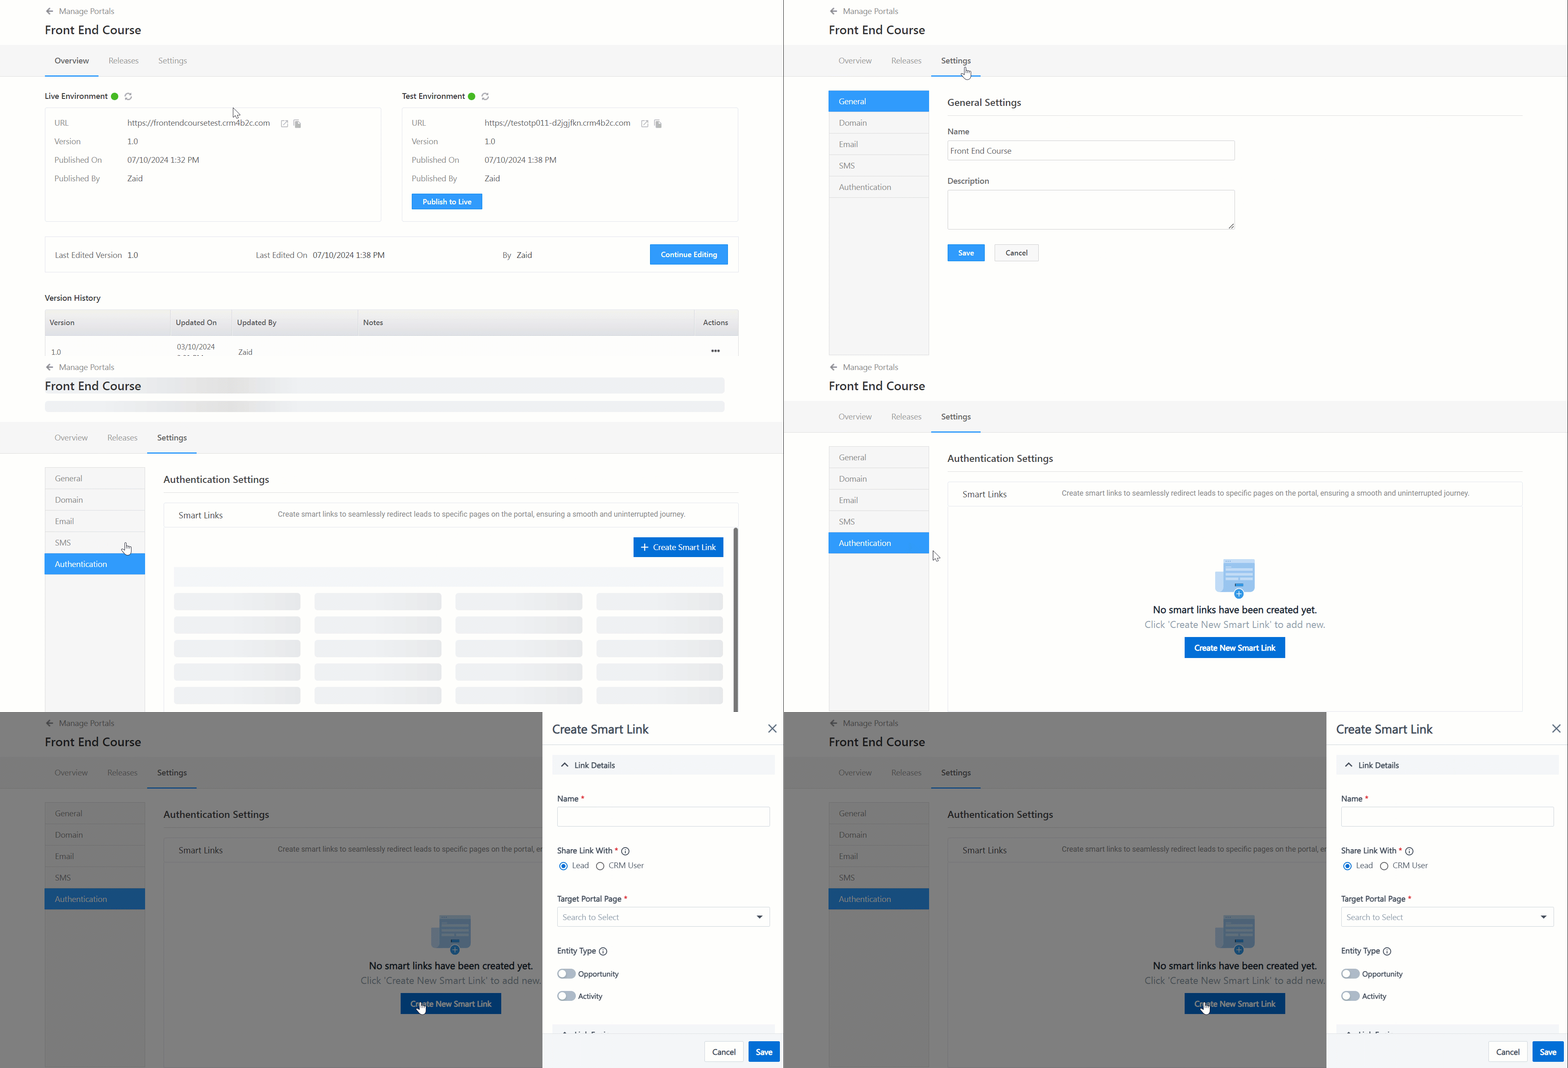
On the Portal Edit page, navigate to Settings>Authentication and click + Create Smart Link.
4. Configure Smart Link
Configuring the Smart Link involves the following steps –
- Name: Enter a name for the Smart Link.
- Target Portal Page: Select the page the lead or the CRM user will be redirected to through the smart link. You can only select pages that require a login to the portal.
- Share Link With: Select who’s allowed to access this link –
- Lead: This option will allow the leads to access the Smart Link.
- Entity Type: Select the relevant entity type to help users resume their progress on the portal page. You can choose either an Opportunity or an Activity. When the lead opens the Smart Link, the opportunity details or activities related to the lead will be retrieved.
- Note: Entity details can be passed either in this configuration or while defining the trigger in the automation (refer to section 5.1). In either case, the entity details passed in the automation will take precedence.
- Generate Short Link: You can create short links for easy sharing by selecting the Generate Short URL option.
- Note: If you generate short, shareable links for smart links, the maximum expiry period that can be set is 6 months.
- Set Link Expiry: Set an expiry date for the Smart Link by defining the month(s) and/or day(s). After the expiration date, the link will be inaccessible.
- Set End Date: Set an end date for your smart link. Post the end date, the configured Smart Link will deactivate. The end date cannot be before the expiry date.
- Maximum Usage Limit: Set the number of times the lead can access the link.
- Entity Type: Select the relevant entity type to help users resume their progress on the portal page. You can choose either an Opportunity or an Activity. When the lead opens the Smart Link, the opportunity details or activities related to the lead will be retrieved.
- CRM User: This option will allow the CRM User to access the Smart Link.
- Allow CRM user to edit: If enabled, the user will have access to edit the customer’s journey.
- Lead: This option will allow the leads to access the Smart Link.
- Auto Register Leads: By enabling this, Smart Links allow leads to bypass the login step and directly access specific portal pages.
- For example, a student submits a lead form on your website, and their record is created in the CRM. With Auto Register Leads enabled, the student is automatically registered on the portal and receives a Smart Link. Clicking the link takes them directly to the student dashboard without requiring manual registration or login.

5. Set Up Automation to Email Smart Links to Leads
Follow these steps to share the Smart Link with leads. As an example, let’s consider that automation will trigger and send an email to the lead to remind them to complete the payment on the portal.
This section covers three steps: Automation Trigger, Custom Webhook, and Send Email Action.
5.1 Automation Trigger
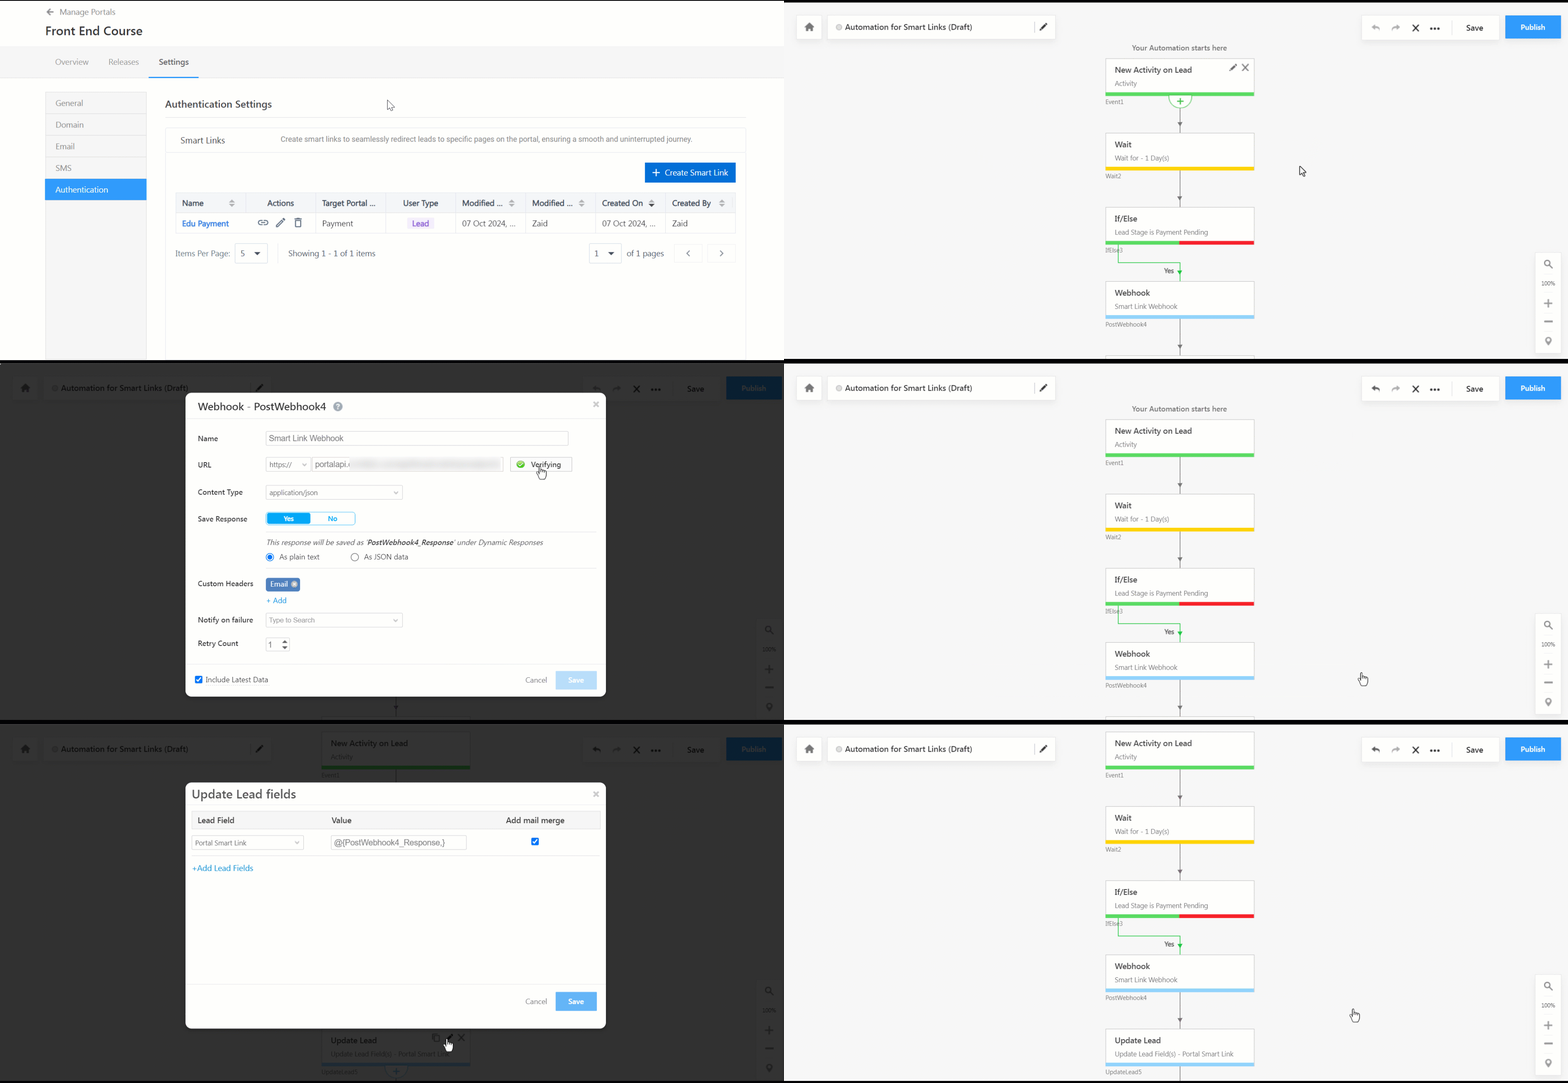
- The automation will be triggered when an activity or opportunity is posted on the lead.
- Optionally, you can add a Wait card to pause the automation for a few days.
- Use an If/Else card to check if the lead has made the payment. For example, add a condition that checks if the payment status is Pending through the Lead Stage field.
- If true, add a custom Webhook (refer to the next section).

5.2 Custom Webhook
- If the payment is pending, configure a Custom Webhook to call the Smart Links Webhook URL. You can find the Webhook option under Custom action.
- Copy and paste the Smart Link from the Portal’s Authentication Settings page into the Custom Webhook. Make sure to use https.
- Save the response (Smart Link) in a temporary field by selecting Yes against Save Response.
- Click Save.
5.3 Send Email Action
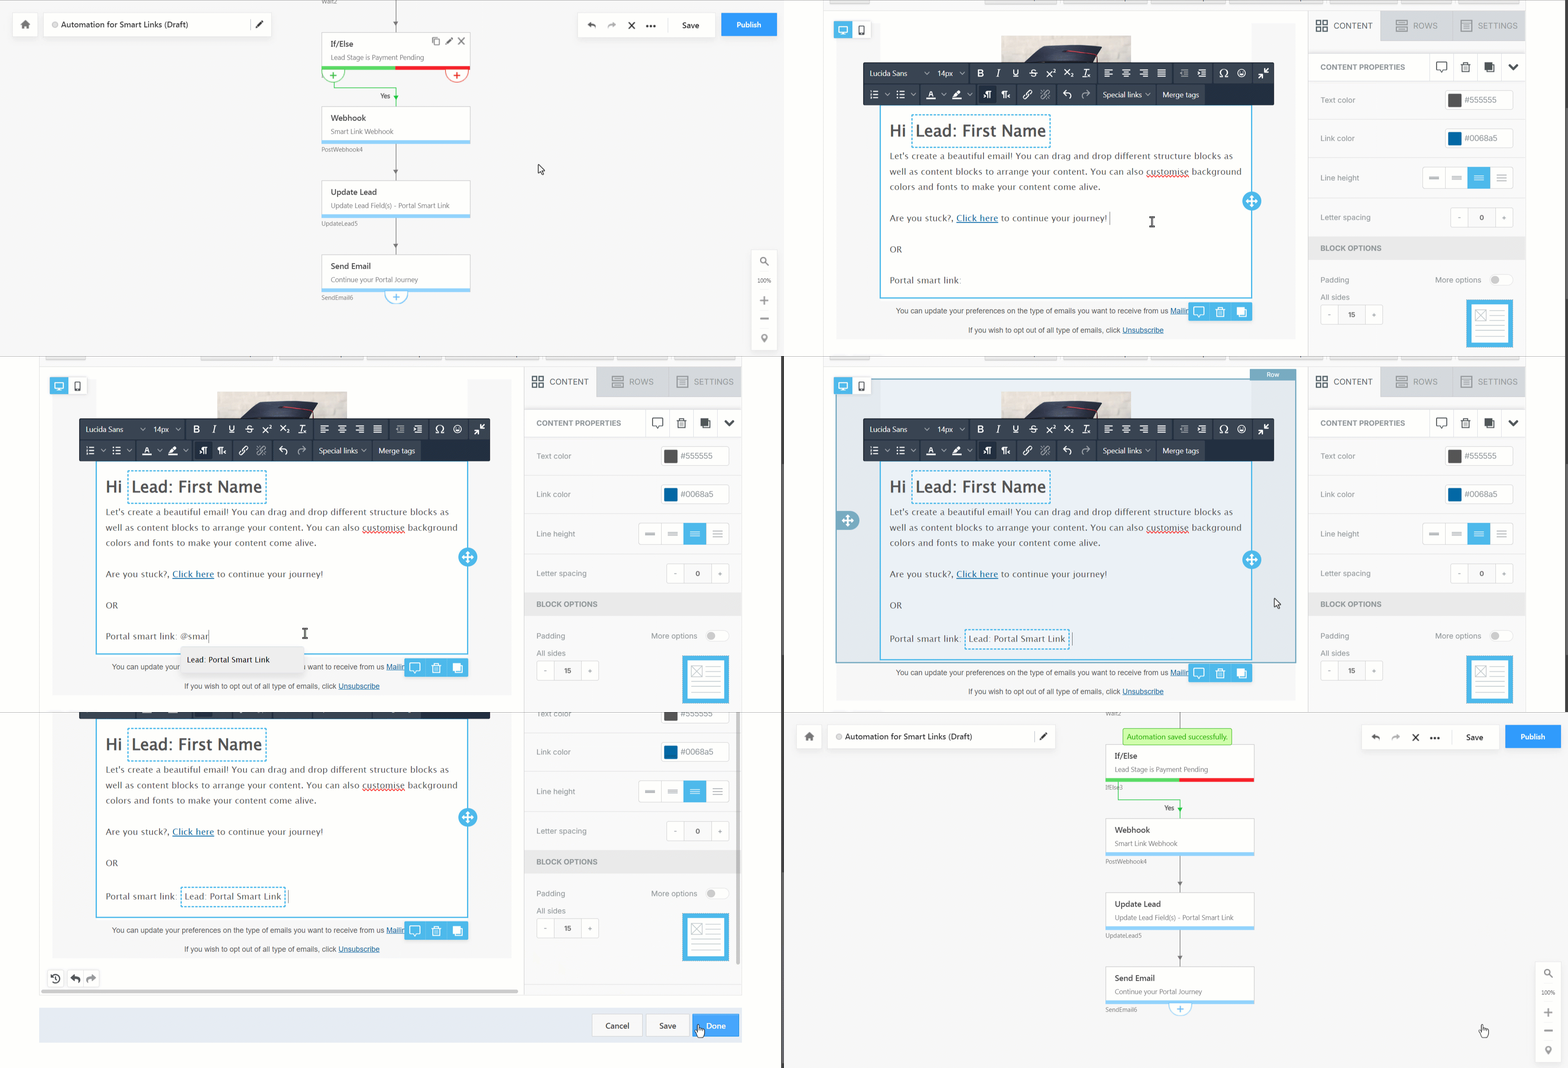
- Add a Send Email action to the flow. You can find the Send Email option under the Messaging action.
- Draft your email and mail-merge (or, hyperlink) the webhook response (Smart Link) into the email.
- Once finalized, click Done.
Note: You can mail-merge either the temporary field or the custom lead field.
Once complete, you can publish the automation.
6. Configure Smart Links Access for CRM Users
- First, copy the Smart Link from the Portal Authentication Settings page.
- Next, configure the Smart Link in the Custom Lead and List Actions Connector by adding an action.
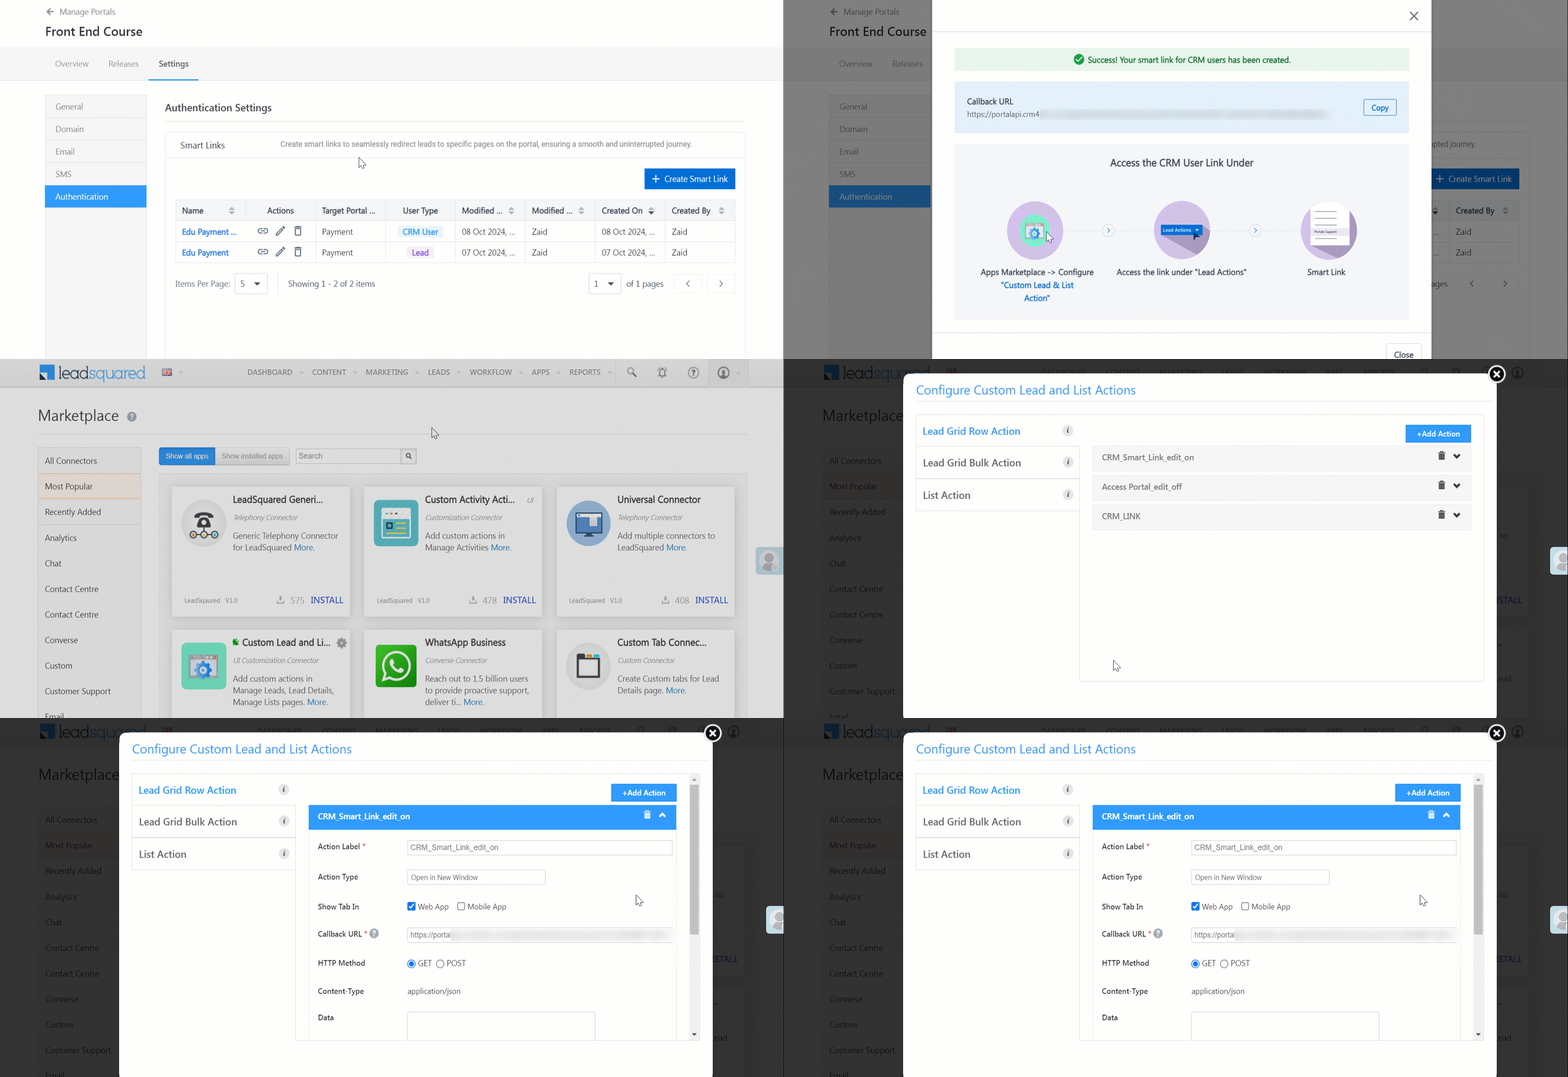
Once configured, the users will be able to view the link posted against the lead through the Action button on the Manage Leads page. If permissions have been granted, the user can also edit the lead’s journey or application.
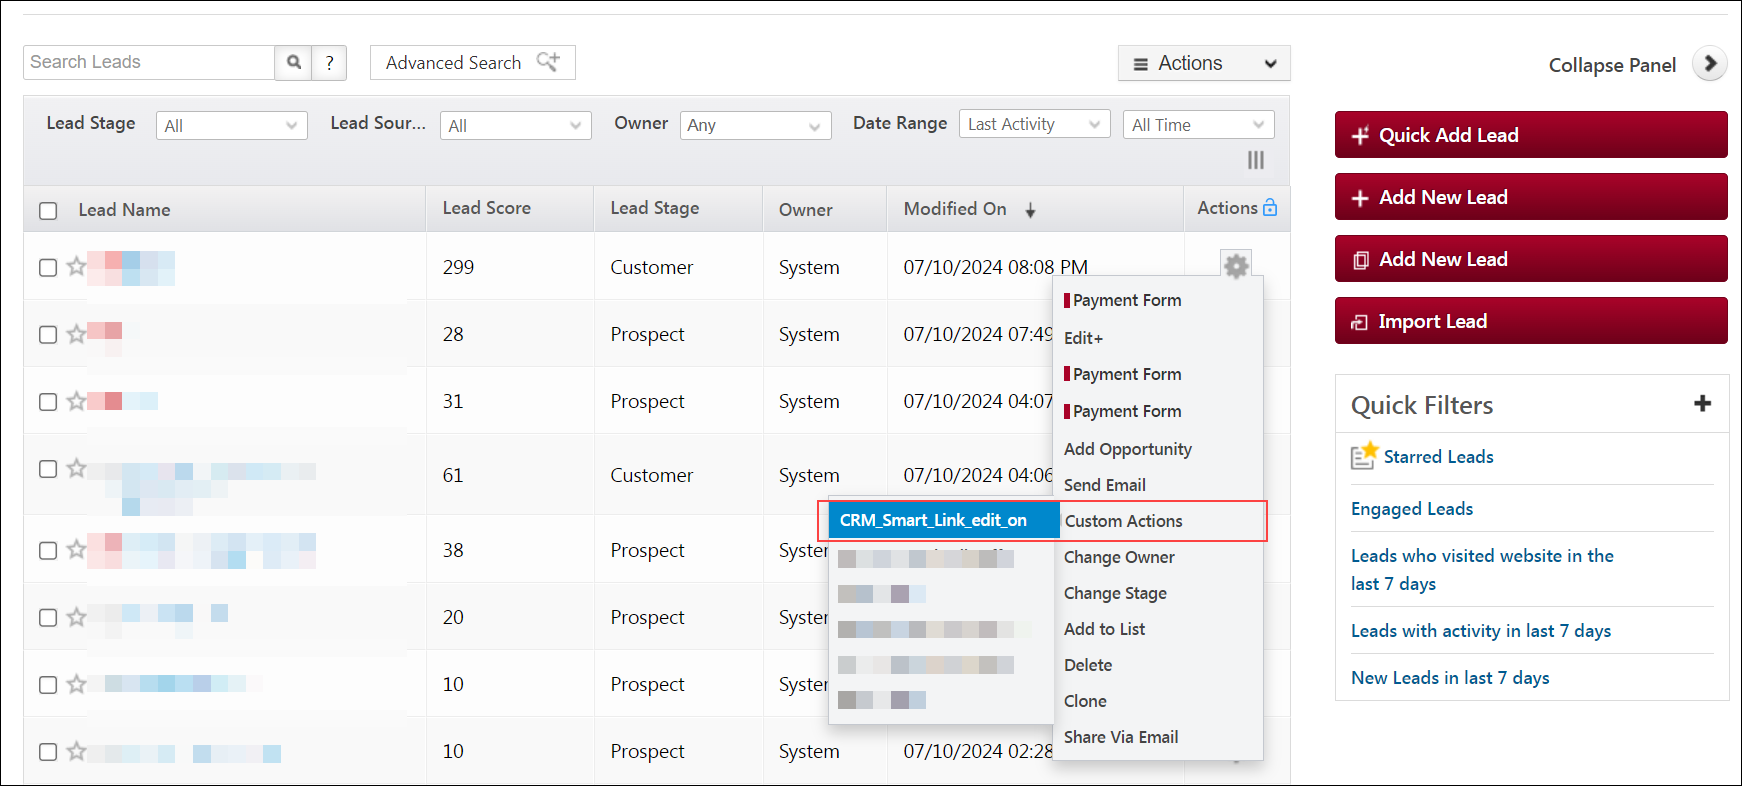
For more details on how to configure the Custom Lead and List Actions Connector, refer to this article.
Any Questions?
Did you find this article helpful? Please let us know any feedback you may have in the comments section below. We’d love to hear from you and help you out!


