


Get Started
Sales Suite
Field Ops
Marketing
Service CRM
Integrations & Apps
FloStack
Build a Journey Based Chatbot (v2)
1. Feature Overview
Build a chatbot to guide your leads through an end-to-end journey to achieve specific goals and complete processes, such as exploring course options and fees, applying for a loan, booking a doctor’s appointment, raising support tickets, and more. The bot assists leads at each step, helping them understand what actions need to be taken to move forward. It can be integrated with your website, landing pages, portals, mobile app (via a mobile SDK), and your Business WhatsApp account.
The chatbot has different components that help you achieve various use cases. This article outlines the functionality of each component, how they interact with one another (when applicable), and what they can help you accomplish when configuring a bot.
Note: To know how to create an AI Help Bot, refer to Chatbot – AI Help Bot.

2. Prerequisites
- You must install the Chatbot connector. To enable it on your account, contact your account manager, or write to support@leadsquared.com.
- You might come across a few terms for the first time in LeadSquared, so it’s important to familiarize yourself with the Glossary list for the Chatbot.
- Before you configure the Handover Node, ensure LeadSquared Converse is enabled on your account.
3. How it Works
The chatbot feature allows for complete flexibility in designing your bot flow. Below is a comprehensive list of chatbot components and their functionalities, categorized into Bot Types, Actions, and Other Actions.
While the components in this article are fixed, they can be used in various combinations and configurations to meet your specific needs effectively. Each section explains the purpose of the component, any prerequisites, and how it can interact with other components. While there is no single method for building a bot, this document serves as a reference to guide you in creating your own customized chatbot.
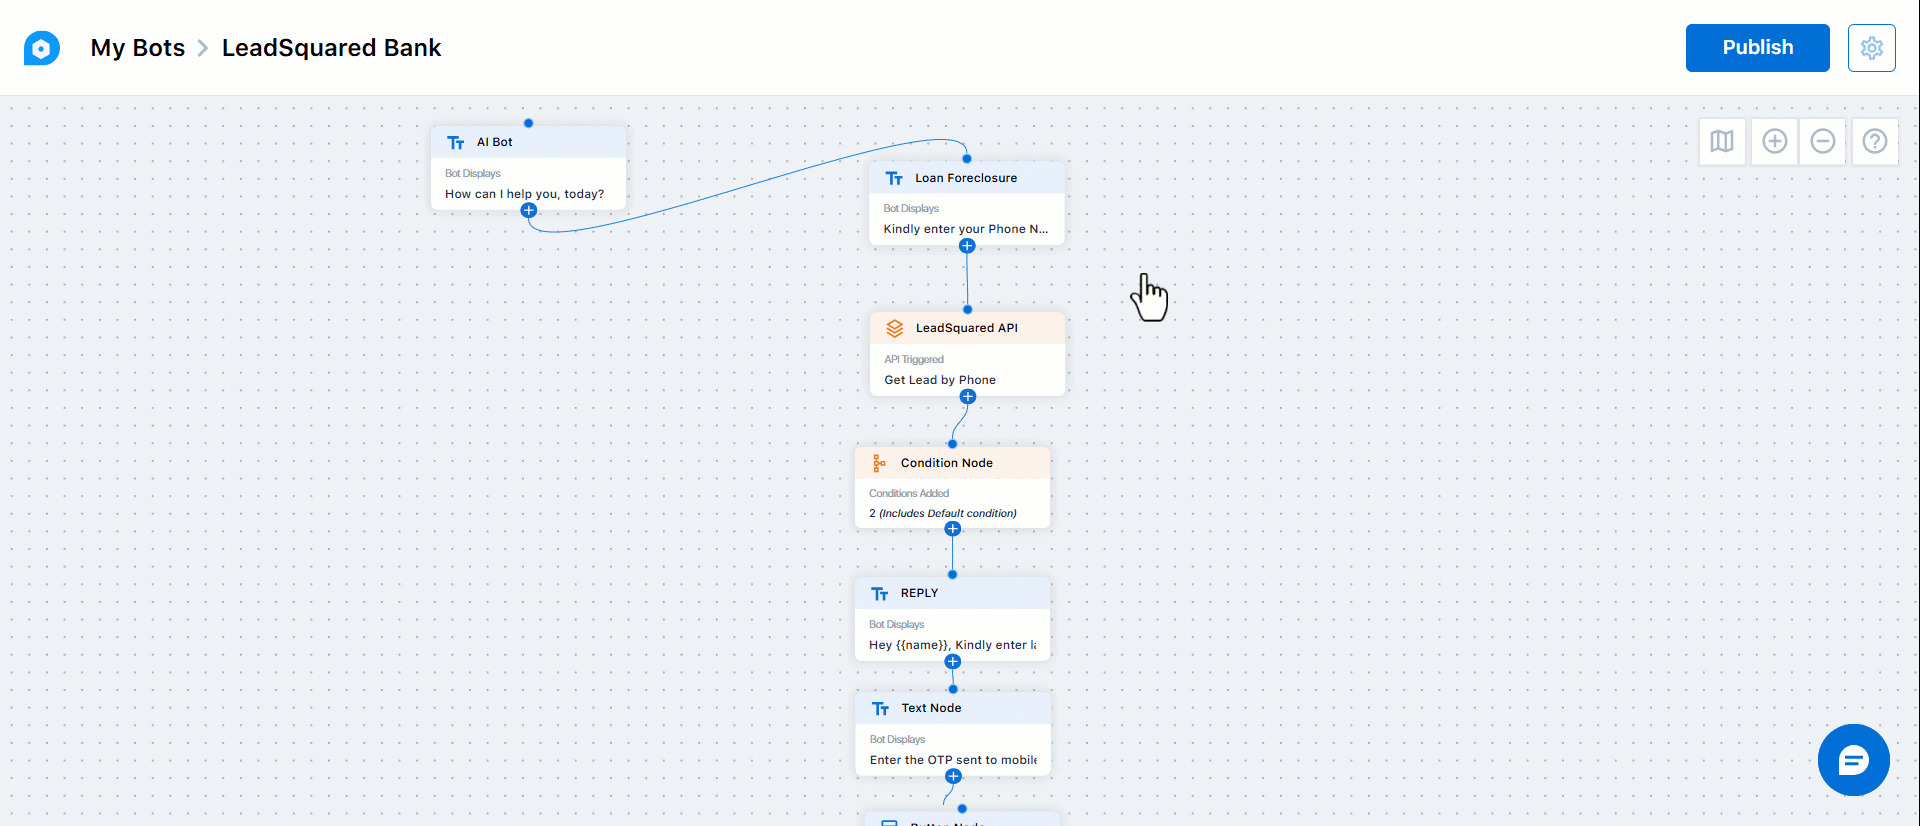
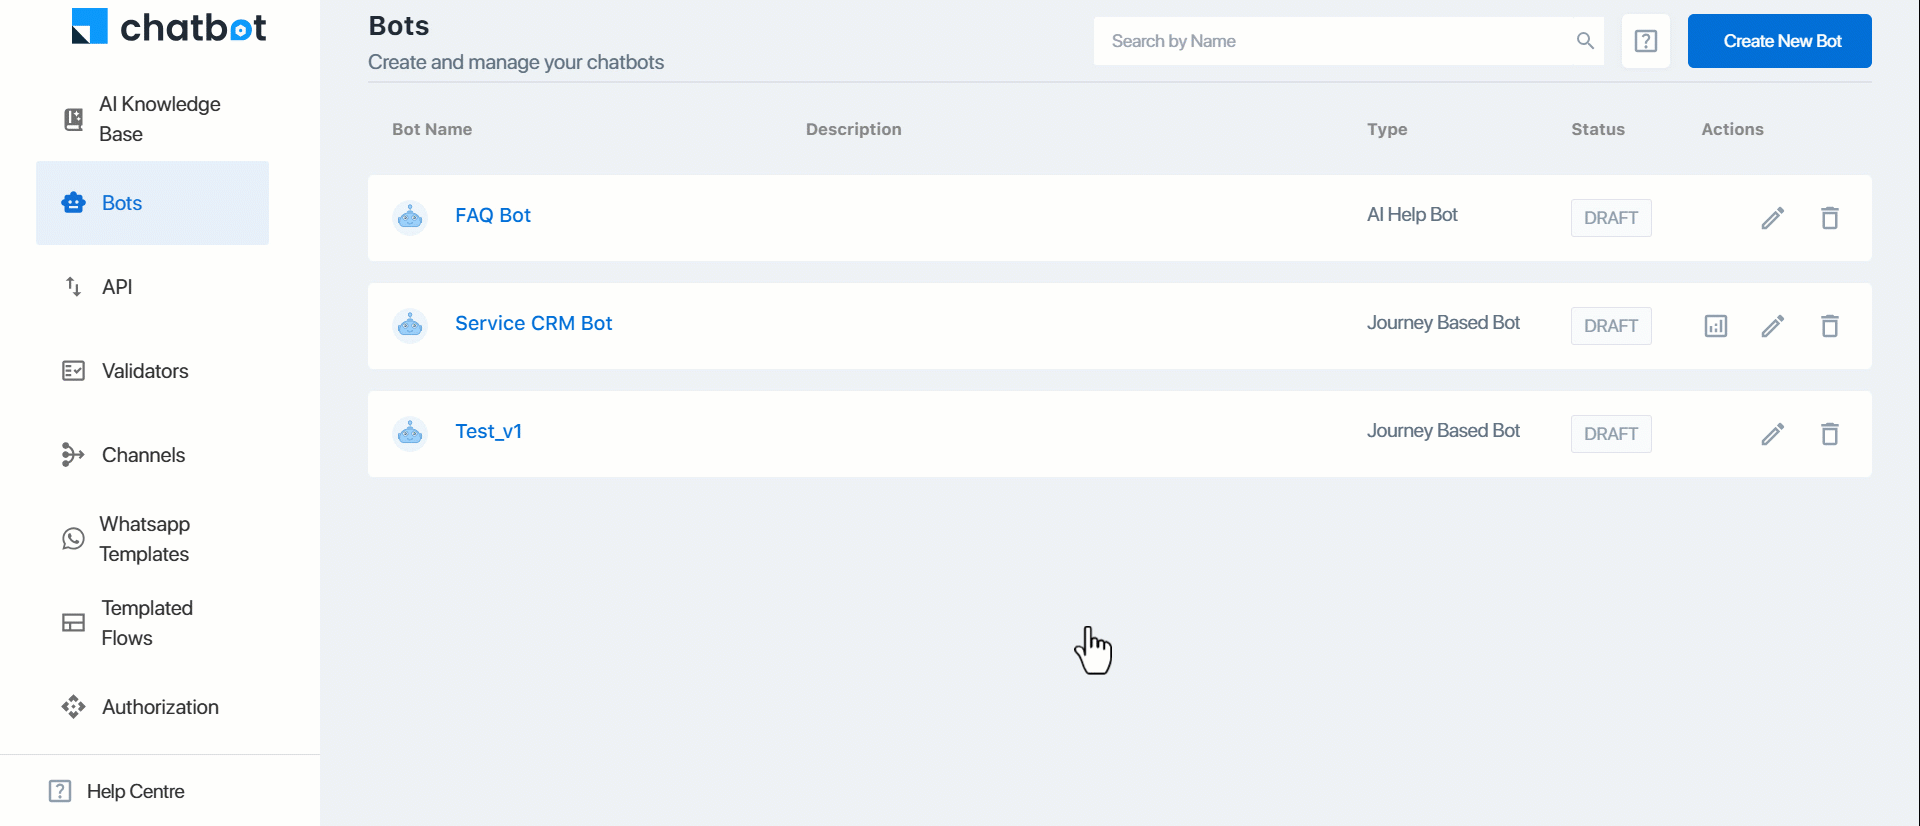
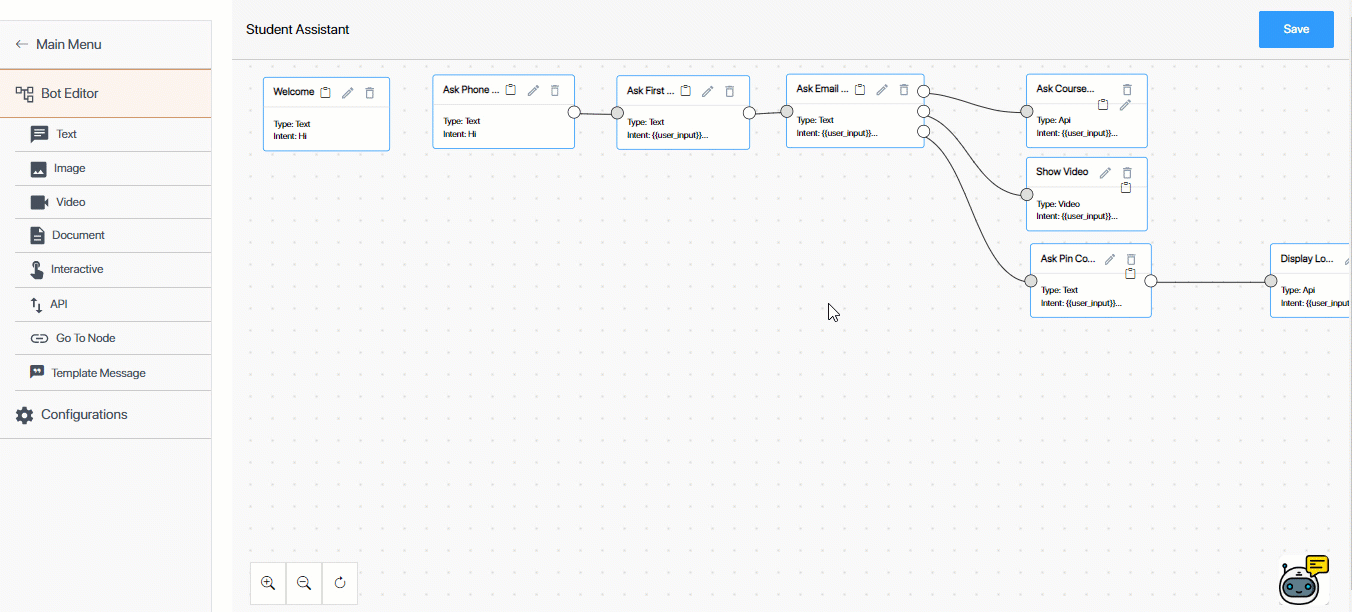
4. Create a Journey Bot
Create a chatbot that assists your leads in completing a task or process –
- Once the chatbot is installed on your account, navigate to Apps>Chatbot, and click Get Started.
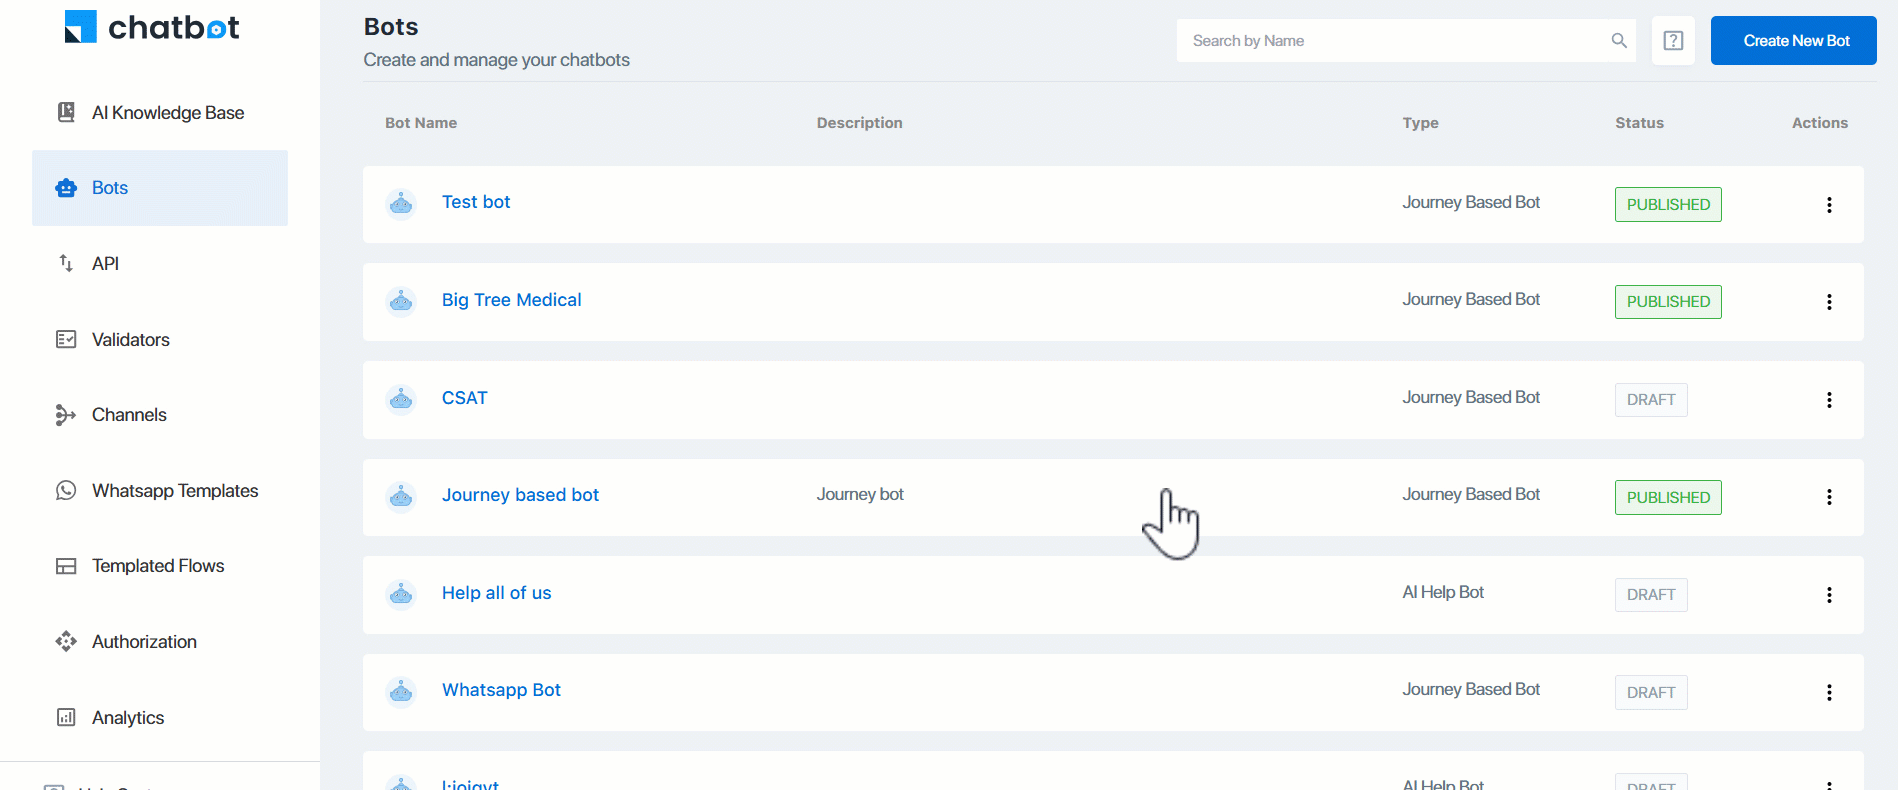
- On the Dashboard screen, from the left panel, click Bots, and then click Create New Bot.
- On the Select Type pop-up, under Journey Based Bot, click Select.
- On the Create New Bot pop-up, enter a relevant Bot Name and Description for the bot.
- This name is for internal identification only and is not the actual display name of the bot.
- Once you’re done, click Save.

5. Common Node Configurations
The following configuration options are available across all nodes and perform the same functions. To avoid repetition in each node’s section, we will list these components here. The Node Configurations govern how the node receives the lead’s input messages.
On the Bot Builder screen, click the Add Node button, and under Messages, click the node you want to add, and enter the following details on the Node Configuration tab –
- Node Name – Enter an internal display name for this node.
- User says – Enter the lead’s message, such as “Hi” or “Can I schedule a demo,” that triggers this node. This is a hardcoded message, meaning the node will only activate if the lead sends this exact phrase. Once the node is triggered, the response (text, image, video, etc.) you configure is then sent to the lead.
If you don’t want to predefine a lead input, you can also choose from the following options –- User Input lets the chatbot respond to any message the lead sends. For example, if the bot asks, “Please enter your name,” it accepts any response (a name in this case) from the lead as valid input. The bot can then reply, “Thank you. Can you please provide your phone number?” This makes the chatbot more flexible in handling different responses.
- Validate User Input – For phone numbers and email addresses, select the checkbox to validate the lead’s response. From the Validator dropdown, choose Phone Number or Email Address, based on the type of lead input you want to capture. This validation helps ensure that the data collected is accurate and formatted correctly, reducing the chances of errors in your records.
- Dynamic Intent refers to the ability of a chatbot to receive inputs from an API response in real time. For example, you can set the node’s response to “Select the city you’re residing in,” and configure an API to fetch a list of all Indian cities. This list is then displayed to the lead, allowing them to choose the city they are in.
- Add Utterances to improve the chatbot’s answering accuracy. Utterances represent the different ways a lead might ask a question during their interaction with the bot. For example, if the lead’s question is “Which loans are being offered?”, possible utterances could be “What loan types are available?” or “Loans available?”. This helps the chatbot recognize and respond accurately to various phrasing of the same question. To do this, enable the slider, add variations of the question, and click the Add Utterances button. It’s recommended you add different keywords to trigger the node here.
- A Multi Node response sends multiple replies to a single message from the lead. For example, if the lead says “Hi,” the bot can respond with two messages: “Welcome” and “Please enter your phone number.” This allows the bot to provide more information or instructions in a single message.
- When Final Node is enabled, it designates that node as the last step in the chatbot flow. This signifies that the lead’s interaction with the bot has ended and that the process or activity the chatbot was designed for is complete. This node is configured only after the lead successfully finishes the required steps, marking the conclusion of their journey.
6. Configure Bot Responses
After you’ve set up the Node Configuration, configure the type of response sent to your lead when the node’s triggered.
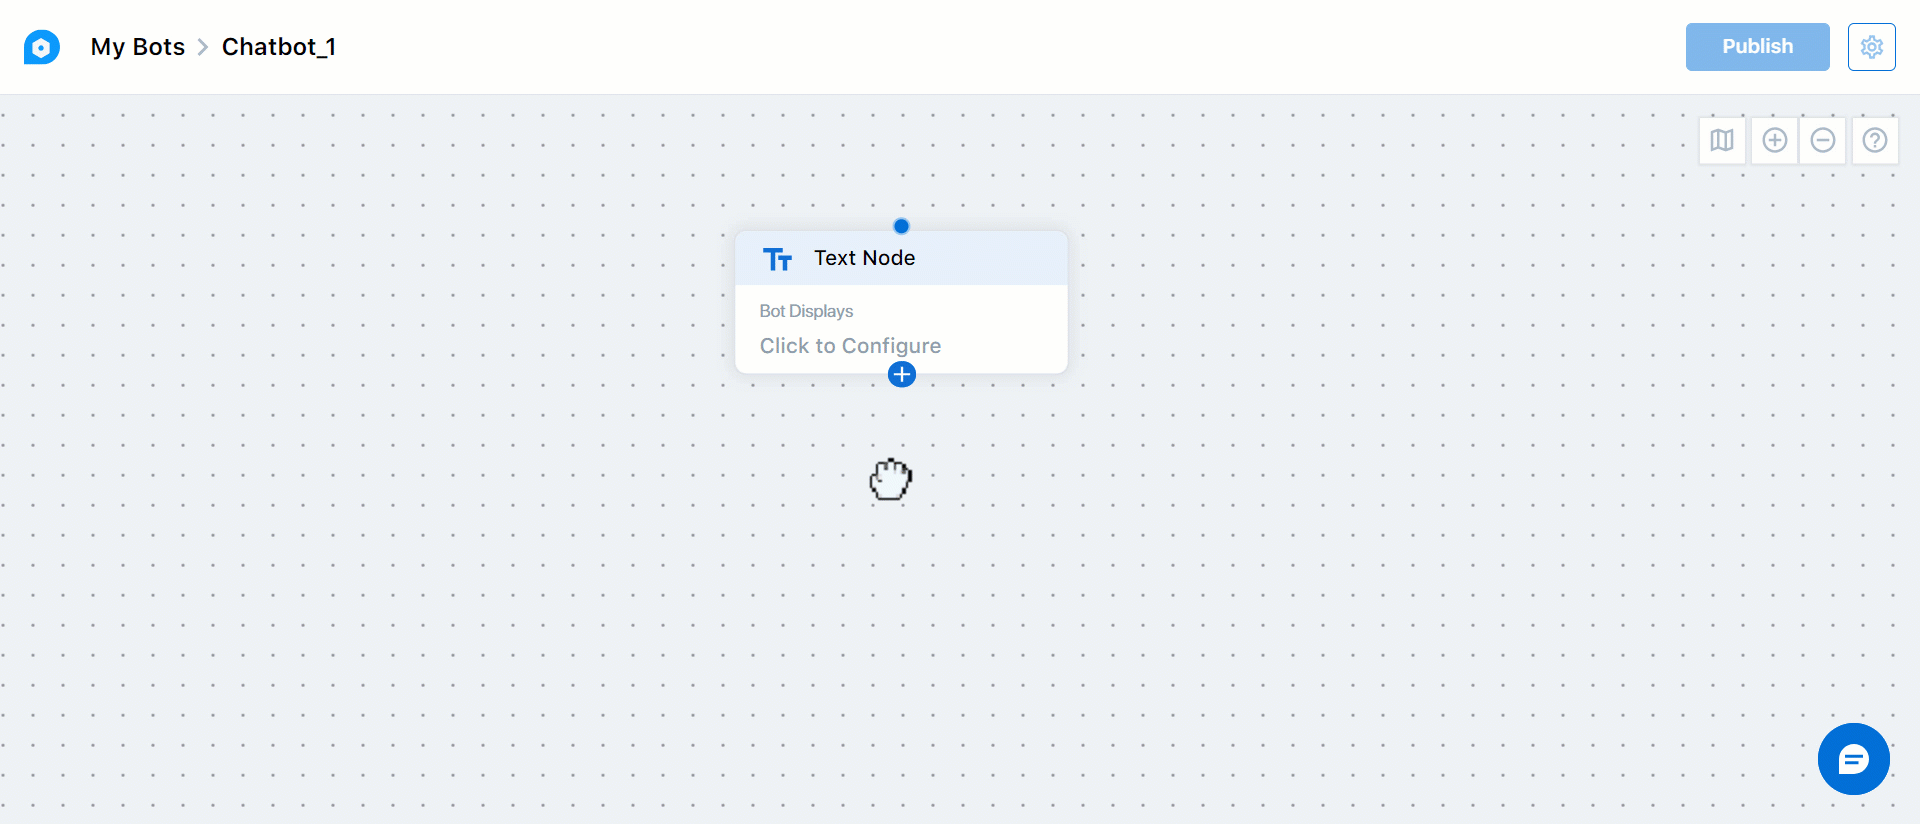
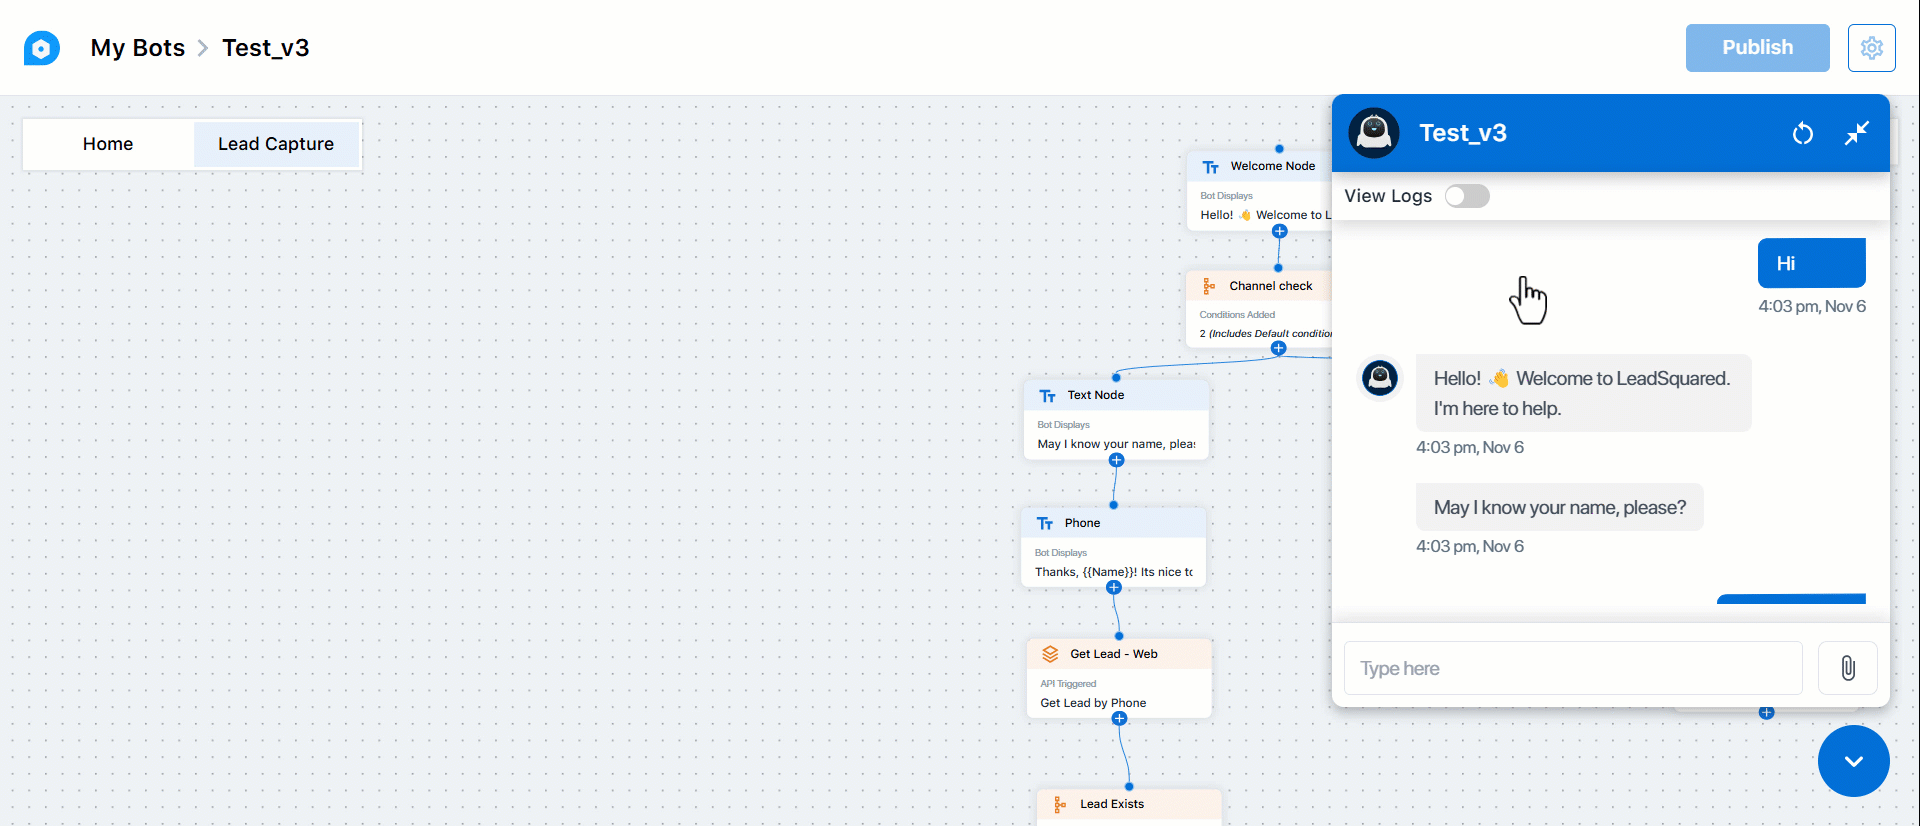
6.1 Text Node
This sends a text response to the lead. In the box under Bot displays, enter the text content. You can format this response using bold, italics, and strikethrough. You can also include a URL link. Once you’re done, click Save.

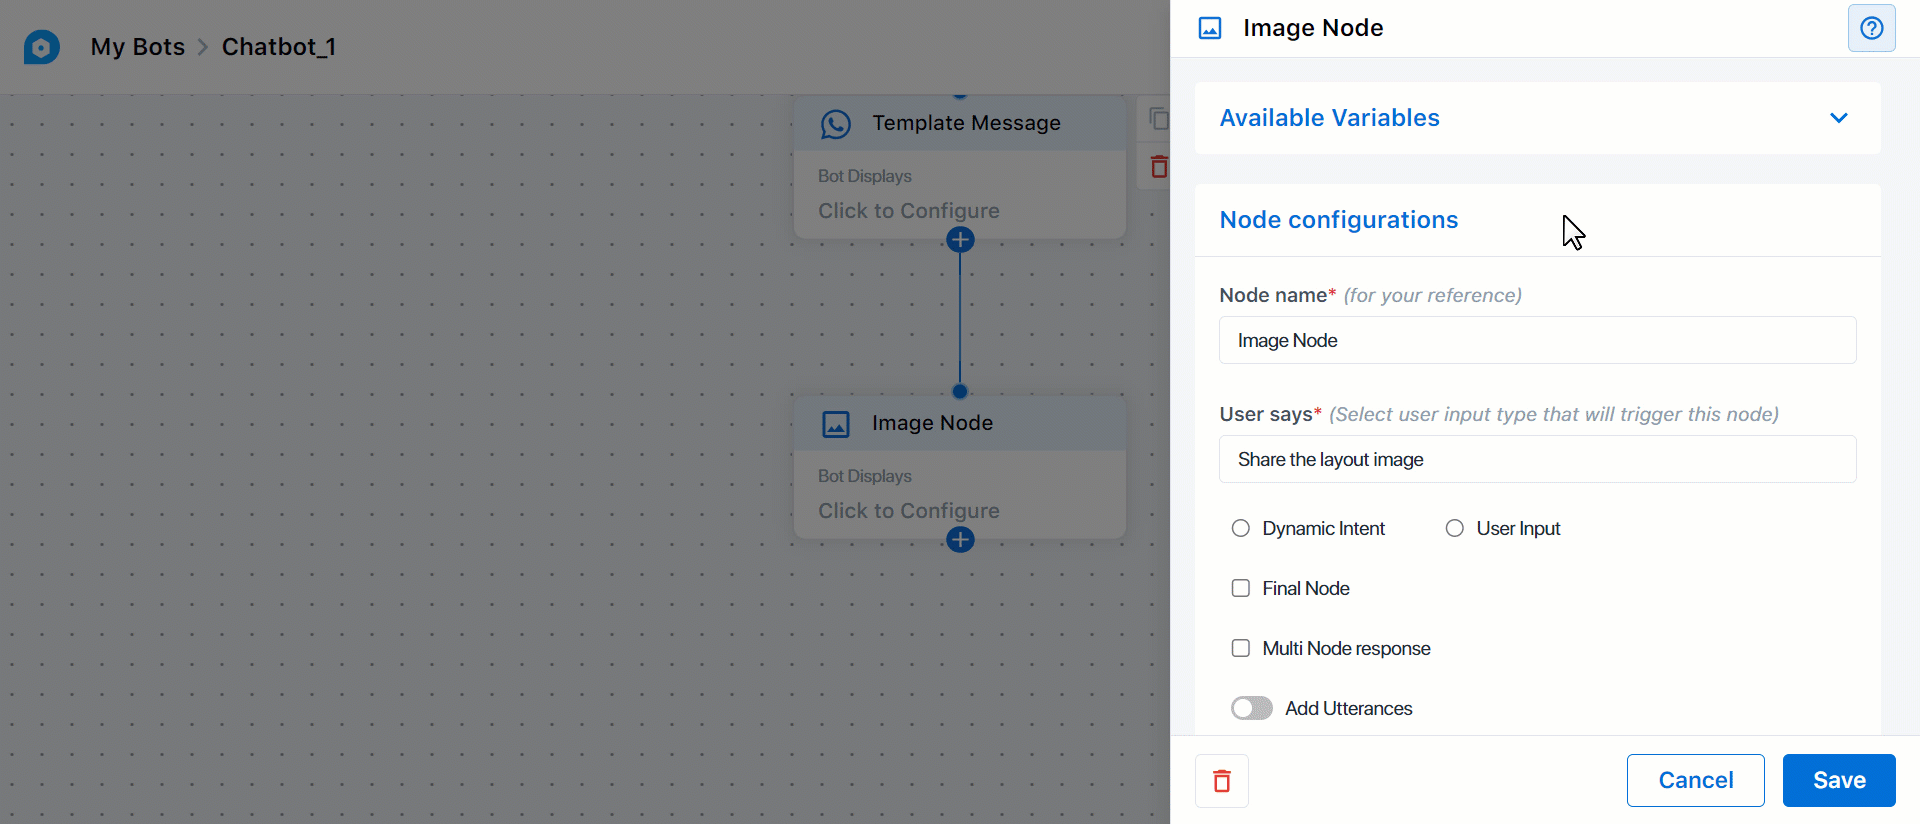
6.2 Image Node
This sends an image response to the lead. Along with the image, you must add a text caption as well. Enter the image URL and text caption in their respective boxes. Once you’re done, click Save. Your leads can download this image when it’s shared with them.
Note:
- You can’t upload a file from your local storage. You can only provide an image URL.
- The URLs can be in any of these formats: .jpg, .jpeg, .png, .gif.
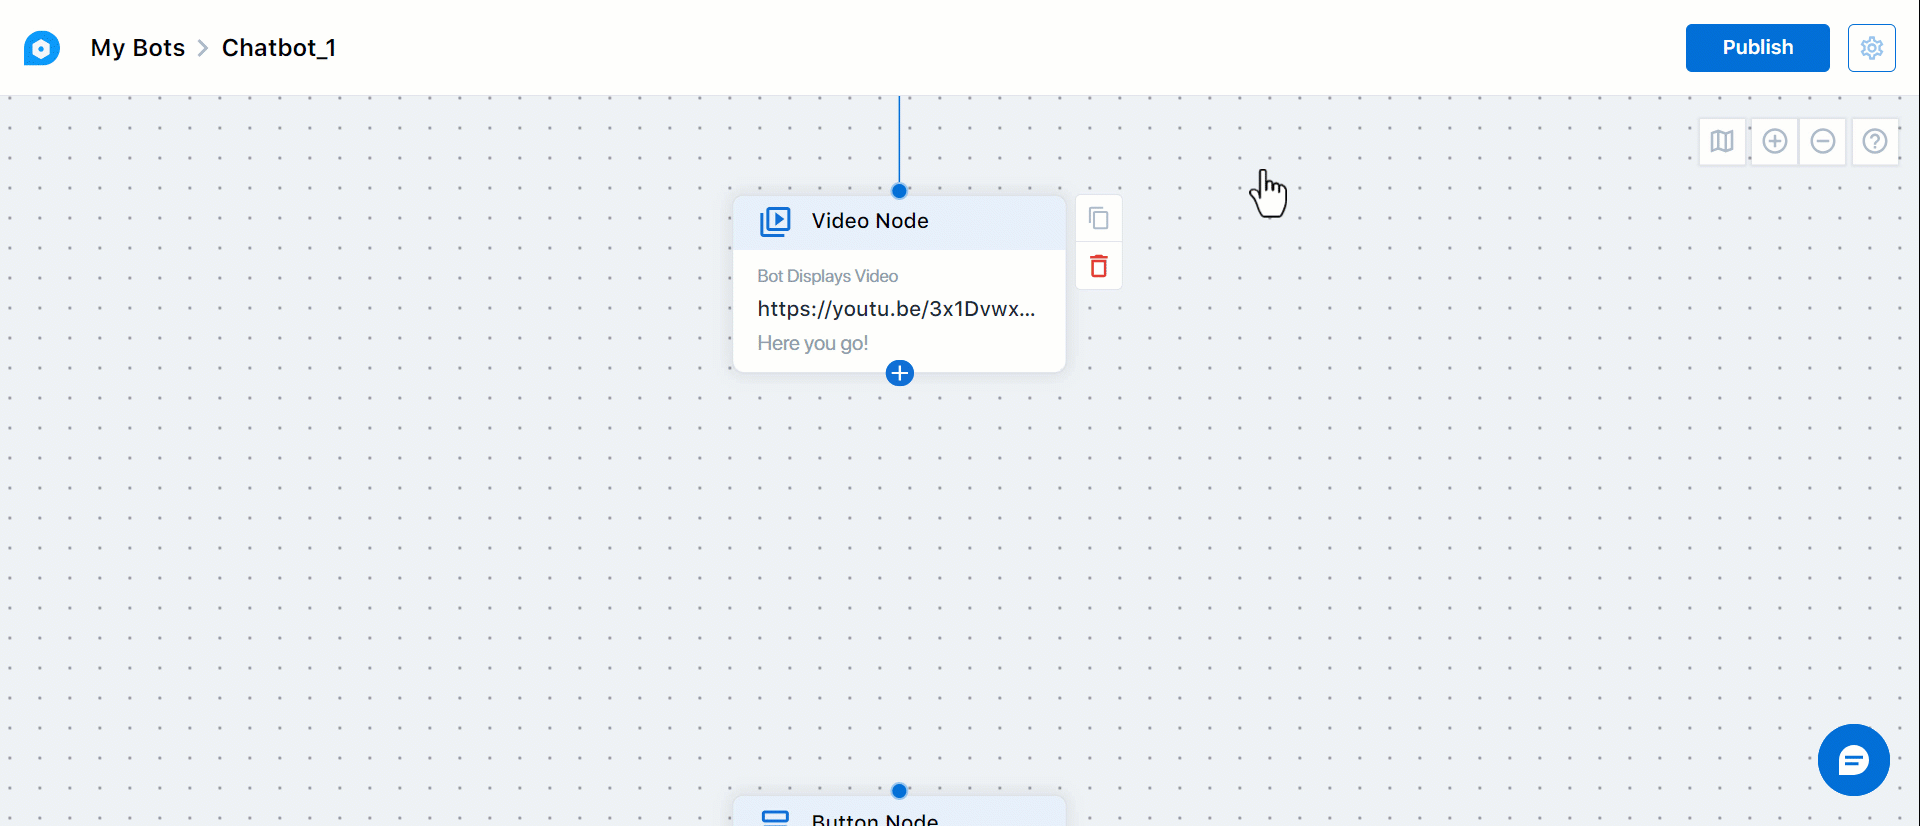
6.3 Video Node
This sends a video response to the lead. Along with the video, you must add a text caption as well. Enter the video URL and text caption in their respective boxes. Once you’re done, click Save.
Note:
- You can’t upload a file from your local storage. You can only provide a video URL.
- The URLs can be in any of these formats: .mp4 and YouTube Embed URLs.

6.4 Document Node
This sends a document (PDF file) response to the lead. Along with the document, you must add a text caption as well. Enter the document URL and text caption in their respective boxes. Once you’re done, click Save.

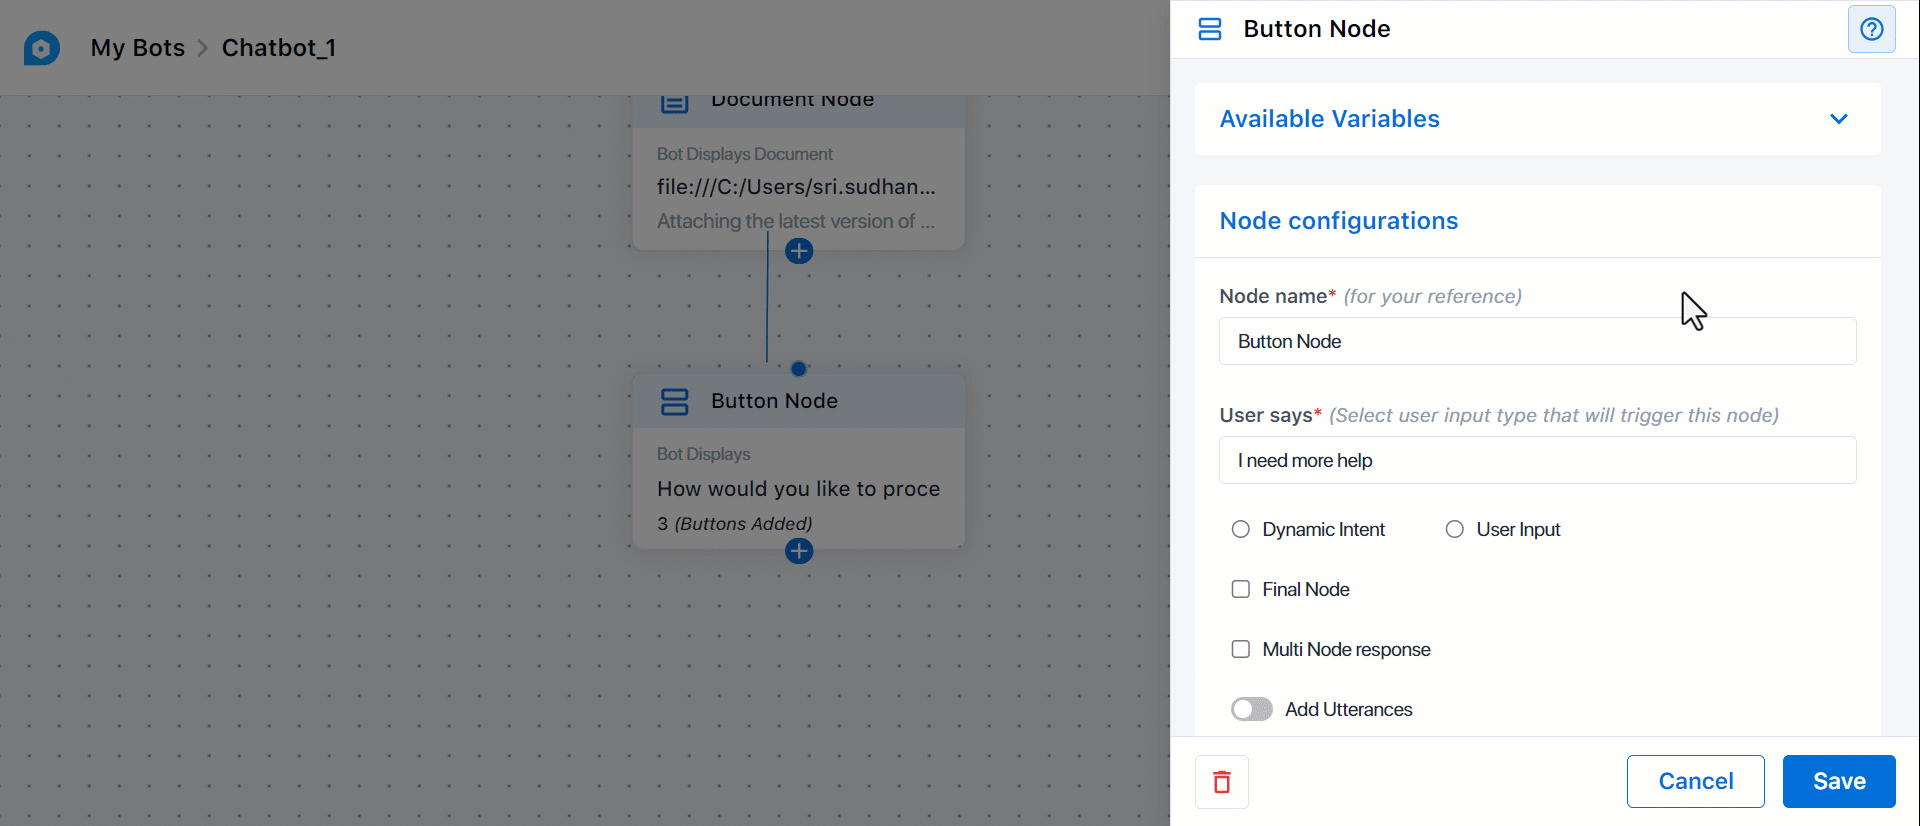
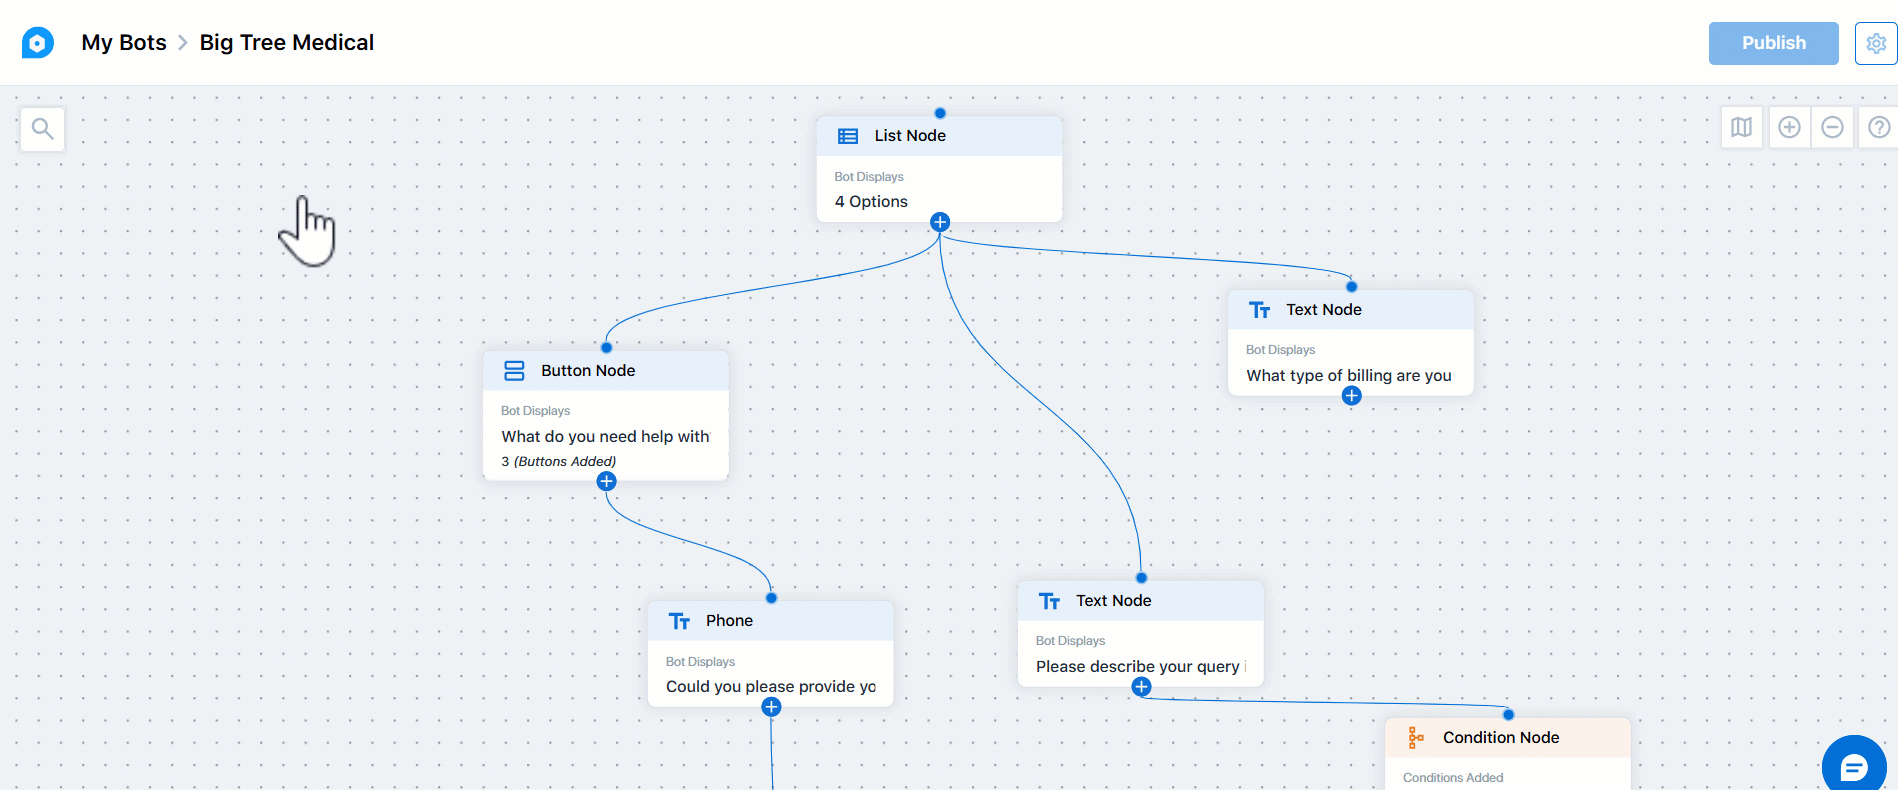
6.5 Button Node
This node offers clickable options for the lead instead of requiring them to type a response. When the lead clicks a button, the chatbot responds based on the selected option. For example, if the bot asks, “How would you like to proceed?” the available actions are the call action (“Talk to an agent”), website visit action (“View our Website”), download action (“Download our Catalogue”), and a plain text option (“Something Else”). To configure this node, provide the following details –
- Header – The bot’s response header lets you send plain text directly, or an image, video, or document by adding their URL. This is optional.
- Body – Enter the text response that will be sent to your leads. This is optional.
- Footer – You can display any relevant text information in the footer, which is optional.
- Button Configurations – Select the button action (Text, Visit Website, Call Phone Number, or Download), and enter a display name for the button. In the first box, enter the display name for the action (e.g., Talk to an Agent). In the second box, enter the action (e.g., phone number, website URL, or document URL).
- If you selected the action Visit Website or Download, enter a valid URL link.
- If you selected the action Call Phone Number, enter a valid phone number.
Once you’re done, click Save.
6.6 List Node
The List Node is similar to the Button Node, as it lists clickable options for the lead to select instead of typing a response. The difference is that the List Node only offers text options and doesn’t allow linking to a website, phone number, or document. To configure this node, provide the following details –
- Show as Dropdown in Web Bot – To render the list as a dropdown, enable this option.
- Header – The bot’s response header lets you send plain text directly, or an image, video, or document by adding their URL. This is optional.
- Body – Enter the text response that will be sent to your leads. This is optional.
- Footer – You can display any relevant text information in the footer, which is optional.
- Action Button Text – Enter the text you want to display on the action button.
- List Configuration – Enter a display name for each option, along with a description (which is optional).
Once you’re done, click Save.
6.7 Template Messages
This option lets you create a node using an existing Web or WhatsApp message template. When creating the node, choose a template from the list available in your account. The process is similar to creating a Text Node, but instead of entering the response content, you select a relevant template from the Select Template dropdown.
7. Actions
Actions are specific tasks a bot performs based on certain lead inputs. These are not responses the bot sends but are instead actions it takes. Configure the following actions –

7.1 Go To Node
From the current node, a Go To Node redirects the conversation to a different node in the chat flow (for example, restarting and going to the first message). This is useful when you want to take the lead back to the main menu or have them confirm certain details.
To configure this action –
- Under a node, click
 , and under Actions, click Go To.
 - Under Bot Response, choose the node to which you want to redirect the lead.
- Once you’re done, click Save.
7.2 Trigger Bot
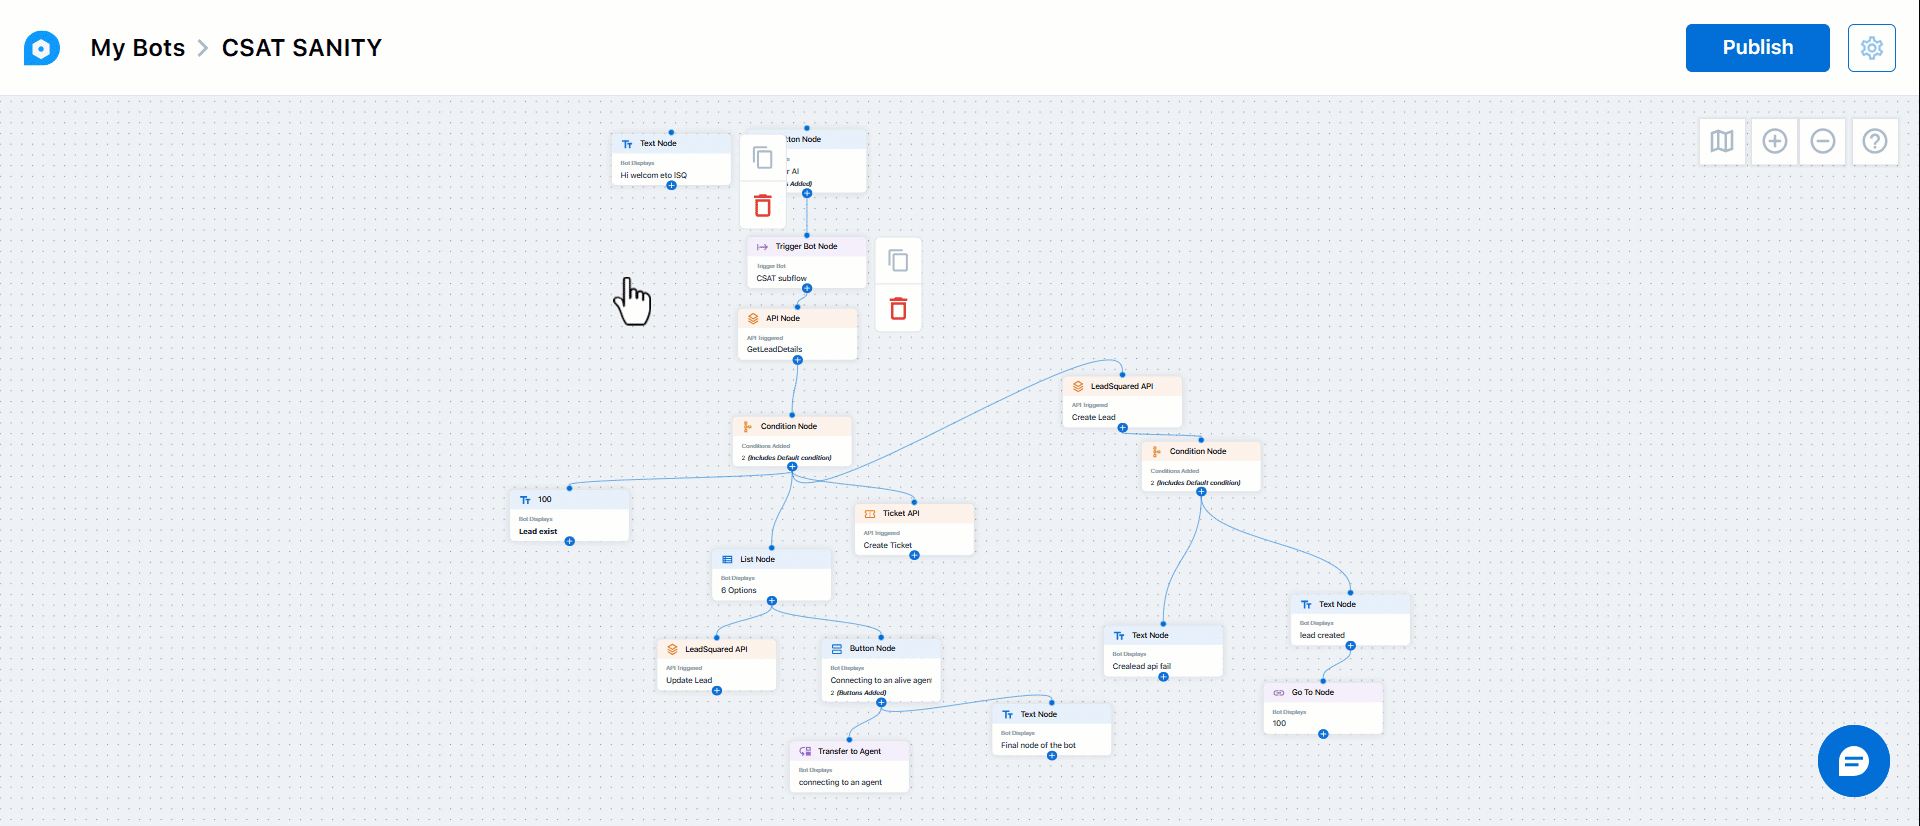
In cases where a lead’s journey involves multiple flows, such as when offering different undergraduate course plans like BTech, BCom, or BA, configuring all flows within a single chatbot can be complicated. To simplify this, you can create separate bots for each course flow. For example, you could have one bot dedicated to BTech inquiries, another for BCom, and a third for MBA.
Using the Trigger Bot feature, you can then link these flows under the main lead journey chatbot. When a lead interacts with the chatbot and selects their desired course, such as BTech, the Trigger Bot directs them to the BTech bot. Similarly, if they choose BCom or MBA, they are directed to the respective course-specific bot. This approach keeps the chat flow organized while providing tailored information based on the user’s selection.
When configuring this action, under Bot Response –
- Under a node, click , and under Actions, click Trigger Bot Node.
- From the Trigger Bot dropdown, select the bot you want to redirect the lead to.
- Then, from the Select Bot Intent dropdown, choose the lead input that should trigger the bot.
- Once you’re done, click Save.
Note:
- Only published bots will appear in the dropdown of the trigger bot action.
- You can redirect the lead only to the starting (first) node of another chatbot flow. Sending the lead to a node in the middle of a different flow is not possible. This ensures that leads begin any new flow from the intended starting point.

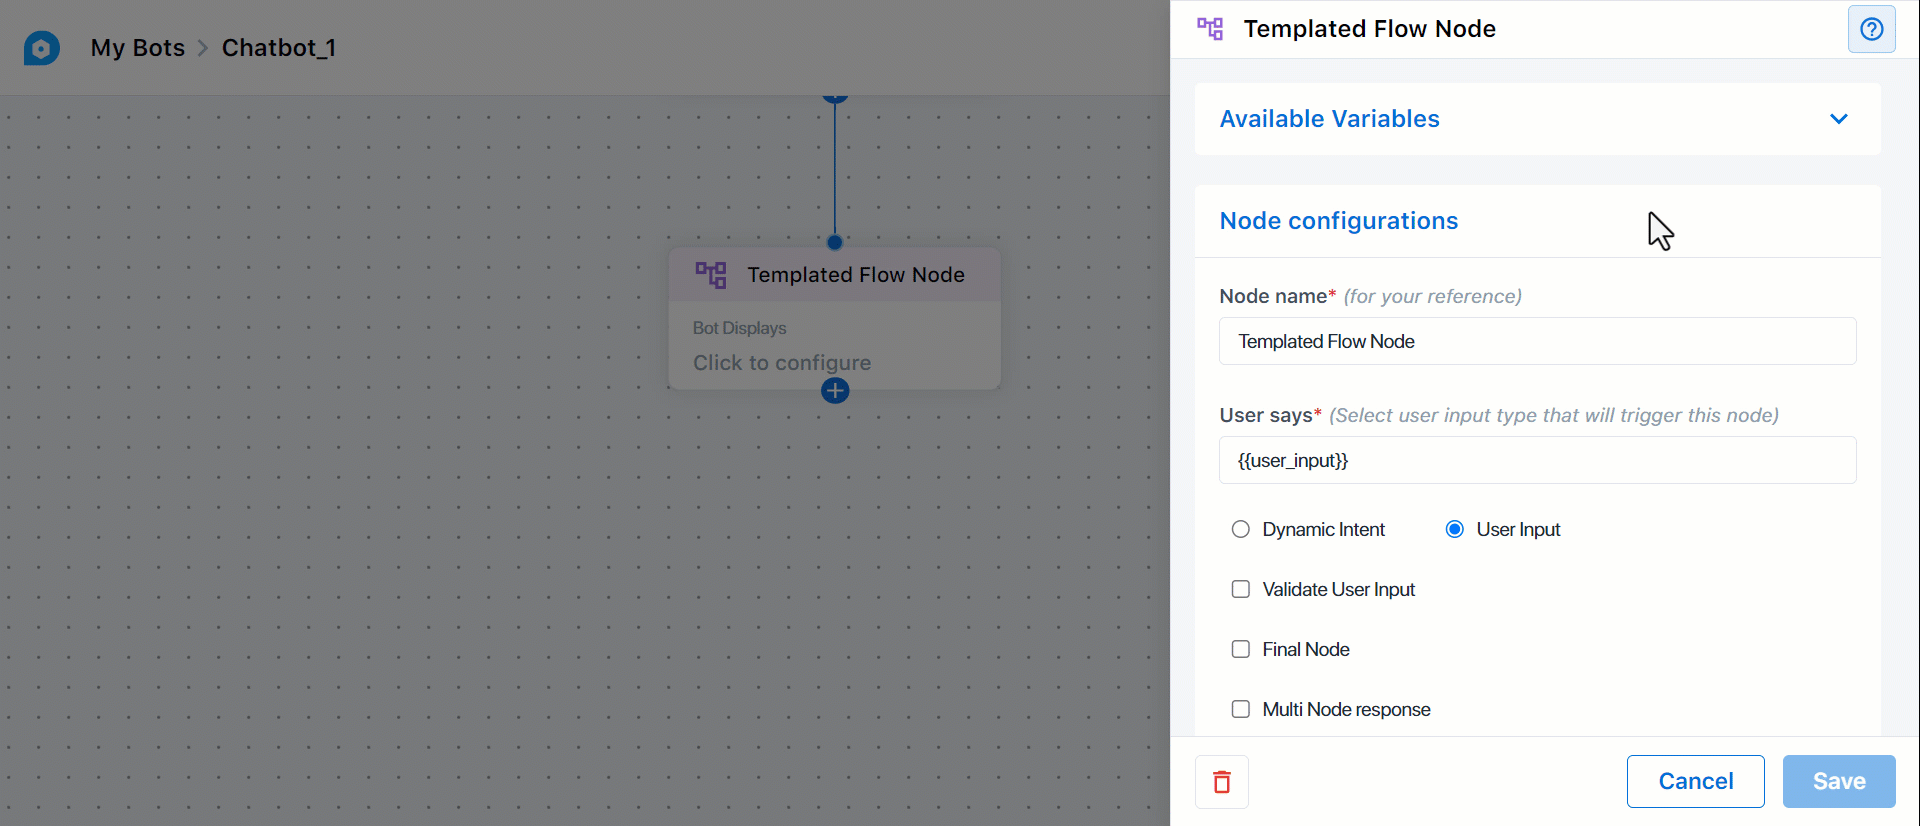
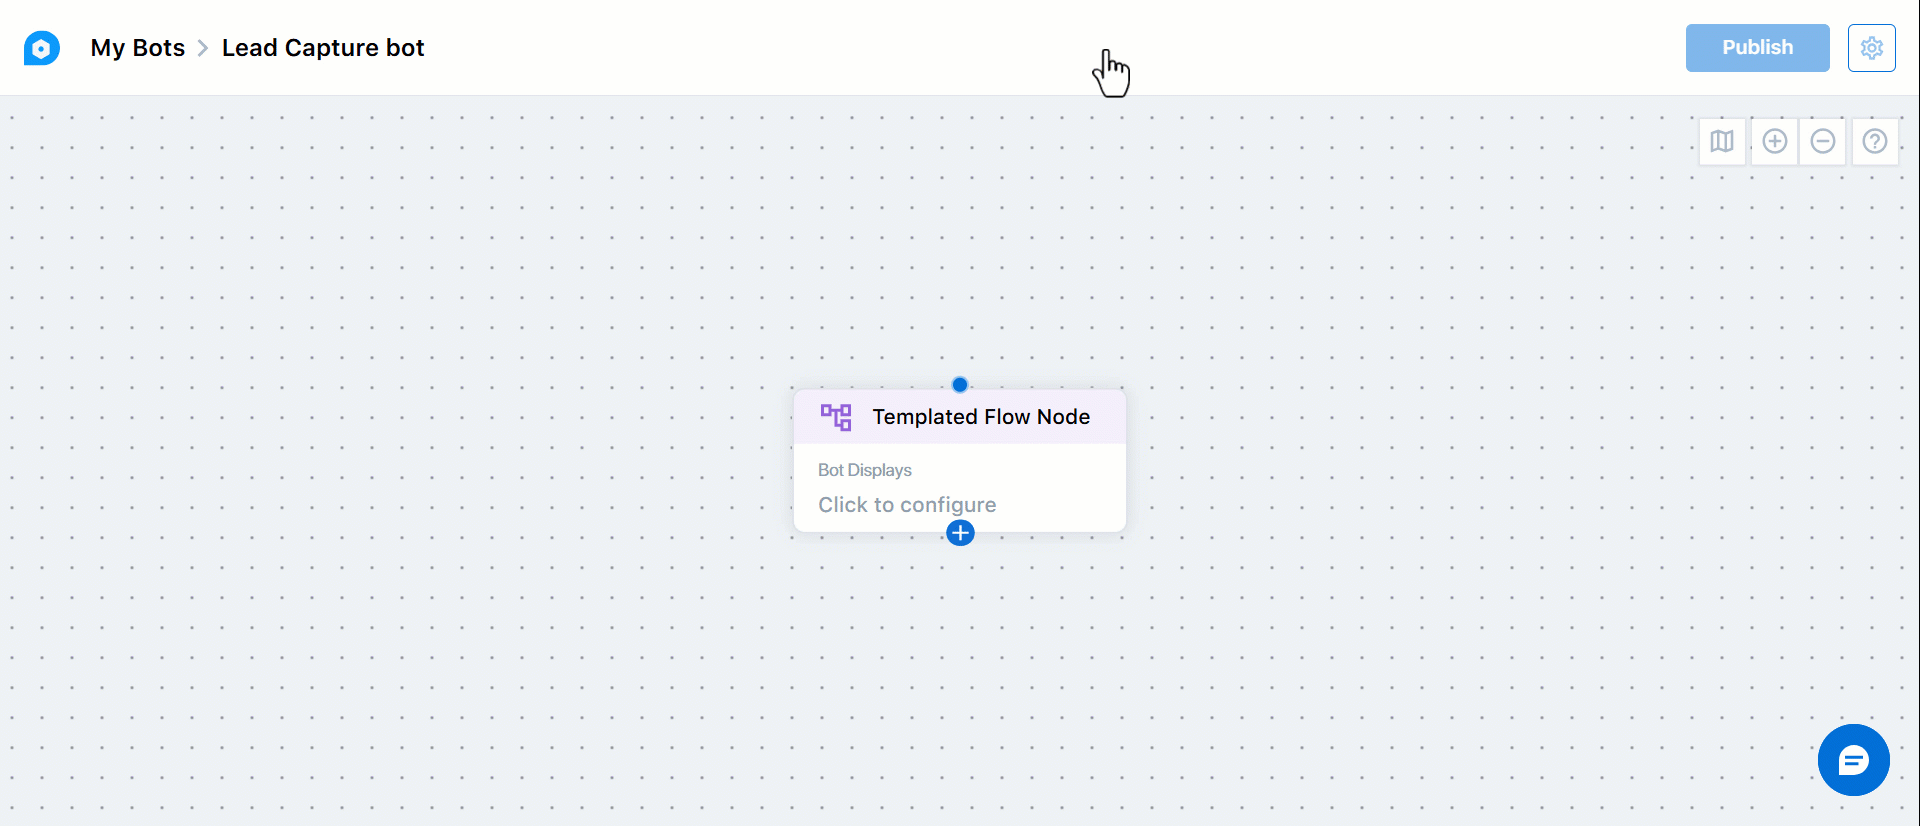
7.3 Templated Flow
We’ve created chatbot flow templates designed for specific use cases. After selecting a template, you can customize it to fit your business needs. Currently, we offer the OTP Verification template, which is used to verify the OTPs entered by leads, and the Lead Capture template, which helps you collect essential lead details. These templates streamline the setup process, allowing you to efficiently implement effective chatbot solutions. To use these templates –
- Under a node, click , and under Actions, click Template Flow Node.
- Under Bot Response, choose the flow you want to use from the Templated Flow dropdown menu. If you’ve selected OTP Verification –
- Configure whether to Allow Resend OTP. If enabled, the OTP will be resent to the lead upon request.
- If OTP resend is enabled, set the maximum number of OTP requests the lead can make.
- To set up a Condition based response, enable the slider. Once enabled, you can configure different responses that will be shown to your lead depending on whether they enter the correct (True) or incorrect (False) OTP.
- Under Bot displays, select the type of response you want to send after the lead enters the OTP – Text, Button, or List. After choosing the type, configure the content to be displayed. Setting up Text, Button, and List responses follows the same steps outlined earlier…
- Configure whether to Allow Resend OTP. If enabled, the OTP will be resent to the lead upon request.
- If you’ve selected Lead Capture, enter the text response that will be sent to your lead once their details are captured. No further steps are required here.
- Once you’re done, click Save.
- The selected template flow is now applied to your chatbot. Publish the bot to make it live.
The GIF below shows the OTP Verification flow being configured.
The GIF below shows the Lead Capture flow being configured.
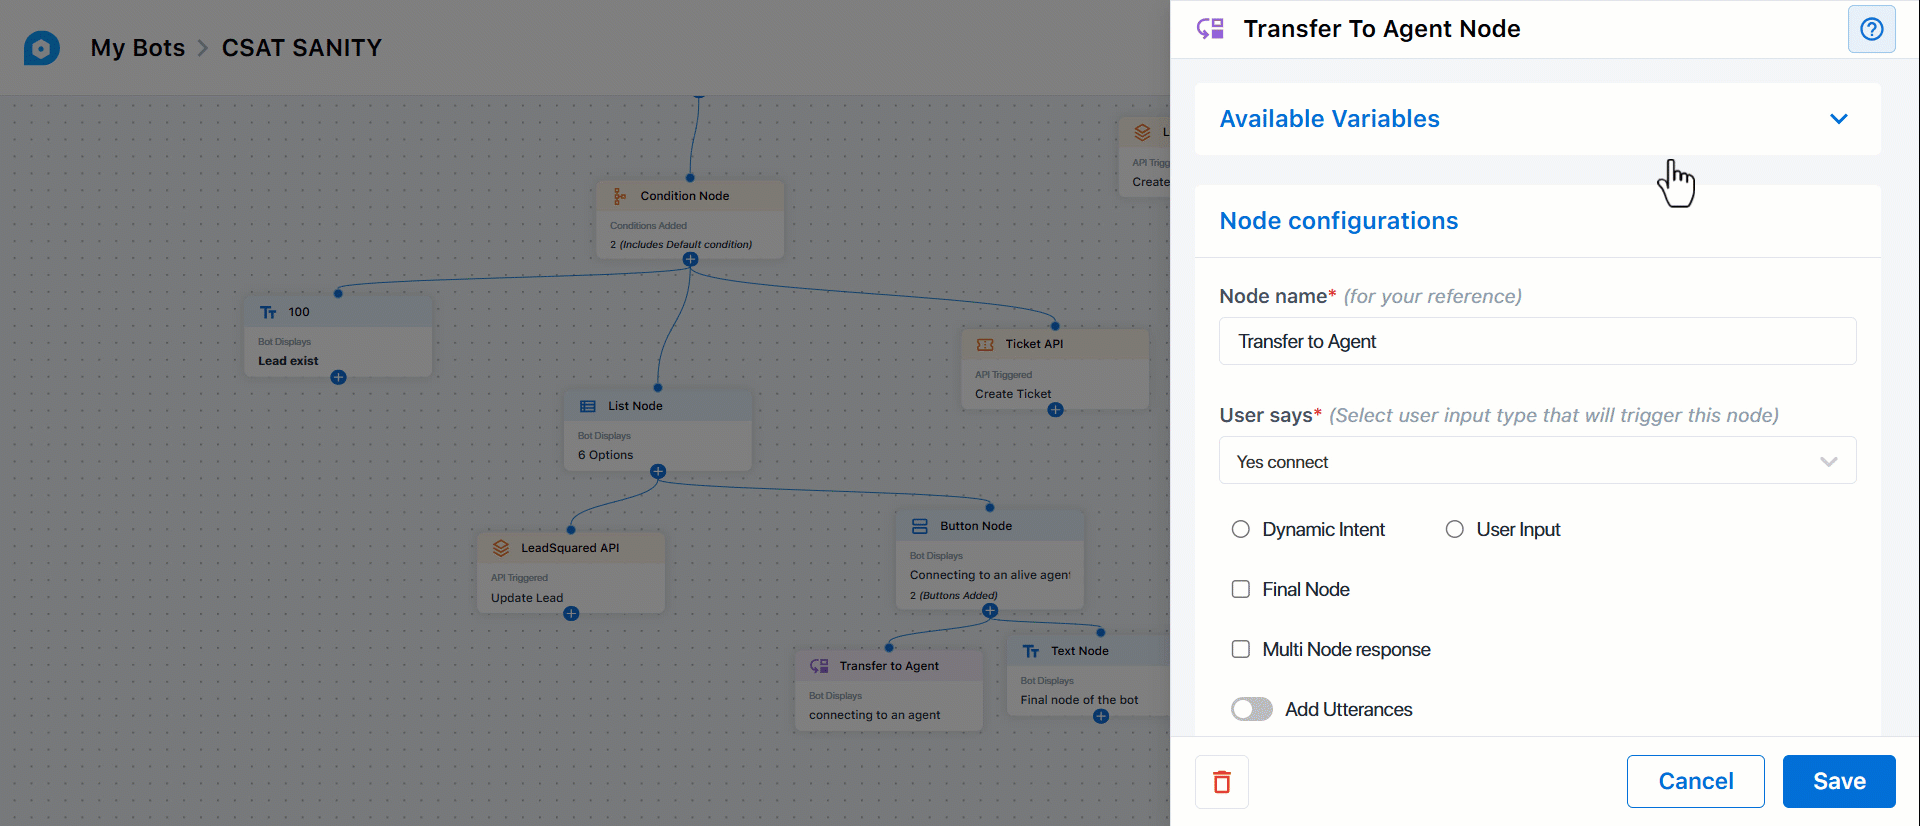
7.4 Agent Transfer
This action allows the chatbot to transfer an ongoing conversation to a live agent. This feature is useful when the chatbot cannot resolve a complex query, or when the lead specifically asks for help from a human agent. When this action is triggered, the bot seamlessly redirects the conversation to an available agent, ensuring that the lead receives personalized assistance. The handover node also ensures continuity, as the agent can review the previous chat history before responding, making it easier to provide accurate and informed support. This enables smooth transitions between automated responses and human intervention, enhancing the overall user experience.
This node can route chats to your Sales users or Service users. For instance, if a new lead wants a product demo, the bot can direct them to a sales user. Conversely, if an existing lead wants to upgrade their plan, the bot can route them to a service user.
Prerequisites
Before you set up the Agent Transfer node, ensure the following steps are completed. This is mandatory –
- On the Chatbot home screen, click Authorization.
- Under Generate API Key, alongside Converse, click Generate.
- Copy the API key, and navigate to My Profile>Settings>Converse>Authentications.
- Under Add API Key, alongside BOT, enter the API Key you copied, and click Add.
- Then, on the same page, under Generate API Key, alongside BOT, click Generate Key.
- Copy this key, and navigate back to the Chatbot home screen.
- Then, under Add API Key, alongside Converse, enter the API Key you copied, and click Add.
This links the Chatbot with Converse to ensure seamless transfer of chats to your live agents.
Note:
- The lead ID must be defined in the flow to transfer a chat to an agent. Use the Get a Lead LeadSquared API for existing leads and the Create a Lead LeadSquared API for new leads to achieve this. Configure the
blc_lsq_lead_idin the response variable to save the lead ID. This enables the chatbot to identify the lead and facilitate the transfer of the chat to an agent. - Ensure you’ve also set up a Sales CRM Routing Rule and/or Service CRM Routing Rule.
- Under a node, click , and under Actions, click Agent Transfer.
- Under Bot Response, configure the following –
- Handover To – If Service CRM is enabled, select if you want to transfer the chat to a Sales User or a Service User.
- Select Routing Rule – In the dropdown, select the Routing Rule logic you want the system to apply when transferring the chat to an agent.
- If you’ve not configured a rule, click the Create Routing Rule button, and configure rules in your account.
- Text Configuration – Enter the message the bot will display to the lead when transferring the chat to an agent.
- Once you’re done, click Save.
- When testing the bot flow on the emulator, check LeadSquared Converse to ensure messages are delivered to both the bot and Converse correctly.
8. Other Actions
In addition to the actions listed in the previous section, you can also configure the following actions –

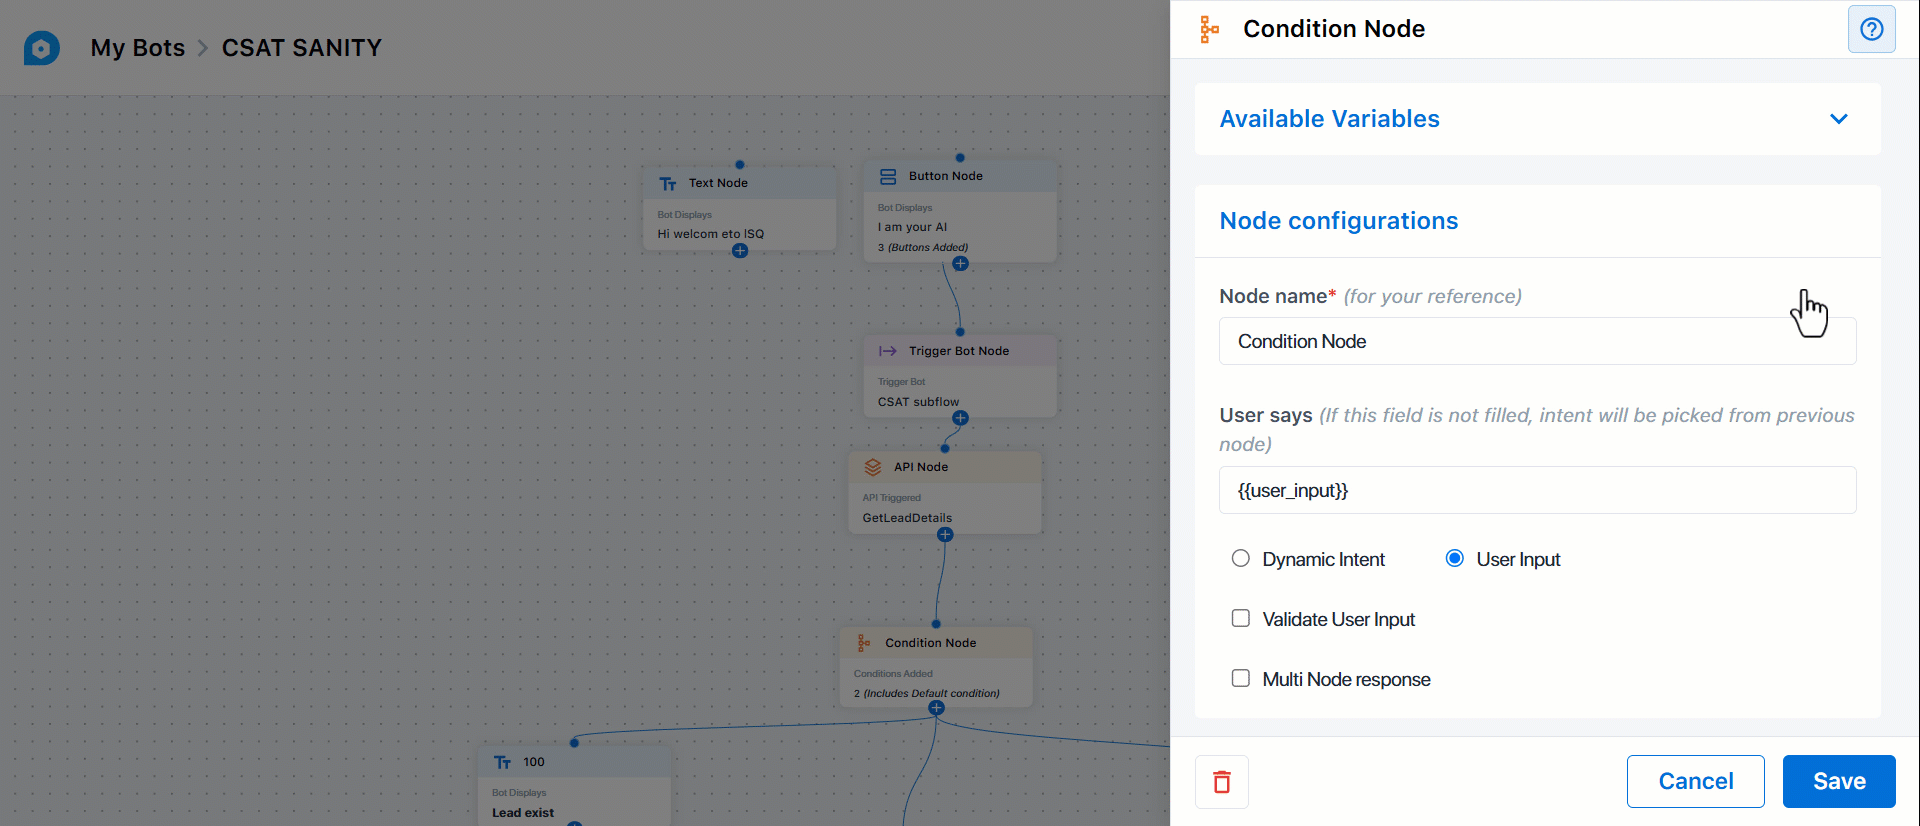
8.1 Condition
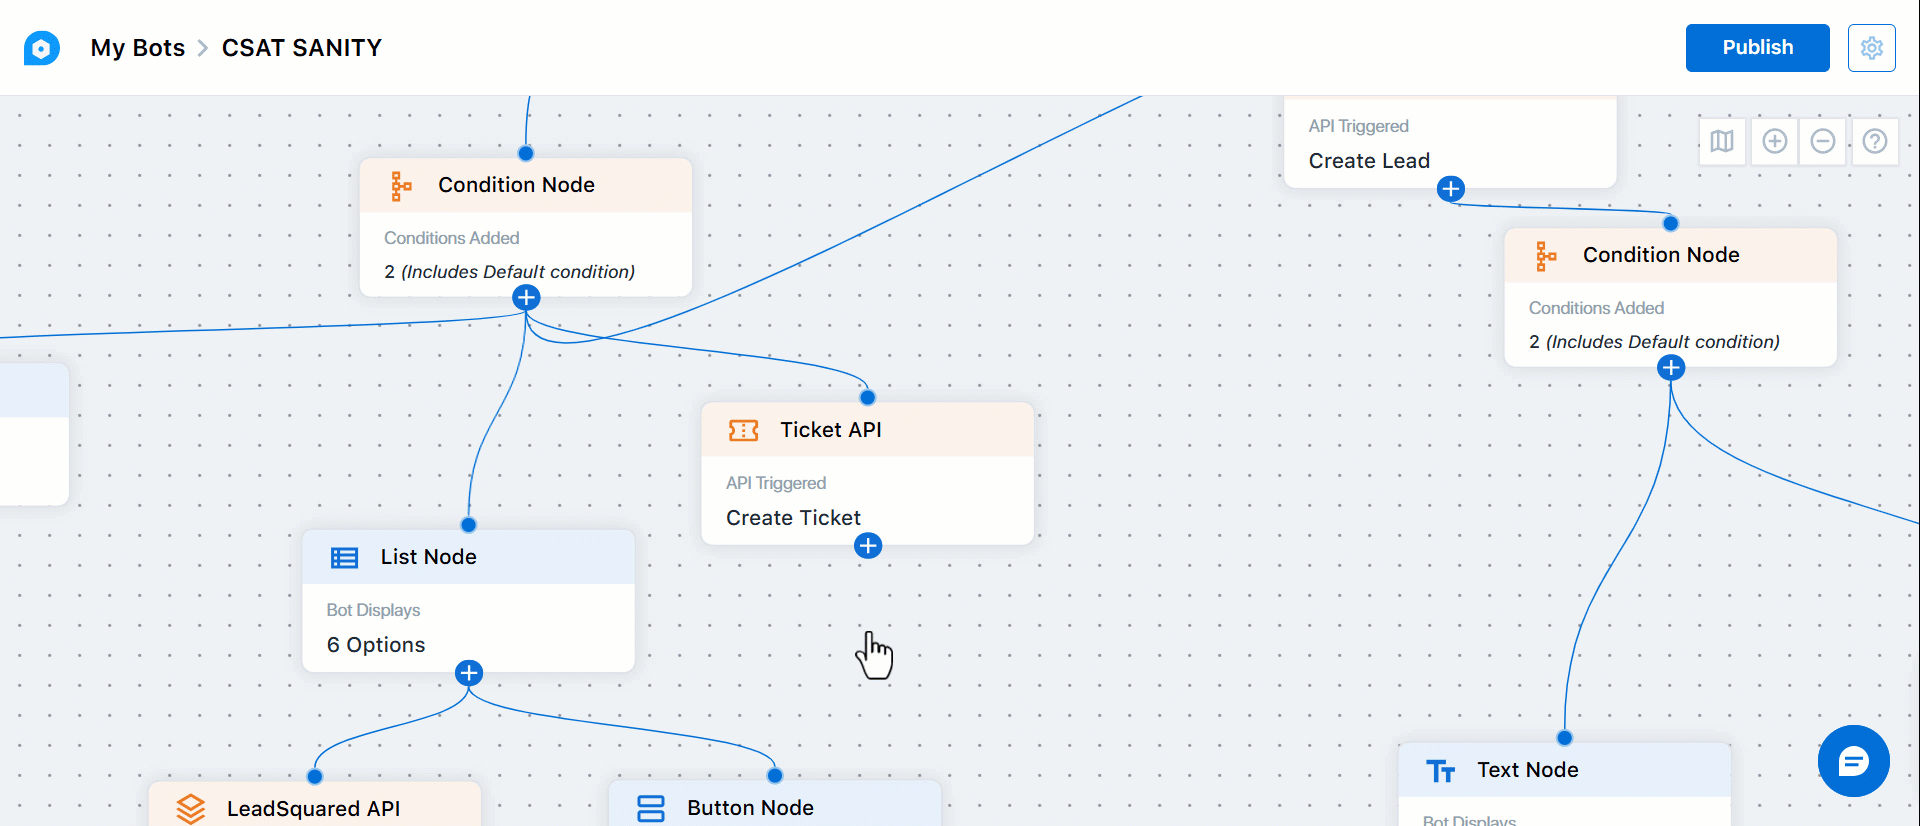
Configure conditions to enable the chatbot to respond based on specific criteria, allowing you to tailor its replies to different outcomes. For instance, you might set up a condition to check if a lead already exists in your system based on their phone number. If the lead exists, the bot can respond using their name. If not, the bot can request additional details (like name and email) and use these to create a new lead in LeadSquared. This approach ensures relevant, personalized responses, providing a more engaging and efficient experience for users.
- Under a node, click , and under Other, click Condition.
- Under Bot Response, configure the following –
- Name – Add a display name for the condition.
- Alongside IF, use the dropdown to configure the conditions.
- Use the Add Rules button to add multiple rules to the same condition.
- To add multiple conditions, use the Add Condition button.
- After configuring the conditions, click Save, and then test the chatbot to ensure it responds as intended based on the set conditions. This helps verify that the bot is delivering the correct responses and handling different outcomes effectively.
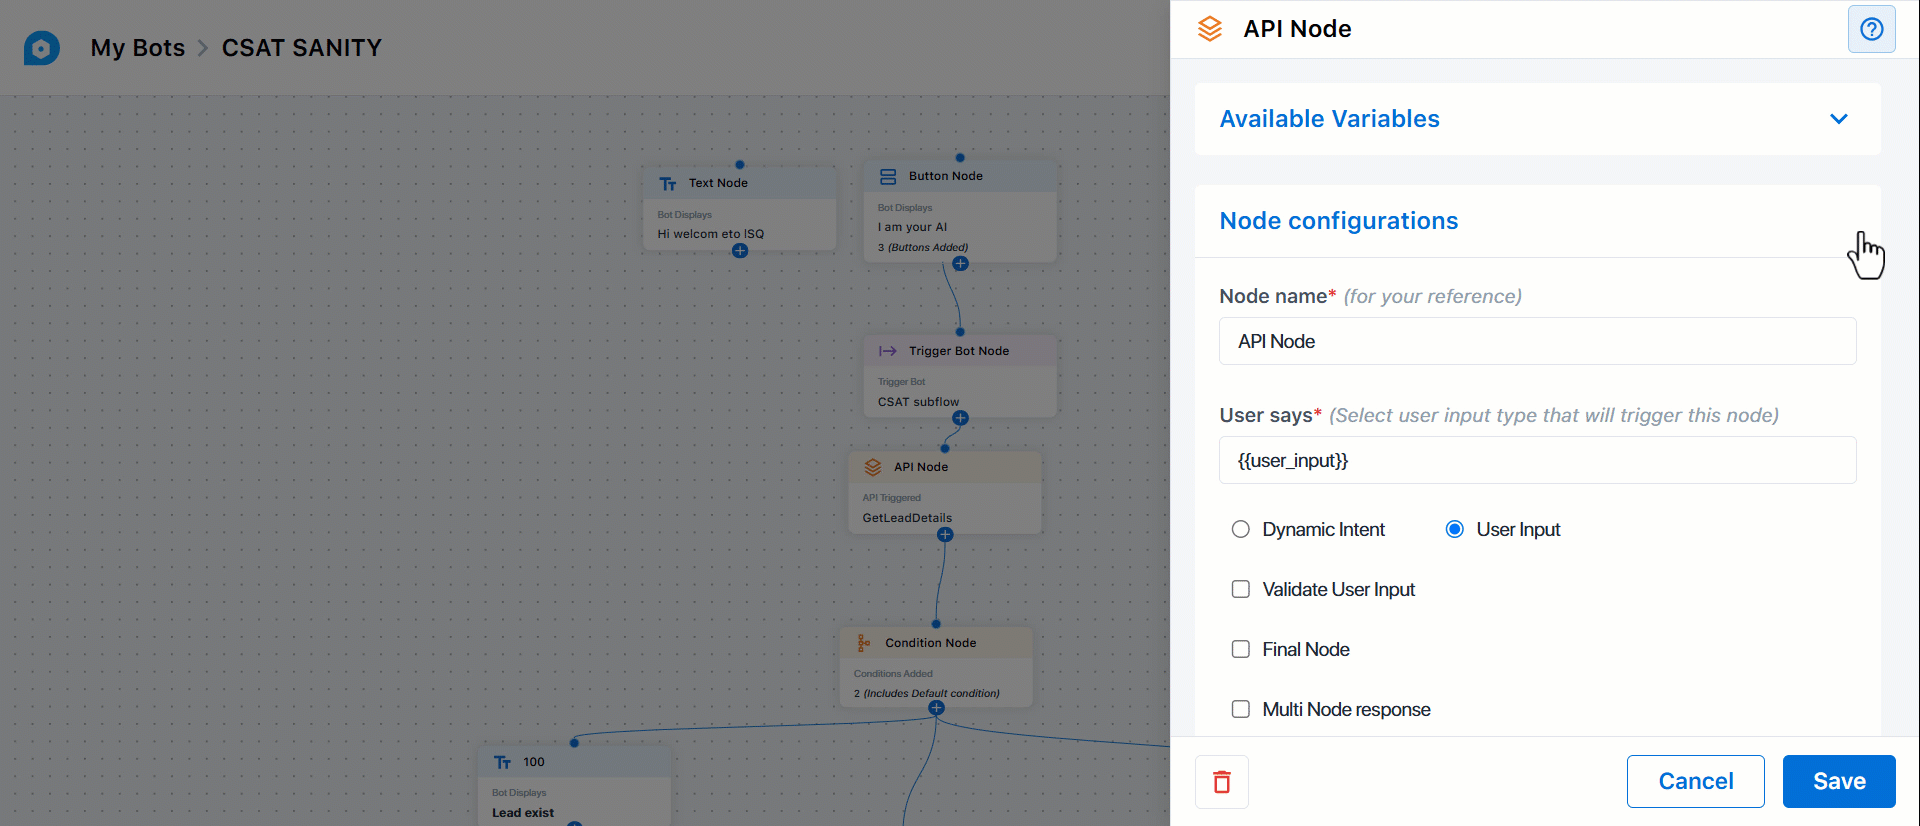
8.2 API Node
An API node integrates either LeadSquared APIs or external APIs, allowing the chatbot to capture or display information dynamically. For example, it can capture details provided by the lead, such as their name or contact number, or display relevant information like a list of courses or available pin codes. The response configured in an API node can be a simple text message or an interactive response, where button options or list options are shown to guide the lead’s next steps. This enables a more personalized and data-driven interaction within the chatbot flow.
- Under a node, click , and under Other, click API Node.
- Under Response Configuration, from the Select API to call dropdown, select the API you want to integrate with the bot.
- Once you’re done, click Save.
8.3 LeadSquared API Node
Unlike the API Node, which requires manual integration of a LeadSquared API, this node automatically fetches LeadSquared APIs into the chatbot. Depending on the LeadSquared entities enabled in your account, you can directly access and configure the corresponding APIs for these entities within the bot builder framework. This streamlines the setup process, making it easy to incorporate key LeadSquared data without additional API configuration steps.
- Under a node, click , and under Other, click LeadSquared API Node.
- Under API Configurations, configure the following details –
- Module – From the dropdown, select the LeadSquared module you want to integrate with the bot. The available modules are Lead Management and Activity Management.
- Action Type – From the dropdown, select the action you want the bot to perform. For the Leads module, you can choose from Create, Update, Retrieve, or Delete actions. For the Activity module, only the Create action is available.
- Select API to Call – Based on the action you selected in the previous dropdown, this dropdown shows the available APIs under that action. Choose a relevant API.
- Attribute Configuration – This option allows you to map data fields between the chatbot and the API. Attributes like name, phone number, and others configured here ensure that data flows correctly from the chatbot to the corresponding fields in LeadSquared, keeping information synced between the bot and your LeadSquared account.
In the first box, enter the LeadSquared schema name, and in the second box, enter the corresponding bot variable. The lead attribute schema names are present on the Lead Fields Settings page. - Response Variable Configuration – This allows you to map the API’s response with the bot, enabling you to capture information returned by the API, such as lead status, verification outcomes, or available options, and use it within the chatbot flow. This means the bot can respond with real-time data, display relevant information to the lead, or trigger further actions based on the API response.
For example, if you use the Response Variable to set up a Condition Node, the bot might check if the lead exists based on the API response. If the lead exists in your account, the bot can proceed to send a message offering a demo. Alternatively, if the lead doesn’t exist, the bot might respond with a message asking them for additional lead details. - Configure Fields – This option allows you to configure custom fields for Activities when posting an activity. Add the attribute name as the schema name and assign bot variables as the corresponding values.
- Once you’re done, click Save.
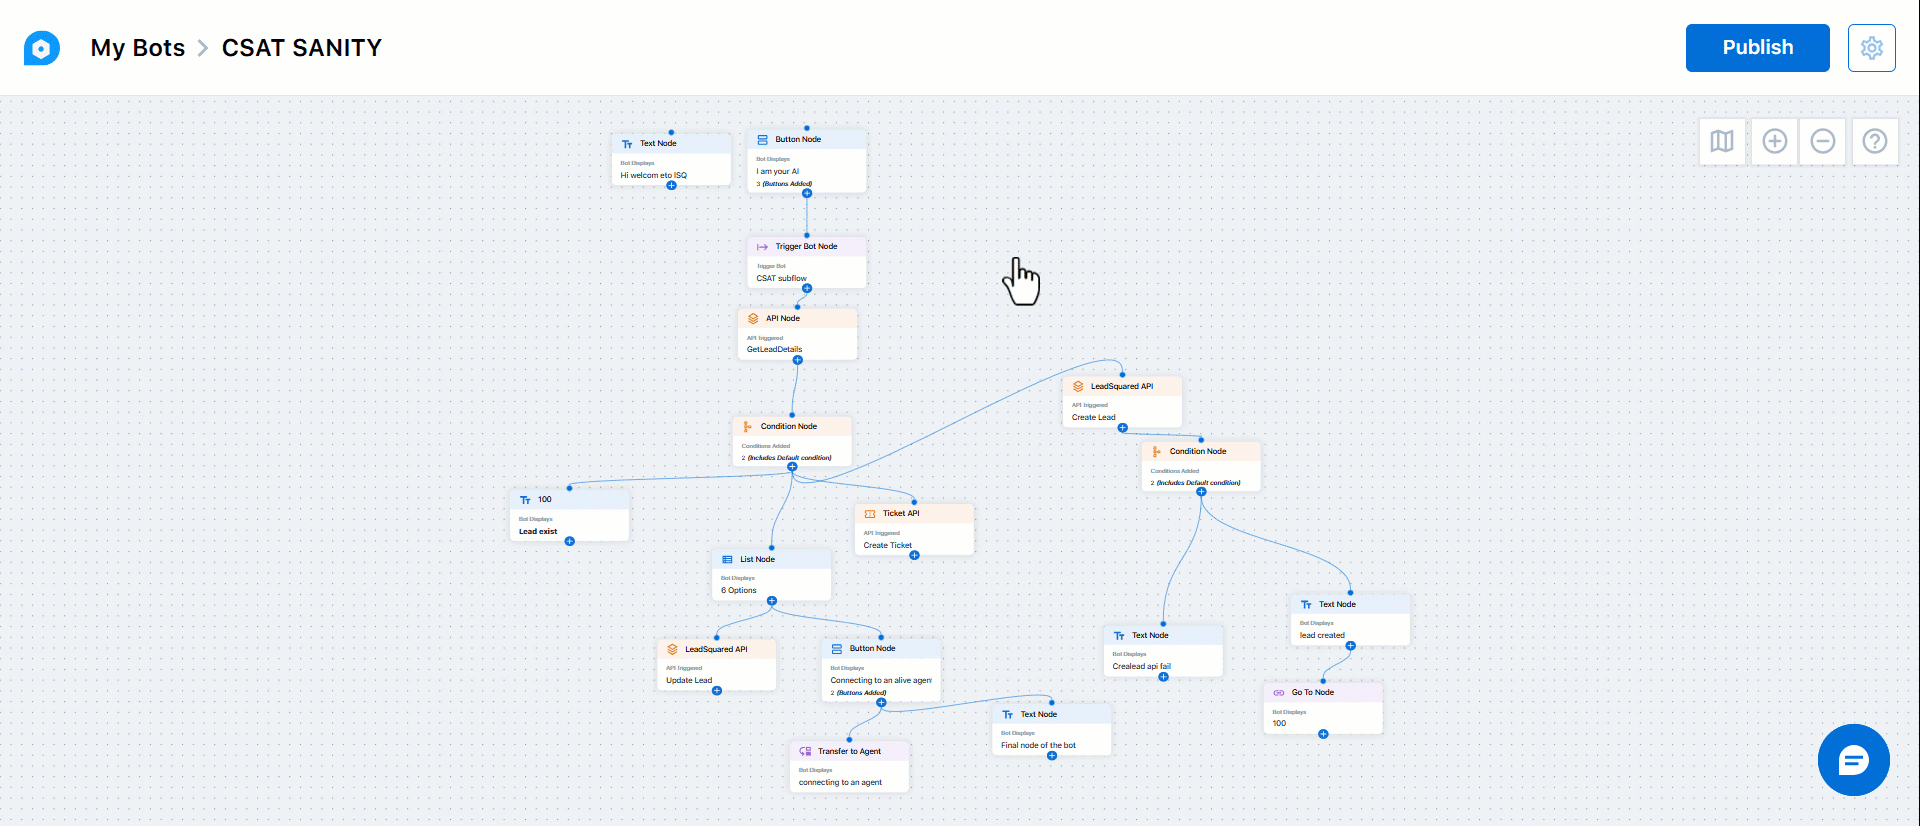
8.4 Ticket API Node
This bot integrates the Service CRM Create a Ticket API with the Chatbot. This bot is visible only if the Service CRM feature is enabled and configured in your account.
- Under a node, click , and under Other, click Ticket API Node.
- Under API Configurations, configure the following details –
-
- Attribute Configuration – This option allows you to map data fields between the chatbot and the API. Attributes like ticket subject, priority, and others configured here ensure that data flows correctly from the chatbot to the corresponding ticket fields in Service CRM, keeping information synced between the bot and your LeadSquared account.
In the first box, enter the LeadSquared schema name, and in the second box, enter the corresponding bot variable. The ticket attribute schema names are present on the Ticket Fields and Form Configuration page. - Response Variable Configuration – This allows you to map the API’s response with the bot, enabling you to capture information returned by the API, such as ticket status, and use it within the chatbot flow. This means the bot can respond with real-time data, display relevant information to the lead, or trigger further actions based on the API response.
For example, if you use the Response Variable to set up a Condition Node, the bot might check if the lead exists based on the API response. If the lead exists in your account, the bot can proceed to send a message offering a demo. Alternatively, if the lead doesn’t exist, the bot might respond with a message asking them for additional lead details. - Configure Fields – No action is required here.
- Attribute Configuration – This option allows you to map data fields between the chatbot and the API. Attributes like ticket subject, priority, and others configured here ensure that data flows correctly from the chatbot to the corresponding ticket fields in Service CRM, keeping information synced between the bot and your LeadSquared account.
-
- Once you’re done, click Save.
9. Bot Emulator Actions
When testing out the chatbot using the emulator, you can perform the following actions –
- To see a record of all interactions with the emulator, enable the slider next to View Logs. This will display a detailed log of each interaction, helping you track and review the chatbot’s responses and actions during testing.
- In the log, you can view the specific configurations of each node by clicking on the node name. This allows you to edit the node directly from the log.
- To reset the emulator, click
 . This will clear the current session, along with the existing emulator logs.
 - To close the emulator, click
 .
.
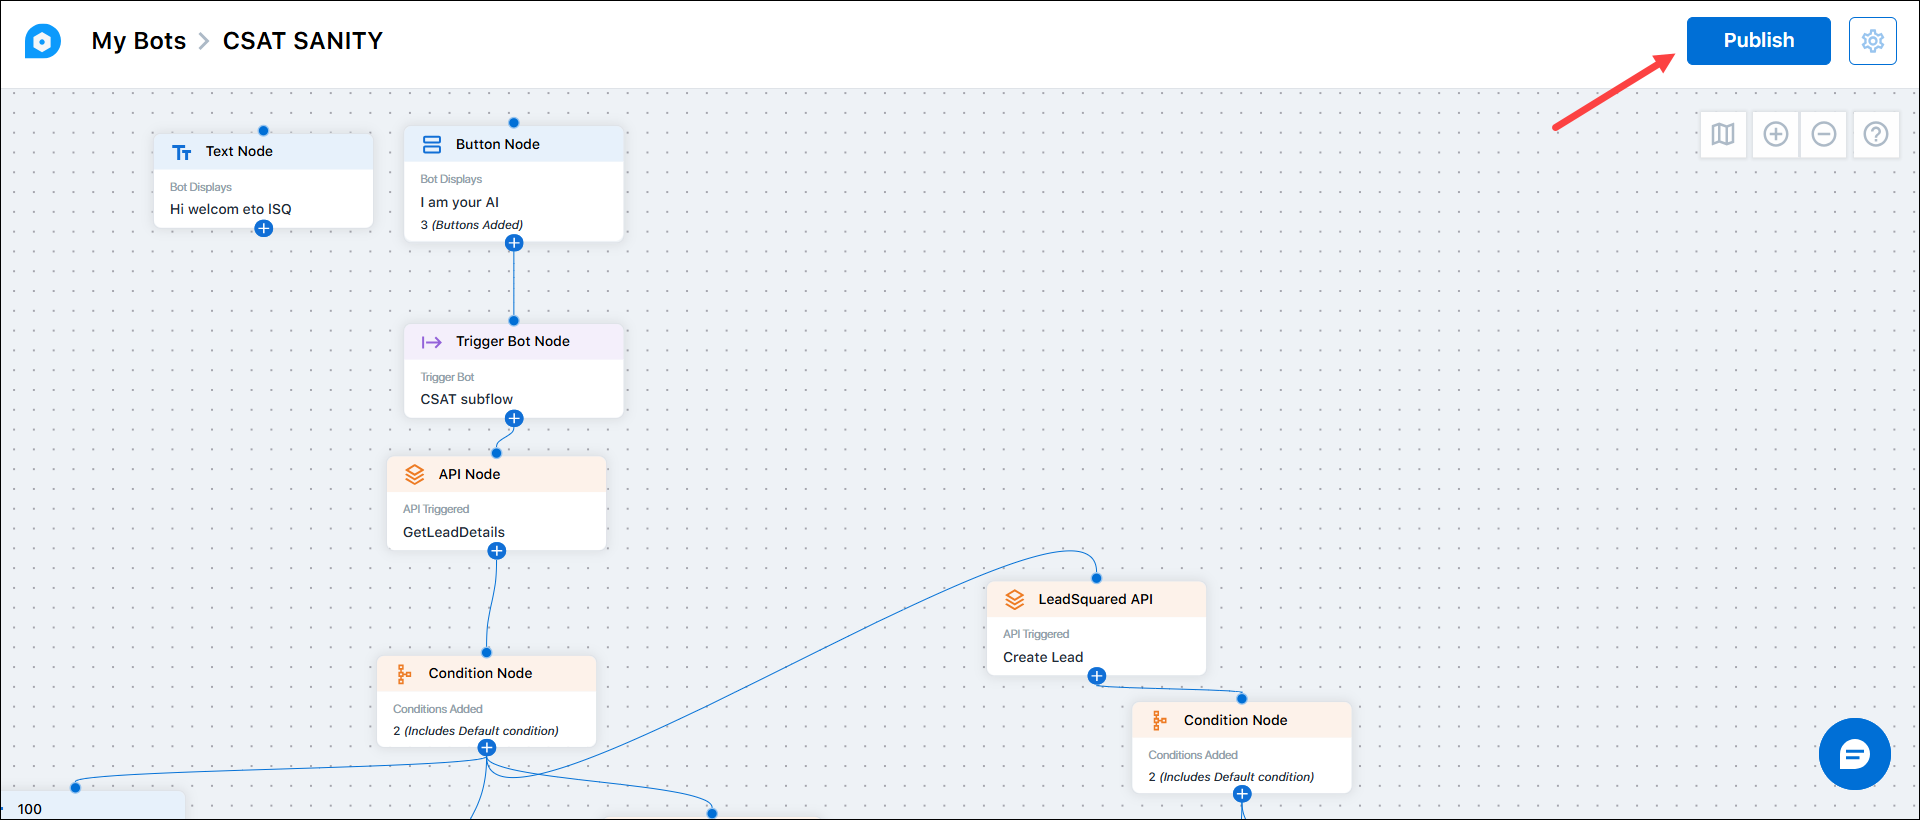
10. Publish the Bot
Once the bot flow is ready, publish it. To do this, click the Publish button on the bot builder page.
11. Configurations
To complete the chatbot set-up, navigate to the Configurations screen.
11.1 Session Timeout
Configure the message you’ll send to the lead when the chat session ends because the lead hasn’t sent any message for a specified time period.
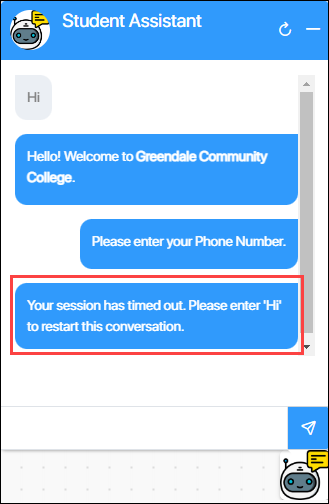
Click Edit to –
- Set the hours and minutes of inactivity after which you want to display the message to your lead.
- Add the timeout message the lead receives after the session times out.
- To add multiple timeout messages, click
 .
.
Once you’re done, click Save.
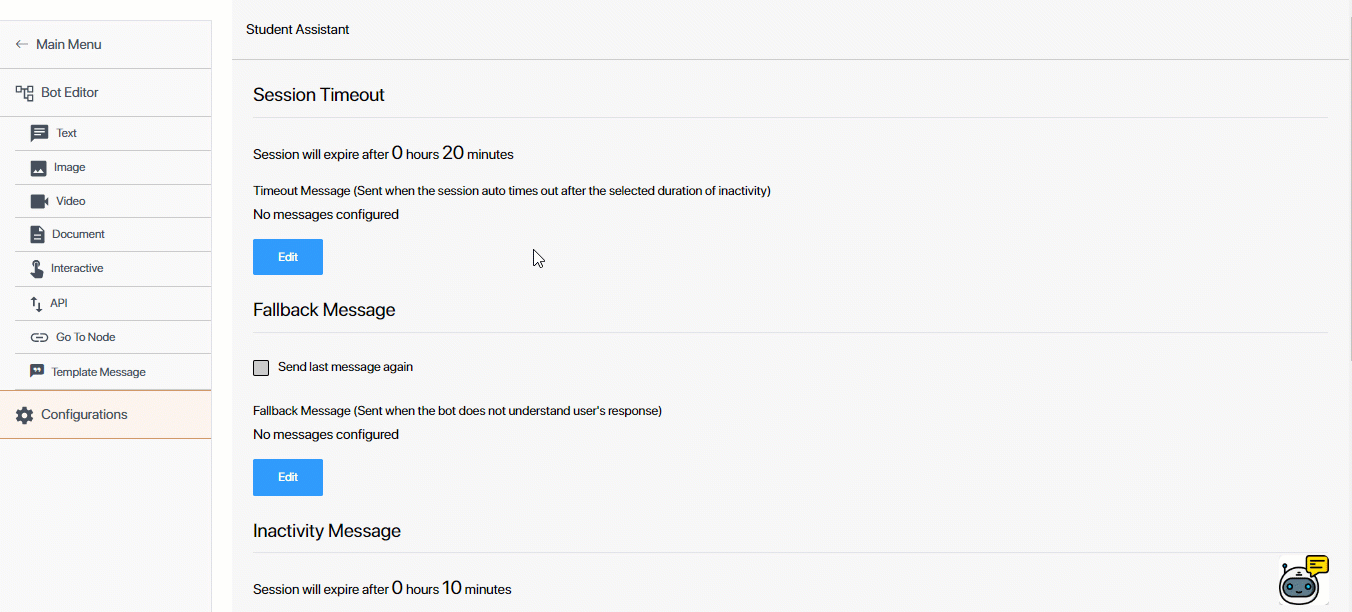
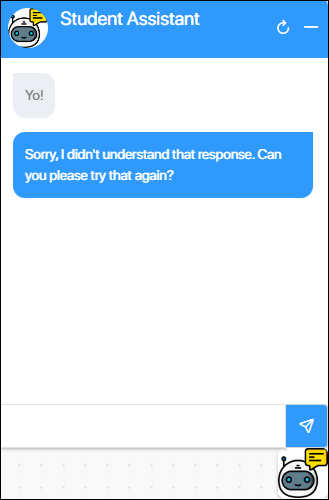
11.2 Fallback Message
Fallback messages are sent when the chatbot doesn’t understand the lead’s message. For example, if a journey-based bot asks for a mobile number and the lead types “Sam”, the bot replies with a fallback message like “Could you please check your response?” or “Sorry, I didn’t understand.”
Click Edit to –
- To send the previous chatbot message as the fallback message, enable the
 checkbox.
 - Add the fallback message the lead receives when the bot does not understand the lead’s response.
- To add multiple timeout messages, click .
Once you’re done, click Save.
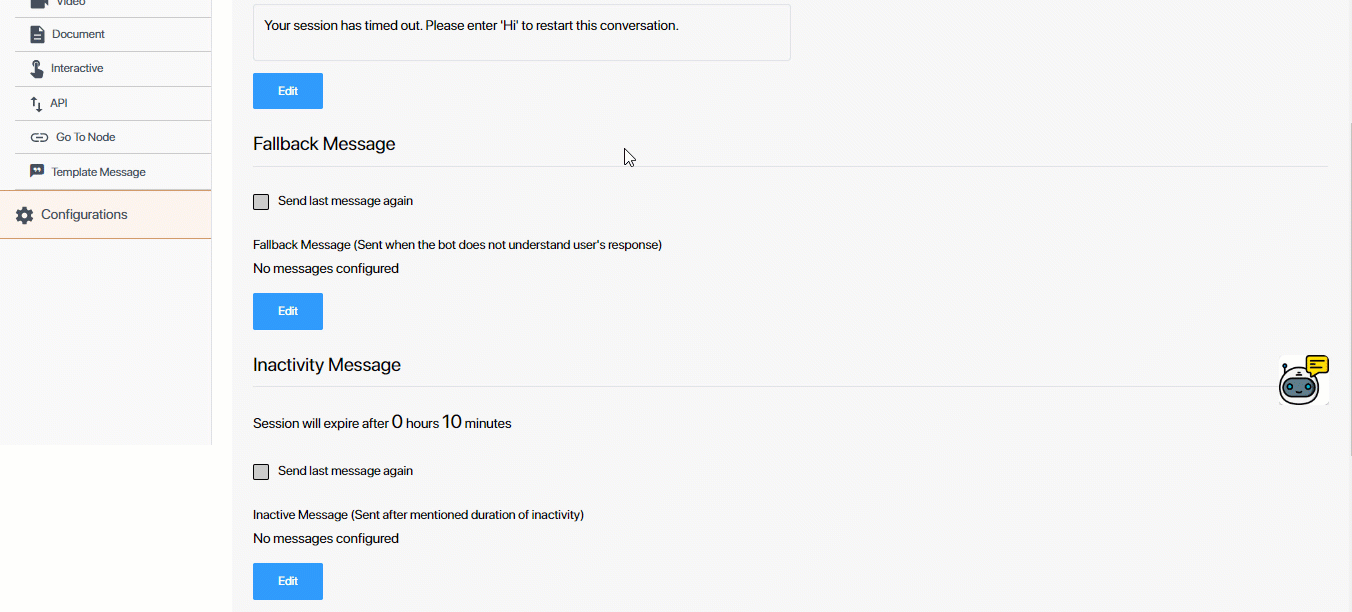
11.3 Inactivity Message
Configure the message the chatbot sends to the lead when the lead is inactive on the chatbot and hasn’t sent any message for a specified time period. This message is a reminder to the lead, to let them know the session is idle.
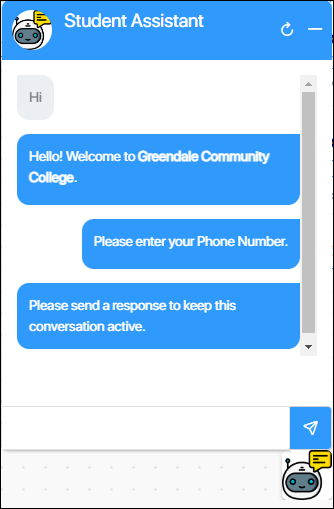
Click Edit to –
- To send the previous chatbot message as the inactivity message, enable the checkbox.
- Set the hours and minutes of inactivity after which you want to display the message to your lead.
- Add the timeout message the lead receives after the session times out.
- To add multiple timeout messages, click .
Once you’re done, click Save.
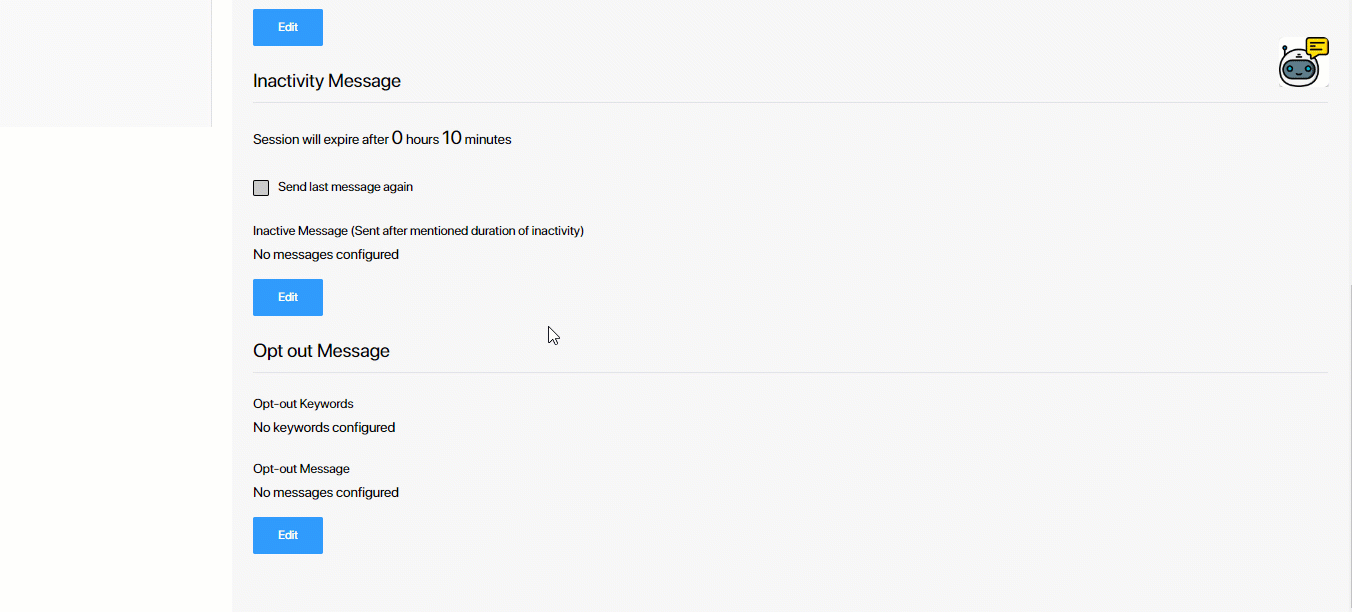
11.4 Opt-out Messages
When a lead sends any of the keywords configured here as an input message, the lead automatically opted out of further interactions with the chatbot. Click Edit to add the list of keywords. In the Opt-out Message box, configure the message you want to send as the chatbot response once the lead has opted out of the conversation.
Once you’re done, click Save.
12. View Chatbot Interaction Activity
When a lead interacts with your bot, the entire conversation is recorded as an activity called Chatbot Interaction. This activity includes the complete chat transcript, the channel used for the chat, the session’s start and end times, and whether the chat was transferred to a live agent. This activity can be viewed on the Lead Details page or the Manage Activities page. The activity is posted if –
- Final Node Triggered – When the lead completes the chatbot flow.
- 24 Hours of Inactivity – If the chat remains inactive for 24 hours.
- Transfer to Agent – When the chat is handed over to a live agent.
13. More Actions
- On the bot builder screen, you can search for a node using the node name, the user intent, the buttons configured and the Bot Display.
- You can clone an existing bot from the Bots homepage. To do this –
- Alongside the bot you want to clone, click
 , and click Clone.
 - On the Clone pop-up, click Clone to confirm.
- Alongside the bot you want to clone, click
14. Next Steps
After you’ve set up the chat flow, you must configure the chatbot channel. To know how to do this, refer to Configure Chatbot Channel.
Any Questions?
Did you find this article helpful? Please let us know any feedback you may have in the comments section below. We’d love to hear from you and help you out!