1. Feature Overview
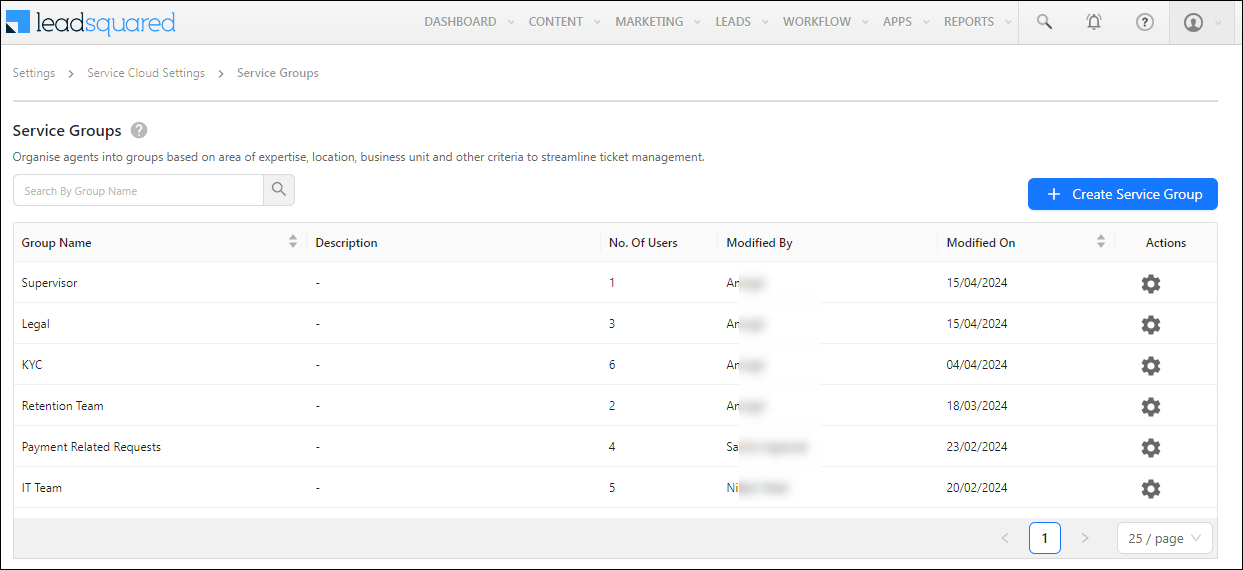
After configuring Service User roles in your account, organise them into groups based on common attributes, such as the regions they cover (Mumbai, Delhi, etc.), the products they handle (home loans, education loans, etc.), the priority level at which tickets are assigned to them (High, Low, etc,) and so on. Once Service Groups are created, manually assign tickets or automatically through Ticket Assignment Rules and Automations.

2. Prerequisites
- Service CRM is a paid feature. To enable it, contact your account manager, or write to scsupport@leadsquared.com.
- You must be a Service CRM Admin to create Service Groups.
3. Create Service Groups
To create a Service Group in your account –
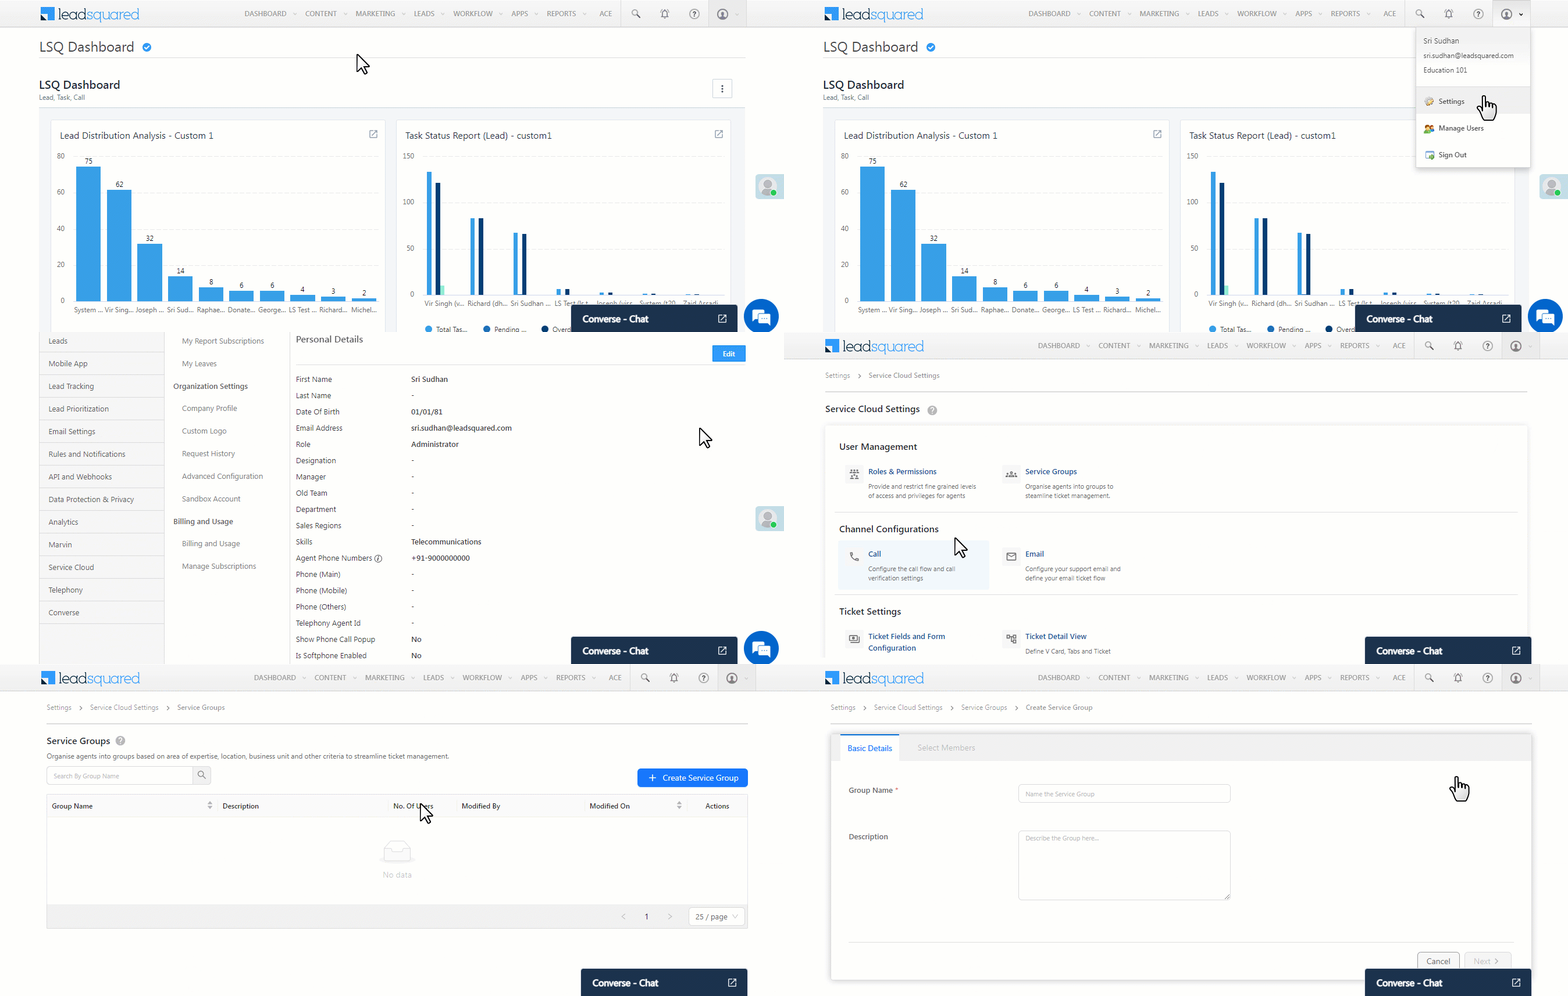
- Log in to LeadSquared (https://login.leadsquared.com/), and navigate to My Profile>Settings>Service Cloud.
- Under User Management, click Service Groups.
- On the Service Groups screen, click Create Service Group.

3.1 Basic Details
Here, enter the following details –
- Group Name – An internal identification name for the group. This is mandatory. Examples of group names can include Mumbai Region, Escalated Tickets, Loan Closure Tickets, etc.
- Description – A description of the group.
Once you’re done, click Next.

3.2 Select Members
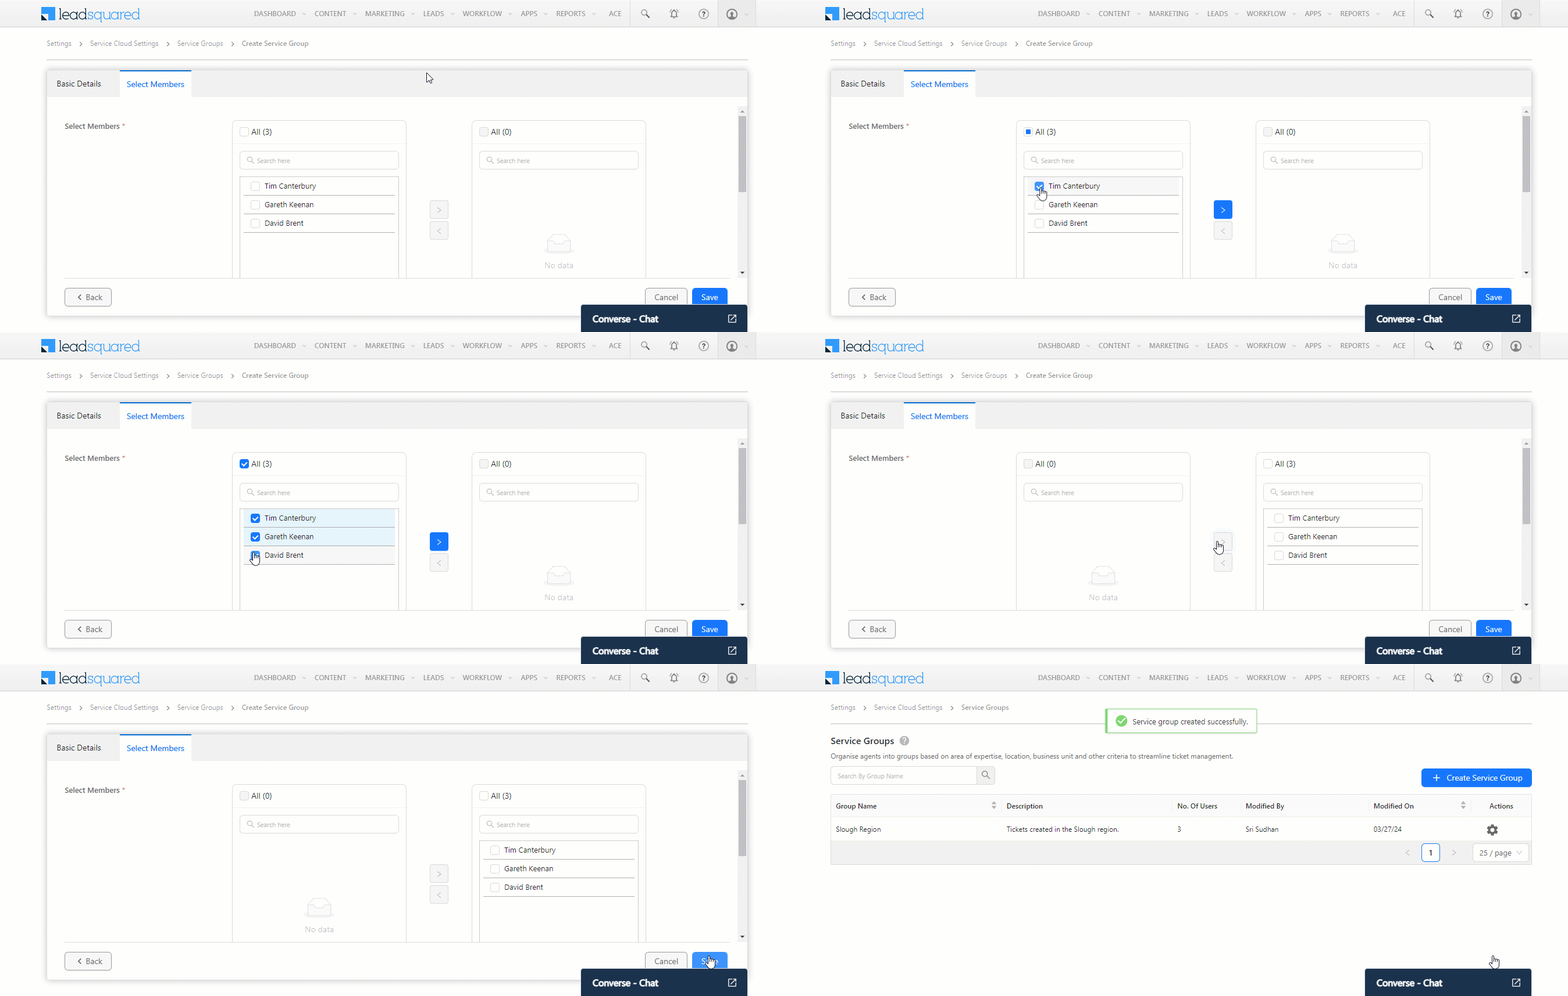
Once you’ve added the basic details, add the Service Users to your group and click Save. The group is now live. You can create multiple Service Groups following the same process.

3.3 Other Actions
Click ![]() to perform the following actions on a Service Group that’s live –
to perform the following actions on a Service Group that’s live –
- Edit – Let’s you update the Basic Details and list of members in the group.
- Delete – Deletes the group. This will not impact the status of the agents within the group.

4. Next Steps
- Manually assign tickets or configure Assignment Rules or Automations to assign tickets to Service Groups.
- To define the working hours for these groups, refer to Workday Templates.
- To define the holidays for these groups, refer to Holiday Calendars.
Any Questions?
Did you find this article helpful? Please let us know your feedback in the comments section below. We’d love to hear from you and help you out!


