


Get Started
Sales Suite
Field Ops
Marketing
Service CRM
Integrations & Apps
FloStack
Ticket Assignment Rules
1. Feature Overview
Once tickets are created (either by a user or the system), Assignment Rules automatically distribute them to agents and Service Groups based on the conditions configured. This setup eliminates the need for manual ticket assignment by managers. The system evaluates user availability and workload to assign tickets to those with the capacity to handle them. Examples can include setting up rules to assign tickets –
- Created in the Delhi region only to agents working in Delhi.
- With the Status “Open” to the L1 team.
- With email subject lines that contain the word “Urgent” to the high-priority team.
- Created through Social Media channels to the dedicated Social Media support team.
This article helps you set up and configure ticket assignment rules in your account.

2. Prerequisites
- Service CRM is a paid feature. To enable it, contact your account manager, or write to scsupport@leadsquared.com.
- You must be a Service CRM Admin to create assignment rules in your account.
- Enable permissions for Others on the Manage Service Permissions page, and configure the number of tickets that can be assigned to each user.
3. How it Works
- Set up a trigger for the assignment rule, based on any ticket or lead field (system and custom fields are available).
- When the rule triggers, select if the tickets should be assigned to an individual user, a Service Group, or based on the specific properties of a user (like “Last Ticket Owner”, etc.).
- If you opt for a Service Group, configure the order of ticket assignment to the agents within the group.
- After you’ve selected this, configure how many tickets are assigned to users, and if the assignment happens based on their availability, shift timings or capacity.
- Once you’re satisfied, publish the rule.
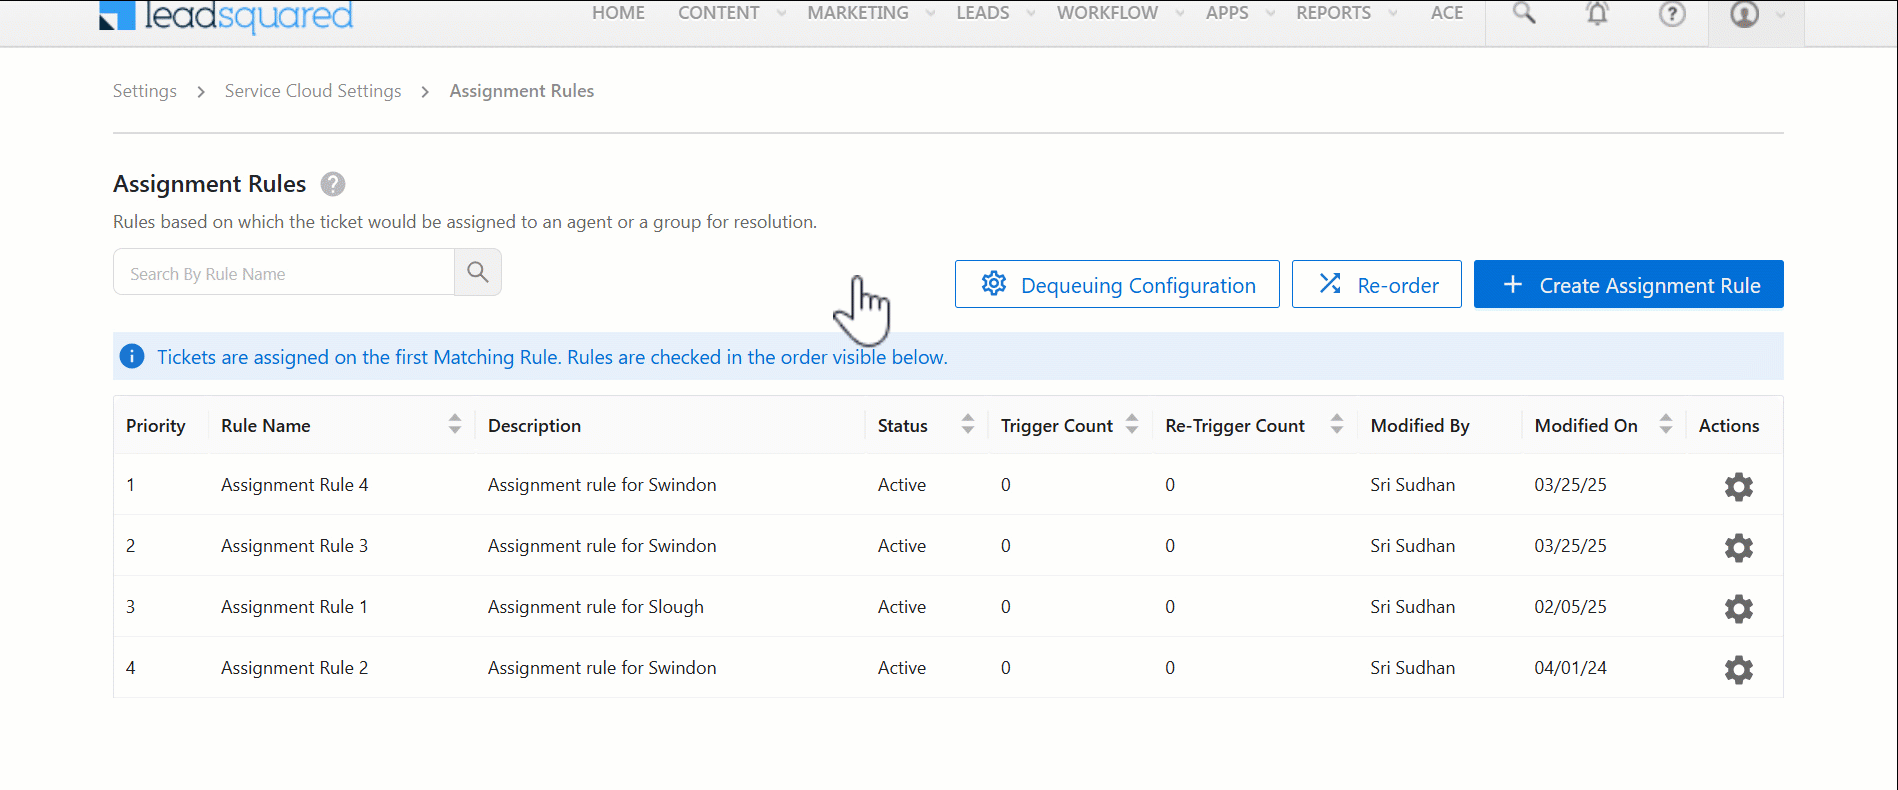
If you have multiple assignment rules, set their order of priority. The first rule in the list is the primary rule, and our system will follow this sequence when assigning tickets.
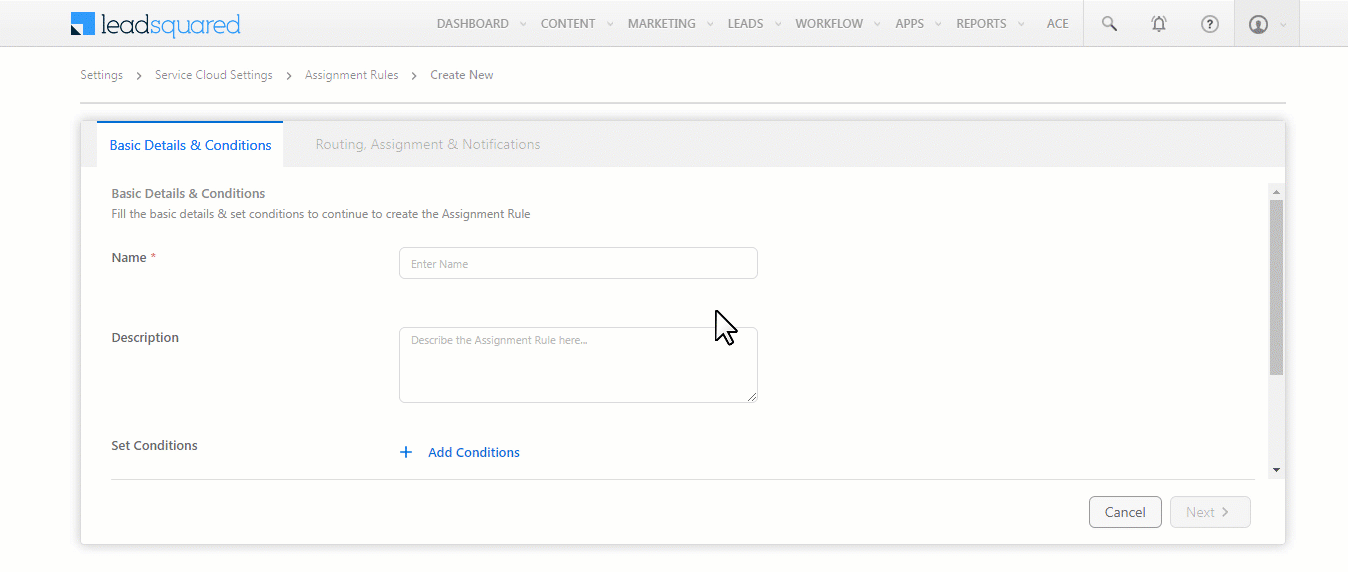
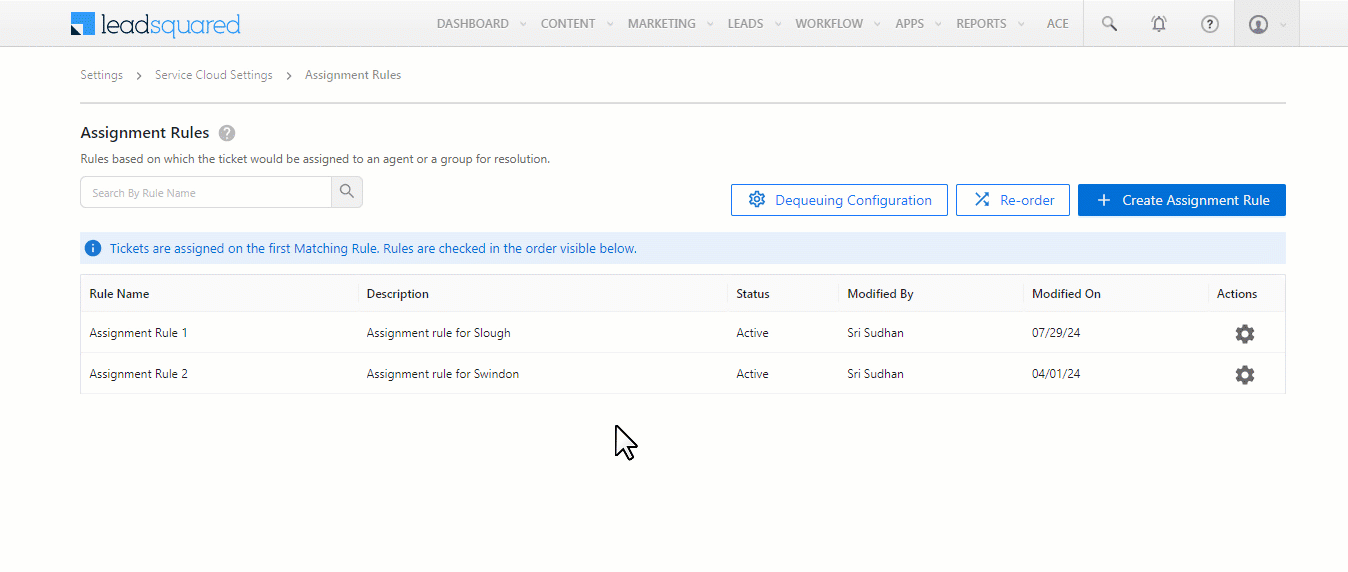
4. Create Rules
Once you log in to LeadSquared (https://login.leadsquared.com/), to create rules in your account –
- Navigate to My Profile>Settings>Service Cloud.
- Under Workflows, click Assignment Rules.
- On the Assignment Rules screen, click Create Assignment Rule.
Note:
- The assignment rules you create won’t apply to tickets where the Ticket Owner is specified or the Ticket Status is “Closed”. These tickets can only be assigned manually to agents.
- For tickets already assigned to a Group, you must configure the Service Group routing logic for assignment rules to work. This is mandatory.
- For example, if a Status update rule is configured and a ticket manually assigned to the Delhi Group is updated from Open to In Progress, it will only be assigned to an agent within the Delhi Service Group if a round-robin routing rule is set up.
5. Basic Details
Enter the following details, and add the conditions based on which you want the tickets to be assigned –
- Name – Enter a name for the rule. This is mandatory.
- Description – Enter a description for the rule.
- Set Conditions – Click Add Conditions to configure the conditions based on which the ticket assignment rule gets triggered. We’ll set up an example rule to assign all tickets with the status “Open” to the ‘Slough Service Group’. On the Set Conditions pop-up –
- All Tickets – This is the “AND” operator. All tickets that satisfy the set conditions are assigned to the selected users/group. For example, if you add a rule for City and select Delhi, and add another rule for Status and select Open, then only those tickets created with the City field populated with Delhi and with the Status set to Open are assigned to the user/group you select. The ticket will only be assigned if both conditions are satisfied.
- Any Tickets – This is the “OR” operator. Any tickets that satisfy the set conditions are assigned to the selected users/group. For example, if you add a rule for City and select Delhi, and add another rule for Status and select Open, those tickets that either have the City field populated with Delhi or with the Status set to Open, are assigned to the user/group you select. Even if one of these conditions are satisfied, the ticket will get assigned.
- Select – From this dropdown, select the ticket field or lead field. The assignment rule is triggered based on its value. You can choose from both system and custom ticket/lead (customer) fields. We’re selecting the Status ticket field.
- Operator – Based on the type of field you’ve selected, select a relevant operator from the list of options provided. Some of the options you’ll find are “is”, “is not”, “contains”, “starts with”, “is defined”, and so on. We’re selecting “is”.
- Value – Based on the type of field you’ve selected, enter or select a value here. Since the Status ticket field has predefined values, we’ll select “Open” here.
- Add Rule – Click this to add multiple rules within the same group.
- Add Group – To add multiple conditions, click Add Group. Once you’ve added a new group of conditions, select “AND” or “OR”.
Once you’re done, click Set.
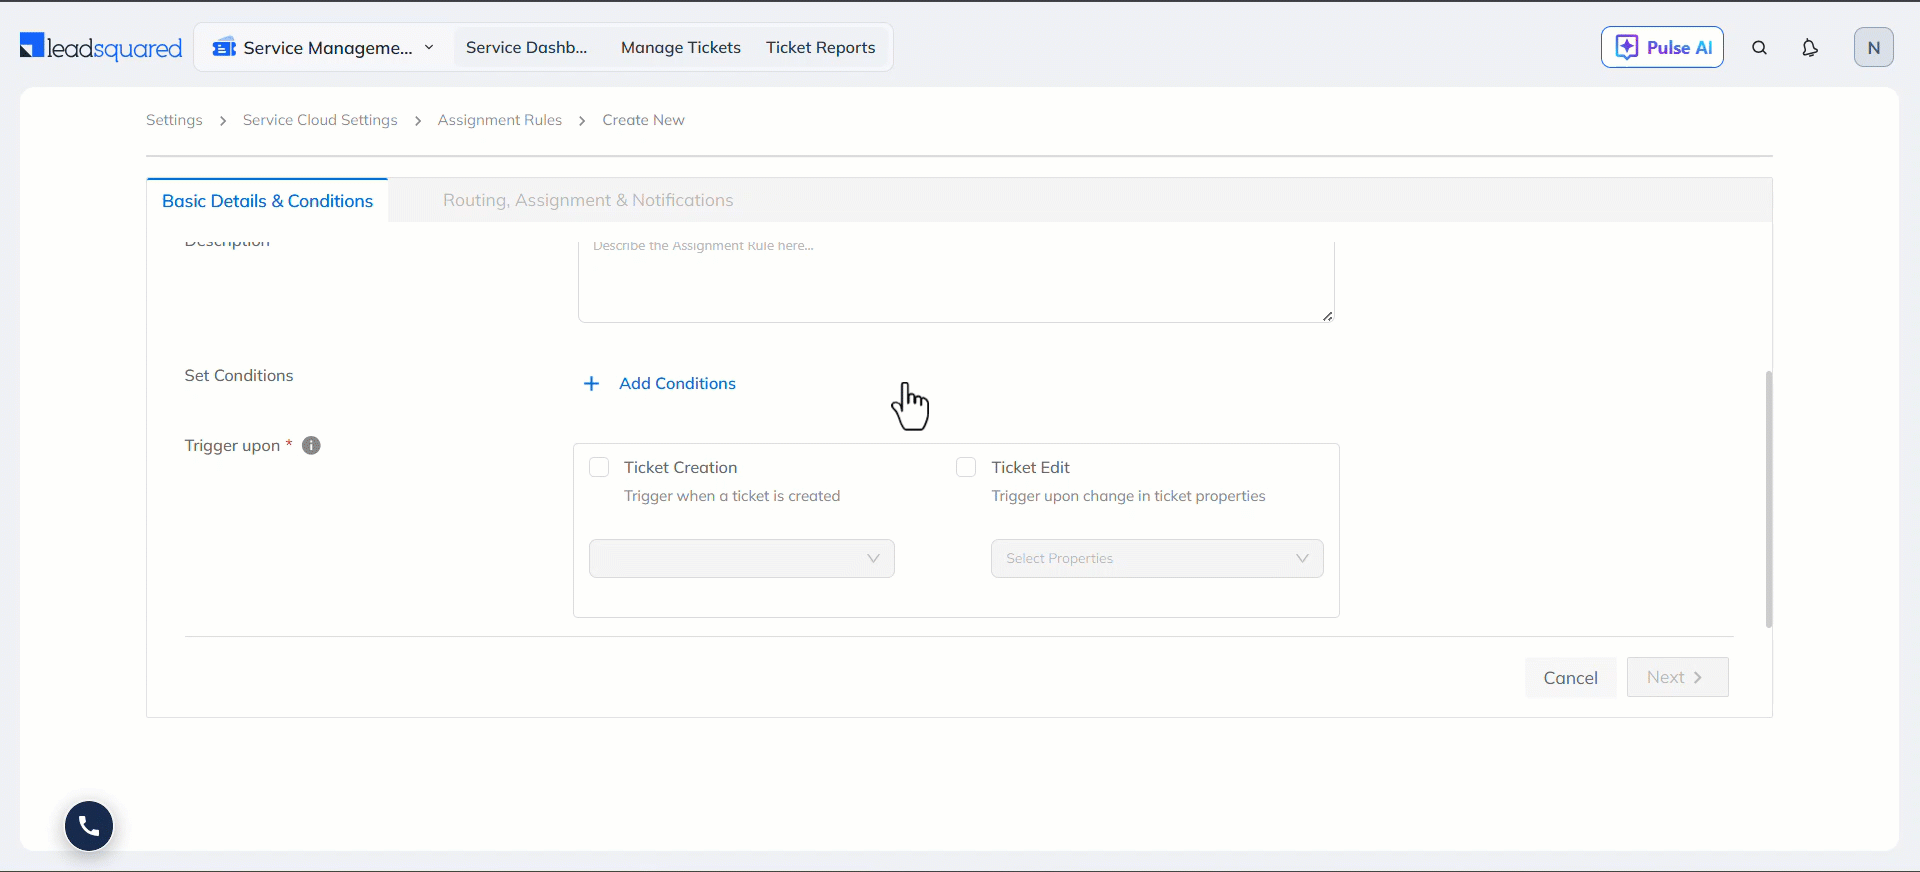
- Trigger Upon – Select if you want the assignment rule to trigger –
- Ticket Create – The rule is triggered when a new ticket is created and satisfies the conditions set. Then, configure if the rule applies only to –
- System generated tickets
- User created tickets
- Ticket Edit – The rule is triggered when an existing ticket is edited, and if it then satisfies the conditions set. Then, select which ticket property needs to be updated for the rule to trigger.
- Ticket Create – The rule is triggered when a new ticket is created and satisfies the conditions set. Then, configure if the rule applies only to –
Once you’re done, click Next.
Note:
- To remove a condition, click
 .
. - To delete a group, click
 .
. - To edit an existing rule, click
 .
.
6. Sentiment based Ticket Assignment
When customers are not satisfied with ticket progress and raise concerns, the sentiment-based escalation workflow helps you set up an assignment rule that uses AI to analyse customer sentiment and trigger actions to address these issues. It helps you identify dissatisfied customers in real time, reduce manual monitoring, prioritise critical tickets, and improve response times and customer satisfaction.
To do this –
- On the Basic Details screen, when you Set Conditions, configure either Intent or Emotion as the variable.
- Intent looks at the intent behind the customer’s response, and whether it was a Query, Request or Complaint.
- Emotion looks at the emotions present in the customer’s response, and the options are Frustrated, Sad, Happy, Anger, Disgust and Neutral.
- Once you’re done, save the configured conditions, and enter the remaining Basic Details and move to the next section.
7. Routing, Assignment & Notifications
Once the trigger is configured, assign the ticket to an individual agent, a Service Group, or based on user-specific properties. You can further assign the tickets based on the selected user’s shift timings, availability, or defined ticket capacity.
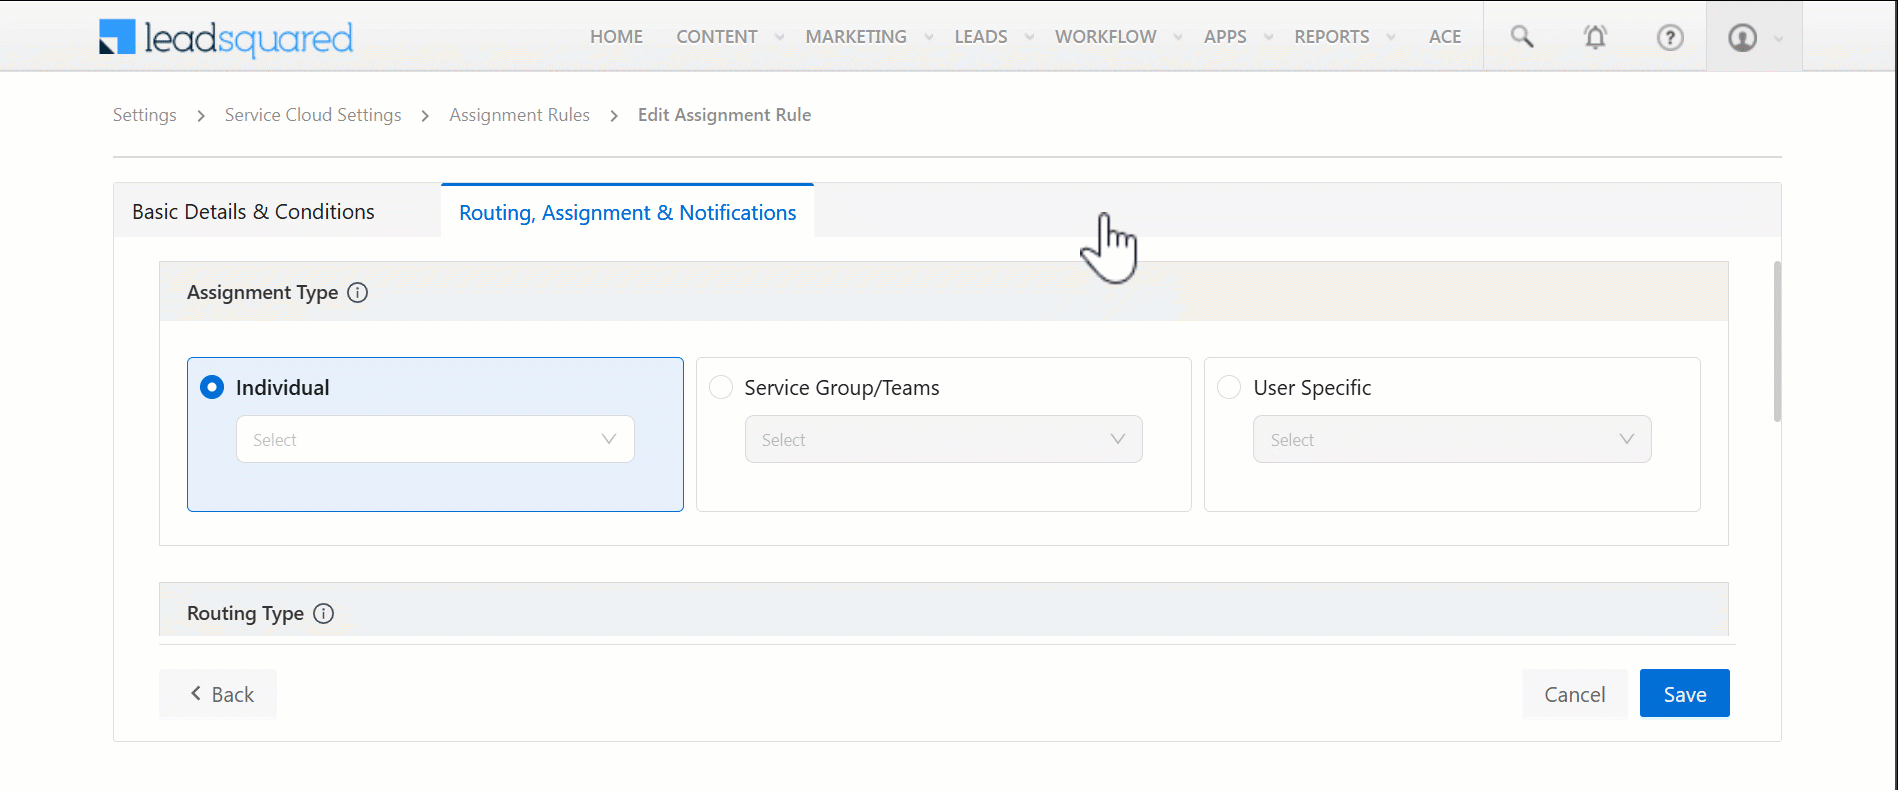
7.1 Individual
Here, assign tickets to individual agents (e.g., Tim, Arjun, etc.) in your account. For example, tickets related to specific issues (such as “payment debited twice, but order not placed”) can be assigned to agents with the expertise to resolve them (e.g., Tim). Once you select the Assignment Type as Individual –
- Select – Under Individual, select the agent from the dropdown to whom the ticket is assigned when the rule is triggered.
- Routing Method – The sequence in which you want the tickets to be assigned to the selected agent. But here, since the ticket is directly assigned to the agent you’ve selected, the Routing Method is by default set to Direct, and you cannot edit it.
- Parameters – Select the Parameters the system will use to determine if the selected agent has the bandwidth to work on this ticket. Select one, two, or all the options listed below. This is optional* –
- Availability – The ticket is assigned to the user only when they mark their status as Available (Online). Your agents can mark their status through the Check-in/Check-out pop-up. For example, if Tim marks himself as Available at 10 AM and remains available at 9 PM, and a ticket is created at 8:30 PM, the ticket will be assigned to him regardless of his shift timings.
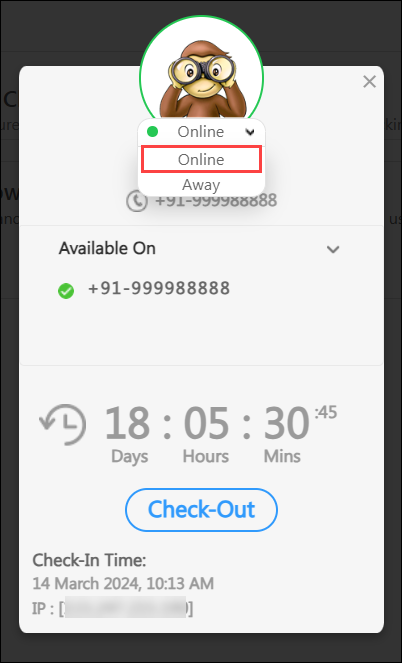
- Shift – The ticket is assigned to the user based on the Workday Templates configured on this user. When selected, this ignores the user’s availability and only follows the time defined on the template assigned to them. For example, if Tim’s shift timings are from 10 AM to 7 PM, and he marks himself as Available at 10 AM and remains available until 9 PM, but a ticket is created at 8:30 PM, the ticket will NOT be assigned to him because it was created outside his shift timings.
- Capacity – The ticket is assigned to the user based on the ticket limits configured for them. For example, if Tim’s ticket limit is set to three tickets (created through Chat), and three tickets are assigned to him via Chat, any additional tickets created through Chat will NOT be assigned to him until his ticket count falls below three. To configure these limits, refer to Manage Service Permission.
- Availability – The ticket is assigned to the user only when they mark their status as Available (Online). Your agents can mark their status through the Check-in/Check-out pop-up. For example, if Tim marks himself as Available at 10 AM and remains available at 9 PM, and a ticket is created at 8:30 PM, the ticket will be assigned to him regardless of his shift timings.
- Notifications – Choose whether you want users to be notified when a ticket is assigned to them. Once you select Yes, from the list of options in the Who should be Notified dropdown, select the agent to be notified.
- Once you’re done, click Save. The assignment rule is now live, and the tickets are assigned to the selected agent.
The order of preference for the Parameters is as follows –
- Shift
- Availability
- Capacity
Example
Scenario 1: All three parameters are selected for Tim.
- His shift (workday) is from 10 AM to 7 PM.
- His availability status is Available, and the current time is 9 PM.
- His ticket capacity is set to 3, and he has only 2 tickets.
Event: A new ticket is created at 8:30 PM.
Outcome: It will NOT be assigned to him because the ticket falls outside his Shift hours, even though his Availability and Capacity conditions are met.
Scenario 2: Only the Availability and Capacity parameters are selected for Tim.
- His shift (workday) is from 10 AM to 7 PM.
- His availability status is Offline, and the current time is 9:10 PM.
- His ticket capacity is set to 3, and he has only 2 tickets.
Event: A new ticket is created at 9:10 PM.
Outcome: It will NOT be assigned to him because the ticket was created after he marked himself as Offline, even though his Capacity condition is met.
Note:
- *If you don’t select either option, tickets will continue to be assigned to your users based on the existing routing rule.
- Shifts currently do not support leave management. If a user is on leave but a ticket is created during their normal shift hours, the ticket will continue to be assigned to them.
- You cannot assign tickets to multiple individual users through the same assignment rule. Each assignment rule you set up only assigns tickets to a single user.
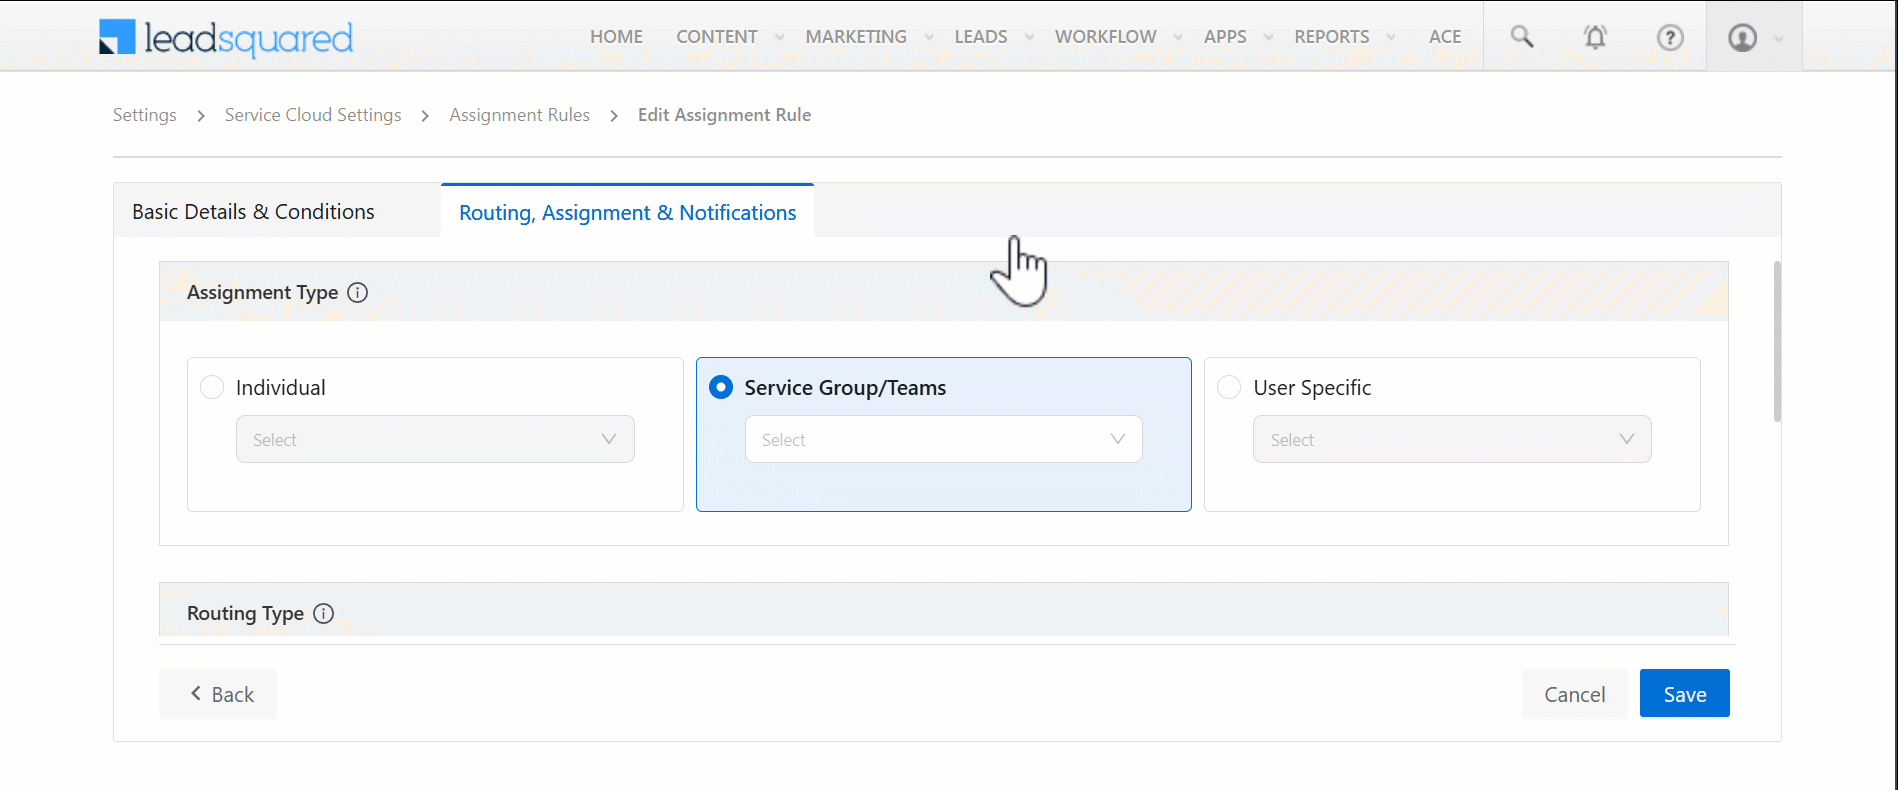
7.2 Service Group
Here, assign tickets to Service Groups. Once the ticket is assigned to a specific group, you can configure the order in which the tickets are distributed to agents within the group. For example, tickets created in Delhi can be assigned to the Delhi Service Group, and from there, you can define how tickets are allocated to the agents in that group.
Note: For tickets already assigned to a Group, you must configure the Service Group routing logic for assignment rules to work. This is mandatory.
- For example, if a Status update rule is configured and a ticket manually assigned to the Delhi Group is updated from Open to In Progress, it will only be assigned to an agent within the Delhi Service Group if a round-robin routing rule is set up.
- Select – From the Service Group/Teams dropdown, select the group to which the ticket is assigned when the rule is triggered.
- Routing Method – It’s the sequence in which the tickets are assigned to the agents in the group.
- Round Robin – When selected, the system will sequentially assign tickets to each agent in the group. For instance, if three users are in the group – Tim, Gareth, and Keith – the system will assign the first ticket to Tim, the second to Gareth, the third to Keith, the fourth to Tim again, and so forth.
- Manual – When selected, the Group Manager must manually distribute tickets to the agents in the group.
- Manual ticket assignment will override existing Availability, Capacity and Shift parameters. For example, if Availability is selected and a user (Tim) is Offline, his manager can still assign a ticket to him.
- Parameters – Select the Parameters the system will use to determine if the selected agent has the bandwidth to work on this ticket. Select one, two, or all the options listed below. This is optional* –
- Availability – The ticket is assigned to the user only when they mark their status as Available (Online). Your agents can mark their status through the Check-in/Check-out pop-up. For example, if Tim marks himself as Available at 10 AM and remains available at 9 PM, and a ticket is created at 8:30 PM, the ticket will be assigned to him regardless of his shift timings.
- Shift – The ticket is assigned to the user based on the Workday Templates configured on this user. When selected, this ignores the user’s availability and only follows the time defined on the template assigned to them. For example, if Tim’s shift timings are from 10 AM to 7 PM, and he marks himself as Available at 10 AM and remains available until 9 PM, but a ticket is created at 8:30 PM, the ticket will NOT be assigned to him because it was created outside his shift timings.
- Capacity – The ticket is assigned to the user based on the ticket limits configured for them. For example, if Tim’s ticket limit is set to three tickets (created through Chat), and three tickets are assigned to him via Chat, any additional tickets created through Chat will NOT be assigned to him until his ticket count falls below three. To configure these limits, refer to Manage Service Permission.
- Availability – The ticket is assigned to the user only when they mark their status as Available (Online). Your agents can mark their status through the Check-in/Check-out pop-up. For example, if Tim marks himself as Available at 10 AM and remains available at 9 PM, and a ticket is created at 8:30 PM, the ticket will be assigned to him regardless of his shift timings.
- Notifications – Choose whether you want users to be notified when a ticket is assigned to them. Once you select Yes, from the list of options in the Who should be Notified dropdown, select the agent to be notified.
- Once you’re done, click Save. The assignment rule is now live, and the tickets are assigned to the selected agent.
The order of preference for the Parameters is as follows –
- Shift
- Availability
- Capacity
Example
Scenario 1: All three parameters are selected for Tim.
- His shift (workday) is from 10 AM to 7 PM.
- His availability status is Available, and the current time is 9 PM.
- His ticket capacity is set to 3, and he has only 2 tickets.
Event: A new ticket is created at 8:30 PM.
Outcome: It will NOT be assigned to him because the ticket falls outside his Shift hours, even though his Availability and Capacity conditions are met.
Scenario 2: Only the Availability and Capacity parameters are selected for Tim.
- His shift (workday) is from 10 AM to 7 PM.
- His availability status is Offline, and the current time is 9:10 PM.
- His ticket capacity is set to 3, and he has only 2 tickets.
Event: A new ticket is created at 9:10 PM.
Outcome: It will NOT be assigned to him because the ticket was created after he marked himself as Offline, even though his Capacity condition is met.
Note:
- When you select Service Group, you can also assign tickets to Group Managers.
- Shifts currently do not support leave management. If a user is on leave but a ticket is created during their normal shift hours, the ticket will continue to be assigned to them.

7.3 User Specific
Here, assign tickets based on user properties. Choose between the Last Ticket Owner and the Lead Owner.
- Last Ticket Owner – If a customer has raised a previous ticket, the Service Cloud user assigned to that ticket will automatically receive any new tickets created for the same customer.
- For example, if Syed raised a ticket in April for a payment issue that was assigned to Service Agent Tim, and Syed raises another ticket in September for a product issue, the new ticket will be automatically assigned to Tim.
- Lead Owner – This option can be configured only if Hybrid Users are enabled and configured in your account. Hybrid Users have access to both the LeadSquared Sales Platform and the Service CRM platform. When this option is selected, a new ticket is assigned to the lead owner.
- For example, if Syed, a customer, raises a ticket and his lead owner is Adam, the new ticket will be automatically assigned to Adam.
- Parameters – Select the Parameters the system will use to determine if the selected agent has the bandwidth to work on this ticket. You can only choose Shift. This is optional.
- If Shift is selected, tickets will be assigned based on the user’s properties only if the ticket is created within the user’s work hours. These work hours are defined using Workday Templates.
- If Shift is not selected, tickets will be assigned based on the user’s properties, regardless of whether the ticket was created during the user’s work hours.
Once the ticket is assigned to the user role, you can choose to notify them. To do this, under Notifications, click Yes, and from the Who should be Notified dropdown, select Individual.
Once you’re done, click Save.
Note: If you’ve configured either of these options, but –
- There’s no prior ticket raised by a specific lead, or
- The Hybrid Users feature is not enabled on your account, then –
The User-Specific assignment rule will be ignored, and other Individual or Service Group assignment rules will be considered.
8. Rules Order
Rules are listed in order of priority. The first rule in the list is used as the primary (main) rule when assigning tickets. If the first rule’s conditions aren’t met, the second rule is checked. If the conditions match, the second rule will be followed. Otherwise, the conditions of the third rule are checked, and so on.
- To edit the order of the assignment rules in your account, click Re-order.
- Drag and drop the rules in the order of your preference.
- Alternatively, select a rule and click Move to Top or Move to Bottom to change its order.
- Once you’re done, click Save Order.
9. Dequeuing
Dequeuing is the process of removing tickets from the ticket assignment queue and assigning them to an agent for resolution. This ensures efficient distribution and timely addressing of support tickets. To configure the dequeuing order –
- On the Assignment Rules page, click Dequeuing Configuration.
- On the pop-up, select the order in which you want tickets to be dequeued –
- Created Date – Tickets with the oldest creation dates are dequeued and assigned. For example, if one ticket was created on January 11th, at 2 PM, and another on January 11th at 5 PM, the ticket created at 2 PM will be dequeued first. This is the default option.
- First Response SLA – Tickets with the shortest First Response SLA time are dequeued and assigned first. For example, if one ticket has a First Response SLA at 12 PM and another at 12:10 PM, the ticket with the 12 PM SLA will be dequeued first.
- Resolution SLA – Tickets with the shortest Resolution SLA time are dequeued and assigned first. For example, if one ticket has a Resolution SLA at 5 PM and another at 5:10 PM, the ticket with the 5 PM SLA will be dequeued first.
- Priority – Tickets with the highest priority levels are dequeued and assigned first. For example, if three tickets have High, Medium, and Low priority levels, the ticket with High priority is assigned first, followed by the Medium priority ticket, and then the Low priority ticket.
- Once you’re done, click Save.
Note: If multiple tickets have the same SLA, priority, or creation date, all three metrics are used for dequeuing. For example:
- If three tickets share the same SLA (5 PM) and priority (High), the ticket created first will be dequeued first.
- If three tickets are created simultaneously with the same SLA but different priority levels, the ticket with the highest priority will be dequeued first.
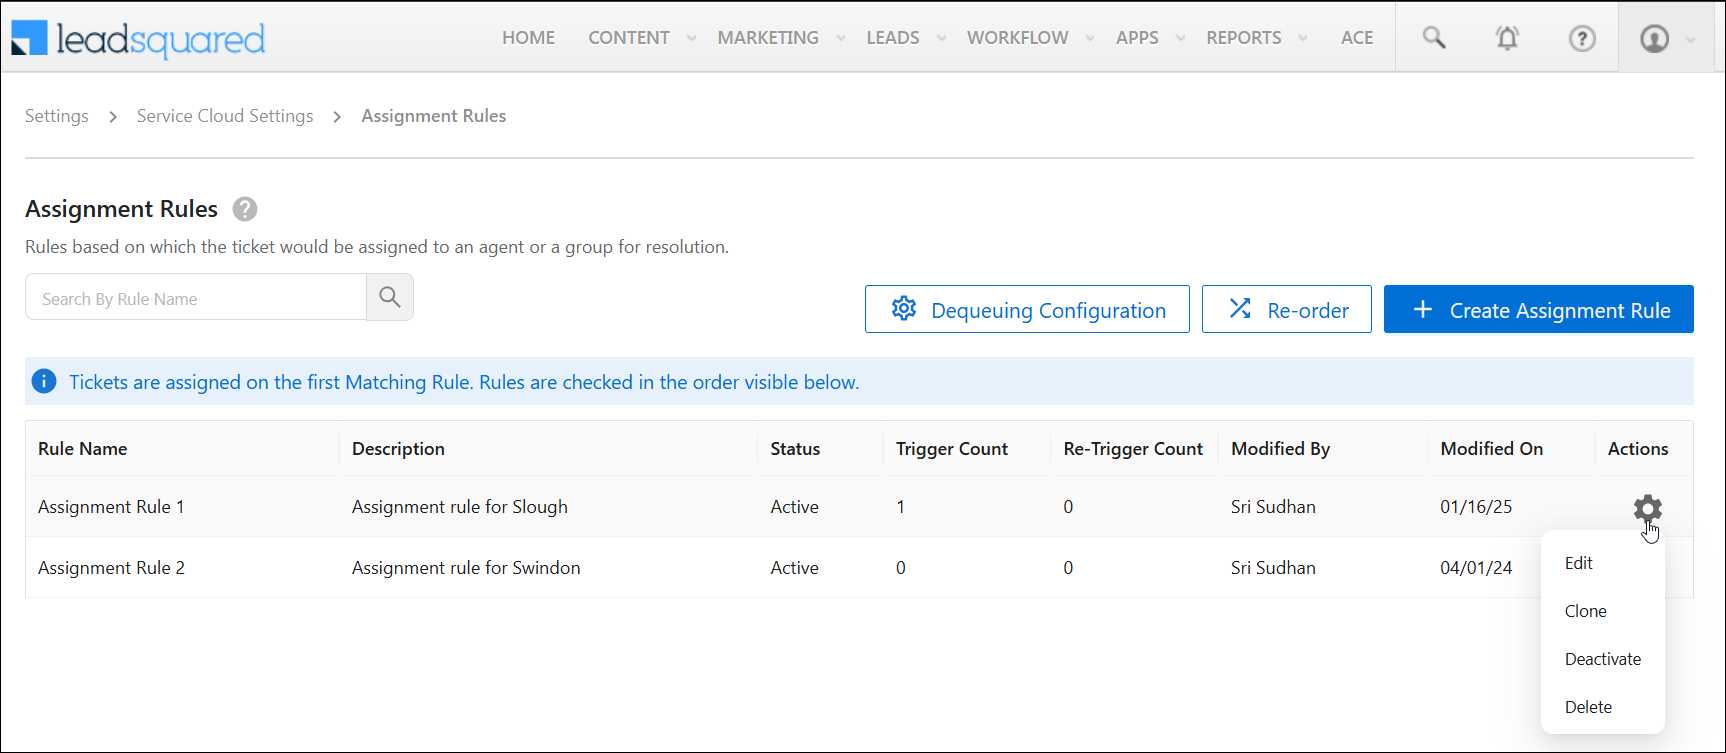
10. Other Actions
Once a rule is published, perform the following actions on the rule once it’s live –
- Edit – Edits the rule’s details and assignment conditions.
- Clone – Clones the rule to create an identical duplicate.
- Deactivate – Deactivates the rule while retaining its conditions in our system, allowing you to re-activate it later.
- Delete – Deletes the rule and its configurations permanently. This removes the rule conditions from our system, and they cannot be retrieved.
- Trigger Count – Shows how many times this rule was triggered when a ticket was created.
- Re-trigger Count – Shows how many times this rule was triggered when a ticket was updated.
Any Questions?
Did you find this article helpful? Please let us know your feedback in the comments section below. We’d love to hear from you and help you out!