1. Feature Overview
Ticket tags enable agents to quickly label and identify tickets by associating them with relevant keywords (e.g., Insurance, Loan, Credit Card, etc.), helping capture attributes not included in ticket fields. Tags make it easier to filter tickets and run targeted searches.
Your account comes with a set of pre-defined system tags (like New, Reopened, Parent, Child, etc.). In addition to these, also create your own custom tags. These custom tags will be available on the Ticket Details page, where agents can easily apply them to their tickets.
2. Prerequisite
To enable creating custom tags in your account, contact your account manager, or write to scsupport@leadsquared.com.
3. Create Custom Tags from the Settings Page
As an Admin user, create tags from the Ticket Settings page –
- Navigate to My Profile>Settings>Service Cloud.
- On the Service Cloud Settings screen, under Workflows, click Tags.
- On the Tags screen, click Add Tags, and enter your list of custom tags.
- Press ENTER after each tag to add it as a new entry.
- Once you’re done, click Add Tags.
4. Add and Create Custom Tags on the Ticket Details Page
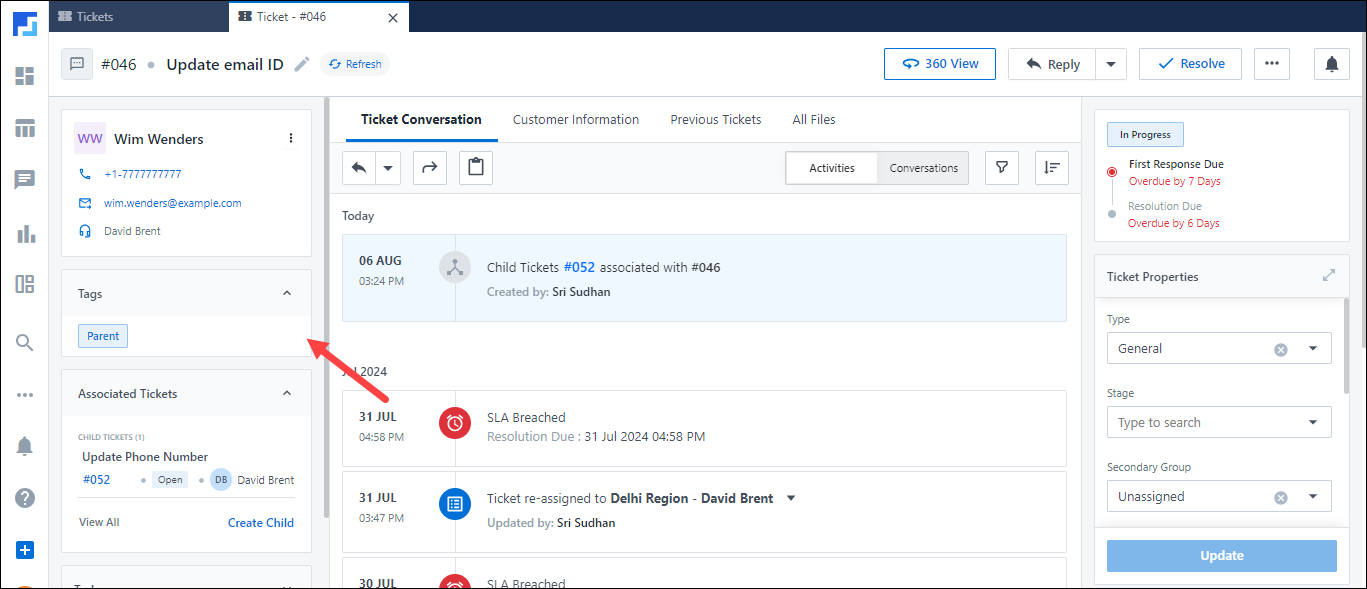
Admins and Agents can create and add tags directly to a ticket on the Ticket Details page –
- On the Ticket Details page, expand the Tags tab.
- Click the search bar, and from the list of system and custom tags listed on your account, select relevant tags.
- You can add multiple tags to a ticket.
- To create a new tag, type the tag, and press ENTER.

5. Apply Bulk Tags
On the Ticket Views page, apply tags in bulk to tickets –
- Alongside the tickets you want to tag, select the
 checkbox.
 - Hover your cursor on the More Actions button, and select Add Tag.
- On the Add Tag pop-up, from the Tag dropdown, select the tags you want to add.
- You can select multiple tags.
- Once you’re done, click Update.
6. Find Tickets using Tags
On the Ticket Views page, use the Advanced Search feature to find tickets using tags –
- Alongside the search bar, click
 , and then click Filters.
 - From the list of options, click Tags, and select the list of tags you want to search by.
- Once you’re done, click Apply. You’ll now see tickets filtered by the selected tags.
7. Other Actions
On the Tags page, perform the following actions –
- Edit – To edit a tag, click
 .
. - Delete – To delete a tag, click
 .
.
- When a tag is deleted from this page, it continues to remain on existing tickets but can no longer be used to filter tickets in Advanced Search.
- You cannot edit or delete a system tag.
Any Questions?
Did you find this article helpful? Please let us know your feedback in the comments section below. We’d love to hear from you and help you out!


