


Get Started
Sales Suite
Field Ops
Marketing
Service CRM
Integrations & Apps
FloStack
SSL Certificate for Landing Pages
1. Feature Overview
By default, LeadSquared’s landing pages work on https, and on our internal viewpage.co domain. But if you’ve hosted your landing pages on custom domains (outside of LeadSquared), this article will help you obtain SSL Certificates to support these domains. The certificates are also extended to email links (see Email Link Domain Settings). We use SSL certificates generated by Amazon Certificate Manager on custom domains.
Note: We currently do not support SSL certificates purchased outside of LeadSquared.
2. Prerequisites
- Before you request for SSL Certificates, ensure your domains and/or sub-domains are listed on the Website & Landing Page Domains page. To know more, refer to Configuring Multiple Domains in LeadSquared.
- If multiple domains/sub-domains are listed, ensure the domain for which you’re requesting the SSL certificate is Set as Primary.
- There’s a cost involved in obtaining SSL certificates through LeadSquared. For more details, reach out to your account manager, or write to support@leadsquared.com.
3. How it Works
Once you add your domains and sub-domains in LeadSquared, create the SSL Certificate Request. We generate a CNAME record, which you must add to your DNS Settings. This helps us identify the domain ownership. If your domain ownership verification is successful, we generate a subsequent CNAME record, which you must again add to your DNS Settings. The new CNAME record points to the SSL Certificate obtained from Amazon Certificate Manager.
If the domain ownership verification fails, you have up to 72-hours to add the correct CNAME record, after which you must create a fresh SSL Certificate Request from LeadSquared.
4. Create SSL Request
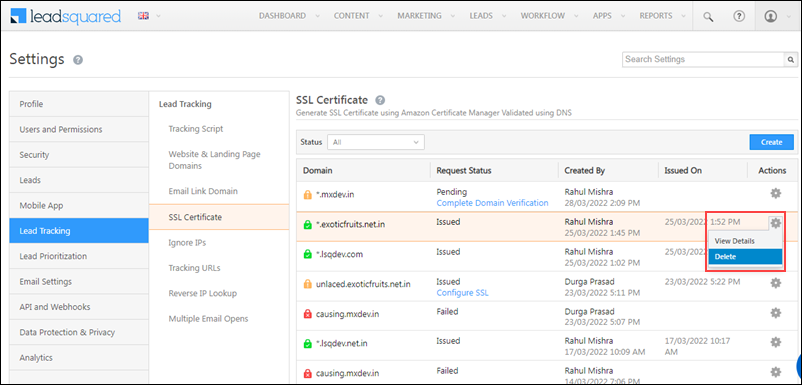
- After your domains and sub-domains are listed on the Website & Landing Page Domains page, navigate to My Profile>Settings>Lead Tracking>SSL Certificate.
- On the SSL Certificate page, click Create.
- On the Request SSL Certificate pop-up, Select the Domain Name.
- Once the domain is selected, from the following options, Select the Sub-Domains –
- Wild Card Certificate – The SSL Certificate is requested for all the sub-domains listed under the selected domain (including the email link domain and landing page domains).
- Email Link – The SSL Certificate is only requested for the selected email link domain.
- Landing Page – The SSL Certificate is only requested for the selected landing page domain.
- Once you’re done, click Next.
5. Domain Ownership Verification
Once the SSL Request is created, on the Domain Ownership Verification pop-up –
- Click your cursor on the Domain and Value to copy these values.
- Alternatively, click
 to download the CNAME Record.
- Alternatively, click
- Add this CNAME Record in the DNS configuration for your custom domain. For example, if your service provider is –
- GoDaddy, refer to Add a CNAME record.
- Bluehost, refer to How To Create & Edit CNAME.
- AWS, refer to Add DNS CNAME record.
- Namecheap, refer to How to Create a CNAME Record For Your Domain
- Dreamhost, refer to Adding a Custom DNS record
- Bluehost, refer to DNS Management: How to Add, Edit, or Delete DNS Entries
- Refer to your service provider’s documentation if not listed above.
- Once the CName Record is added, on the Domain Ownership Verification pop-up, alongside “I have updated the CNAME record”, click
 , and then click Done.
Note:
- You have a 72-hour window to add the correct CNAME record in your DNS Settings.
- The domain ownership verification will take up to 4-hours.
- If the CNAME mapping is done incorrectly (typos, pointing to an incorrect domain, etc.), you’ll receive an email reminder when 48-hours and 24-hours are remaining in the 72-hour window. If the CNAME mapping isn’t done correctly by 72 hours, you must create a new SSL request in LeadSquared.
6. Configure SSL
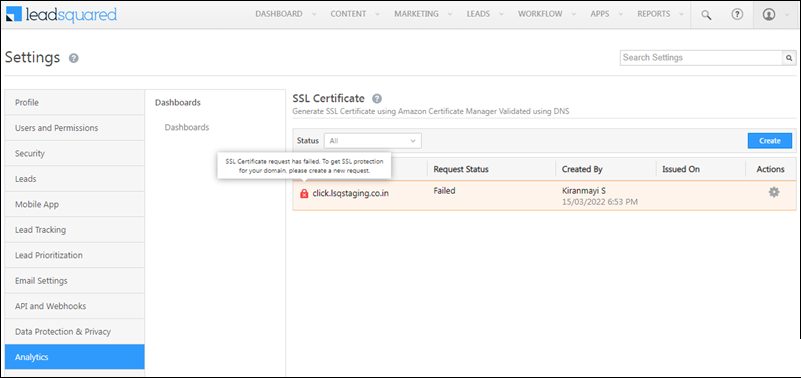
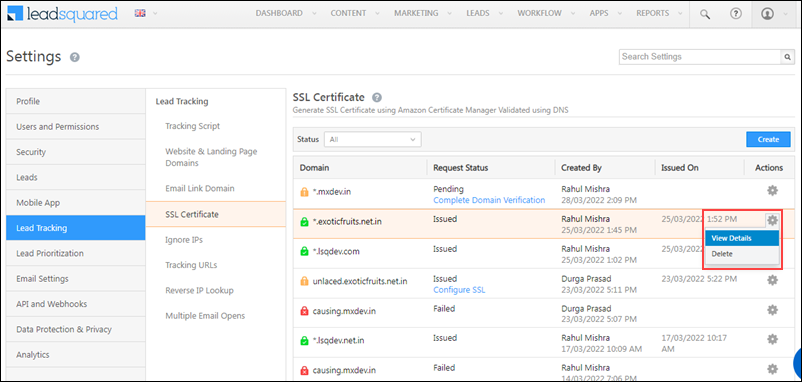
If successfully verified, the status of the request will now change from Pending – View Details to Issued – Configure SSL. To approve the CNAME in LeadSquared –
- Click Configure SSL, and on the Configure SSL Certificate pop-up, click your cursor on Domain and New Value to copy these values.
- Add this new CNAME Record in the DNS configuration for your custom domain.
- Once this is done, navigate back to LeadSquared, and on the Configure SSL Certificate pop-up, verify all the details and click Confirm. The SSL certificate is successfully added to your landing page.

7. View Certificate
Once you add CNAME record in your DNS, to see all the subdomains where the certificate is added, hover your cursor over ![]() , and click View Details.
, and click View Details.
The SSL Certificate is now visible on your landing page.

8. Delete Certificate
To delete existing certificates, alongside the certificate, hover your cursor over ![]() , and click Delete.
, and click Delete.
Any Questions?
Did you find this article helpful? Please let us know any feedback you may have in the comments section below. We’d love to hear from you and help you out!