


Get Started
Sales Suite
Field Ops
Marketing
Service CRM
Integrations & Apps
FloStack
Use Custom Domains For Portals
1. Feature Overview
You can host Portals built with LeadSquared on –
- Our default domain – lsqportal.com. For more details, see Portal Configurations.
- Your own custom business/brand sub-domain (e.g., applications.mybusiness.com).
This article describes how you can host a portal on your own custom domain.

2. Prerequisites
- You must be a LeadSquared Administrator user.
- You must first list the domain on the Website & Landing Page Domains page. For details, see Adding More Website Domains.
- Access to your Domain Name Service (DNS) provider’s account (GoDaddy, Hostgator, Bluehost, etc.).
3. How It Works
Create 2 CNAME records in your DNS provider’s account – one pointing to a certificate manager for HTTPS security, and the other pointing to the actual sub-domain for your portal (e.g. applications.mybusiness.com).
The setup requires you to go back and forth between the portal domain settings in your LeadSquared account and the CNAME record settings in your DNS provider’s account.
This section provides a summary of the setup, the following sections elaborate on each step –
- Create and configure the sub-domain in your LeadSquared account.
- A Name and Value will be generated. Copy the values, and use them to create a CNAME record in your DNS provider’s account. This step sets up a HTTPS certificate to ensure better security for your portal (for more details, see Why HTTPS matters).
- Come back to your LeadSquared account, and verify that the settings in your DNS (for the HTTPS certificate) have taken effect.
- After successful verification, you’ll receive a CDN URL from us. Create a new CNAME record for the sub-domain using the CDN URL.
- Your portal is now live and ready to use.
4. Configure the Sub-domain in LeadSquared
- On the main menu, navigate to Workflow>Manage Portals and select your portal.
- On the top navigation bar, select the Settings tab.
- On the left menu, select Domain.
- Disable the Use LSQ Domain slider
 .
. - Select a domain from the drop-down and enter the sub-domain name.
- Click Confirm
- Copy the generated CNAME Name and Value.
5. Create a CNAME Record for HTTPS Certificate
In this step, you’ll create a CNAME record in your DNS that points to a Certificate Manager and creates a Transport Layer Security (TLS) certificate for your domain. TLS is a security protocol that uses encryption to protect the transfer of data to and from your portal.
Here is some documentation for popular DNS providers –
- GoDaddy: Add a CNAME record
- Namecheap: How to Create a CNAME Record For Your Domain
- Dreamhost: Adding a Custom DNS record
- Bluehost: DNS Management: How to Add, Edit, or Delete DNS Entries
Log in to your Domain Name Service provider’s account (GoDaddy, Hostgator, Bluehost, etc.).
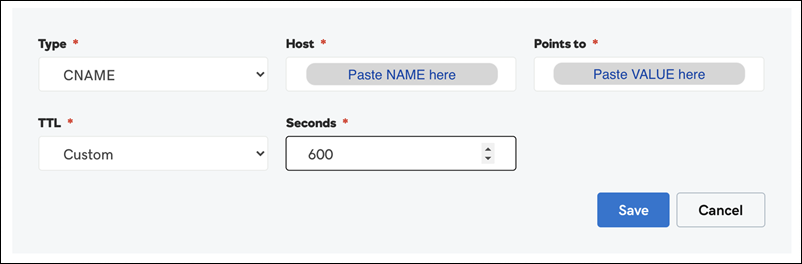
- Click on the DNS settings for the selected URL and create a new CNAME record entry. Paste the above values in the Name (or Host) and Value (or Target) fields, respectively.
- Select the minimum TTL value available.
- Save the record.
- Successful configurations may take some time to reflect.
Here’s an example from a GoDaddy.com account –
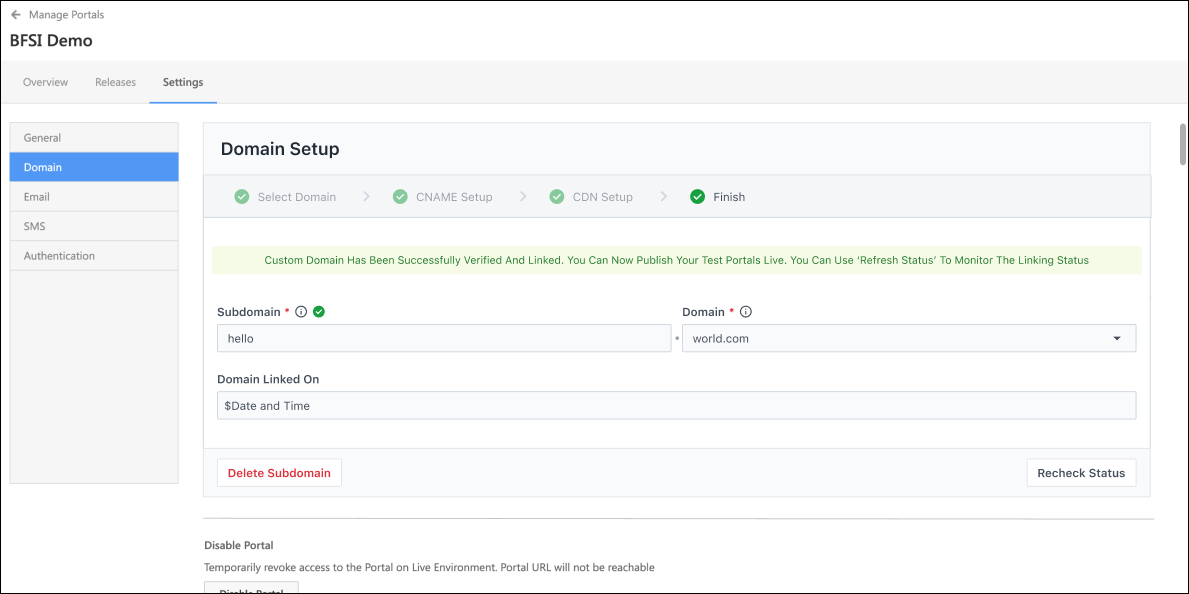
6. Verify the Settings in LeadSquared
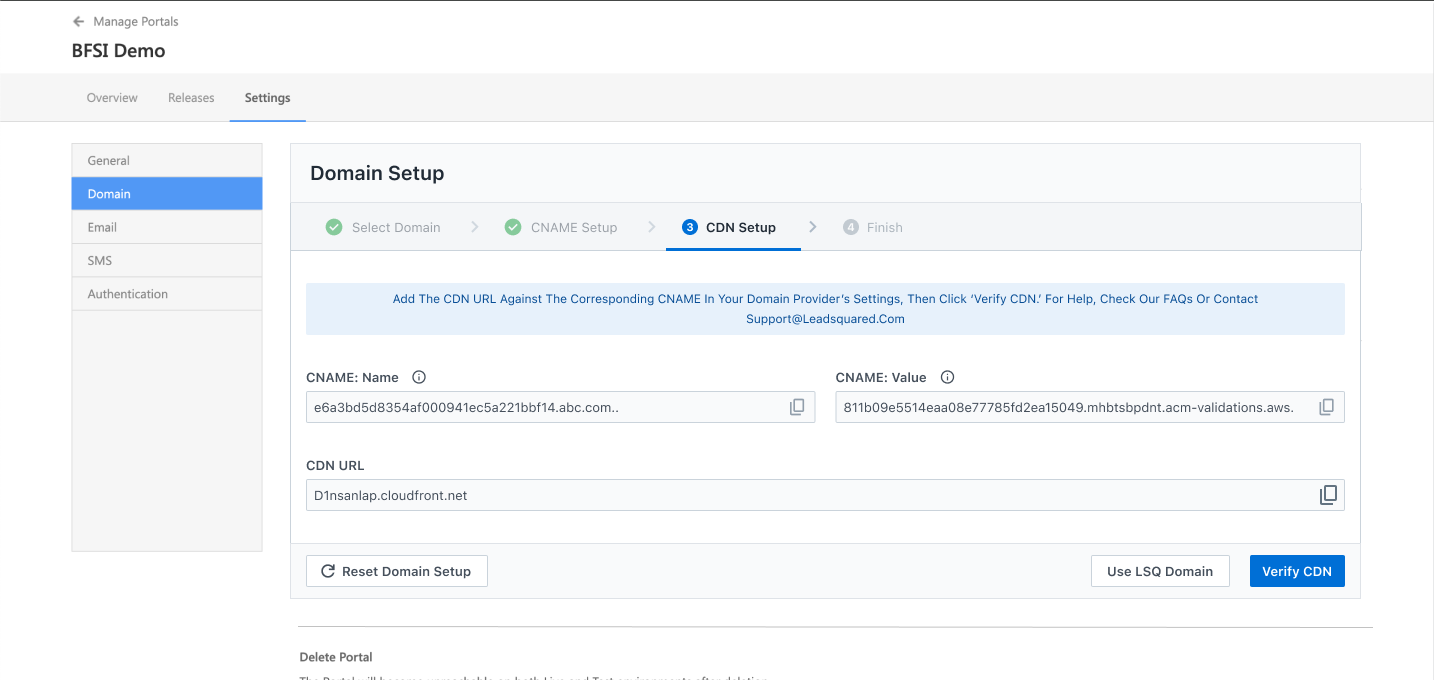
Navigate back to your LeadSquared account and on the Portal Domain Setting page, click Verify –

After successful verification, you’ll receive a CDN URL. Copy this URL and use it to create a CNAME record for the sub-domain.
7. Create a CNAME record for the Sub-Domain

Finally, map the sub-domain with the portal –
- In your DNS provider’s account, click the DNS settings for the selected URL and create a new
CNAME record entry. - Paste the sub-domain name (e.g. ‘applications’ from applications.mybusiness.com) the Name (or Host) and CDN URL in the Value (or Target) fields, respectively.
- Select the minimum TTL value available and save the record.
Here’s an example from a GoDaddy.com account –
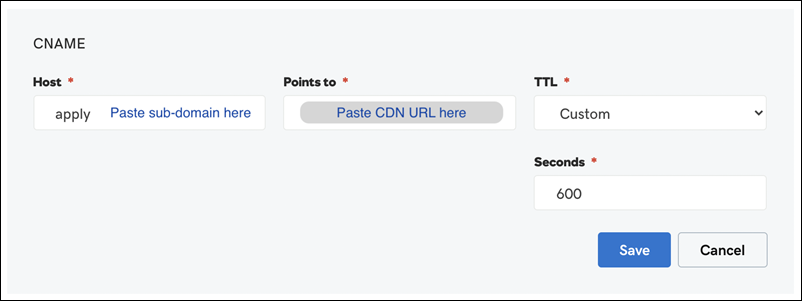
Your portal is now live.
8. Troubleshooting Frequent Issues
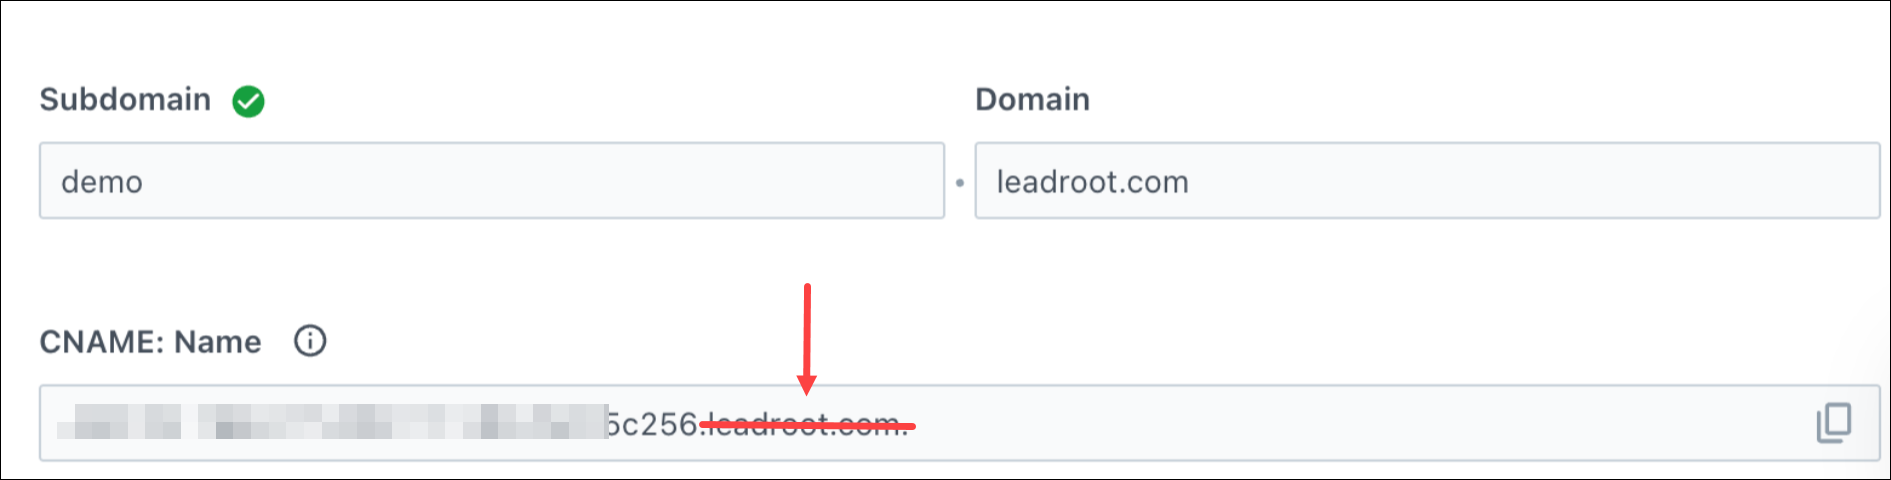
1. Why isn’t my cname setup getting verified?
If you’re using GoDaddy or Hostinger, ensure that the domain is not mapped to .leadroot.com. For example, in the image below, remove .leadroot.com from the CNAME:Name field.
2. I added the CNAME records in my DNS, but when I try and verify the settings in LeadSquared, I get an “Invalid Certificate Id” error. What’s causing the issue?
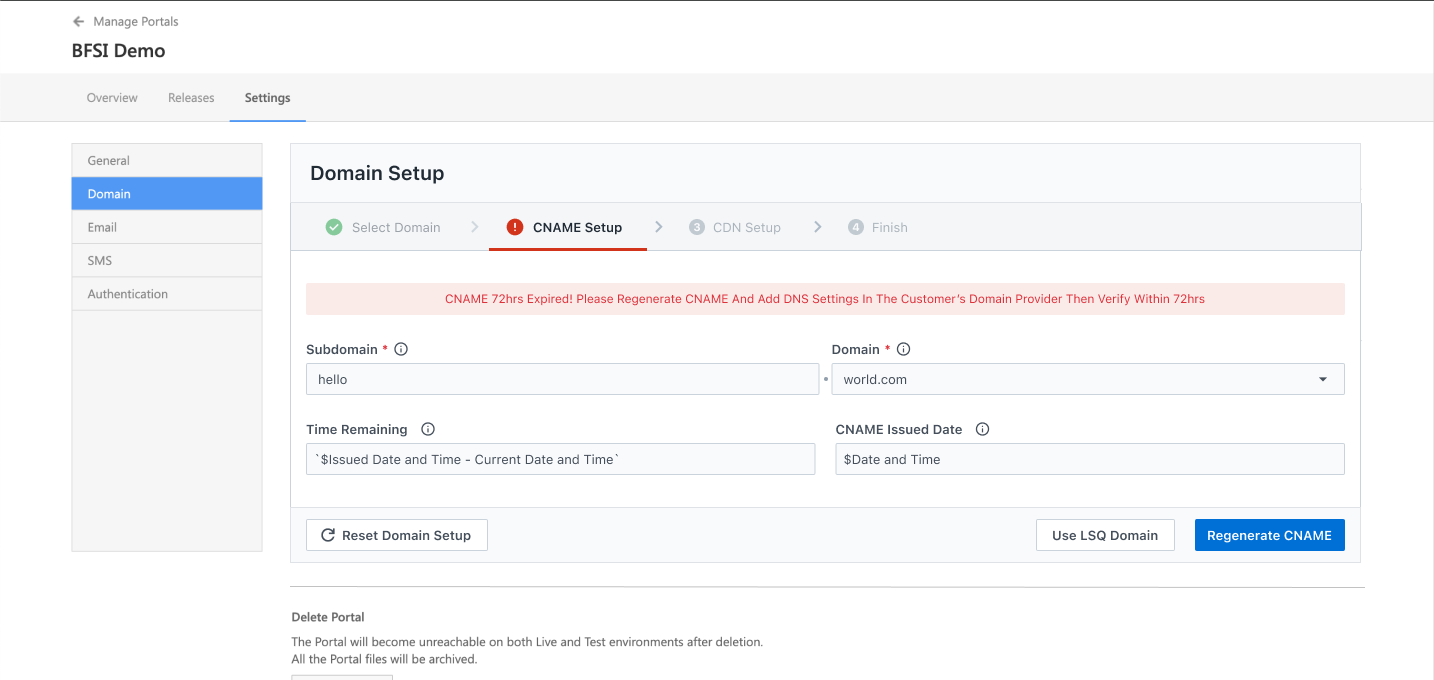
There are 2 reasons why this error may occur
- The request for entries for CNAME records are valid only for 72hrs. If you try and verify the domain outside this window, you’ll receive an “Invalid Certificate Error“. To resolve the issue, unlink the sub-domain name and reconfigure the domain setup in Portal Designer.
- Certificate Authority Authorization (CAA) DNS records configured in your domain provider’s settings are blocking LeadSquared from issuing an HTTPS certificate. To resolve this –
- Remove the custom domain setup from Portal Designer.
- Follow the steps in the Amazon CAA issues article to allow LeadSquared to issue a certificate.
- Remove the CNAME mapping for the portal (if already added) in your DNS provider’s settings.
- Reconfigure the domain setup in the LeadSquared Portal Designer.
3. When I try and add the CNAME record in my DNS provider’s account, I get a “Not able to add CNAME record” error. How do I fix the issue?
This error may be the result of a duplicate CNAME record. If the CNAME record was already created in your DNS settings, delete it, then add the new record.
4. What do I do if my DNS provider is cPANEL?
- If any sub-domain is present, delete it first.
- Then create a new CNAME record in the root domain.
5. How do I regenerate CNAME?
Click Regenerate CNAME, and copy the new Name and Value
Please note, that this is only possible if your portal is not in Published status.
Any Questions?
Leave us a comment below. We’d love to help you out!