1. Feature Overview
In LeadSquared’s Service CRM, customers can raise tickets through various channels such as email, chat, calls, and social media. This article focuses on chat and helps Service Agents use the chat feature to talk to customers and resolve their queries. Before reading further, ensure your account Admin has set up the Chat feature.
2. Access the Chat Screen
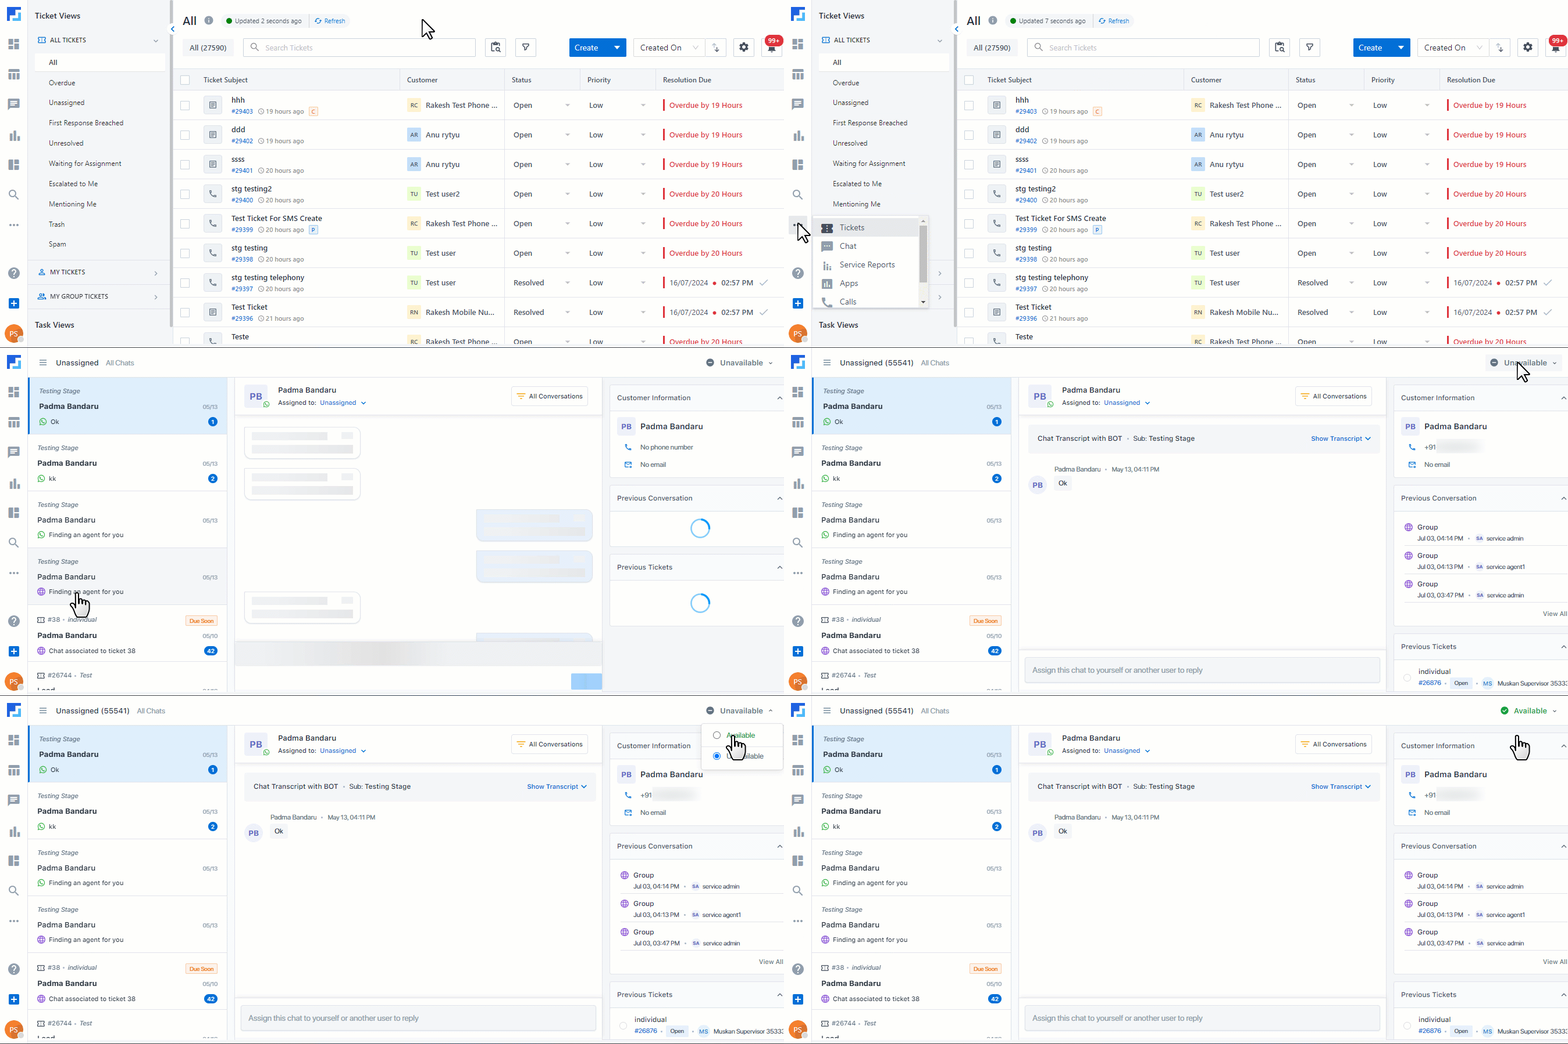
- Log in to your Service CRM account (https://marvin-in21.leadsquared.com/service-cloud).
- On the left panel, click
 , and click
  Chat.
Chat. - On the All Chats screen, mark yourself as Available. You’ll now be able to chat with customers.
- You can also mark yourself as Unavailable on this screen.
Note:
- The chat rule will trigger only if the agent marks themselves as available
- In the case of manual chat assignment, the availability and/or capacity parameters for agents will be overridden, and chats will still be assigned to the agent.
3. Assign Chat
If Chat Assignment Rules are configured in your account, chat conversations are automatically handed over to an individual service agent or Service Group. However, if they aren’t configured –
- Admins can manually assign chats to any agent in the organization.
- Service Group Managers can manually assign chats to any agent in their group.
- Agents can only manually assign chats to themselves.
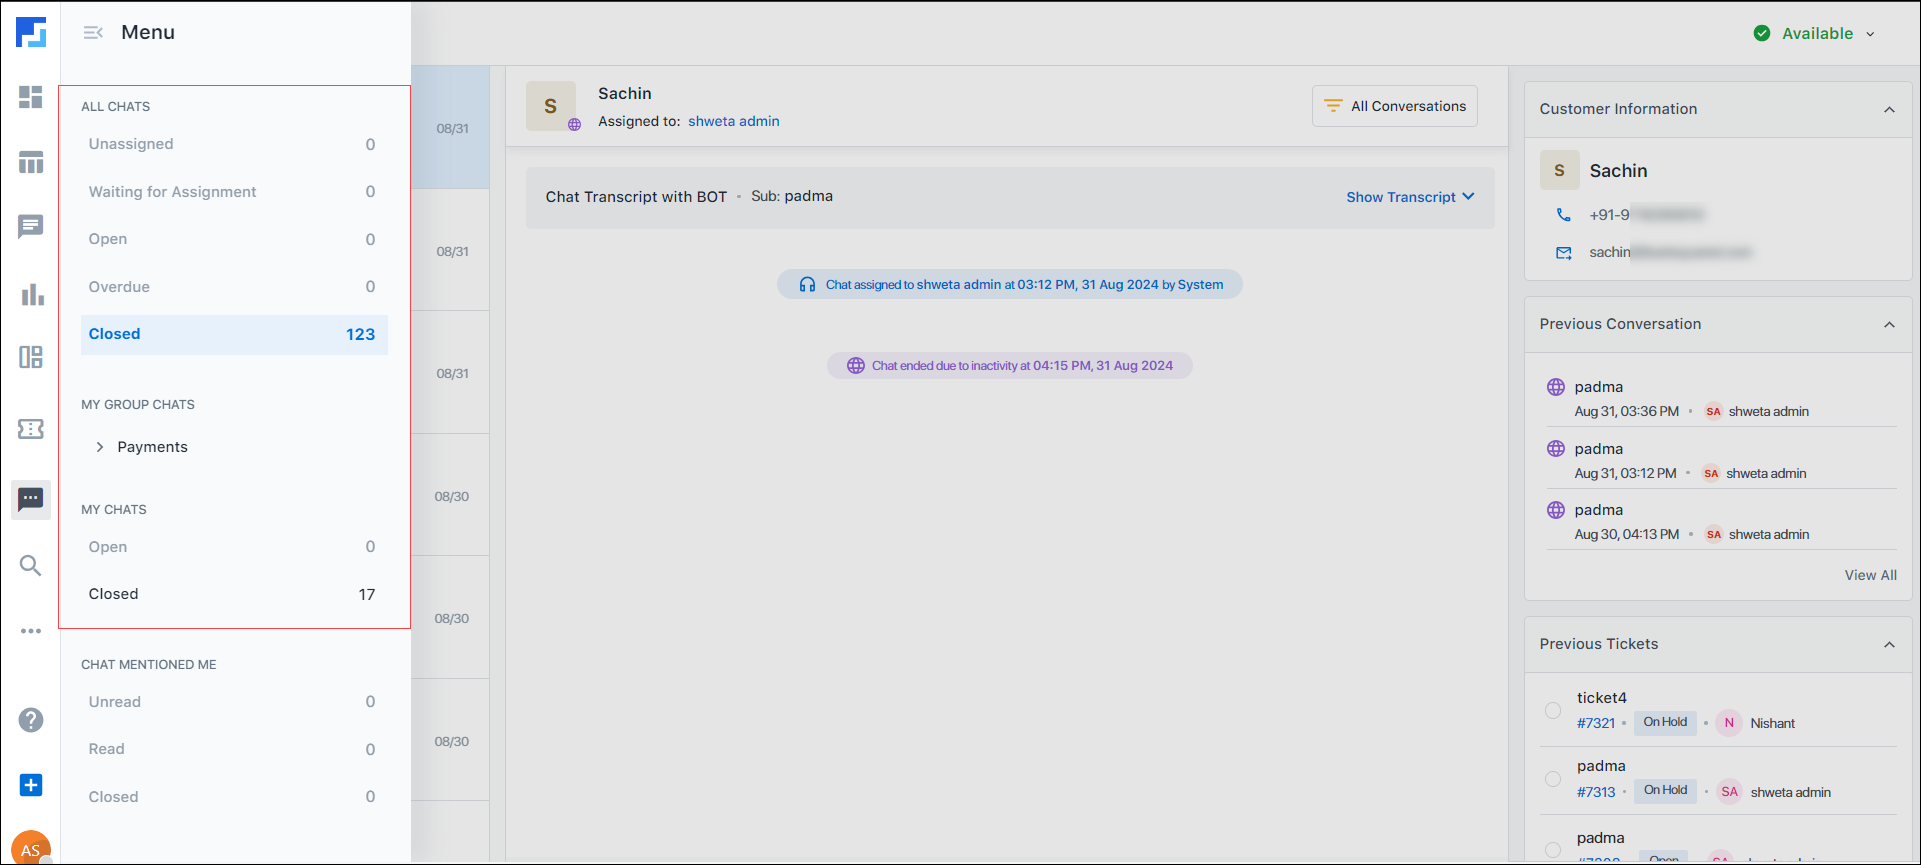
There are three chat screens, and the permissions for each screen are mentioned below –
- All Chat – All chats created in the account are visible on this screen.
- My Group – All the chats assigned to agents in your group are visible on this screen.
- My Chat – All the chats assigned to you are visible on this screen.
| Roles | All Chat | My Group Chat | My Chats |
| Admins | |||
| Service Group Managers | |||
| Supervisor | |||
| Service Agents | |||
| Custom User Role | |||
| Service Light Agent |
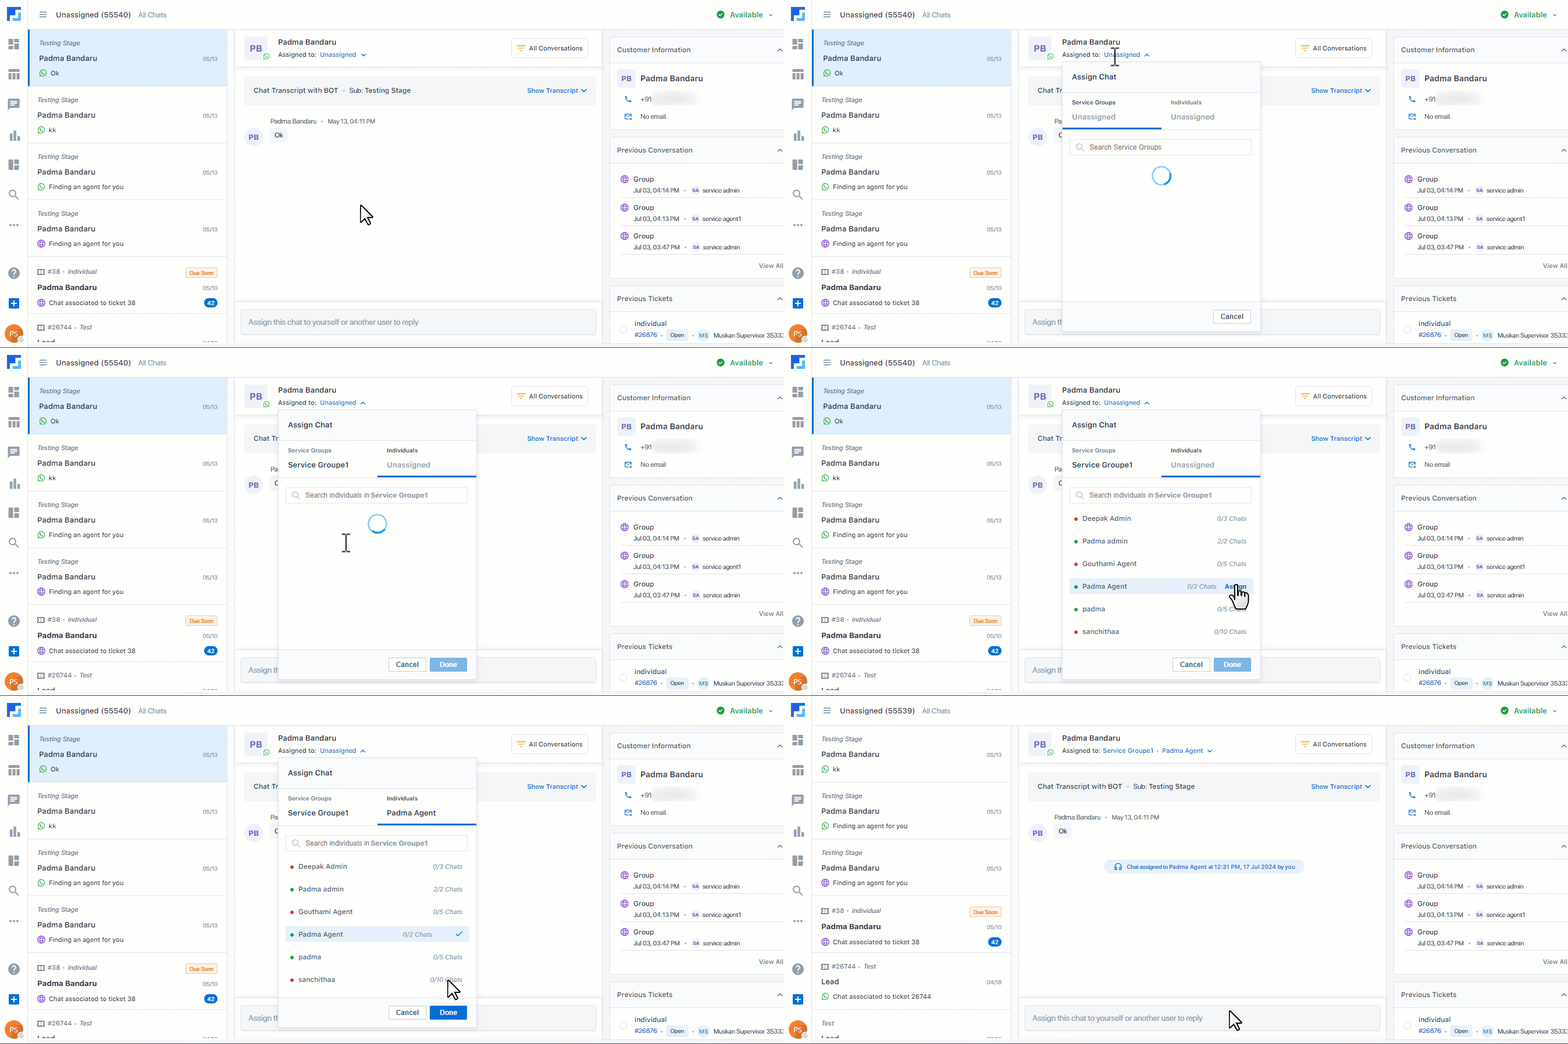
To assign a chat as an Admin –
- On the Unassigned Chat screen, open the chat you want to assign.
- Under the customer’s name, click Unassigned.
- From the Assign Chat dropdown, next to the Service Group or Individual agent you want to assign the chat to, click Assign.
- If you selected a Service Group, next to the Individual agent within this group to whom you want to assign the chat, click Assign.
- Then, click Done. The chat is now assigned to the selected user.
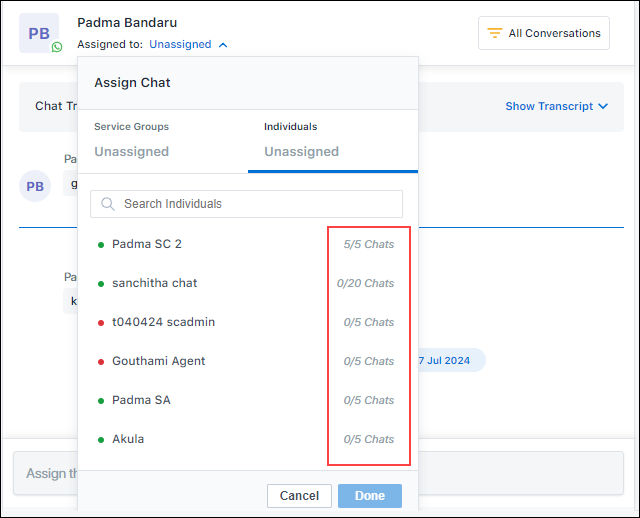
 Each agent has a maximum limit on how many chats can be assigned to them. Once this limit is reached, no further chats can be assigned to them until an existing live chat is ended. To define the limit on the number of live chats that can be assigned to an agent, contact your account manager or write to scsupport@leadsquared.com.
4. Upload and Preview Files
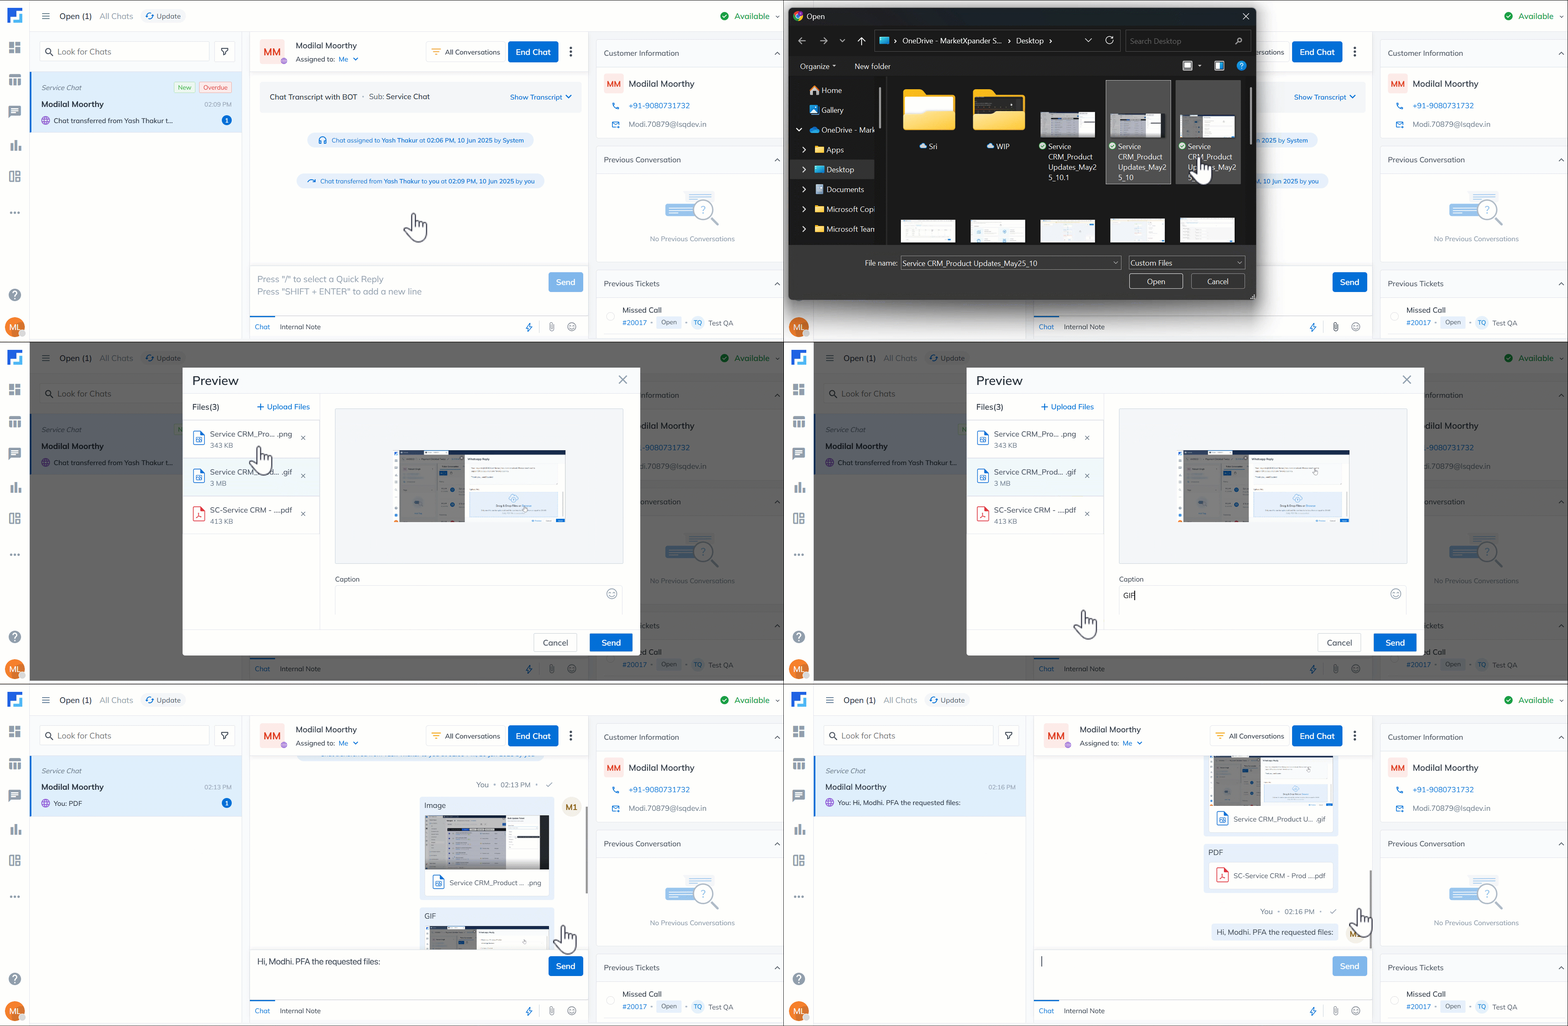
Upload up to 10 files in a single chat message. The maximum file size that’s supported is 8MB, and the supported file types are –
- Documents – .pdf, .doc, .docx, .xls, .xlsx, .ppt, .pptx, .txt, .csv
- Images – .jpg, .jpeg, .png, .gif, .svg, .webp
- Videos – .mp4, .mov, .avi, .webm
- Audio – .mp3, .wav
Preview is supported for PDFs, images, and GIFs. You can also add individual captions to each uploaded file.
5. End Chat
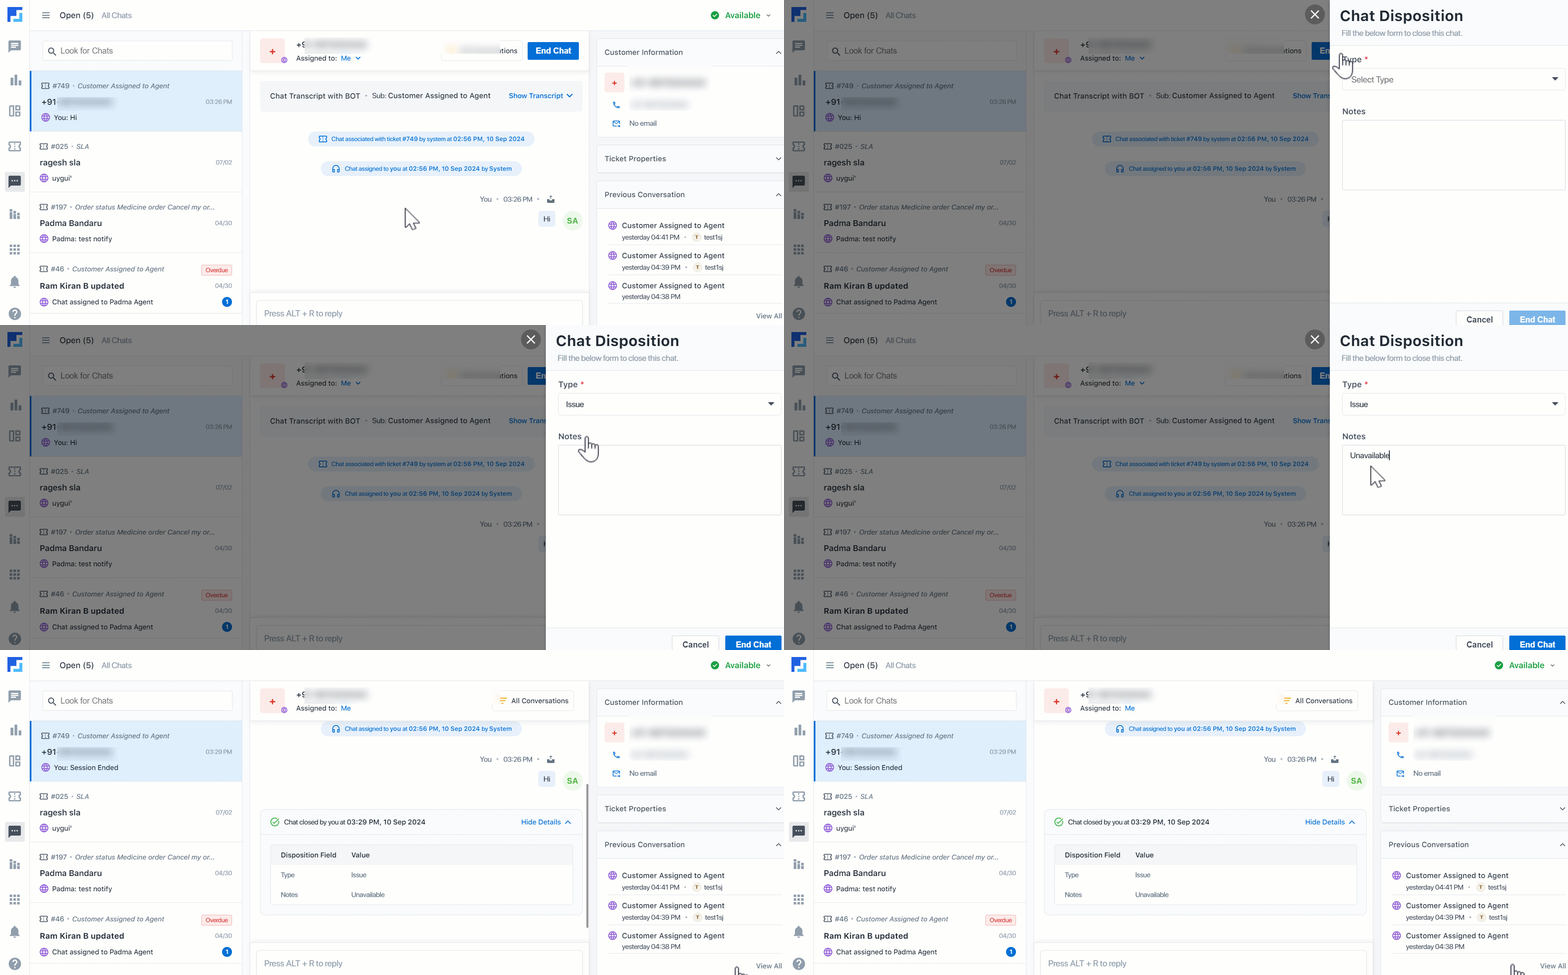
You can end the chat conversation once you’ve answered the customer’s queries. After ending it, a chat disposition form is generated. Enter details about the chat on this form, ensuring everyone in your organization knows the resolution provided to the customer.
6. Other Actions
From the chat screen, perform the following ticket-related actions –
6.1 Previous Conversations
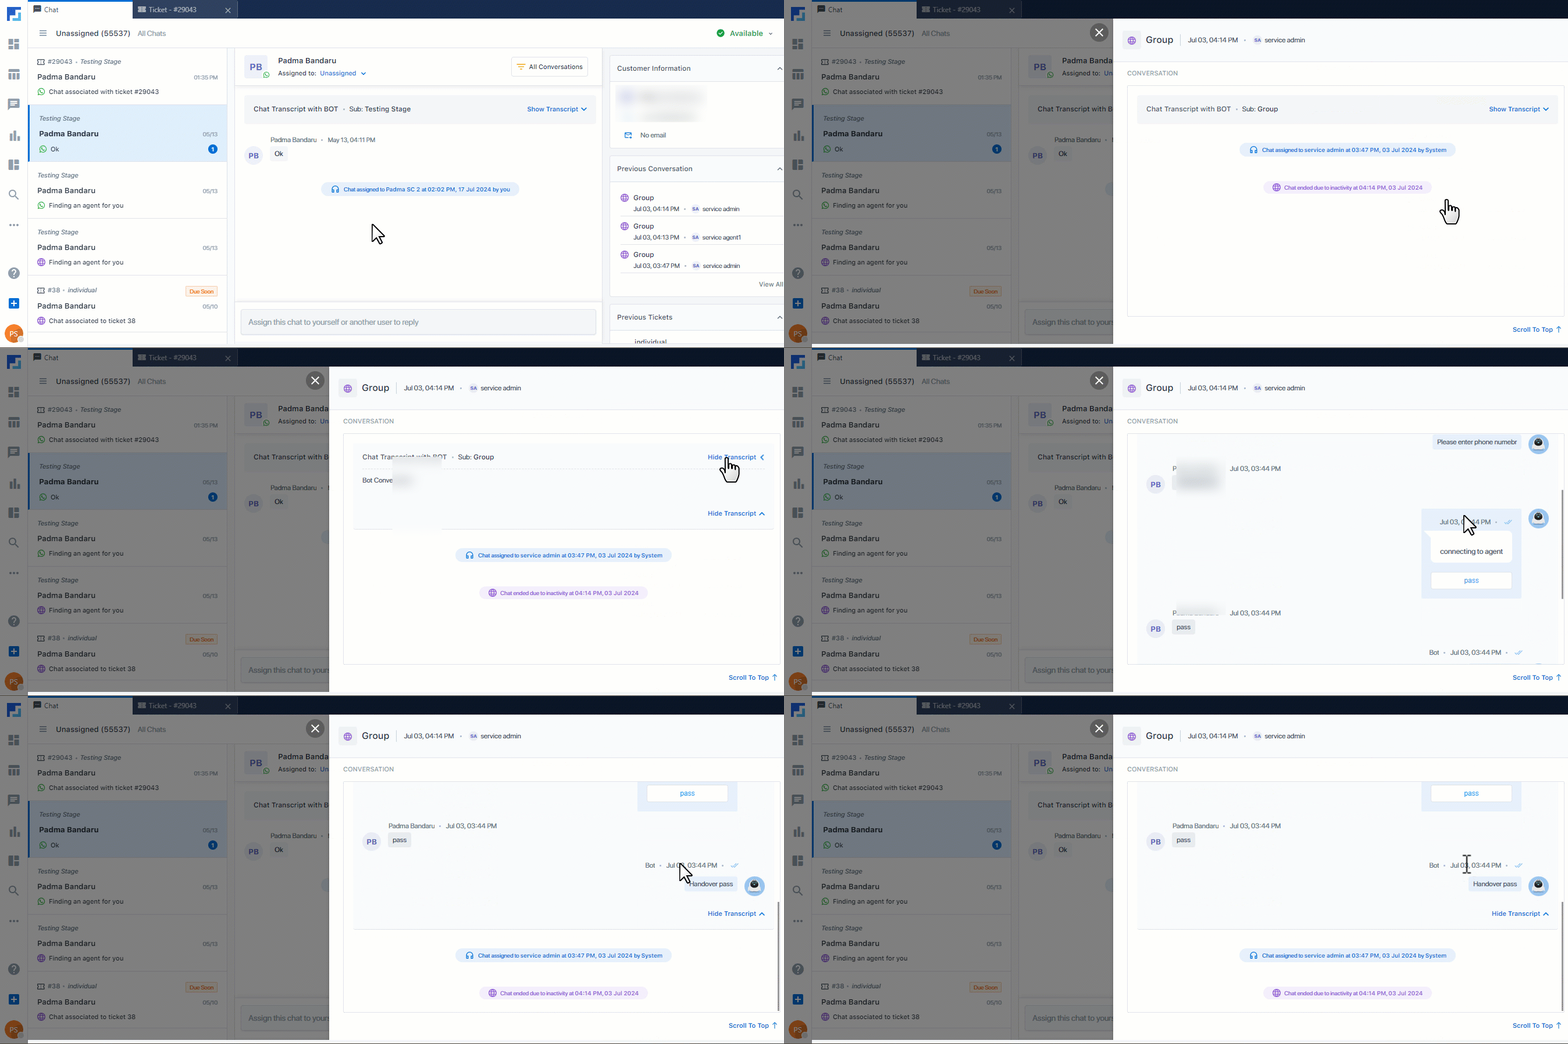
This tab displays the previous conversations the customer had with the chatbot before the chat was transferred to a live agent. Here, you can view the entire chat transcript.
6.2 Previous Tickets
This tab displays all the previous tickets tagged to the customer with whom you are currently chatting. On this tab, click on any existing Ticket Number, and you’ll be redirected to the Ticket Details page for that issue.
- Create Ticket – If no previous tickets exist, and if you want to create a new issue to record the customer’s issue, click the Create Ticket button.
- Associate Tickets – Sometimes, customers may raise the same issue through different channels (such as email, chat, phone calls, etc.), resulting in multiple tickets being created. In this instance, select the relevant existing ticket and click Associate to Ticket. This tags the current chat conversation to the existing ticket.
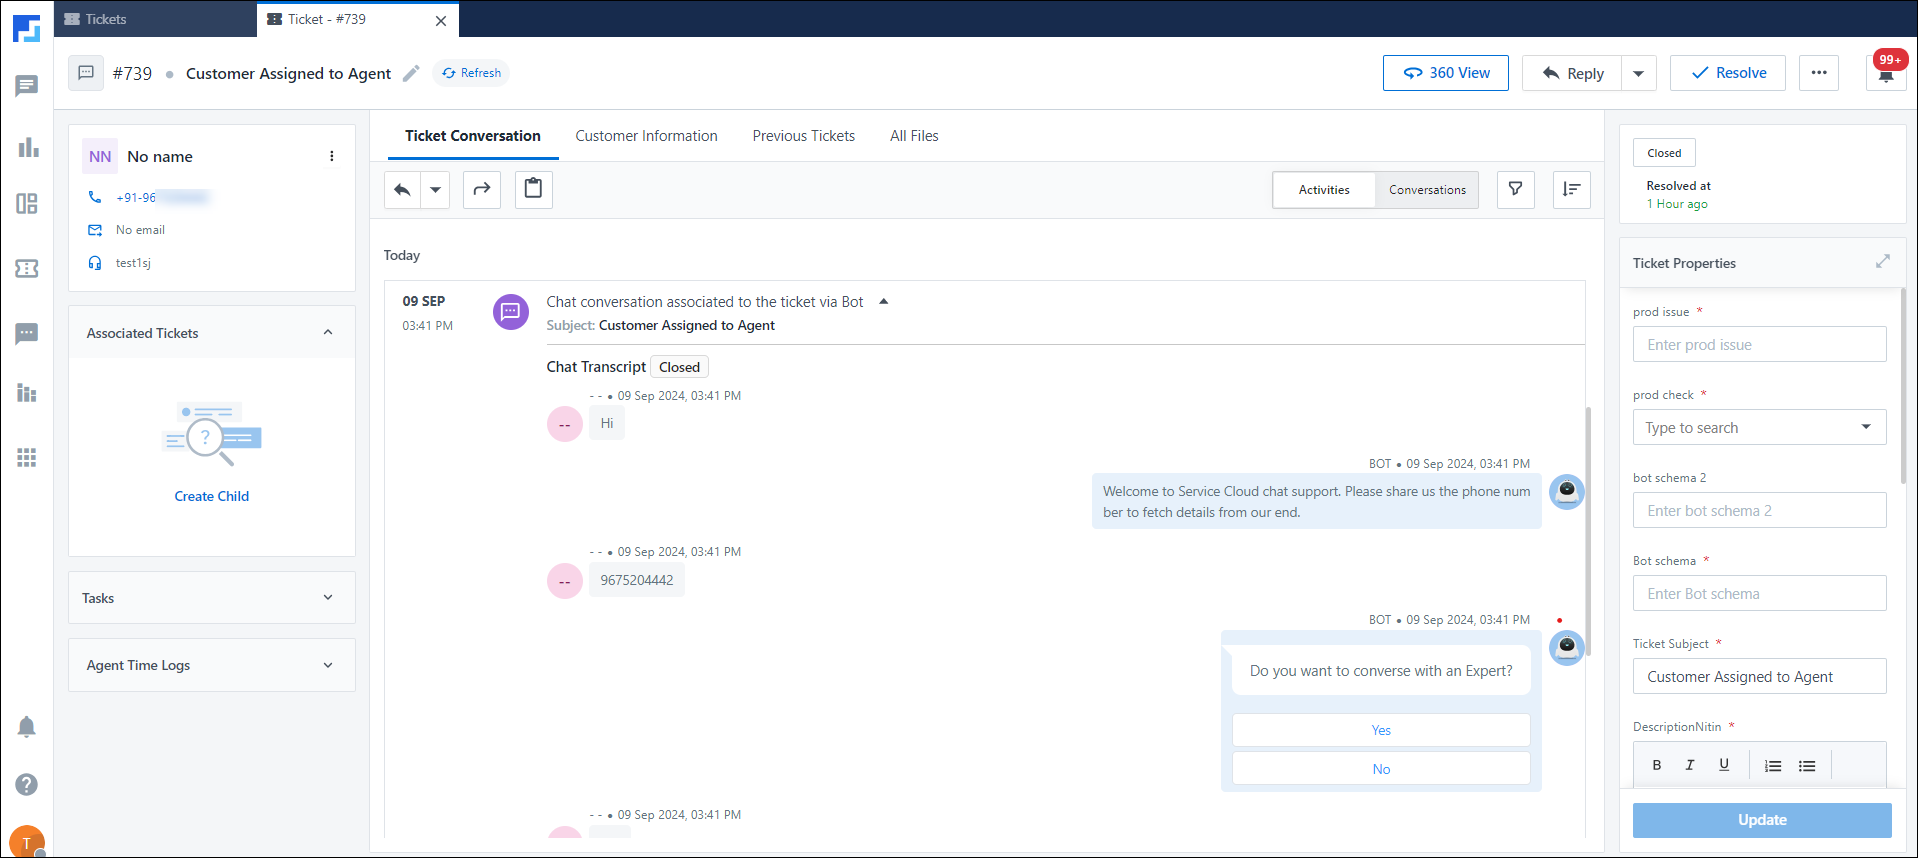
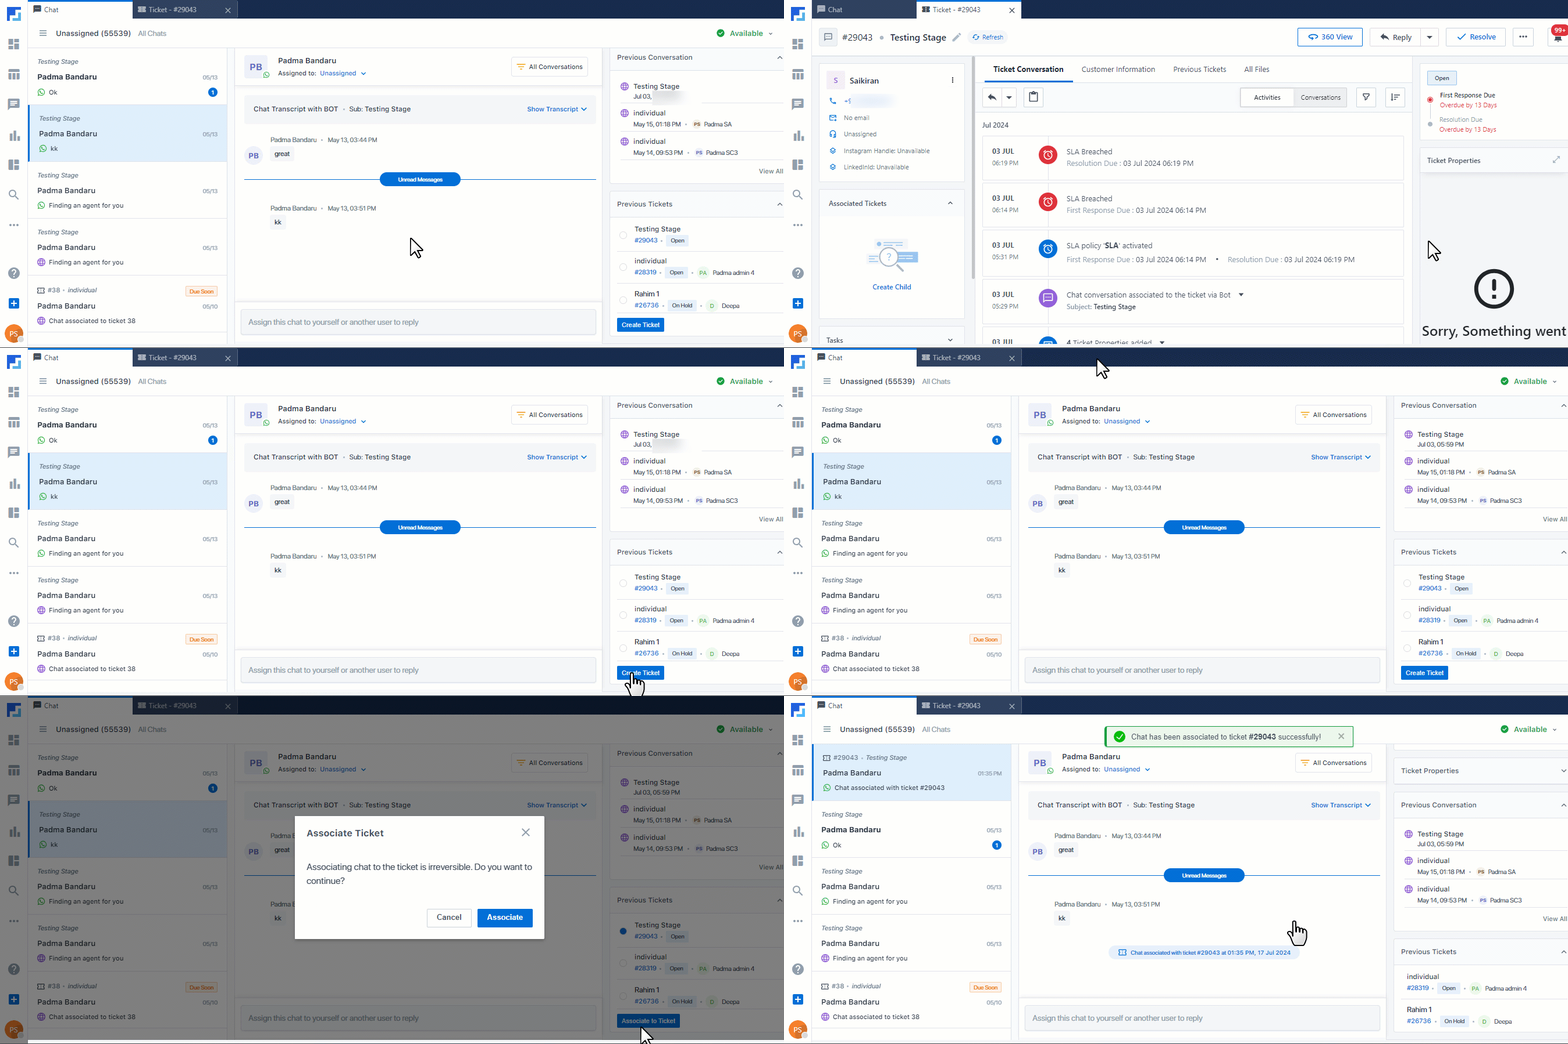 The chat transcript of the conversation between the chatbot and the customer can be viewed on the Ticket Details page, under Ticket Conversation.
6.3 Share Chat
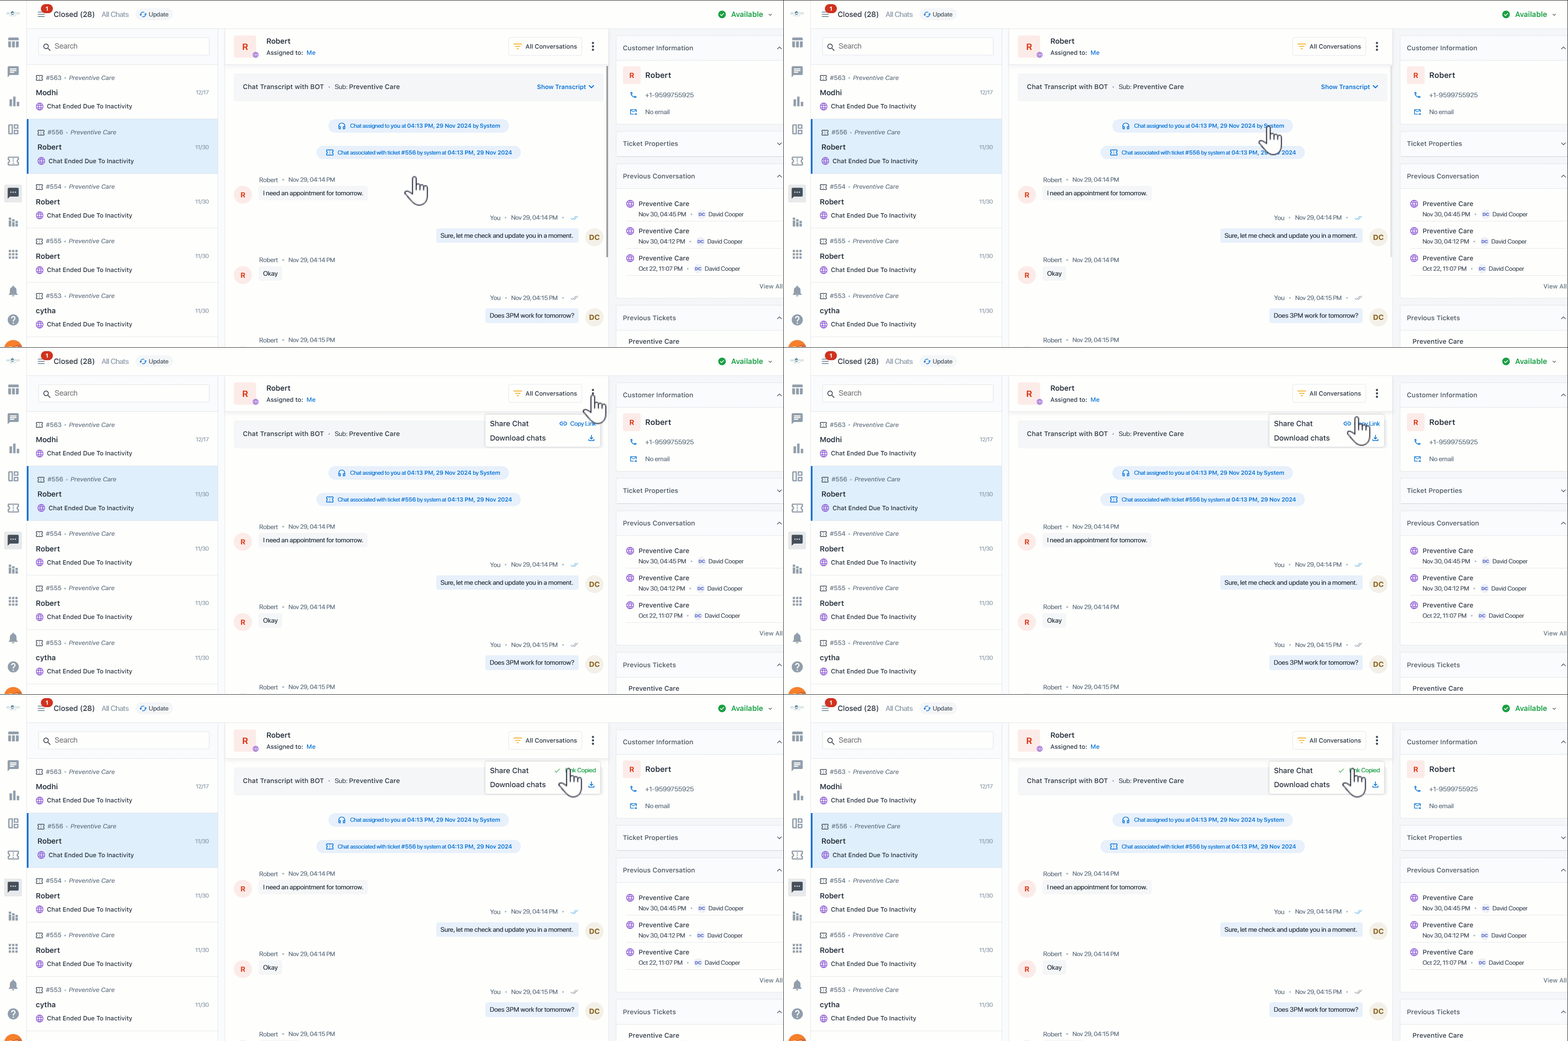
To share the chat with another agent in your account –
- On the chat screen, click the three-dot menu
 .
. - Then, click Share Chat.
- The chat URL is copied, and you can now share it with another agent.
6.4 Download Chat
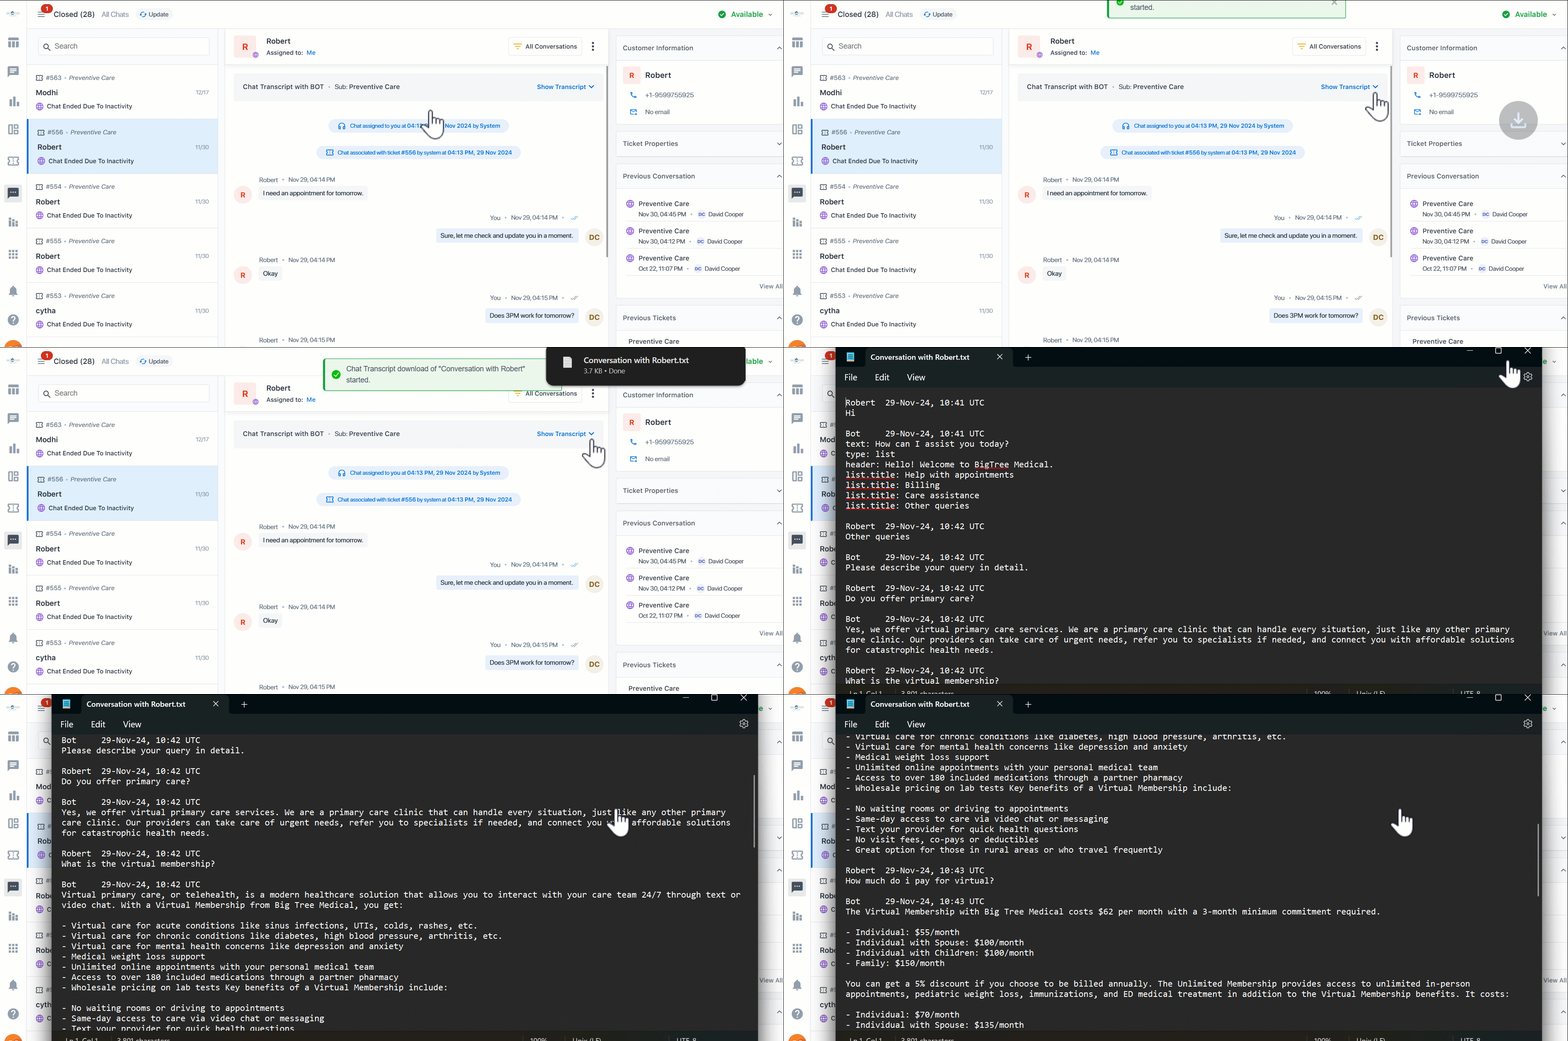
To download the chat transcript –
- On the chat screen, click the three-dot menu
 .
. - Then, alongside Download chats, click
 .
. - The entire chat transcript, along with the chat status, is downloaded as a note (.txt) file.
6.5 Chat Filters
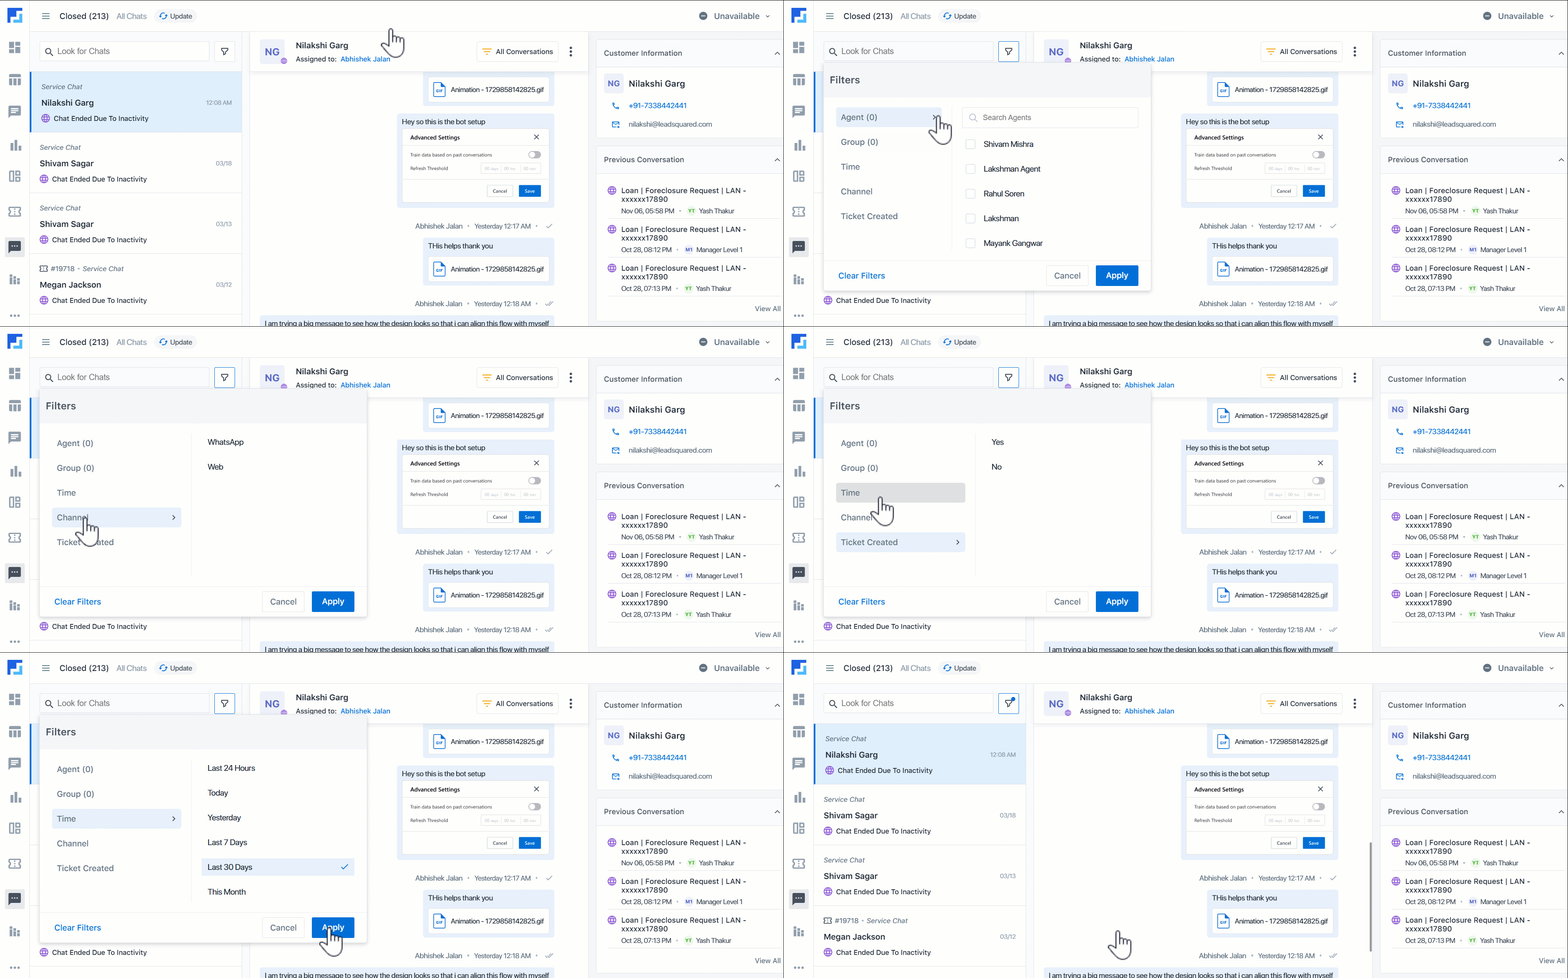
Apply the following chat filters to enhance your experience –
- Time
- Channel
- Ticket Created
These filters make it easier to find and manage specific chats based on your criteria.
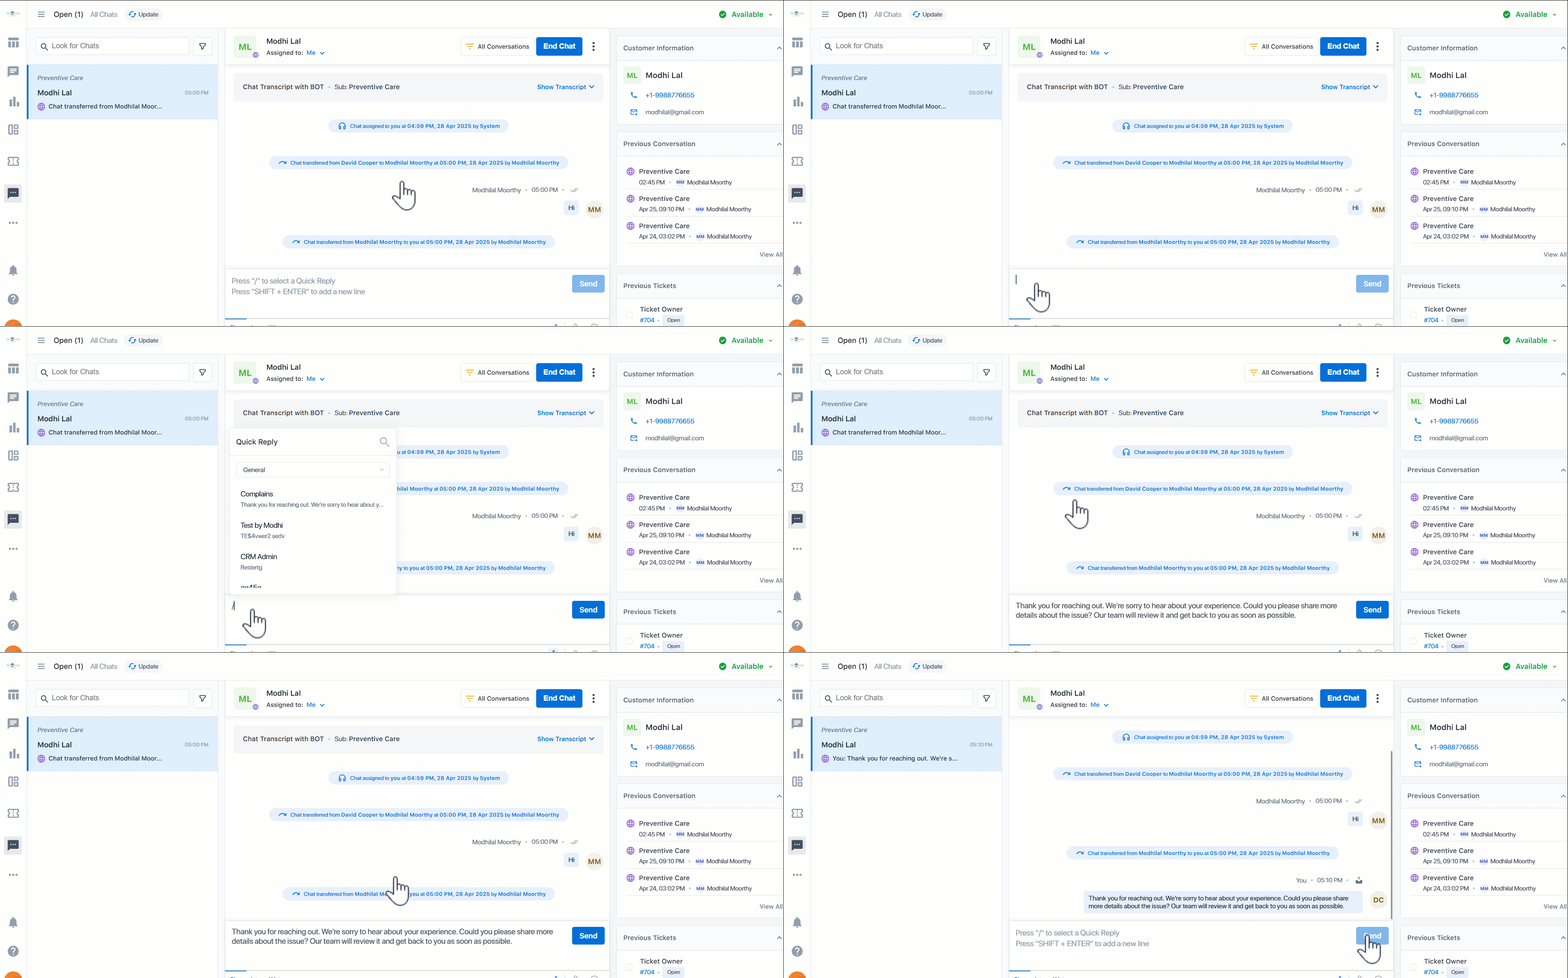
To access Quick Reply templates, enter / in the reply bar. This shows the list of templates configured in your account.
6.6 Bot Conversations
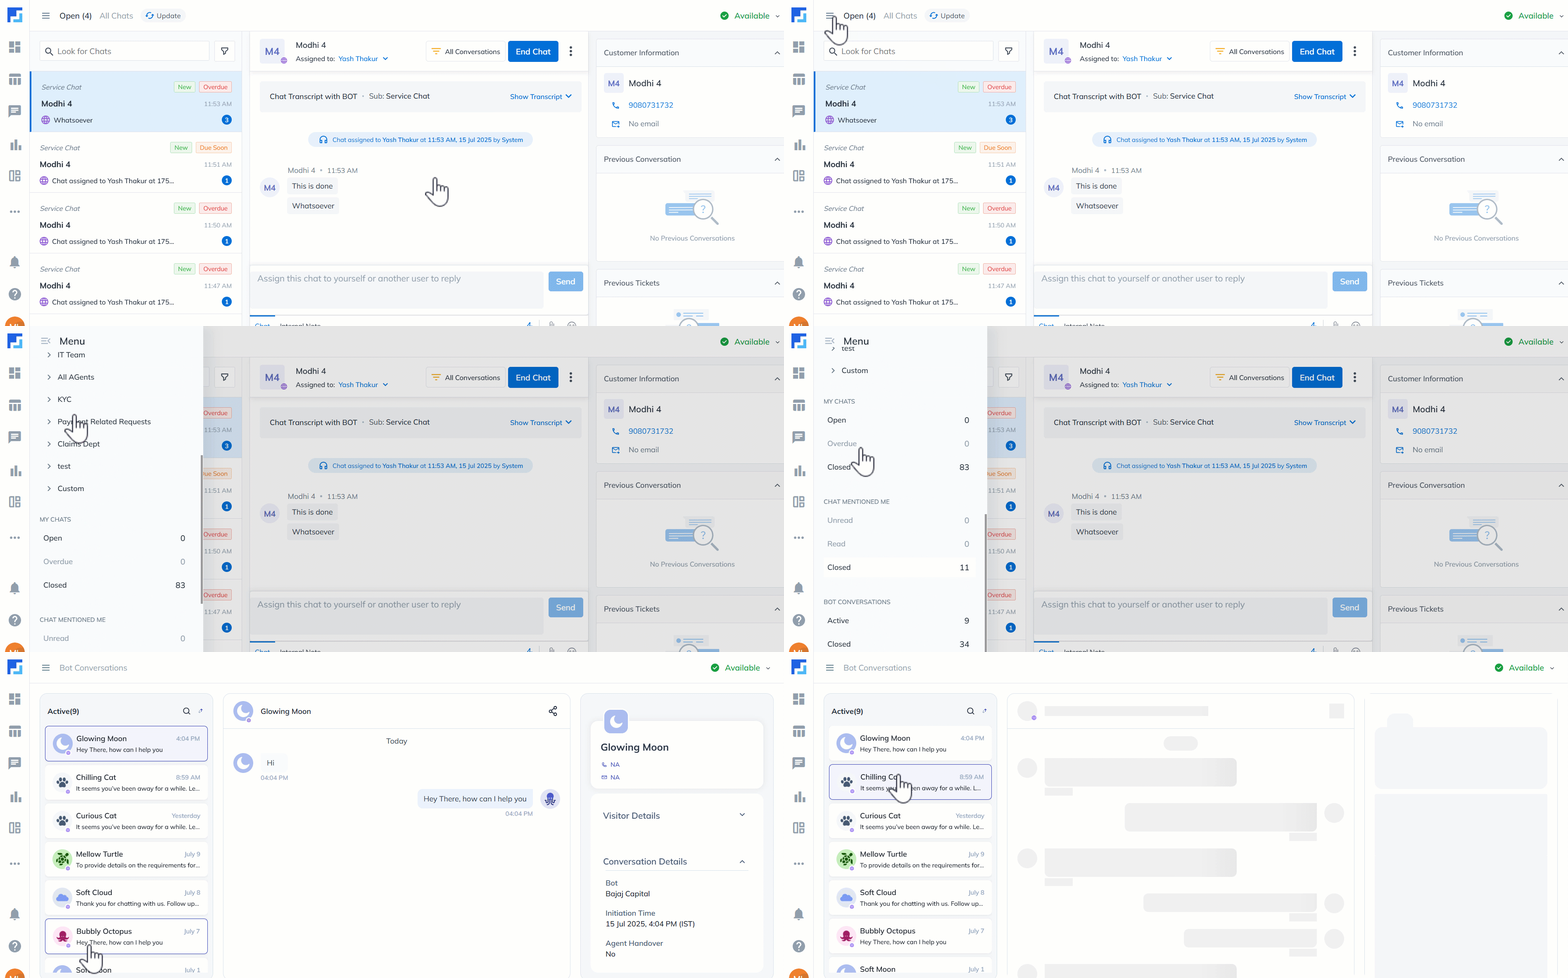
Displays Active and Inactive conversations your chatbots have had with customers. Active chats are ongoing conversations between the bot and the customer. Inactive chats are those the bot completed, handed over to a live agent, or where the customer left the chat.
On the right panel, you can view the following Visitor and Conversation Details –
- Location – The city from which the customer conversed with the bot.
- Browser – The web browser (e.g., Google Chrome, etc.) from which the customer conversed with the bot.
- Browser Type – The device (e.g., desktop, etc.) from which the customer conversed with the bot.
- OS – The device’s operating system (e.g., Windows, etc.).
- IP Address – The customer’s IP address.
- Chat Initiated Page – The URL of the webpage where the customer started the chat.
- Current Page – The URL of the webpage the customer is currently on.
- Bot – The bot’s internal name.
- Initiation Time – The time the conversation started.
- Agent Handover – If the chatbot handed the conversation to a live agent.
Any Questions?
Did you find this article helpful? Please let us know your feedback in the comments section below. We’d love to hear from you and help you out!


