1. Feature Overview
The Sales Activity Management feature lets you capture important information related to each sale (e.g., product sold, sales owner, date, order value, etc.). You can add and manage the revenue generated by your customers for different products and services offered by your organization. You can also cancel or edit sales activities to manage refunds and returns.
2. Prerequisite
You must be the Administrator or the Marketing User of your account.
3. Configure Sales Activity
Admin users can configure sales activity settings like the display name, default currency, etc. In the next section, you can also configure the fields you’d like to include in the sales activity.
- Navigate to Settings>Leads>Sales Activity Settings.
- Enter the Display Name for your sales activity (e.g., New Registration).
- Select or deselect the checkboxes in the settings based on your organization’s requirements.
- Click Save.
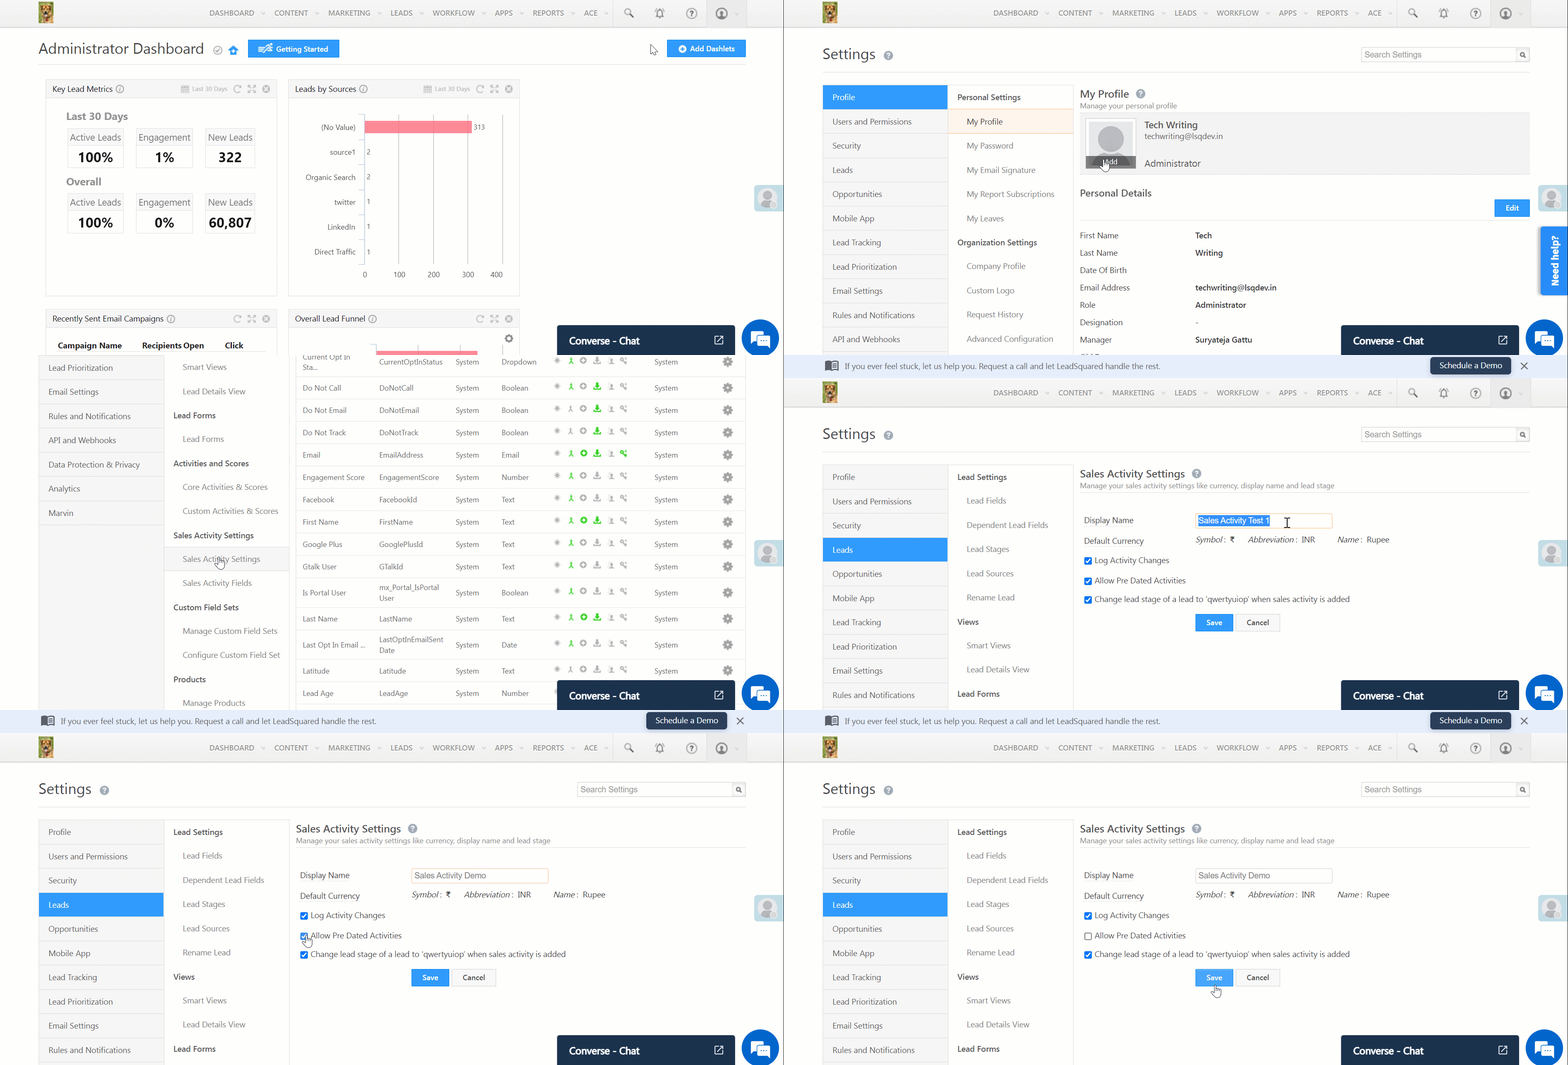
| Setting | Description |
| Log Activity Changes | Edits or changes to the sales activity will appear in the Activity History tab on the Lead Details page. To know more, see How to Log Activity Changes. |
| Allow Pre Dated Activities | Users will be able to create activities for earlier dates. |
| Change lead stage of a lead to ‘X’ when sales activity is added | Automatically changes the lead stage of the lead to the final lead stage configured in your account. |
4. Add Your Products
You can create multiple products that your users can choose from while creating a sales activity. You must be the Administrator of your account to add products.
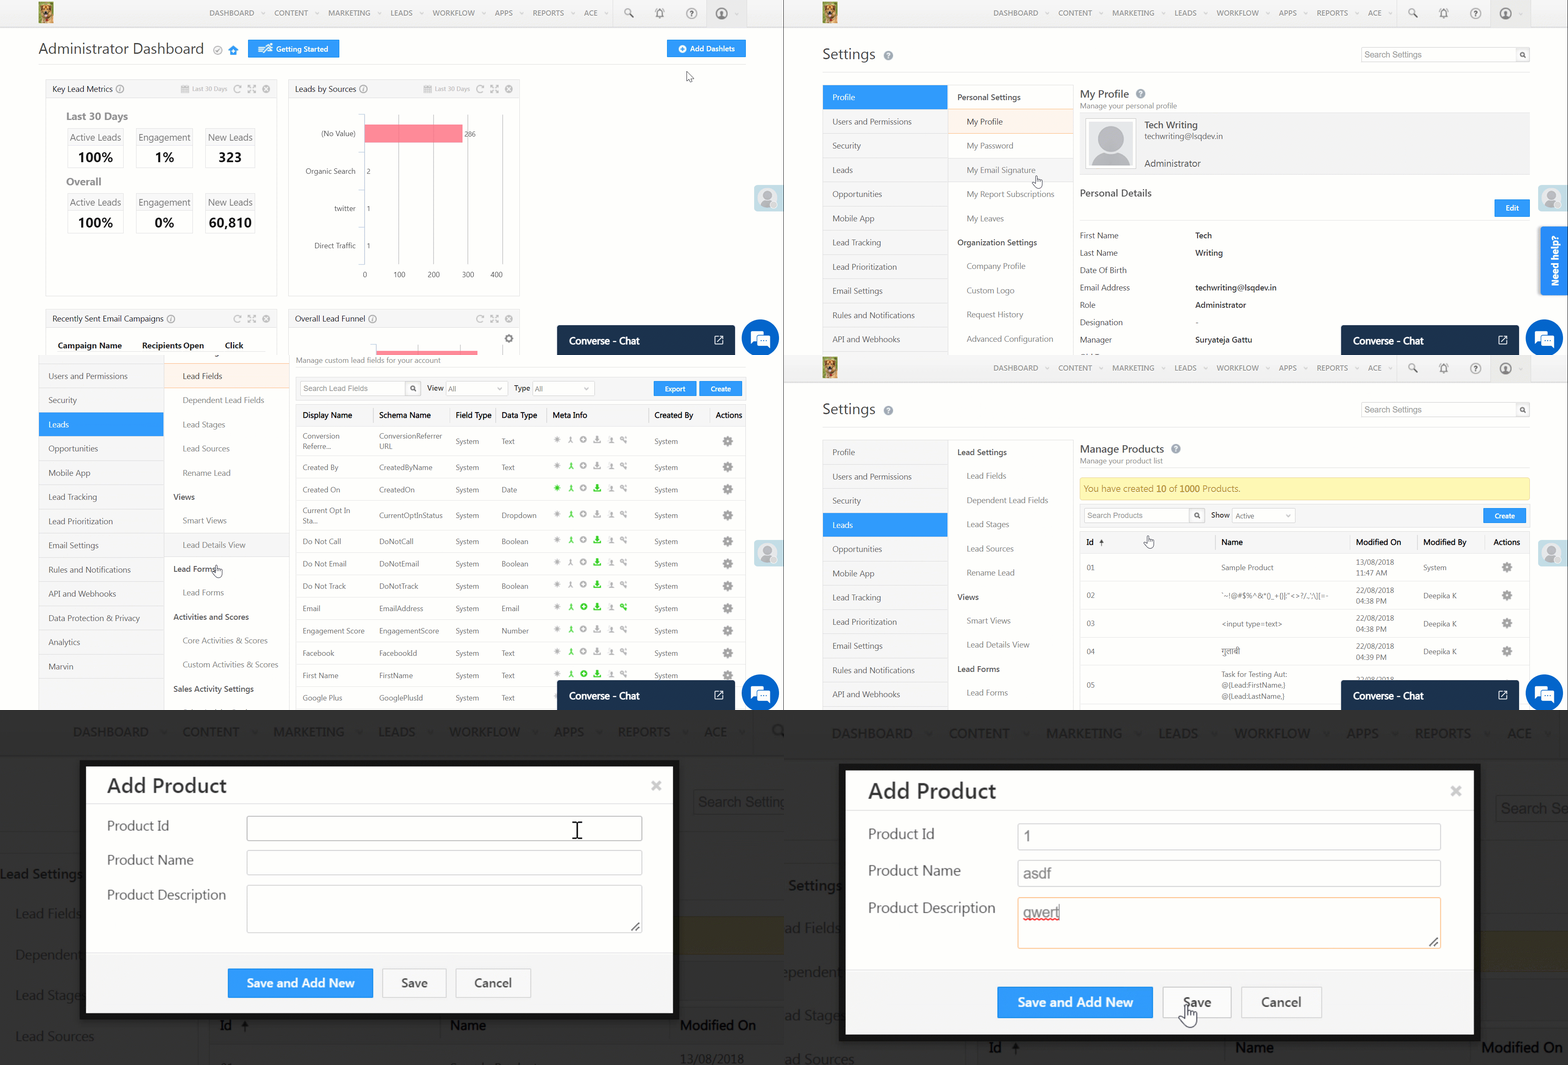
- Navigate to Settings>Leads>Manage Products.
- Click
 .
. - Enter the Product ID, Product Name, and Product Description.
- Click Save.
5. Add Activity Fields in Sales Activity Form
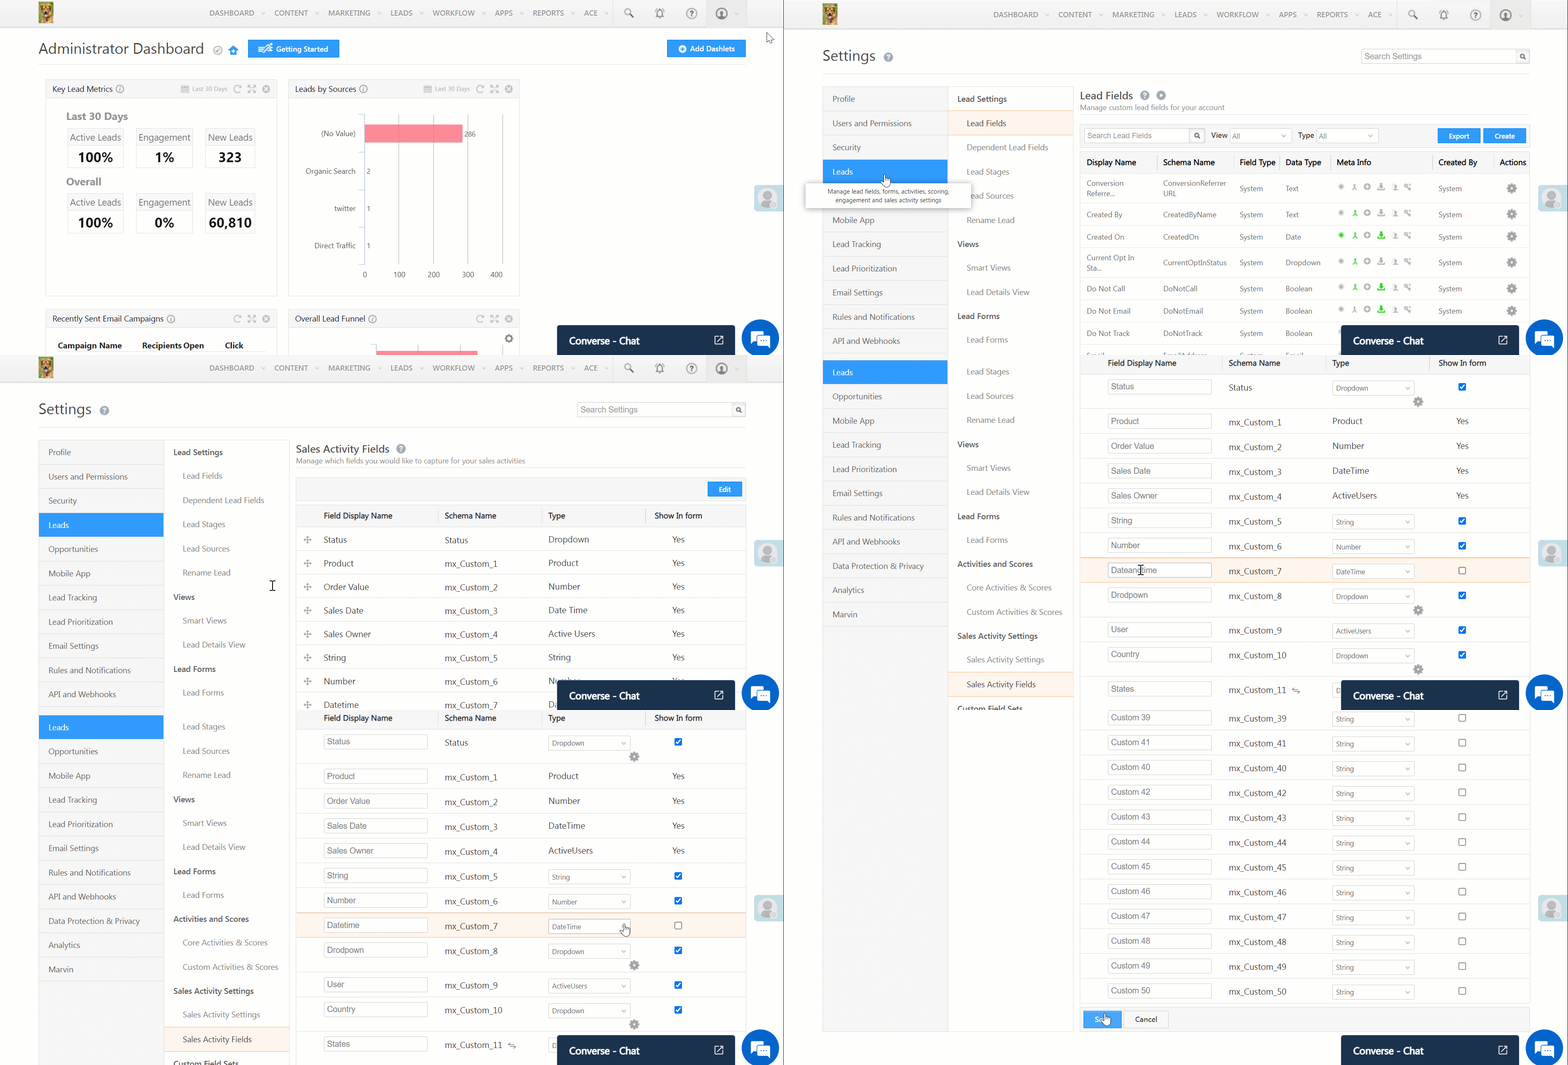
You can configure your Activity Form by adding custom Activity Fields. There are four default system fields and eleven custom fields which can be used in the Activity Form. To configure your form –
- Navigate to Settings>Leads>Sales Activity Fields.
- Click Edit.
- Enter Display Names for the required fields.
- Click the Type dropdown and customise the activity field type.
- To add the selected activity fields in your form, alongside the field, click
 .
. - Click Save.
6. Add Sales Activity for a Lead
Sales Activities can be added by Administrators, Sales Users, and Sales Managers.
6.1 From Manage Leads Page
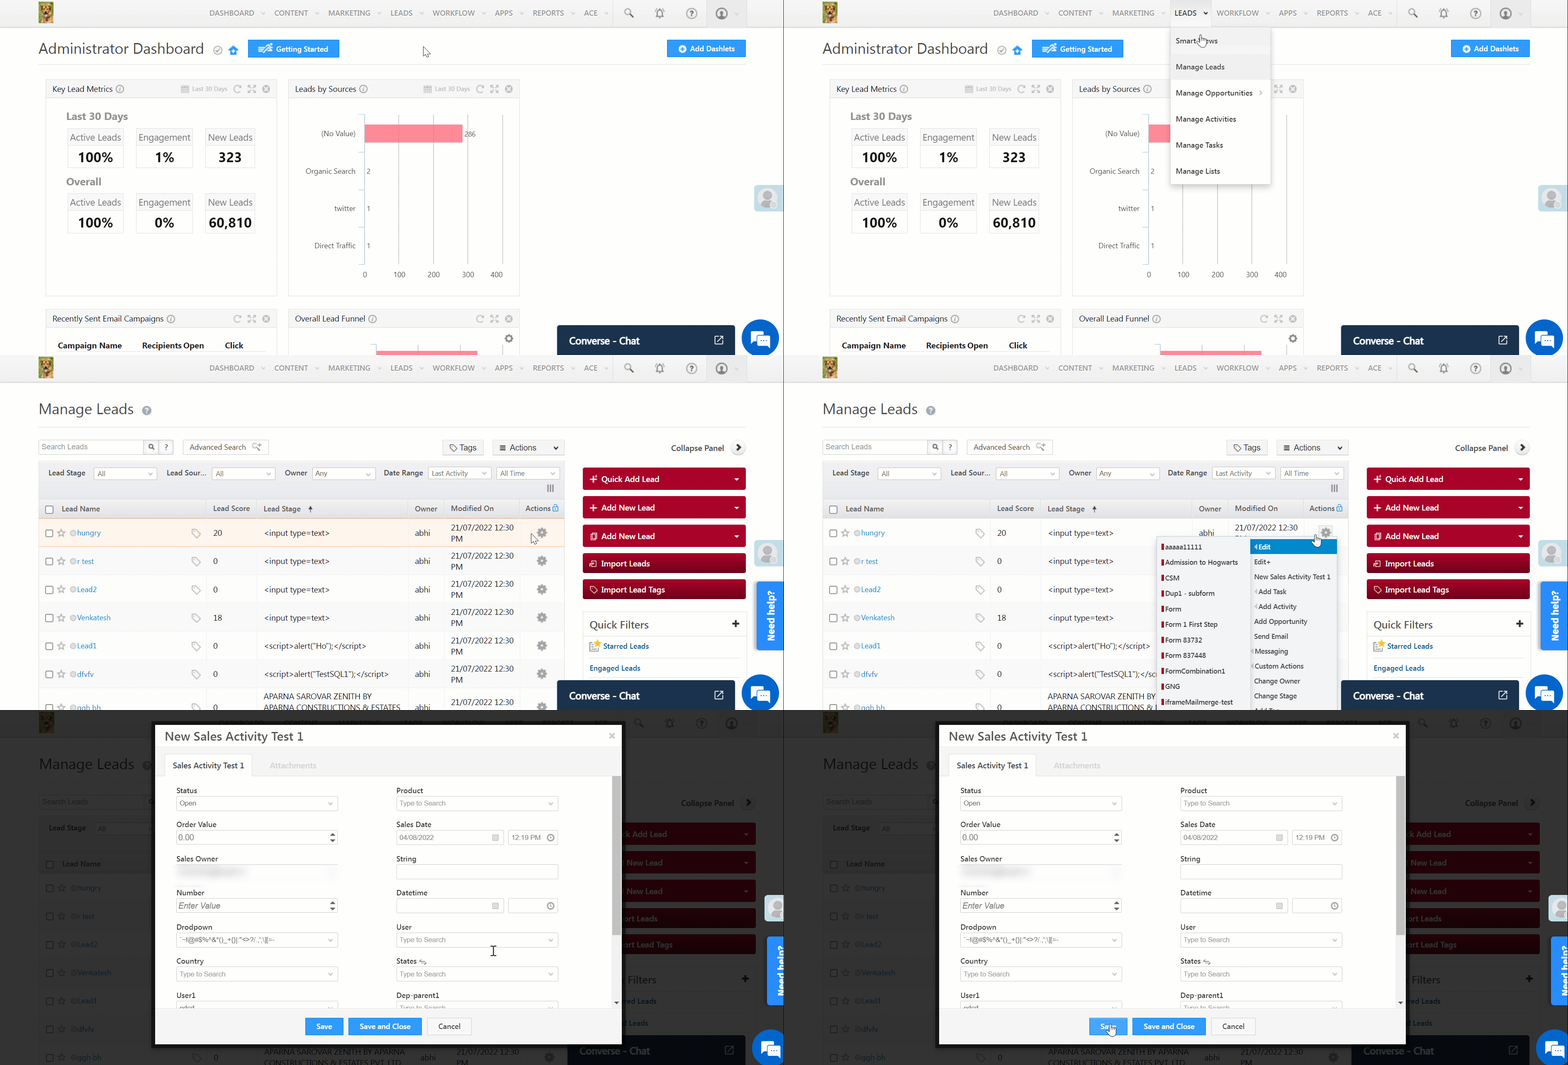
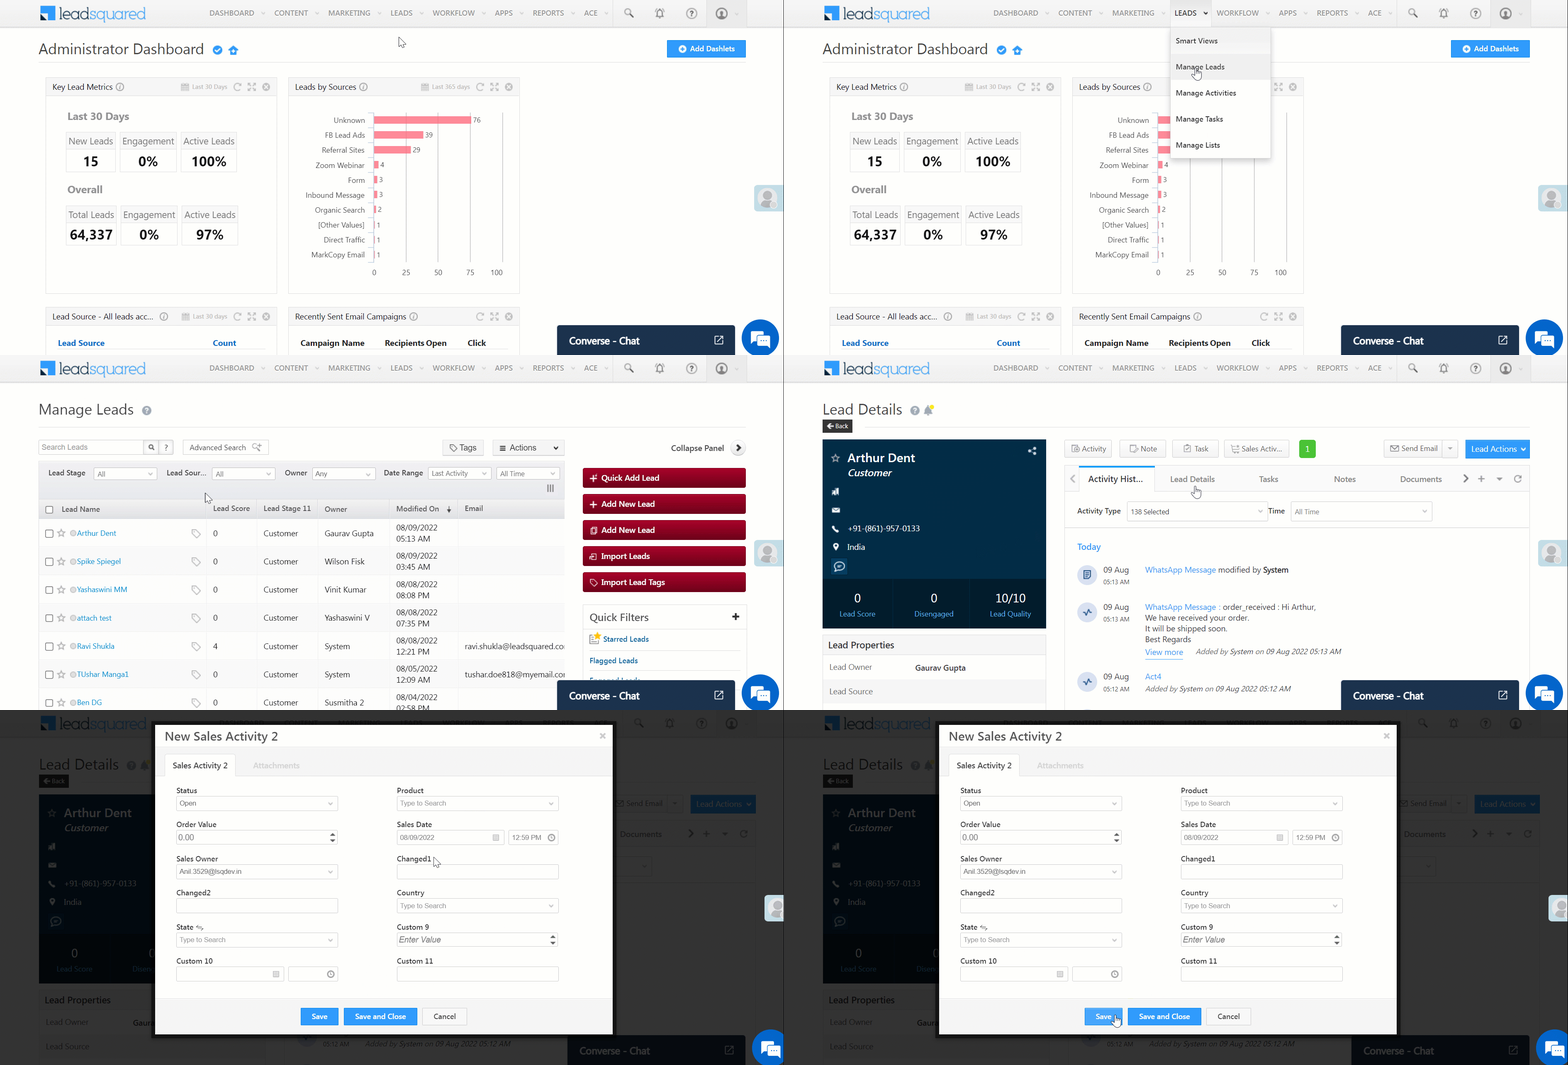
- Navigate to Leads>Manage Leads.
- Alongside the relevant lead, hover your cursor over
 .
. - Select the Display Name of your Sales Activity (e.g., New Registration, Quantity, etc.).
- Enter the details and click Save.
6.2 From Lead Details page
- Navigate to Leads>Manage Leads.
- To view the Lead Details page, click the name of the relevant lead.
- Click Sales Activity and enter the relevant details.
- Click Save.
7. Other Actions
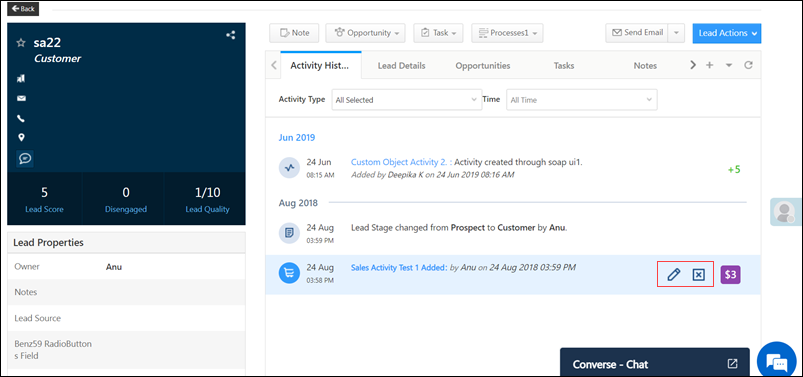
The sales activity of your leads will be displayed in the respective Lead Details pages. You can edit or cancel an existing sales activity here –
- Navigate to Leads>Manage Leads.
- To view the Lead Details page, click the name of the relevant lead.
- To cancel a sales activity, click
 .
. - To edit the details of the sales activity, click
 .
.
Any Questions?
Did you find this article helpful? Please let us know any feedback you may have in the comments section below. We’d love to hear from you and help you out!


