


Get Started
Sales Suite
Field Ops
Marketing
Service CRM
Integrations & Apps
FloStack
Managing and Configuring Lead Stages
1. Feature Overview
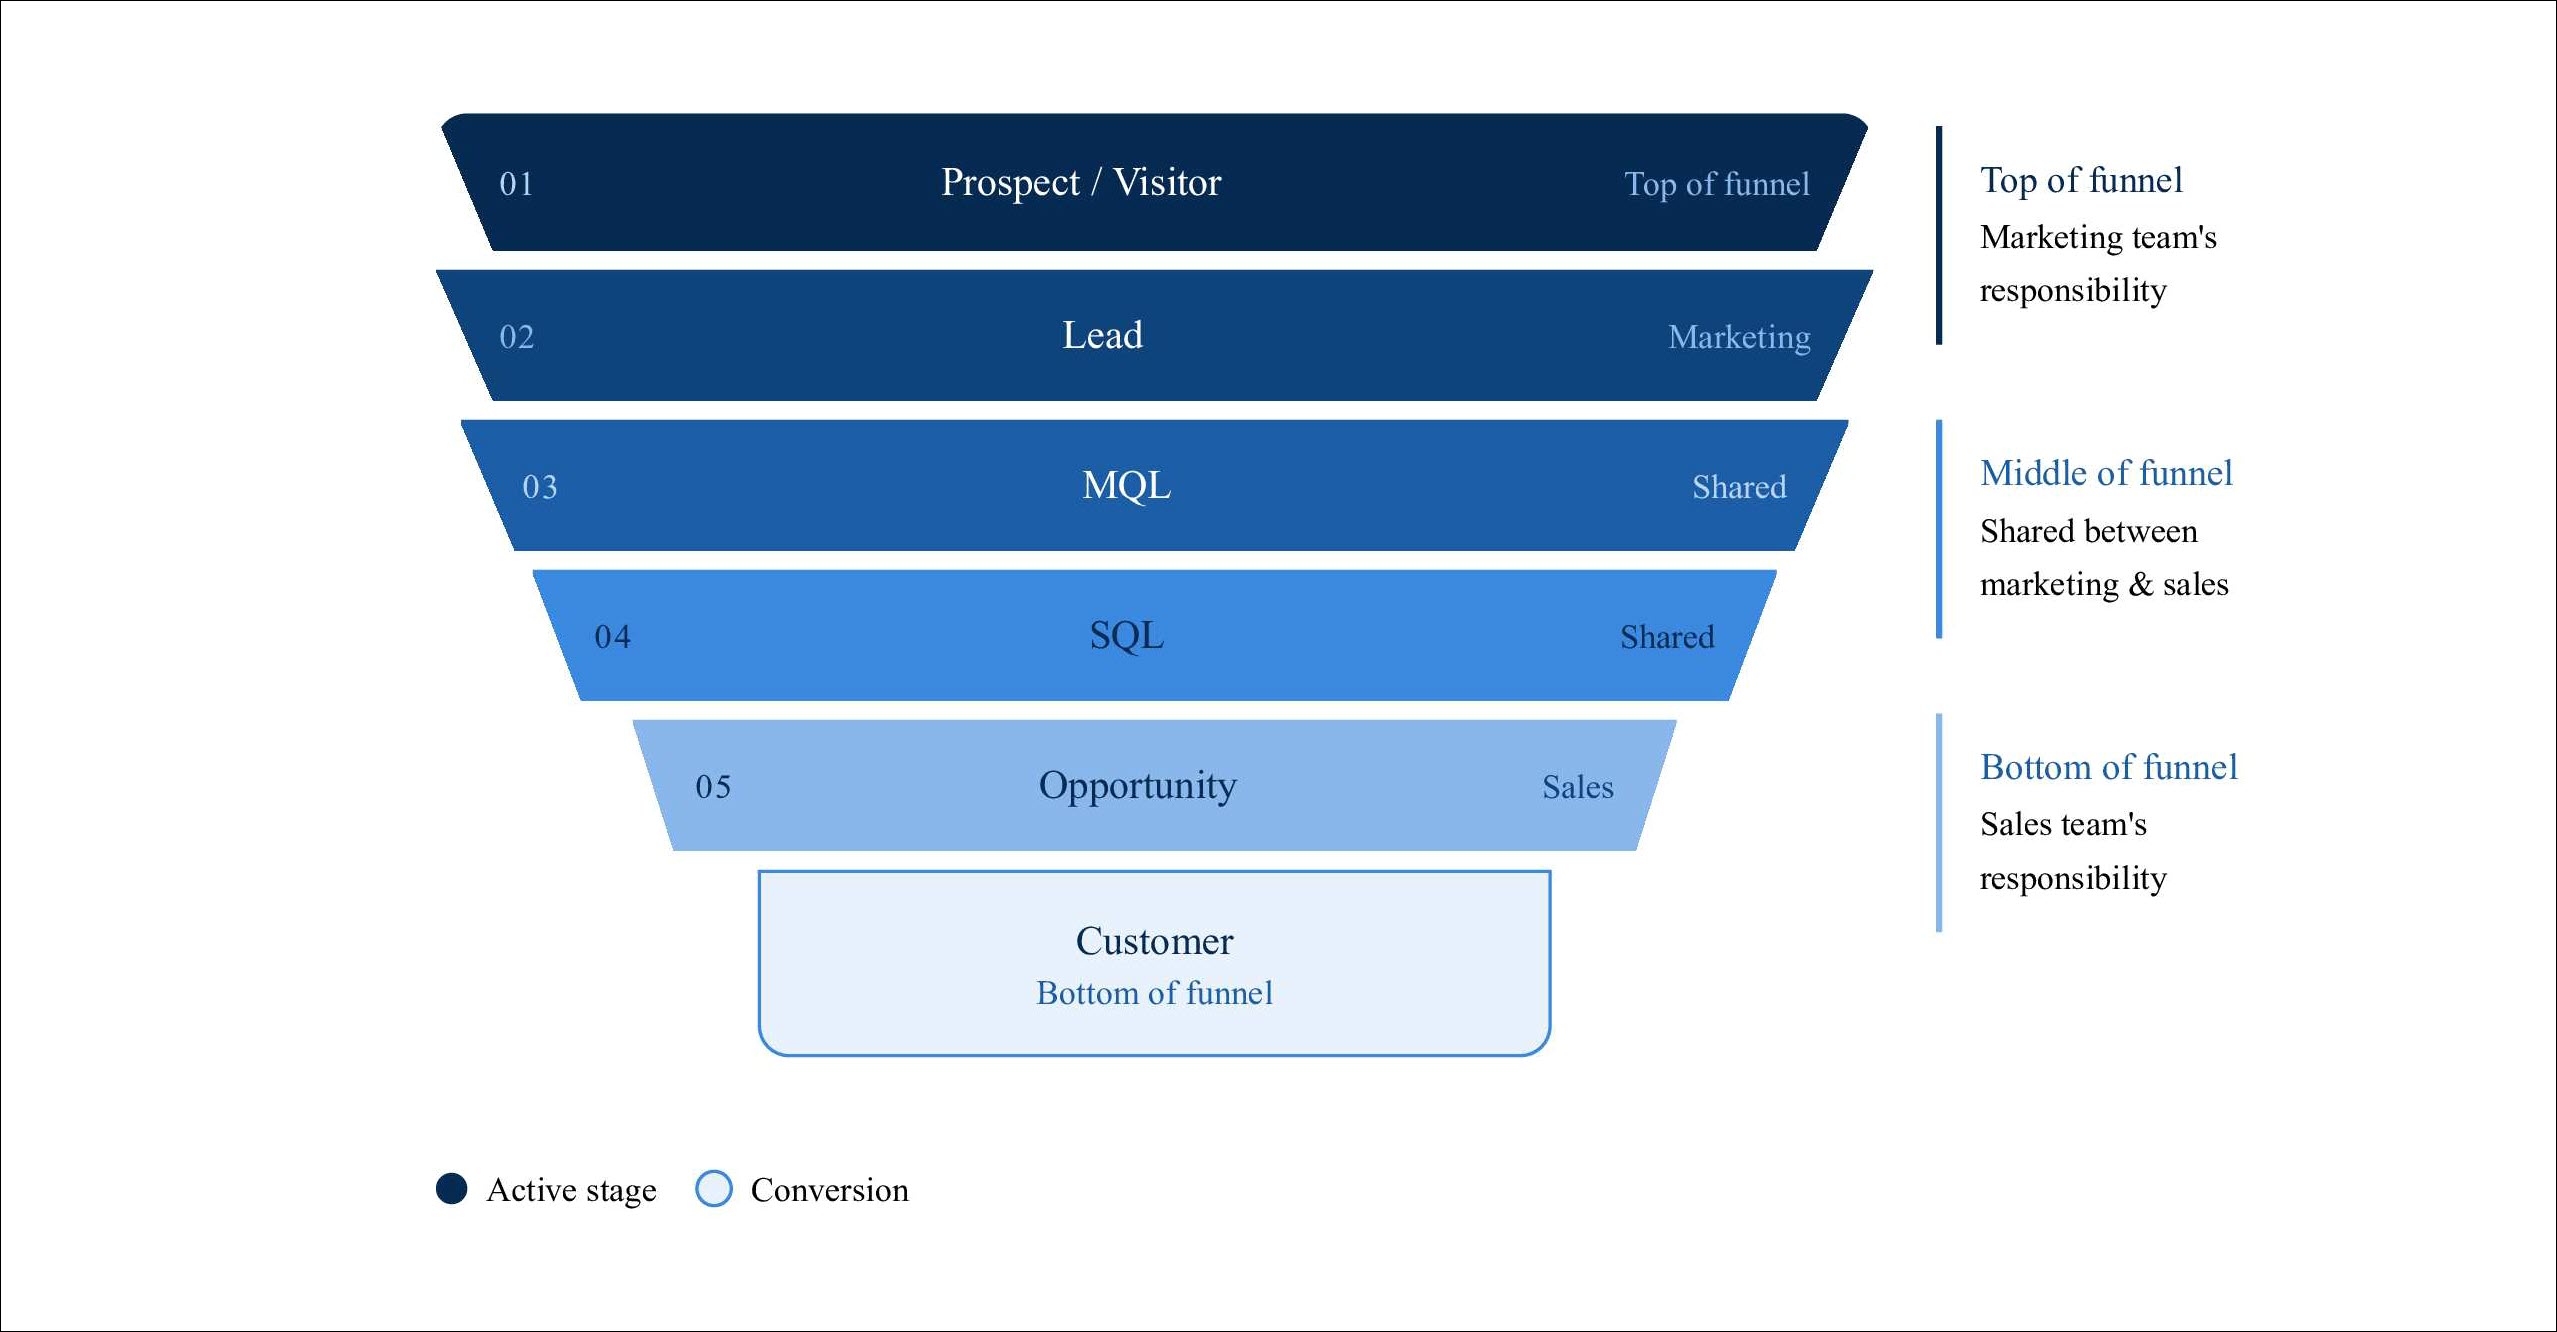
Lead Stages help you track a lead’s journey through your sales process, from initial contact to conversion. They provide sales users with visibility into a lead’s current status and help ensure the right actions are taken at each stage.
LeadSquared comes with three default Lead Stages:
- Prospect
- Opportunity
- Customer
Since sales processes vary across organizations, you can create, edit, and reorder Lead Stages to match your business requirements. Once configured, Lead Stages can be used across Lead Management and Automations to streamline lead tracking and conversion workflows.
2. Prerequisites
- You must be the administrator of your LeadSquared account to configure the lead stages.
3. Active and Inactive Stages
Active Stages represent qualified leads that are still progressing through your sales funnel and have the potential to convert into customers. Examples include stages such as Prospect, Contacted, and Opportunity.
Inactive Stages represent disqualified leads that are no longer being pursued and are unlikely to convert. Examples include stages such as Invalid, Not Interested.
This classification helps sales teams focus on active opportunities while keeping disqualified leads separate for reporting and analysis.
4. How It Works
- Admins can create, edit, delete, and reorder Lead Stages to match their organization’s sales process.
- Every lead in LeadSquared is assigned a Lead Stage that represents its current position in the sales funnel.
- Sales users can update a lead’s stage manually, or stage changes can be automated using Automations.
- As leads progress through the sales process, they move from one stage to another (for example, Prospect>Customer>Opportunity).
5. Creating and Configuring Lead Stages
Follow the steps below to add and arrange a new Lead Stage –
- Navigate to Settings>Leads>Lead Stages.
- Under Active Lead Stages or Inactive Lead Stages, click Add.
- Click the Save icon to save the newly created Lead Stage.
- Under the Enable Comments on Stage Change section, click the checkbox to let your Sales Users make and read comments about the Stage change.
- Under Other Properties, click any of checkboxes to add the available characteristics to the Lead Stage.
- Is Mandatory – Marks the field as mandatory. Users won’t be able to create a new lead record without filling this field
- Show In Quick Add – Includes the field in the quick add lead option to create a new lead
- Include in Mail Merge – Includes this field as a mail merge option for email personalization
- Show In Import – Enables the field for mapping during lead import through CSV
6. Other Actions
You can perform necessary actions on the created lead stages from here.
- To edit/rename the Lead Stage, click the Edit icon.
- To delete the Lead Stage, click the Delete icon.
- To arrange the Lead Stages in a sequential order, click the Arrows icon as required.

7. Next Steps
7.1 View Lead Stages
Once you are done creating and configuring Lead Stages, you can view them on your Manage Leads or Smart Views page on the Columns or by applying relevant filters.
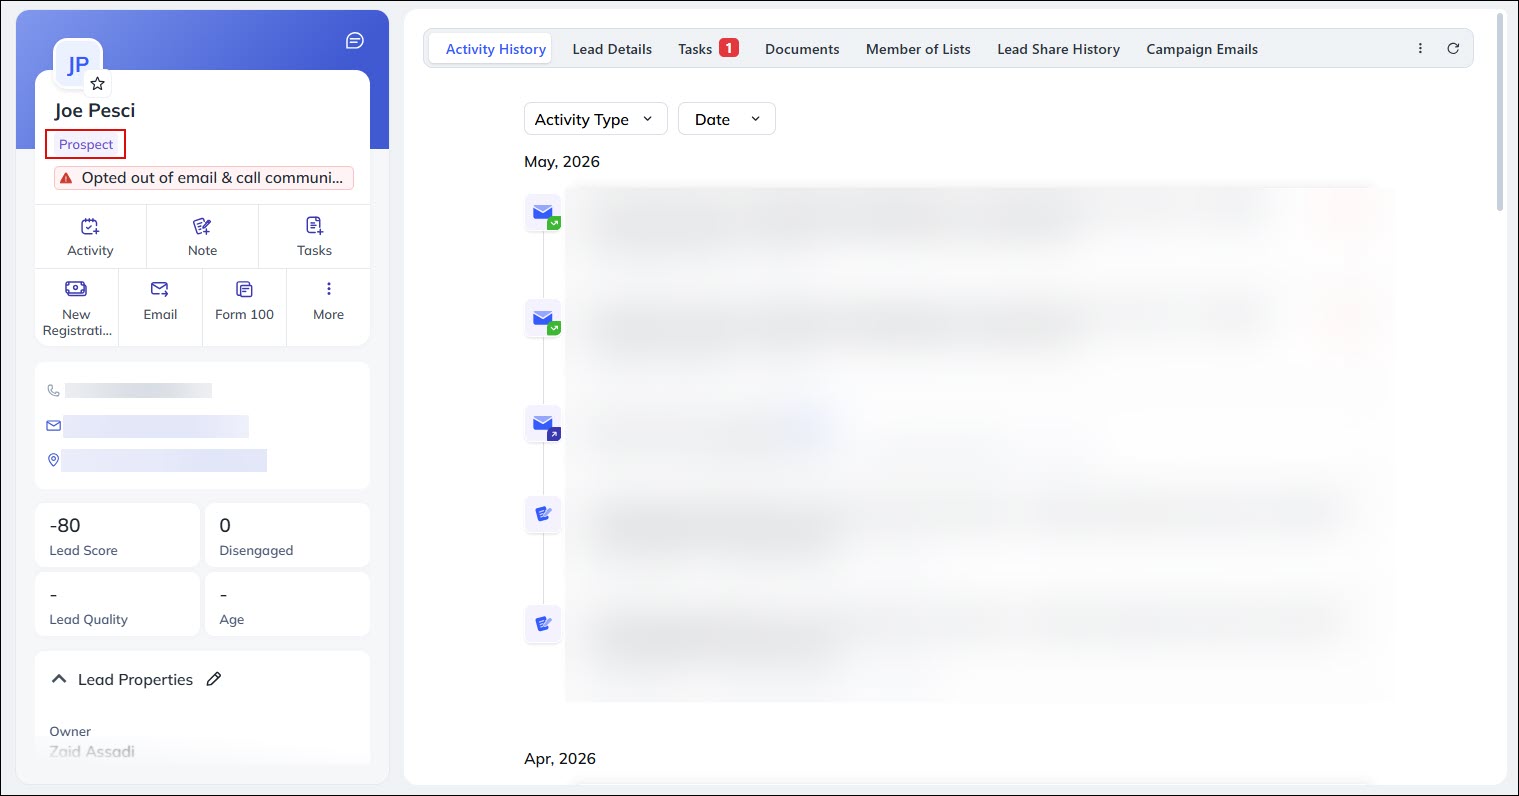
You can also view the Lead Stage of a specific lead on the Lead Details page.
7.2 Create Smart View Tabs
You can create a lead Smart View tab of leads in a particular lead stage.
7.3 Create a List
You can create a list of leads from particular lead stages from the Manage Lists page.
7.4 Create Automation
The Automation feature helps automatically push your leads through your sales funnel based on your sales workflows. In the example below, we have created an automation to change a lead’s stage to Uninterested if they unsubscribe any of our email campaigns. To know more, see Automation – Feature Guide.
Any Questions?
Did you find this article helpful? Please let us know any feedback you may have in the comments section below. We’d love to hear from you and help you out!
What do you mean by default stage?
Why it’s not letting me to unmark it?
Hello, Jogender.
Please write an email to support@leadsquared.com explaining your issue.