


Get Started
Sales Suite
Field Ops
Marketing
Service CRM
Integrations & Apps
FloStack
Adding Custom Field Sets to Activities
1. Feature Overview
This article assumes that you’ve already created one or more custom field sets and are now looking to integrate them with activities.
- If you’re new to custom field sets, see Creating Custom Field Sets.
- If you want to associate a custom field set with leads, see Adding Custom Field Sets to Leads.
- If you want to associate a custom field set with opportunities, see Adding Custom Field Sets to Opportunities.
2. Prerequisites
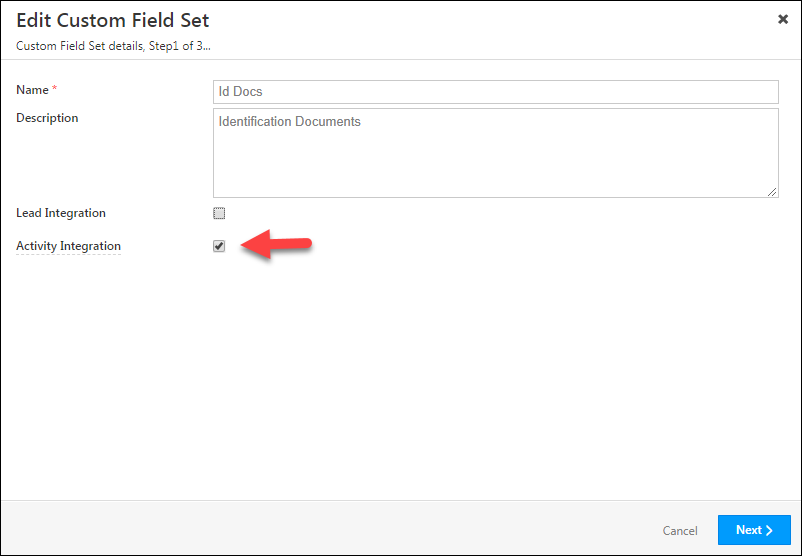
While creating a custom field set, you must select the activity integration checkbox. This will make the custom field set available for activity integration –
3. Associate a Custom Field Set with an Activity
Once you’ve created a custom field set, you can add it as the data type for a field in any custom activity.
- Navigate to My Profile>Settings>Leads>Custom Activities and Scores.
- Click the Edit
 icon alongside an activity (you can also follow the same steps while creating a new activity).
 - On the Update Custom Activity Type pop-up, click Next to navigate to step 2 of 3.
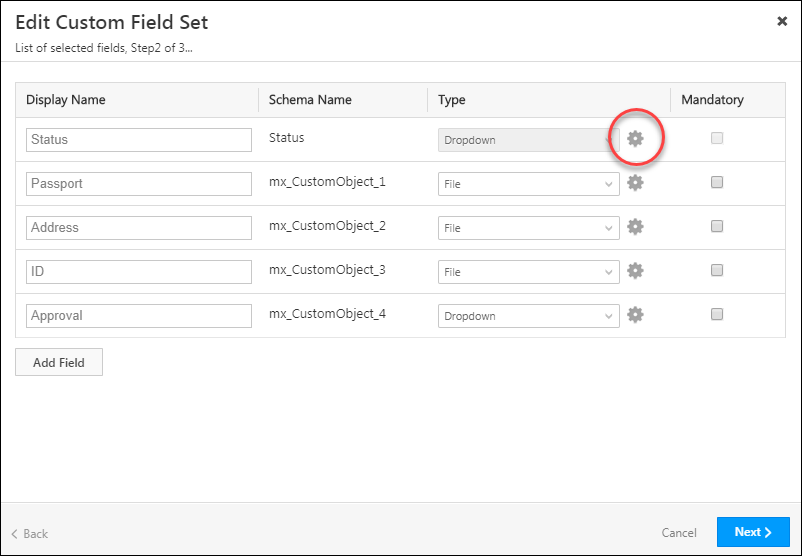
- Create a new field, or edit an existing one. Click the drop-down under the Type column alongside the field you want to associate the custom field set to, then select a custom field set.
- Click the Settings
 icon to edit the custom field set. Click Next when you’re done.
Note: Edits you make to a custom field set from here will not apply to the actual custom field set template you created. The edits will only apply to how the custom field set behaves with respect to this activity field. - Drag and drop the custom field set to change its order or positioning on your create/edit activity forms.
- Click Save.
If a custom field set has any field(s) marked as mandatory,
- The custom field set field will automatically be marked as mandatory while configuring the activity fields (in step 2 of 3).
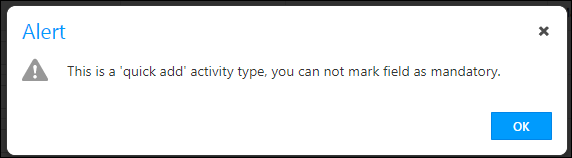
- You won’t be able to enable Quick Add for the associated activity. Conversely, if you enable quick add and then try and make a custom field set mandatory, you’ll still receive an error –
Adding an Activity with a Custom Field Set
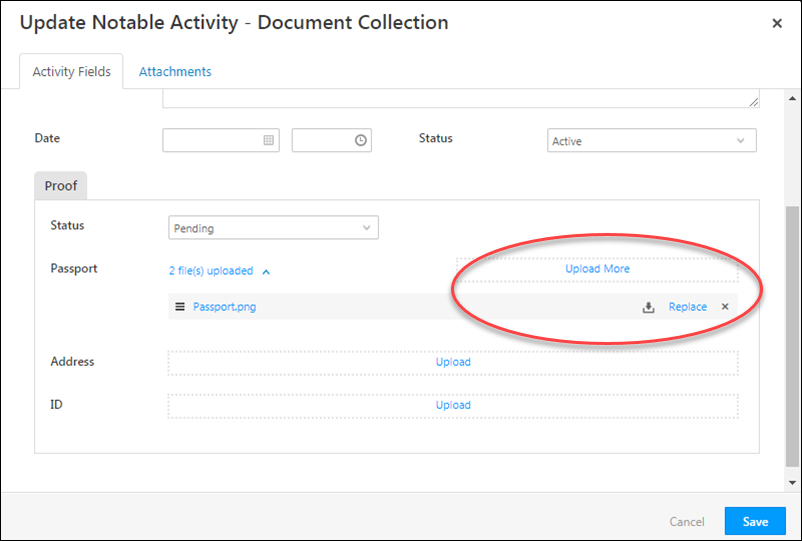
The custom field set will now be available in the create/edit activity forms for that particular activity.
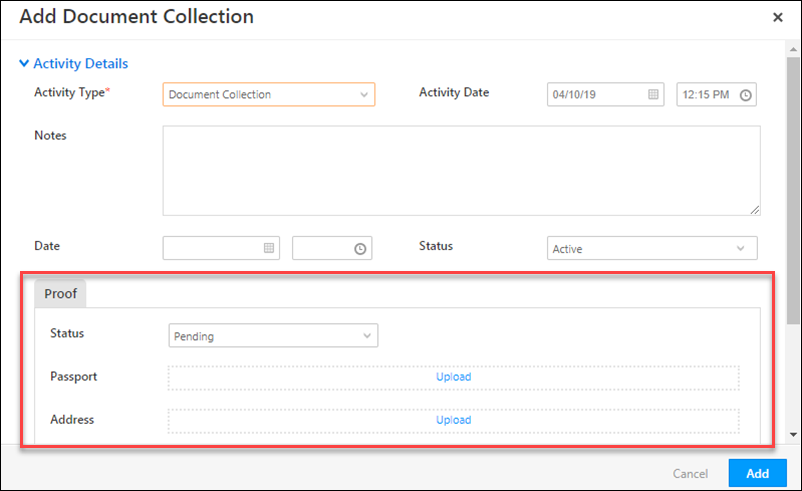
You can upload multiple files to a single field (multiple pages of a passport for example). You can even remove or replace a file after you’ve uploaded one.
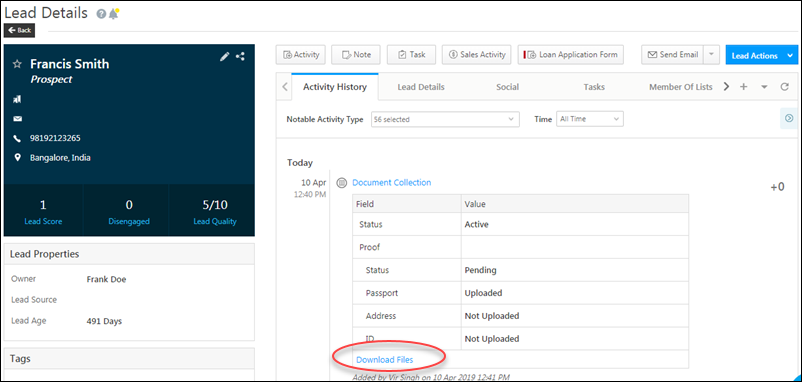
You can download the uploaded files from the Lead Details page.
4. Viewing Custom Field Sets
You can view custom field sets along with the parent activities on the following pages –
4.1 Lead Details Page – Documents Tab
Files uploaded through Custom Fields Sets are available on the Documents tab of the Lead Details page.
- Navigate to the Lead Details page.
- Click the Documents tab (step 1 in the screenshot below).
- Select Custom Field Sets from the Document Source drop-down (step 2 in the screenshot below).
- Click on a file to launch the file viewer.
- To download one or more files, select the checkboxes alongside the files (step 3 in the screenshot below), then click Download (step 4 in the screenshot below).
You can use the search box to search based on the activity name, custom field set name and the sub-fields within a custom field set.

4.2 Lead Details Page – Activity History Tab
Custom field sets are visible on the Lead Details page. Click the activity to view them along with other activity fields.
Click the View Files link alongside a custom field set field to view the uploaded files.
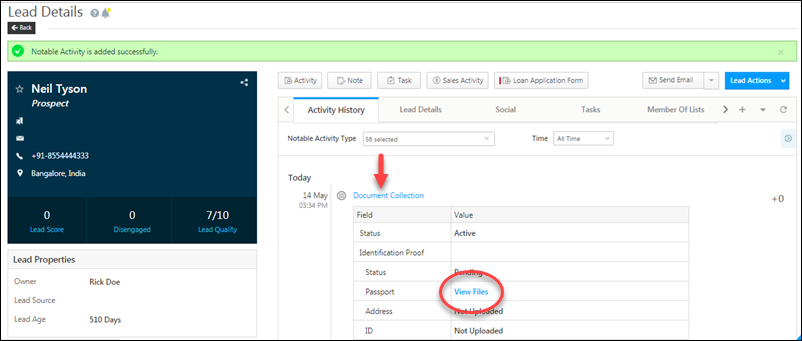

Note: You can only view image and pdf files on the application file viewer. For other file types, you’ll be prompted to download the files and view them on your local drive.
4.3 Manage Activities Page
You can view custom fields sets on the Manage Activities page –
- Navigate to Leads>Manage Activities
- In the Activity Type drop-down, choose an activity where you’ve added a custom field set
- Click the select columns
 icon.
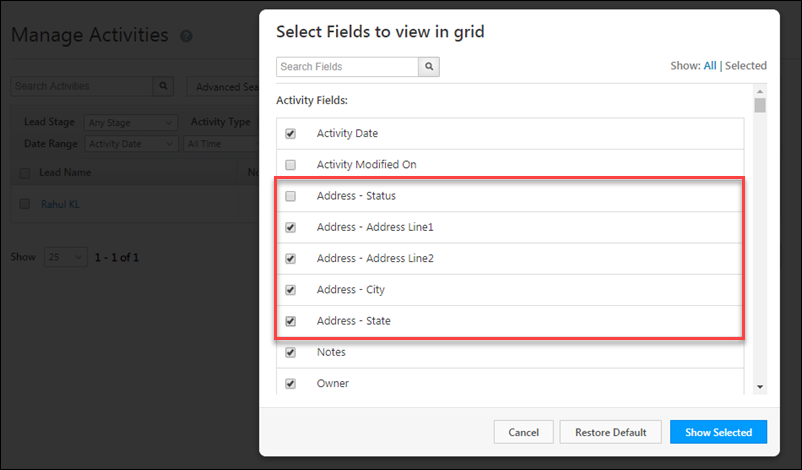
icon. - On the pop-up, alongside Show, click All.
- Select the custom field set, then click Show Selected.
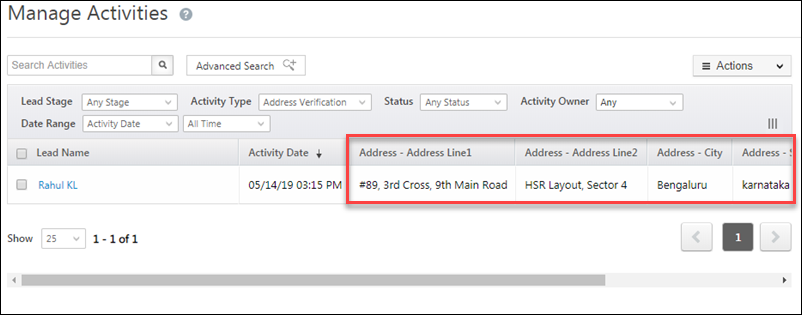
The custom field set will now be visible on the Manage Activities grid.
Note: ESS tenants can select and view individual CFS fields on the grid as shown below. String type fields configured as 1000 character fields and content type fields won’t show up here –
4.4 Smart Views
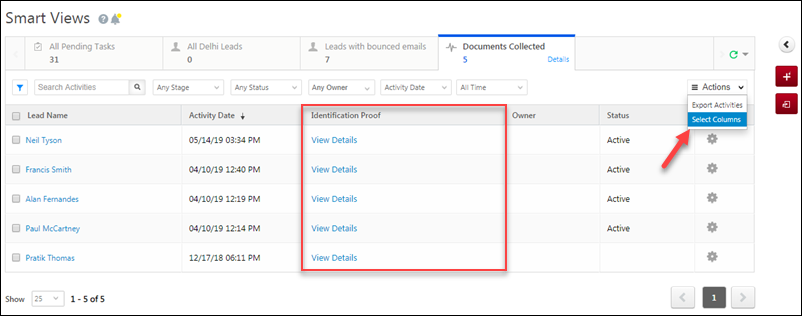
Similar to Manage Activities, you can also customize the Smart Views grid to display Custom Field Sets –
- Navigate to Leads>Smart Views.
- Under Actions, click Select Columns.
- On the pop-up, alongside Show, click All.
- Select the custom field set, then click Show Selected.
5. Bulk Update Custom Field Sets
To bulk update the activity Custom Fields Sets in your account –
- From the main menu, navigate to Leads>Manage Activities.
- Select the leads you want to bulk update the activity fields by clicking the
 checkbox against their names.
 - Then, hover your cursor over the
 button, and from the dropdown, click Bulk Update.
 - In the Bulk Update pop-up, against Activity Field, from the dropdown, select the field you’re looking to bulk update.
- Against New Value, depending on the field type, either select the new value from the dropdown or enter it in the given field.
- Once you’re done, click Update. The selected activity custom fields are now updated.
6. Import & Export Custom Field Sets
You can import and export custom fields sets along with other activity fields. See the import/export section of Manage Activities for more details.
7. Current Limitations
- You cannot delete custom field sets.
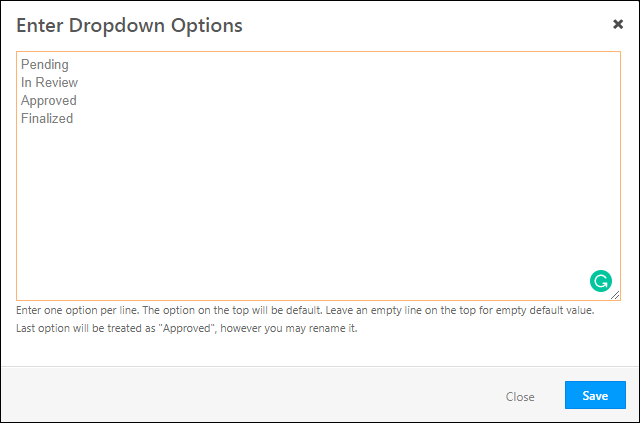
- The status field cannot be removed from a custom field set.
3. You can add/remove the drop-down values of the status field. Note that the last value you enter will be treated as ‘Approved’, regardless of how you rename it.
Any Questions?
We hope this article was helpful. If you still have doubts, feel free to leave a comment below.
Hi, could you please guide me on how to change the default currency (by default it is set to $) for CFS number fields that are configured to show as ‘currency’?
Hi Abhishek. Apologies for the late response. To change the default currency –
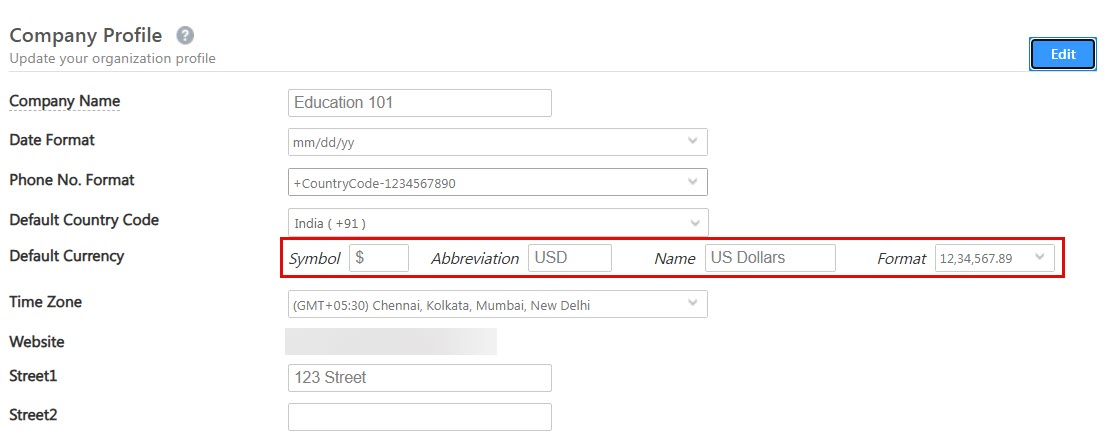
1. Navigate to Settings>Company Profile and click Edit.
2. Make the relevant changes against Default Currency and click Save.
how to create a all select column options in manage activity page
Hi Deepa.
An All Select column cannot be created as each activity type has a different field configuration.
I mean from where we have taken the activity fields and the lead fields for multiple activity types, is that the same for all activity or different?
Hi Deepa.
The Activity & Lead fields selected for an activity type (via column customization) are applicable only for that particular activity. Each activity type has its own set of fields to show/hide in the grid.
To customize the columns for particular activity types,
1. Navigate to Leads>Manage Activities from your LeadSquared Dashboard.
2. Click Select Columns.
3. Select the relevant fields from the pop-up box and click Show Selected.