Feature Overview
This article assumes that you’ve already created one or more custom field sets and are now looking to integrate them with leads.
- If you’re new to custom field sets, see Creating Custom Field Sets.
- If you want to associate a custom field set with activities, see Adding Custom Field Sets to Activities.
- If you want to associate a custom field set with opportunities, see Adding Custom Field Sets to Opportunities.
Prerequisites
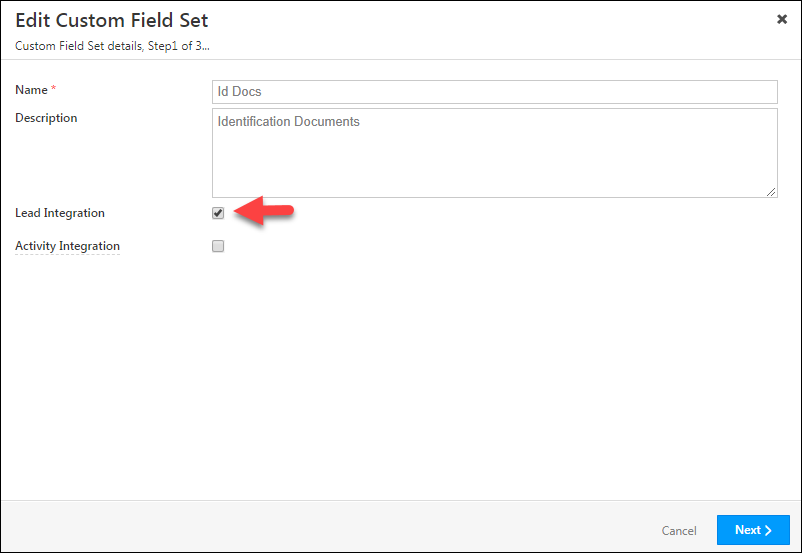
While creating a custom field set, you must select the lead integration checkbox. This will make the custom field set available for lead integration –
Associate a Custom Field Set with Leads
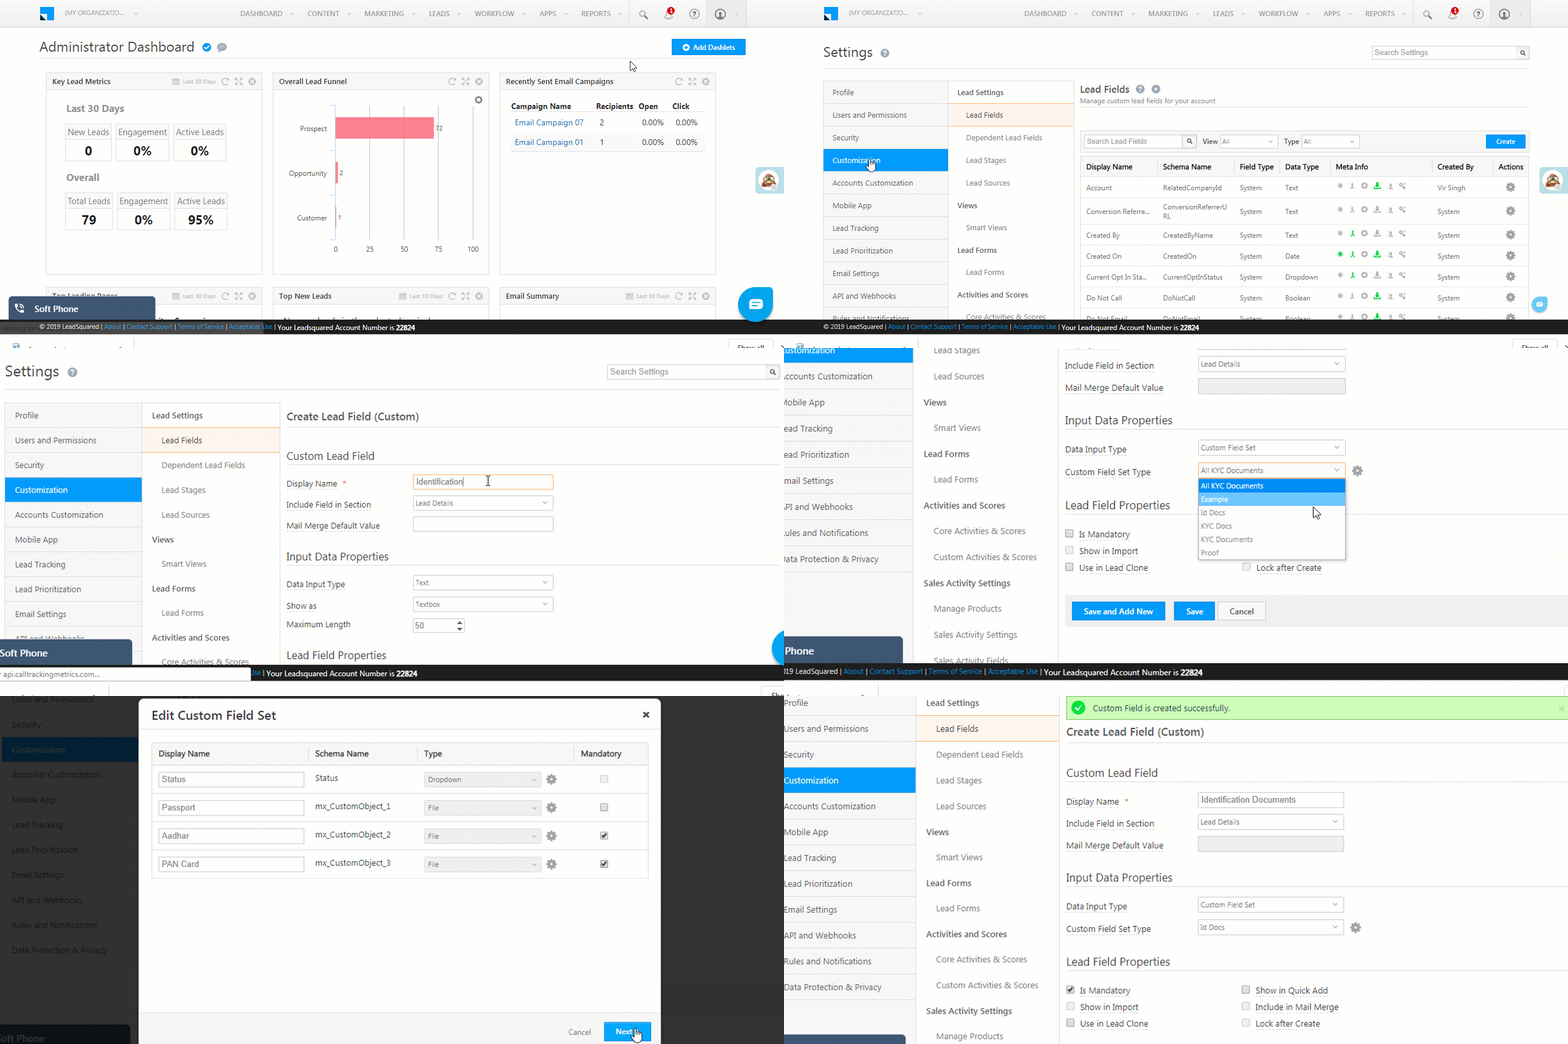
After creating a custom field set, you can associate it with a new custom lead field. Note that you cannot associate a custom field set with an existing lead field. You must create a new one.
- Navigate to My Profile>Leads>Lead Fields and click Create.
- After entering the custom lead field details, in the Data Input Type dropdown, select Custom Field Set.
- Use the Custom Field Set Type drop-down, to select a custom field set you created. Click the settings
 icon alongside the drop-down to edit the custom field set
Note: Edits you make to a custom field set from here will not apply to the actual custom field set template you created. The edits will only apply to how the custom field set behaves with respect to this lead field. - Configure the Lead Fields Properties, then click Save.
Customize Your Lead Forms
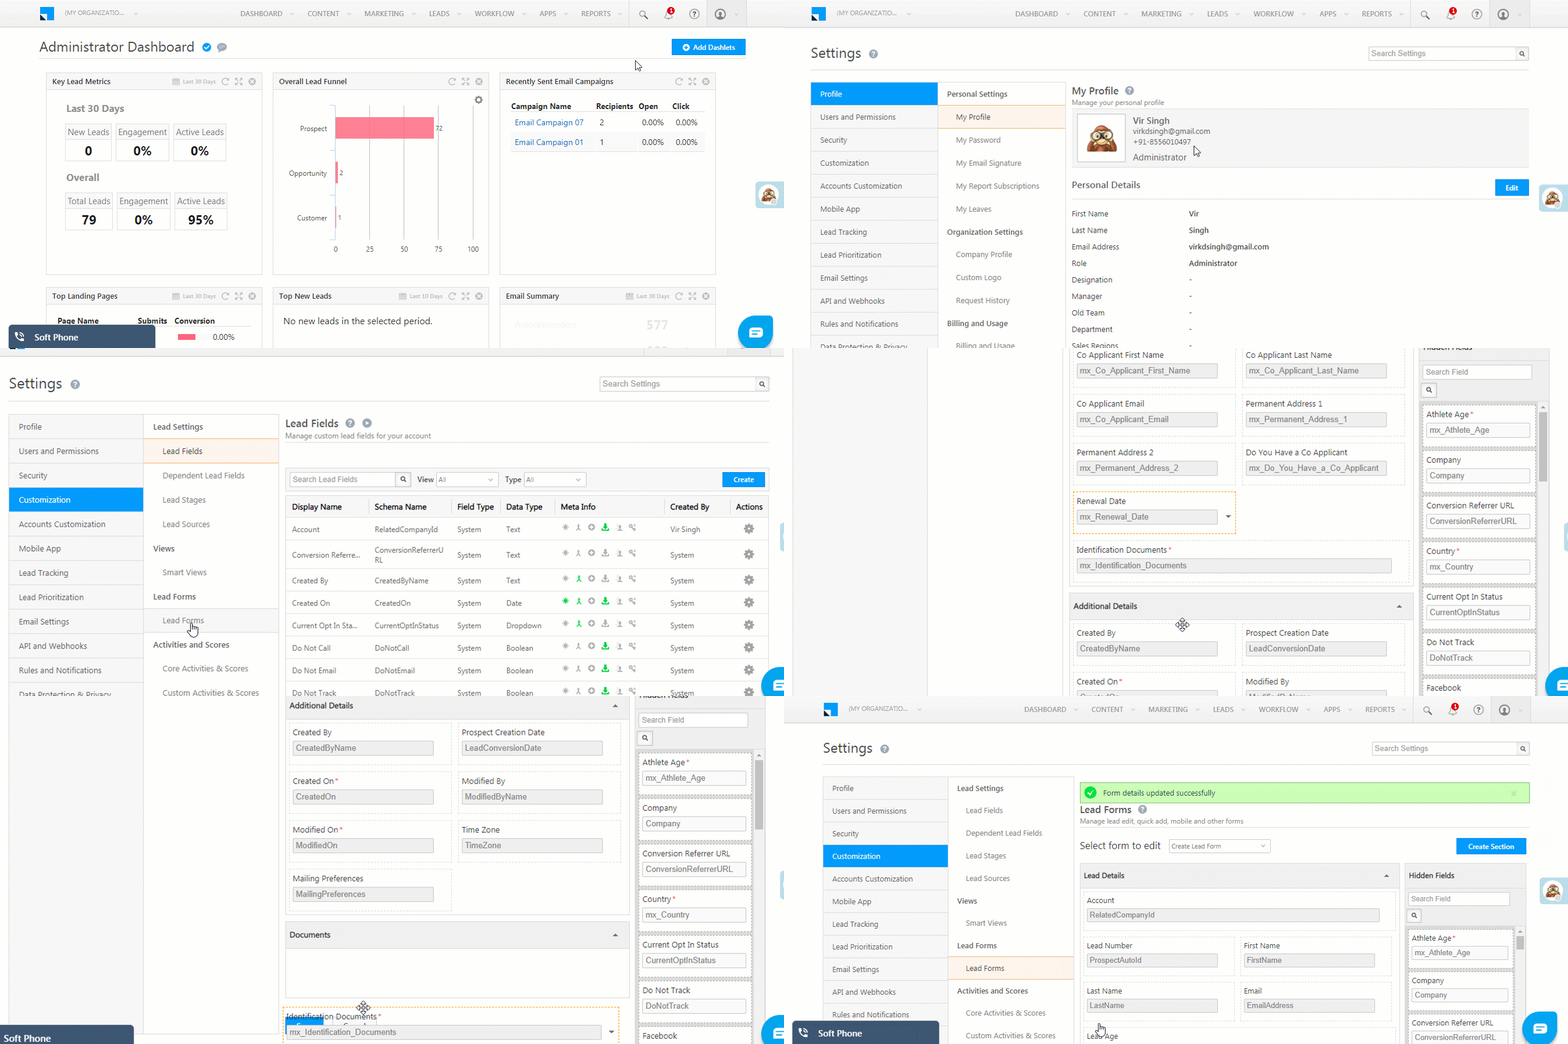
Once you associate a custom field set with a lead field, you can configure where you want it to appear in the layout of your lead forms.
- Navigate to My Profile>Settings>Leads>Lead Forms.
- Use the Select form to edit drop-down to select either the Create Lead Form or the Create Quick Add Form*.
- You can now drag and drop the custom field set to customize the form layout. If you don’t want it to appear on the form, drag and drop it to the Hidden Fields pane on the right.
- Click Save.
* Custom field sets are currently not supported for the ‘Create lead form on mobile’, ‘Agent popup form’ or ‘Lead vCard’.
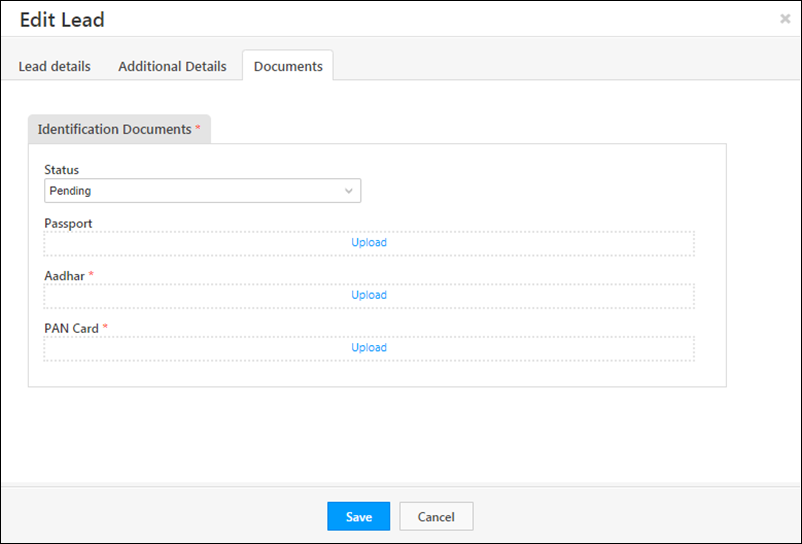
The custom field set will now appear on the form as customized. Navigate to the Manage Leads page and click the Add New Lead form (or the Quick Add Lead form).

In this example, a custom field set for identification documents has been included in a ‘Documents’ section of the Add New Lead form.

Note: The ‘Edit Lead’ pop-up on the Manage Leads page will also display the custom field set as configured –

Viewing Custom Field Sets
Custom fields sets will appear in all places where lead fields are available such as –
Manage Leads and Smart Views
You can use column customization to display custom field sets on the Manage Leads and Smart Views pages. Click the column customization ![]() icon.
icon.

Click the checkbox alongside the custom field set, then click Save.
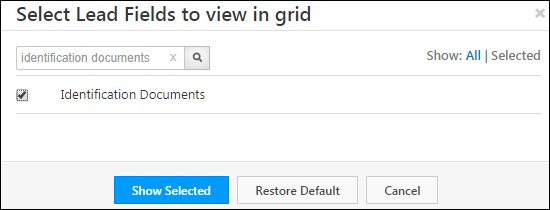
The selected field will now show up on the grid –

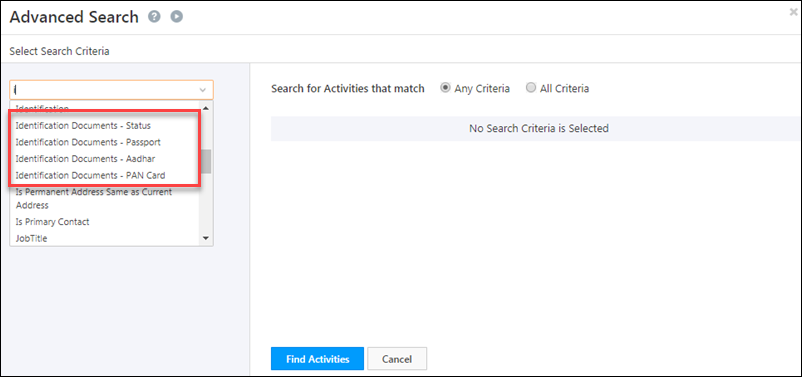
Advanced Search
Custom fields sets associated with lead fields are available in advanced search throughout the application –
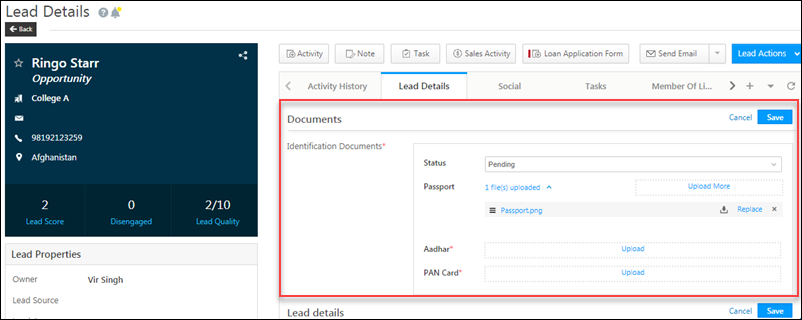
Lead Details Page
You can view and edit custom fields sets from the lead details page –
Bulk Update
You can bulk update custom field sets from the Manage Leads page. For more information, see How to Bulk Update Lead Fields.
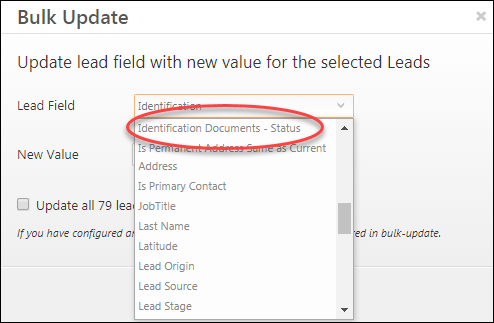
Note: File type fields of custom field sets will not be available for bulk update.
Import and Export
- You can import custom field sets through regular lead import.
- You can export custom field sets along with other lead fields from the Manage Leads page. For more information, see How to Export Leads.
Any Questions?
If you have questions related to this article, please leave us a comment below. We’re happy to help!


how to enable attachement for any acitivity
Hi, Prerana. You must enable the Allow Attachment setting on a Custom Activity to enable your users to add attachments.