


Get Started
Sales Suite
Field Ops
Marketing
Service CRM
Integrations & Apps
FloStack
Custom Opportunity Tab Connector
1. Feature Overview
The custom opportunity tab allows you to fetch and display data from external sources on the Opportunity Details page. Here are some examples of what you can achieve with custom tabs –
- Show all support tickets associated with an opportunity stored in external systems (e.g., Zendesk, FreshDesk, etc.)
- Display the list of products added to an opportunity’s cart on an external site.
- Create a tab for the various custom views related to an opportunity.

2. Prerequisites
- You must be the administrator of your LeadSquared account.
- The opportunities feature must be enabled on your account. To enable it, please write to support@leadsquared.com.
3. How it Works
The custom tab gets created on the Opportunity Details page, and displays data from external URLs. You can also pass mailmerge parameters to the URL, such as @{Opportunity:Status, }, @{Opportunity:Owner, }, etc.
To use the Custom Opportunity Tab connector on your account –
- Install the connector
- Configure the connector
- Use the custom tab
4. Install the Connector
To install the Custom Opportunity Tab connector on your account –
- From the main menu, navigate to Apps>Apps Marketplace.
- In the search box, type “Custom Opportunity Tab”, and click the
 icon.
icon.
- Alternatively, from the left panel, click UI Customization. The Custom Opportunity Tab connector is listed on this page as well.
- On the Custom Opportunity Tabs connector, click Install.
5. Configure the Connector
You must configure the connector to add custom tabs. To do this –
- Once the Custom Opportunity Tab connector is installed, hover your cursor over the icon, and click Configure.
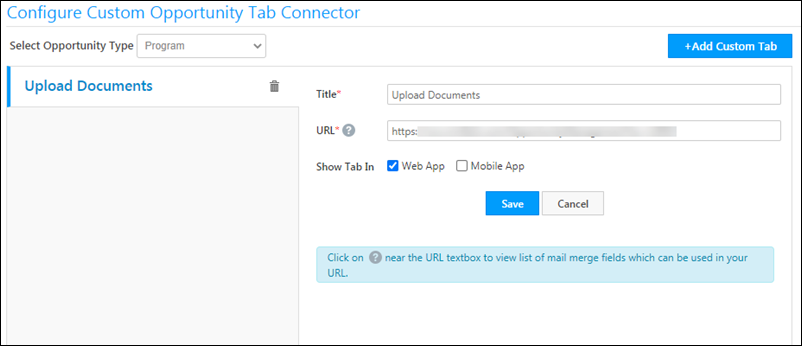
- On the Configure Custom Opportunity Tab Connector pop-up, select the opportunity type on which you want the custom tab to appear in, from the Select Opportunity Type dropdown.
- Click Add Custom Tab, and enter the details of the custom tab.
| Attribute | Description |
| Title | The display name of the tab. This attribute is mandatory. |
| URL | Enter the HTTPs URL which will be rendered as a custom tab. The URL should be of a tab that accepts LeadSquared mail merge fields as parameters and passes them to an external application (e.g., a support system, another CRM or marketing system, another LeadSquared account, etc.) to get the data. Click the question mark |
| Show Tab In | Depending on whether you want the tab to be visible on the Web App or Mobile app or both, click the |
Once you’re done, click Save.
Notes:
- To delete an existing custom tab, click the
 icon against the tab’s name.
 - To edit an existing custom tab, makes the changes on the Configure Custom Opportunity Tab Connector pop-up, and click Save.
6. Use the Custom Tab
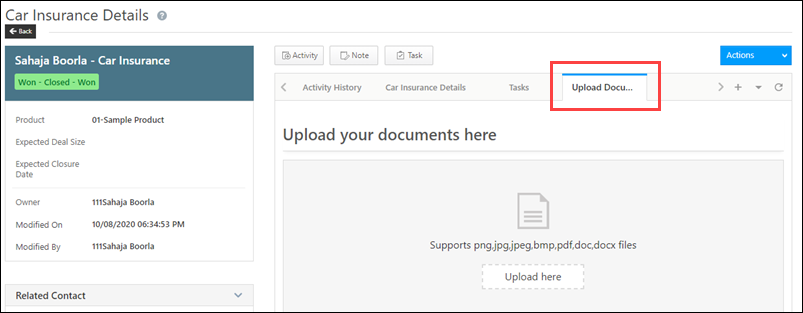
The custom tab is now visible on the Opportunity Details page, under the opportunity type for which the tab was created. To view the tab –
- From the LeadSquared main menu, navigate to Leads>Manage Opportunities>Opportunity Type.
- Under Enquiry, click any opportunity.
- On the Opportunity Details page, you can now view the custom tab.
Any Questions?
Did you find this article helpful? Please let us know any feedback you may have in the comments section below. We’d love to hear from you and help you out!