


Get Started
Sales Suite
Field Ops
Marketing
Service CRM
Integrations & Apps
FloStack
Capturing Leads from Gravity Forms in LeadSquared
1. Feature Overview
Many companies use Gravity Forms on their WordPress sites to capture leads. We provide an integration with Gravity Form to get these leads into LeadSquared.
2. Prerequisites
- Gravity Form should be installed in your WordPress account. The version of Gravity form should be 1.9.10.16 and above.
- You should have LeadSquared Administrator access
3. Procedure
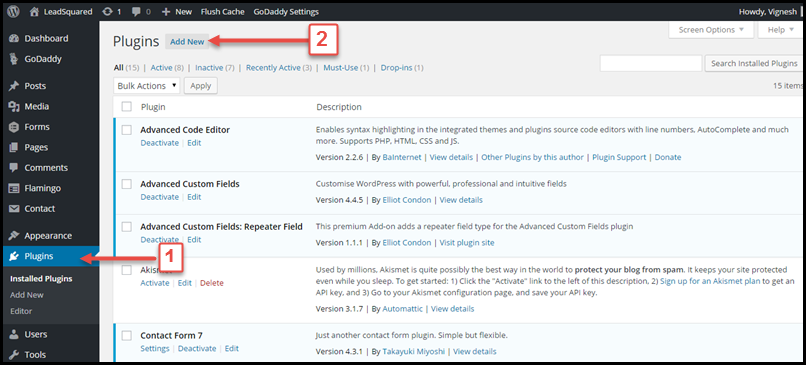
- To download the file, from the LeadSquared dashboard, navigate to Apps>Apps Marketplace and Gravity Form.
- Login to your WordPress account.
- Navigate to Plugins>Add New.
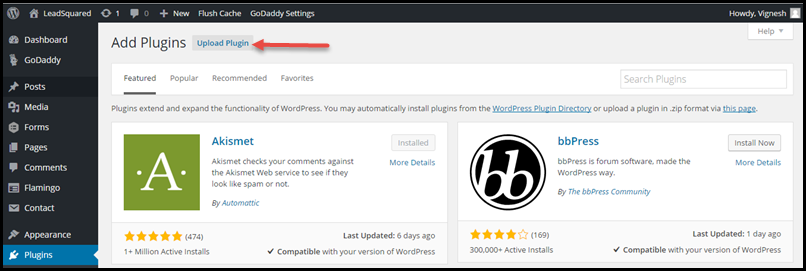
- On the Add Plugins page, you will have the option to Upload Plugin as shown in the below image.
- In the next page, Choose File option is available. Choose the downloaded zip file.
- Once done, click on Install Now.
- Then click on the Activate Plugin as shown in the below image,
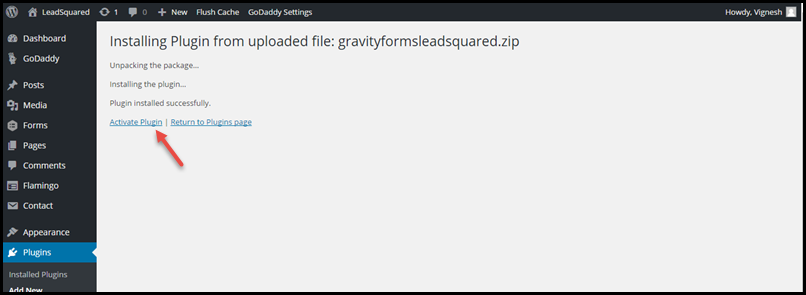
- The plugin is now activated.
Follow the below steps to synchronize Gravity Form and your Leadsquared account.
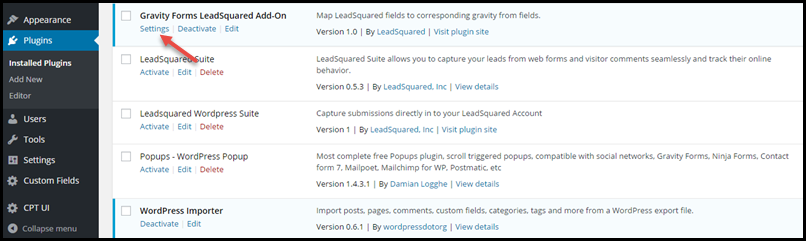
- Once the Plugin is activated you will be able to see Gravity Forms Leadsquared Add-On.
- ClickSettings on Gravity Forms Leadsquared Add-On.
- In the Settings page, you have to provide Access Key and Secret Key of your LeadSquared Account.
- You will find your API Access Key and Secret Key in the Settings page of your LeadSquared Account.
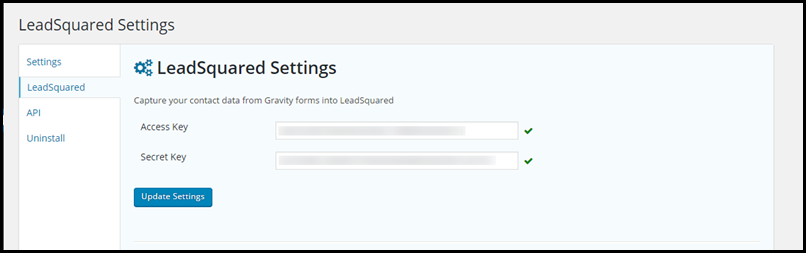
- If the give Access Key and Secret Key is correct then you will see a tick mark as shown in the above image. If the key is incorrect, you will see an (X) symbol in red.
- Now you can Gravity Form fields to LeadSquared fields.
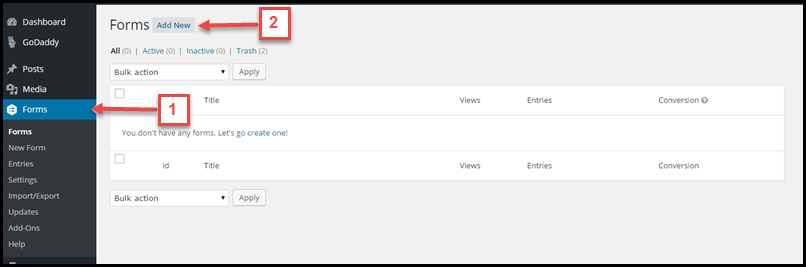
- On the Forms column, click on Add New as shown in the below image, or edit your existing forms.
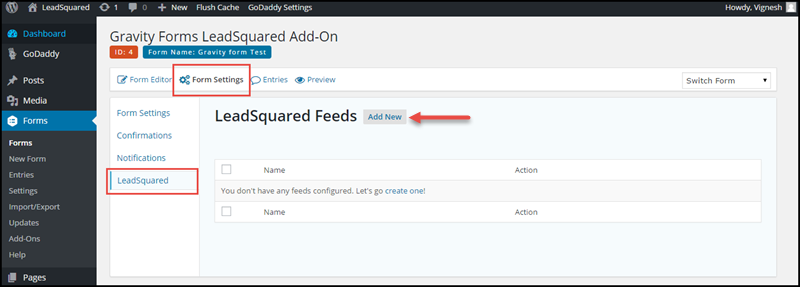
- Click on Form Settings and choose LeadSquared from the drop-down as shown below image
- Now click on Add New as directed below
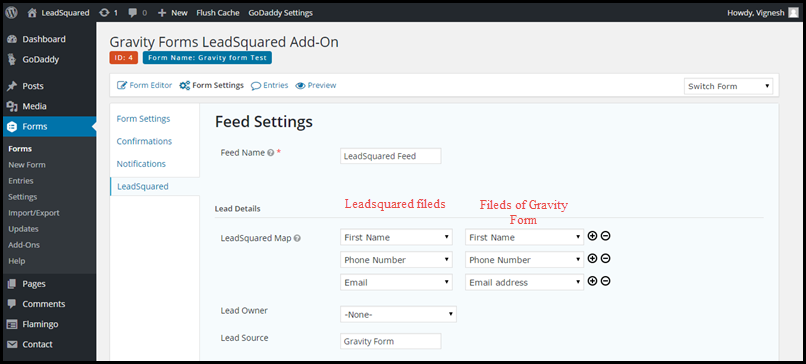
- Now you have to set the appropriate feed settings between the Gravity Form and Leadsquared.
- You can also specify the Lead Owner for all the leads which are from Gravity Form that you are designing in Feed Settings
- Also, you can customize the Lead Source.
- Once the Settings are done, click on Update Settings.
You are Gravity Form is ready to capture leads and push it to Leadsquared.
Note – If you would like to capture the lead source and enable tracking, kindly follow the below steps in additional.
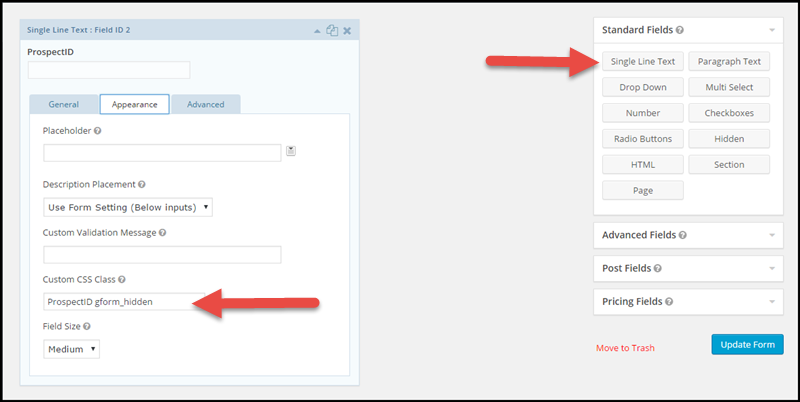
While creating form create a new field (Single Line Text ) and name the field as “ProspectID”. For this field please provide Custom CSS class name as “ProspectID gform_hidden”.
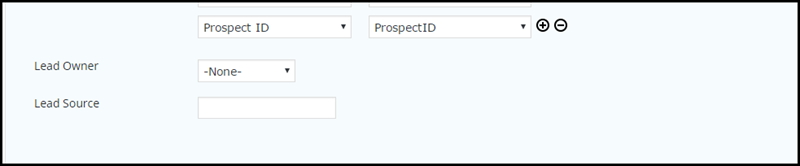
Once you’ve completed this, click Save or Update. In Form Settings, go to LeadSquared, add a new field and map it to the Prospect Id in Gravity Form filed.
Leave the Lead Source field blank as shown in the below image.
Any Questions?
Did you find this article helpful? Please let us know any feedback you may have in the comments section below. We’d love to hear from you and help you out!
In our version of the supplied plugin, there is an “API Host” field. What value goes there? I am not able to connect the API successfully without it.
Hi, Bett. Are you referring to your LeadSquared API host? If yes, you can find your host here – API Host. Hope this helps!