


Get Started
Sales Suite
Field Ops
Marketing
Service CRM
Integrations & Apps
FloStack
LeadSquared Security Settings – Authentication Provider
1. Feature Overview
As an alternative to logging in with your LeadSquared credentials, you can configure your account to enable log-in through the following third-party authentication providers –
Note:
- This article contains instructions on setting up Google, API or Okta as your authentication provider. For instructions on –
- The LeadSquared mobile app supports SAML-based login integration with Azure and Okta.
2. Prerequisites
- Only LeadSquared admins can configure the authentication provider for an account.
- To make Google your authentication provider, your Google Id and LeadSquared email Id must be the same.
- The API is not available by default. Contact us at support@leadsquared.com to enable it for your account. Also,
- Your user id/email address in the third-party application must be the same as your LeadSquared email Id.
- You must expose an API URL that is accessible over the internet.
3. Authentication Provider Settings
- Navigate to My Profile>Settings>Security>Authentication Provider.
- Click Alongside Enable Third Party Authentication Provider, enable the
 slider .
3.1 Google
Here’s how to use Google as your authentication provider and log-in to LeadSquared with your Google credentials –
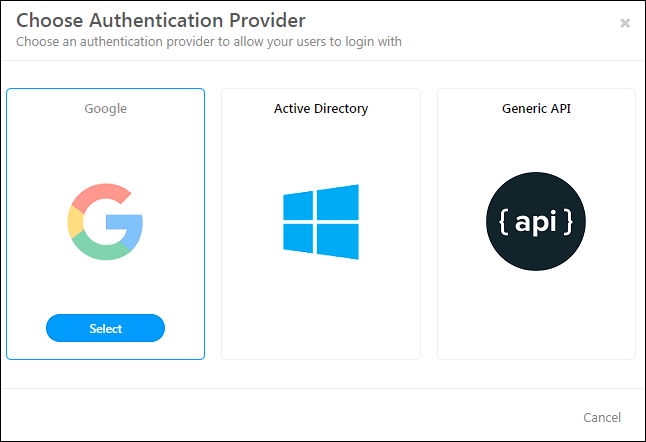
1. Once you enable the third party authentication provider setting, on the Choose Authentication provider pop-up, click Google.
2. Click the Sign-in with Google button, then enter your Google credentials and sign-in.
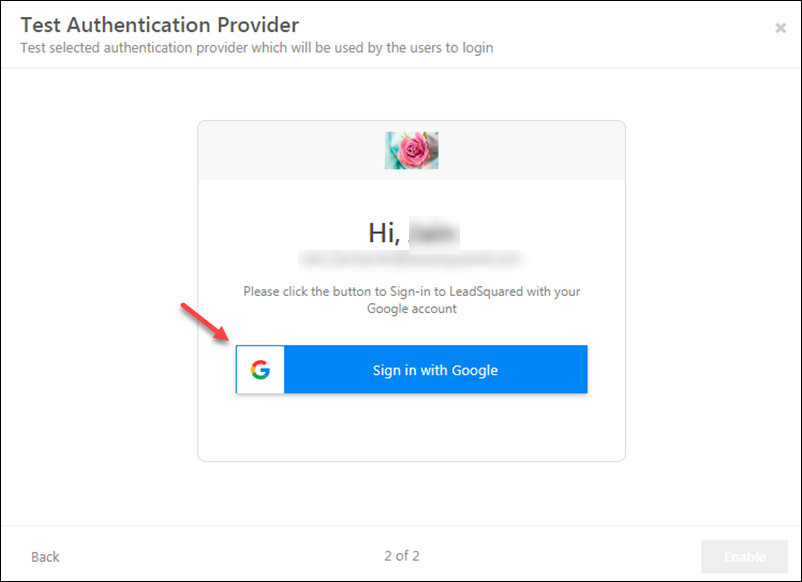
3. From this point on, you’ll be prompted to enter your Google credentials on logging-in to LeadSquared.

4. API
You can use the credentials of a third-party tool to log in to LeadSquared. Ensure that the user/email Id in the tool is the same as the LeadSquared email Id. Expose an API that is accessible over the internet and use the settings below to configure what data you want to pass.
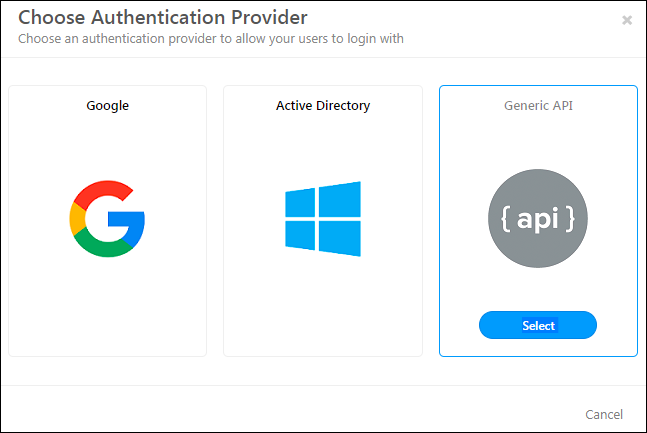
After enabling the third-party authentication provider setting, on the Choose Authentication provider pop-up, click API.
On the Configure Authentication Provider pop-up, enter the details of the API you’ve exposed. When you’re done, click Test.
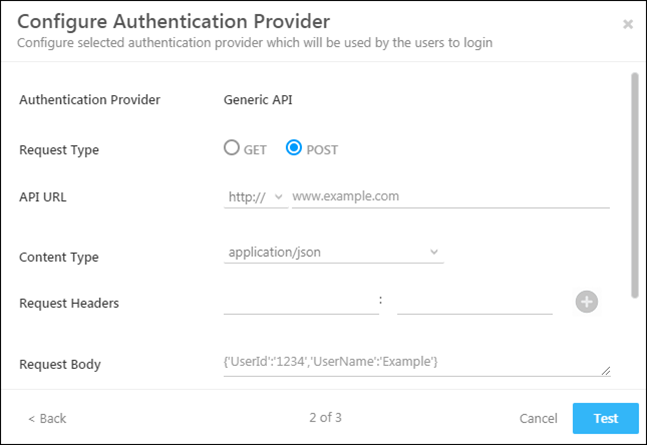
| Field | Description |
| Request Type | Choose HTTP request method as either GET or POST. |
| API URL | Select either http:// or https:// and enter your API URL here. Type @ to use mail merge fields in the query string. |
| Content Type | Currently, data can only be sent as application/json. |
| Request Headers | You can pass multiple request headers here. |
| Request Body | If you select the Request Type as POST, you can enter a valid json in the request body. Type @ to make use of mail merge fields |
| Success Keyword | This is the success keyword that should be present in a successful response. |
| Error Keyword | The error keyword that should be present in the error response. |
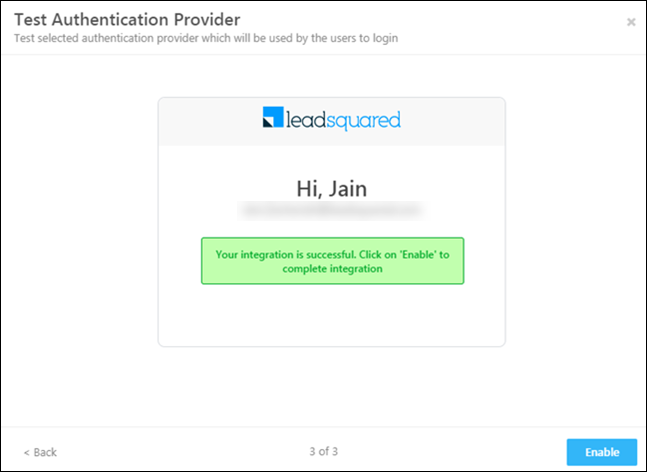
Now enter your credentials, and click Enable.
5. Okta OIDC
Note:
- Apart from Okta, these configuration steps can be replicated for any other OIDC provider as well.
- To get the Okta authentication provider enabled on your LeadSquared account, contact your account manager, or write to support@leadsquared.com.
5.1 Steps in Okta
Before you enable the Okta authentication provider on LeadSquared, complete the following steps on your Okta account –
- Create an OIDC app in Okta. To know how to do this, refer to Create OIDC app integrations using AIW.
- Keep the following points in mind when creating the OIDC app –
- The Application Type should be Native apps.
- The Grant Type should be Implicit (hybrid). Once Implicit (hybrid) is selected, enable the following settings –
- Authorization Code
- Refresh Token
- Under Implicit (hybrid), enable –
- Allow ID Token with implicit grant type
- Allow Access Token with implicit grant type
- Under Refresh Token Behavior, enable Use Persistent Token
- Set the Sign-In Redirect URL for –
- Web with –
https://login.leadsquared.com/Home/SignInWithSSOhttps://identity.leadsquared.com
- Android mobile devices with
com.leadsquared.nextgen:/login - iOS mobile devices with
com.LeadSquaredNextGen.com:/login
- Web with –
- Set the Sign-Out URL for –
- Android mobile devices with
com.leadsquared.nextgen:/logout - iOS mobile devices with
com.LeadSquaredNextGen.com:/logout
- Android mobile devices with
- Based on your LeadSquared account region, enter the following additional URLs –
- If your LeadSquared account is in the Mumbai (India) region –
https://login-in21.leadsquared.com/Home/SignInWithSSOhttps://identity-in21.leadsquared.com
- If your LeadSquared account is in the Hyderabad (India) region, pass
https://identity-in22.leadsquared.comhttps://login-in22.leadsquared.com/Home/SignInWithSSO
- If your LeadSquared account is in the USA region –
https://login-us11.leadsquared.com/Home/SignInWithSSOhttps://identity-us11.leadsquared.com
- If your LeadSquared account is in the Ireland region –
https://login-ir31.leadsquared.com/Home/SignInWithSSOhttps://identity-ir31.leadsquared.com
- If your LeadSquared account is in the Canada region, pass
https://identity-ca12.leadsquared.comhttps://login-ca12.leadsquared.com/Home/SignInWithSSO
- If your LeadSquared account is in the Singapore region, only the two redirect URLs listed above are sufficient, and no additional URLs are required.
- If your LeadSquared account is in the Mumbai (India) region –
NextGen/LeadSquared New UI
If you’re using LeadSquared’s NextGen/LeadSquared New UI, in addition to the above URLs, pass the following URLs as well –
- Enter this default URL, and click Configure
https://marvin.leadsquared.com
- Depending on your region, enter the following additional URLs, and click Configure –
- If your LeadSquared account in the Mumbai (India) region –
https://marvin-in21.leadsquared.com
- If your LeadSquared account is in the Hyderabad (India) region, pas
https://marvin-in22.leadsquared.com
- If your LeadSquared account is in the USA region –
https://marvin-us11.leadsquared.com
- If your LeadSquared account is in the Ireland region –
https://marvin-ir31.leadsquared.com
- If your LeadSquared account is in the Canada region, pass
https://marvin-ca12.leadsquared.com
- If your LeadSquared account is in the Singapore region, only the default URL is required. No additional URL is required.
- If your LeadSquared account in the Mumbai (India) region –
5.2 Steps in LeadSquared
On the Configure Authentication Provider pop-up, enter the following details –
- Provider Name – A display name for the Sign-in button.
- Client ID – The Client ID that was generated after you created the OIDC app in Okta.
- OpenID Connect Metadata URL – To obtain the OIDC app’s metadata URL, refer to OpenID Connect & OAuth 2.0 API. On this page, use the following URL –
https://${yourOktaDomain}/oauth2/${authorizationServerId}/.well-known/openid-configuration
Once you enter the details, click Test. Once you’re satisfied with the login flow, click Enable. Once enabled, your users can enter their Okta login credentials when logging in to LeadSquared.
6. Okta SAML
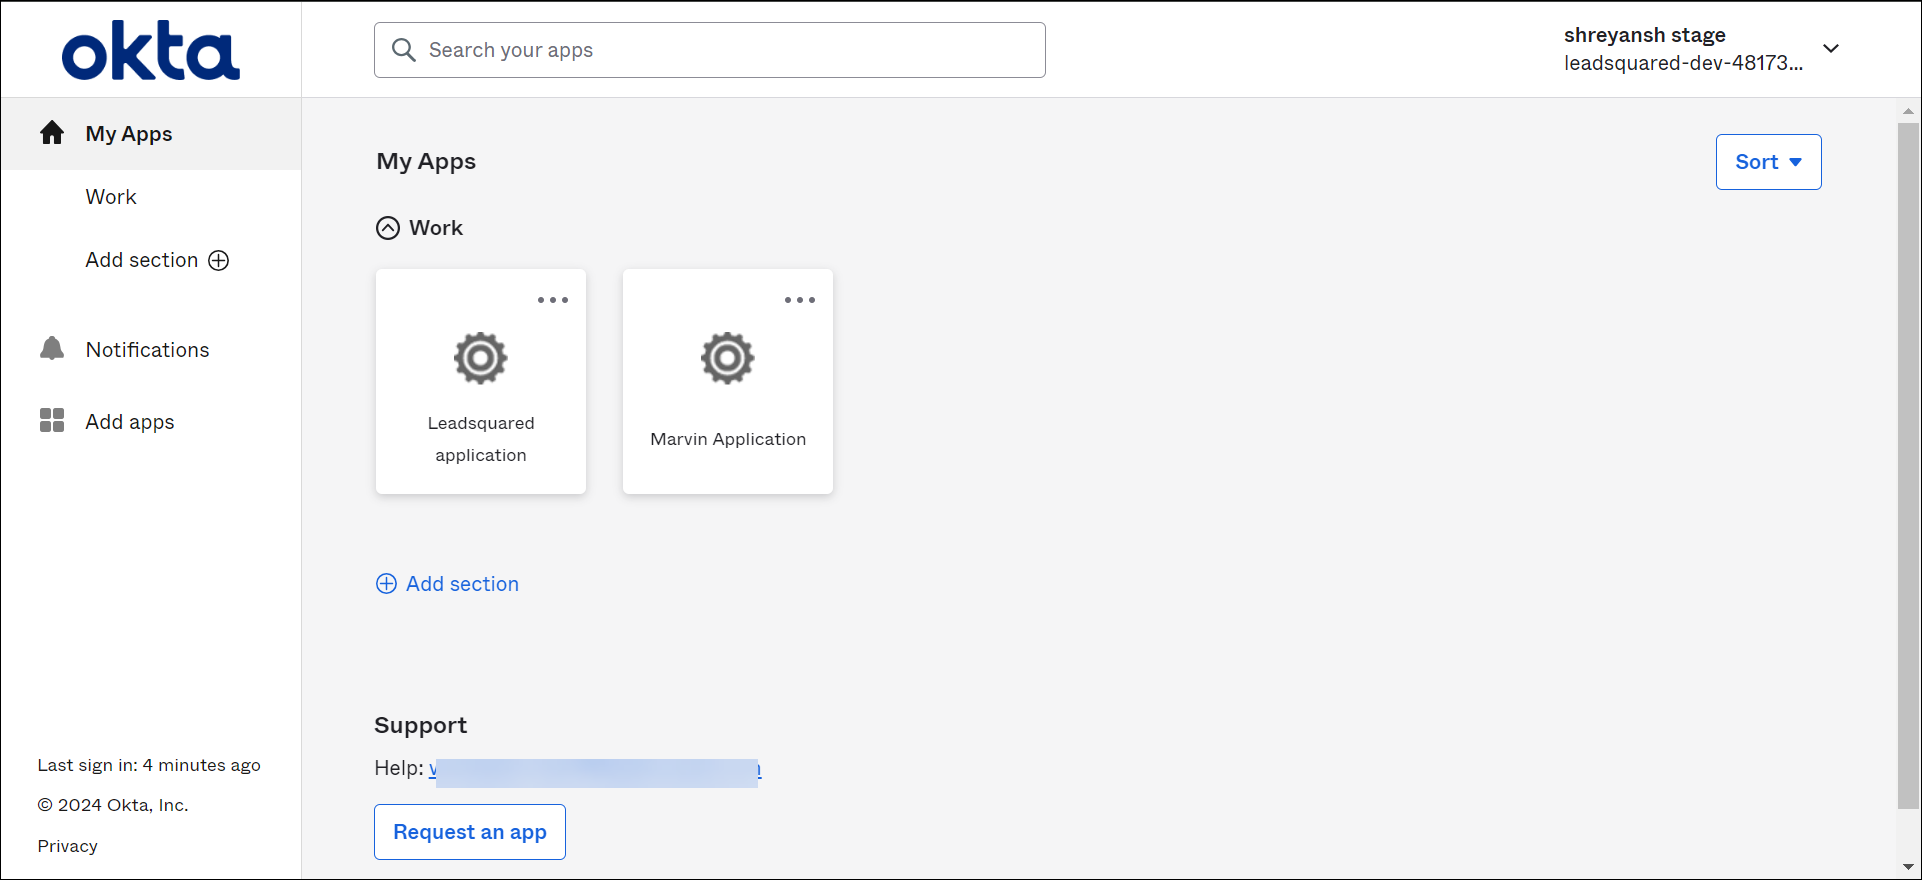
Integrating an Okta SAML app with LeadSquared will help you sign into LeadSquared directly from your Okta Dashboard.
6.1 Configure SAML App
Start by creating a SAML app in Okta. To know how to do this, refer to Create SAML app integrations using AIW. Next, depending on whether you’re creating the app for the LeadSquared platform or Marvin, follow the respective steps outlined below –
6.1.1 Configure SAML App for LeadSquared Platform
- In the SAML Settings, based on your region, set the Single sign-on URL from the table below. Use the same URLs for the Recipient URL and Destination URL.
-
Region Platform URL Singapore https://login.leadsquared.com/Home/Signin_GenericSAMLIndia (Mumbai) https://login-in21.leadsquared.com/Home/Signin_GenericSAMLIndia (Hyderabad) https://login-in22.leadsquared.com/Home/Signin_GenericSAMLUnited States https://login-us11.leadsquared.com/Home/Signin_GenericSAMLIreland
https://login-ir31.leadsquared.com/Home/Signin_GenericSAMLCanada
https://login-ca12.leadsquared.com/Home/Signin_GenericSAML
-
- In the Audience URL field, set the following URL with your Account Number –
-
Region Platform URL Singapore https://login.leadsquared.com/saml/{AccountNumber}India (Mumbai) https://login-in21.leadsquared.com/saml/{AccountNumber}India (Hyderabad) https://login-in22.leadsquared.com/saml/{AccountNumber}United States https://login-us11.leadsquared.com/saml/{AccountNumber}Ireland https://login-ir31.leadsquared.com/saml/{AccountNumber}Canada https://login-ca12.leadsquared.com/saml/{AccountNumber}
-
- In the Other Requestable SSO URLs set the following URL –
-
Region Platform URL Singapore https://login.leadsquared.com/Home/SignInWithSSOhttps://identity.leadsquared.com/api/auth/r1/v1/SSO/GenericSAML
India (Mumbai) https://login-in21.leadsquared.com/Home/SignInWithSSOhttps://identity.leadsquared.com/api/auth/r1/v1/SSO/GenericSAMLhttps://identity-in21.leadsquared.com/api/auth/r21/v1/SSO/GenericSAML
India (Hyderabad) https://login-in22.leadsquared.com/Home/SignInWithSSOhttps://identity.leadsquared.com/api/auth/r1/v1/SSO/GenericSAMLhttps://identity-in22.leadsquared.com/api/auth/r1/v1/SSO/GenericSAML
United States https://login-us11.leadsquared.com/Home/SignInWithSSOhttps://identity.leadsquared.com/api/auth/r1/v1/SSO/GenericSAMLhttps://identity-us11.leadsquared.com/api/auth/r11/v1/SSO/GenericSAML
Ireland https://login-ir31.leadsquared.com/Home/SignInWithSSOhttps://identity.leadsquared.com/api/auth/r1/v1/SSO/GenericSAMLhttps://identity-ir31.leadsquared.com/api/auth/r31/v1/SSO/GenericSAML
Canada https://login-ca12.leadsquared.com/Home/SignInWithSSOhttps://identity.leadsquared.com/api/auth/r1/v1/SSO/GenericSAMLhttps://identity-ca12.leadsquared.com/api/auth/r1/v1/SSO/GenericSAML
-
6.1.2 Configure SAML App for NextGen/LeadSquared New UI
- In the SAML Settings, based on your region, set the Single sign-on URL from the table below. Use the same URLs for the Recipient URL and Destination URL.
-
Region Marvin URL Singapore https://marvin.leadsquared.com/api/auth/r1/v1/SSO/GenericSAML?IsIdPInitiatedRequest=trueIndia https://marvin-in21.leadsquared.com/api/auth/r21/v1/SSO/GenericSAML?IsIdPInitiatedRequest=trueUnited States https://marvin-us11.leadsquared.com/api/auth/r11/v1/SSO/GenericSAML?IsIdPInitiatedRequest=true
-
- In the Audience URI field, set the following URL with your Account Number –
-
Region Marvin URL Singapore https://marvin.leadsquared.com/saml/{AccountNumber}India https://marvin-in21.leadsquared.com/saml/{AccountNumber}United States https://marvin-us11.leadsquared.com/saml/{AccountNumber}
-
- In the Other Requestable SSO URLs set the following URLs (configure all 3 URLs) –
-
Region Marvin URLs Singapore https://login.leadsquared.com/Home/Signin_GenericSAMLhttps://login.leadsquared.com/Home/SignInWithSSOhttps://marvin.leadsquared.com/api/auth/r1/v1/SSO/GenericSAML
India (Mumbai) https://login-in21.leadsquared.com/Home/Signin_GenericSAMLhttps://login-in21.leadsquared.com/Home/SignInWithSSOhttps://marvin-in21.leadsquared.com/api/auth/r21/v1/SSO/GenericSAML
United States https://login-us11.leadsquared.com/Home/Signin_GenericSAMLhttps://login-us11.leadsquared.com/Home/SignInWithSSOhttps://marvin-us11.leadsquared.com/api/auth/r11/v1/SSO/GenericSAML
-
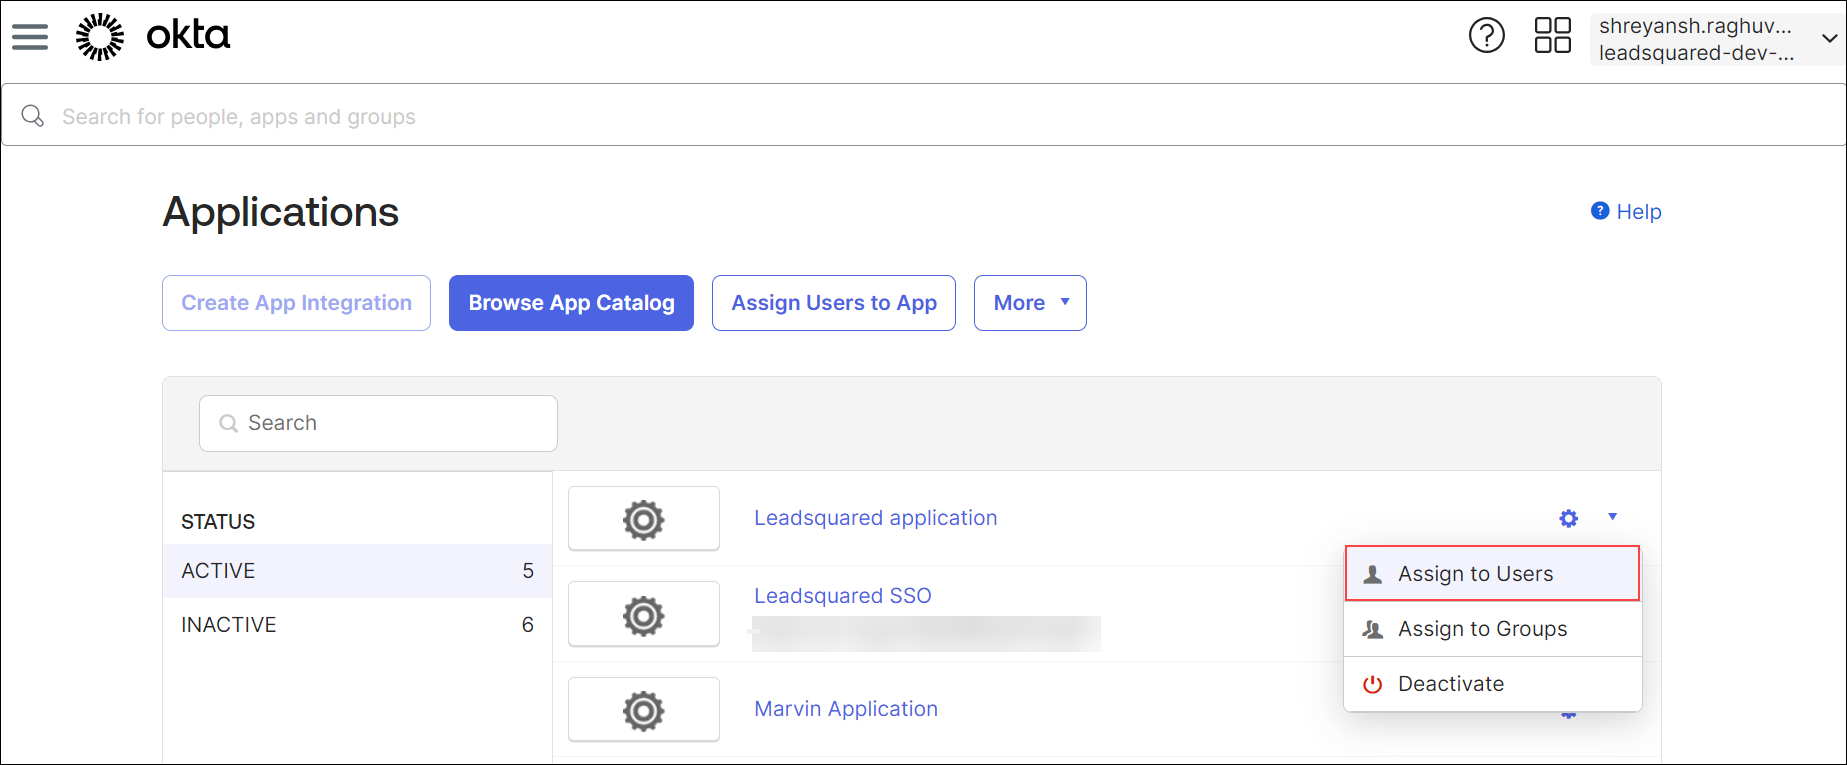
6.2 Assign Users
You can create users on Okta and designate which users can utilize the SAML application to log in to LeadSquared.
To assign users to your application –
- On the Okta admin console, navigate to Applications>Applications.
- Click on the settings option on an application.
- Select Assign to Users.
6.3 Configure Okta SAML on LeadSquared
- On LeadSquared, navigate to Settings>Security>Authenticaton Provider.
- Click Enable.
- Select Generic SAML.
- On the Configure Authentication Provider pop-up, enter the following details –
- Provider Name – A display name for the Sign-in button.
- SAML Metadata URL – To find this URL, On the Okta Admin console, navigate to Applications>Applications>{Select your LeadSquared application}>Sign on and copy the Metadata URL.
- SAML Metadata URL (NextGen/New UI) – To find this URL, On the Okta Admin console, navigate to Applications>Applications>{Select your application}>Sign on and copy the Metadata URL.
- Once you enter the details, click Test.
- Once you’re satisfied with the login flow, click Enable.
Any Questions?
If you have questions, go ahead and start a discussion in the comments section below. We’ll get back to you ASAP!
Do you have any articles on how to integrate with JumpCloud SSO?
Hi. We currently don’t have documentation specifically for JumpCloud. However, since JumpCloud supports SAML and OIDC protocols, you can refer to our Okta SAML or Okta OIDC documentation (listed in this article) as a reference for integration.
Hi,
Is there an updated auth flow for Marvin?
Our OIDC login works fine with the original leadsquared however the same auth setup fails with Marvin.
The error we see is:
unsupported_response_mode: Unsupported response mode: fragment
Given this works fine with Leadsquared, how can we get this working for Marvin?
Thanks!
Hi, Matt.
We need more context to fix this issue. Please reach out to support@leadsquared.com
Is it possible to use OIDC login with providers such as Auth0? Looking through the guide, the only configuration specific to Okta is the OpenID Connect Metadata URL and as an openid-configuration this should be the same.
Thanks
Hi, Matt. Yes, this is possible.
If third party authentication is turned on, do users get a choice to use it or not? And, can it be bypassed (i.e., is there a direct link that will bypass SSO?).
Hi, Nathan. Thanks for writing to us. Once enabled, we do not support the option to bypass third-party authentication. There’s no direct link to bypass third-party authentication either. It becomes mandatory for all users in your organization. Hope this helps!