Platform Updates – Erbium 3
Search By Comma-separated Values in Advanced Search
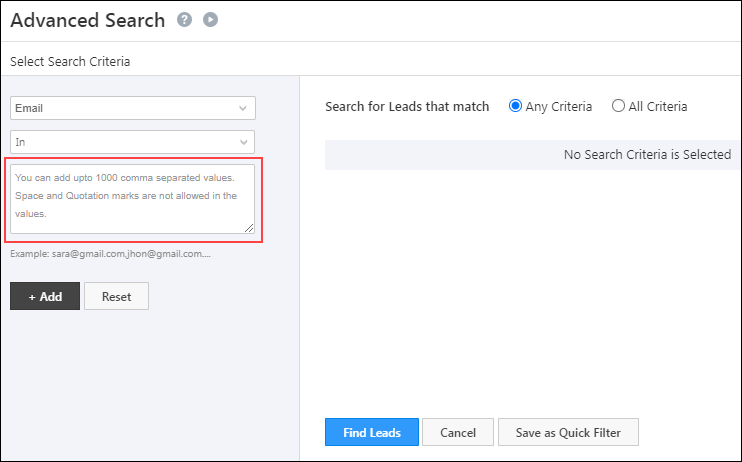
Previously, to search for multiple values (such as email addresses, phone numbers, etc.) using Advanced Search, you had to create multiple search conditions (for example, Email is abc@leadsquared.com or Email is xyz@leadsquared.com or…).
Now, you can search up to 1,000 comma-separated values (for Text, Email, Number, and Phone lead fields*) using the In operator on Advanced Search (provided the total character count doesn’t exceed 20,000).
This allows you to copy large data volumes from CSV files, and use it to filter leads using fewer search conditions.
Note:
- *You must enable the Include in Quick Search setting for these lead fields.
- This feature is available in Advanced Search across the platform, including Automation.
- This setting isn’t available by default. To enable it on your account, contact your account manager, or write to support@leadsquared.com.
Preview Documents in Your Browser
We’ve introduced a new preview functionality to improve the efficiency of Sales Users who verify large numbers of documents received from leads. Previously, sales users had to download the documents and then tally the information against the lead’s details on LeadSquared. Now, they can open the documents in a new browser tab for quicker verification against the lead’s details.
This feature is now available by default on the Lead Details, Opportunity Details pages (Documents tab), and the Activity Details page.
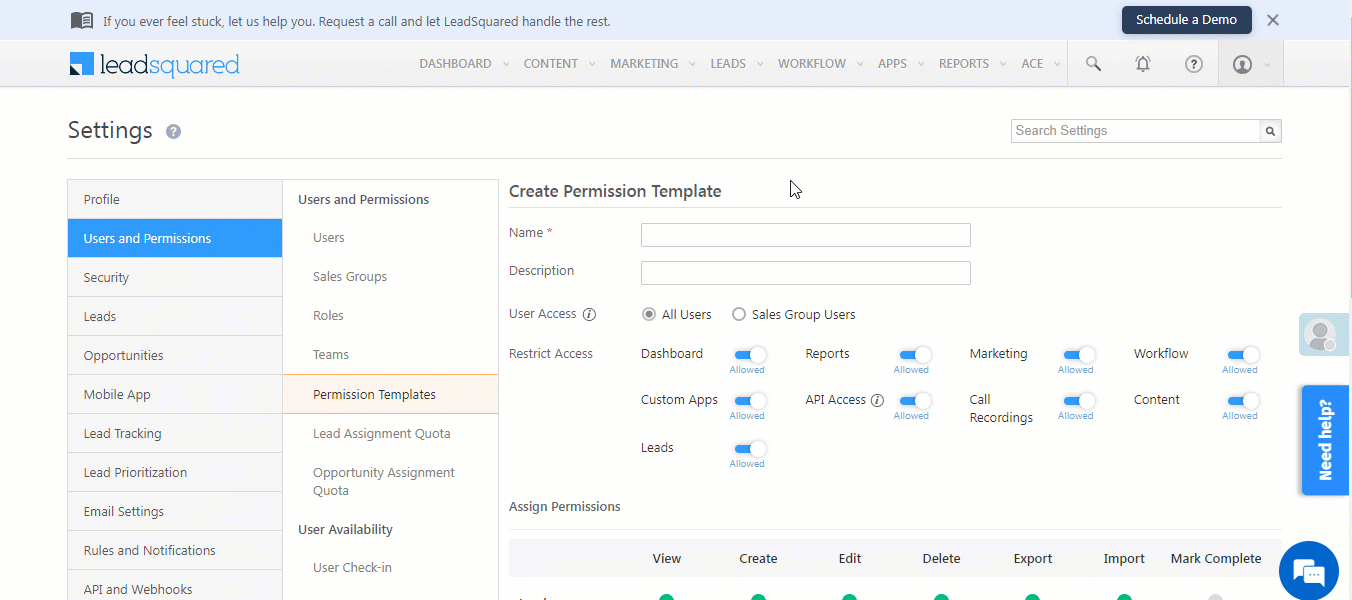
Restrict Bulk Action Through Permission Templates
We’ve enhanced Permission Templates to restrict Sales Users from performing bulk actions (Create, Update and Delete) on Leads, Activities, Tasks, Opportunities and Accounts. This is to ensure your users don’t misuse the Bulk Update option, especially if incentives or payouts are tied to achieving specific targets (e.g., number of tasks completed in a week, etc.)
This feature is available by default in your LeadSquared account.
Add Folders with the Same Name under Image & Document Libraries
Previously, you couldn’t create folders with the same name under the Content>Images & Documents libraries. Now, you can create folders with the same name (e.g., KYC, Passports, etc.) under both the Image Library and Document Library. This feature is available by default in your LeadSquared account.
Embed Opportunity Activity History Page on Third-Party Websites
You can now embed the Opportunity Activity History page within an external website’s/app’s iframe.
User Deactivation Enhancements in Automation
New User Validations on Automation Publish/Republish
Previously, if you configured an automation card with a deactivated/deleted user, the automation was published without throwing any validation error messages. This resulted in the automation cards failing during execution.
Now, when you Publish or Republish an automation, you’ll see a validation message if you add a deactivated/deleted user to the automation card. This enables you to modify the card before you publish the automation.
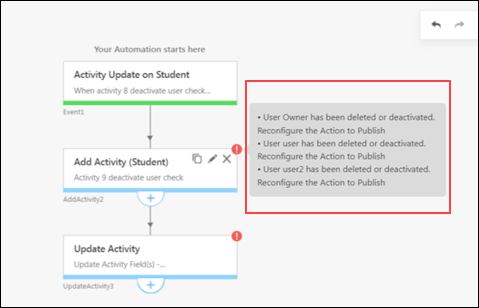
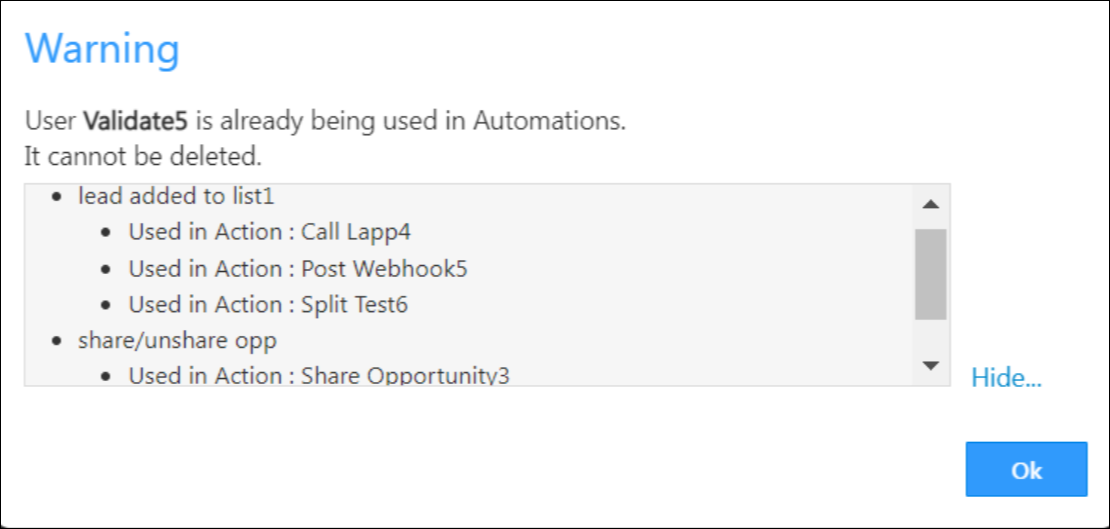
User Deactivation Restrictions for All Automation Cards
Previously, you couldn’t deactivate a user added to the ‘Distribute’ and ‘Notify User’ automation cards. Now, you can’t deactivate a user added to any automation card.
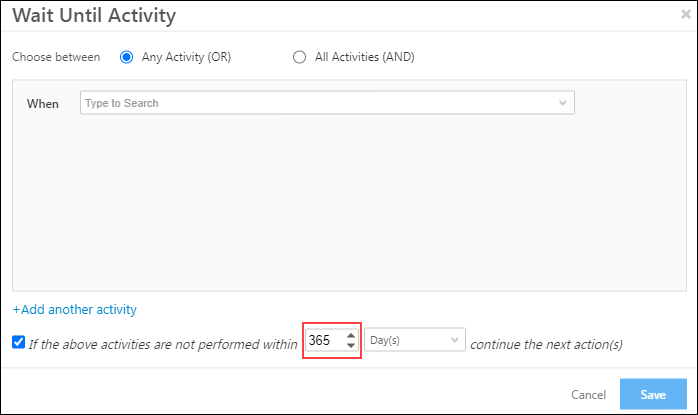
Enhancement to the Wait Until Activity Card
The maximum number of hours/days/weeks supported in the Wait Until Activity automation card is increased from 100 to 365.
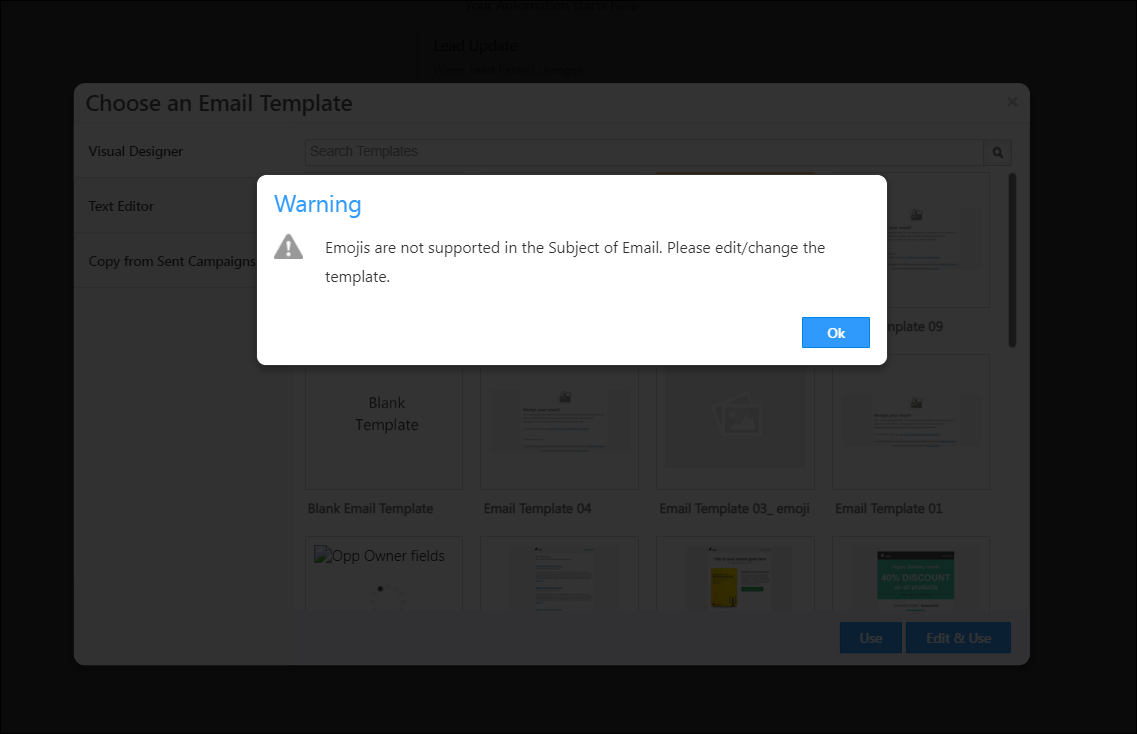
Validations for Email Subject Lines Containing Emoticons
To ensure users are aware that we don’t support email subject lines that contain emojis, we now display a validation message when the Send Email automation card is set up with an email template containing emoticons in the subject line.
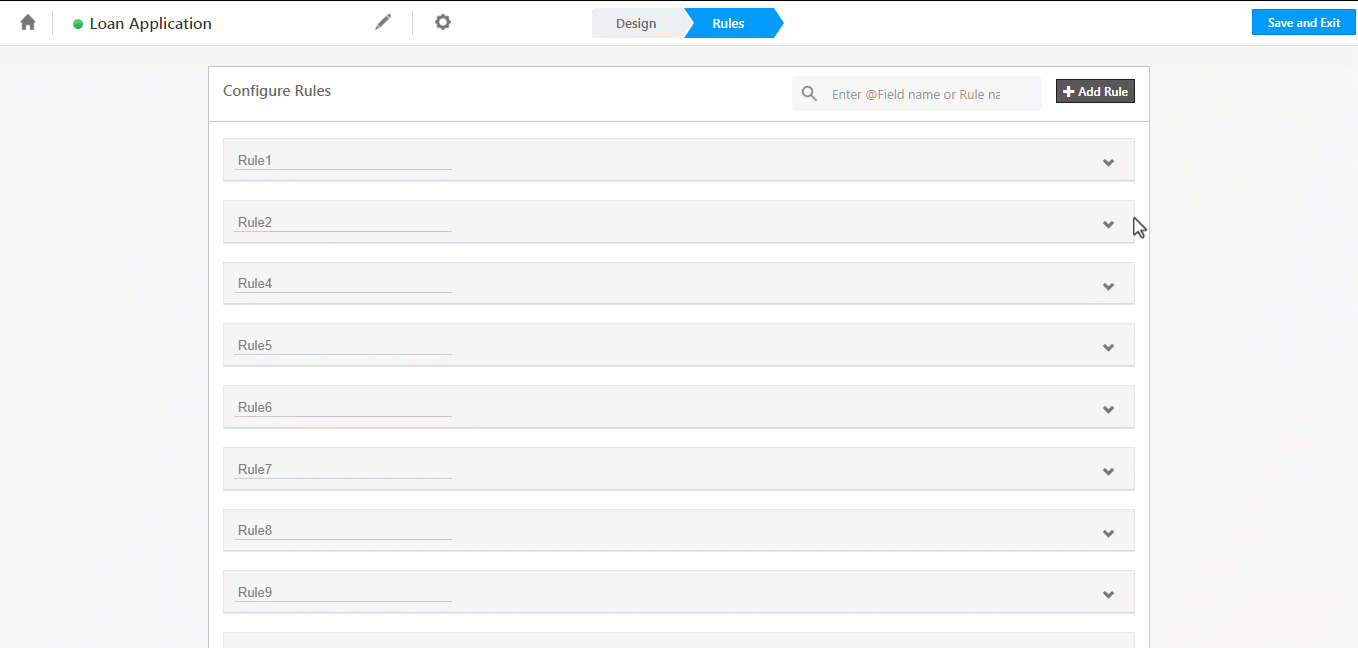
Search For Rules in Dynamic Forms
You can now search for Form Rules by entering the Rule name or Field name (format ex: @Phone Number) into the search box and access the Rule quickly.
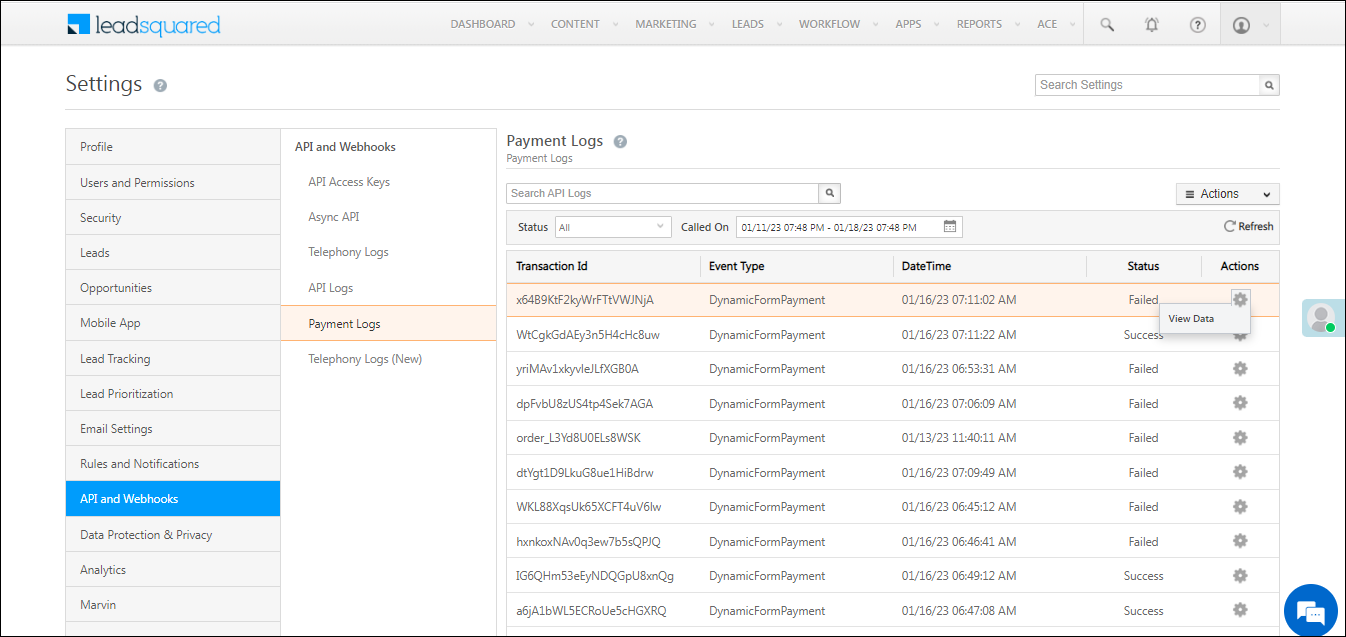
Access Payment Logs within LeadSquared
To access the logs for payment transactions through a Form, navigate to Settings>API and Webhooks>Payment Logs. The logs will be displayed with a Transaction Id, Event Type, DateTime & Status in a list view. Under Actions, click View Data, where you can view the response given by the Payment Gateway to validate the success or failure status.