


Get Started
Sales Suite
Field Ops
Marketing
Service CRM
Integrations & Apps
FloStack
Opportunity Configurations
1. Feature Overview
Opportunities in LeadSquared represent potential deals. Through opportunity management, you can track various aspects of deals in progress. This article will help you understand how to create forms for multiple opportunity types, configure opportunity types, and add opportunities to your leads. To know more about opportunities, refer to Opportunity Management – Feature Guide.
2. Prerequisites
You must be the Administrator of your LeadSquared account to access this feature.
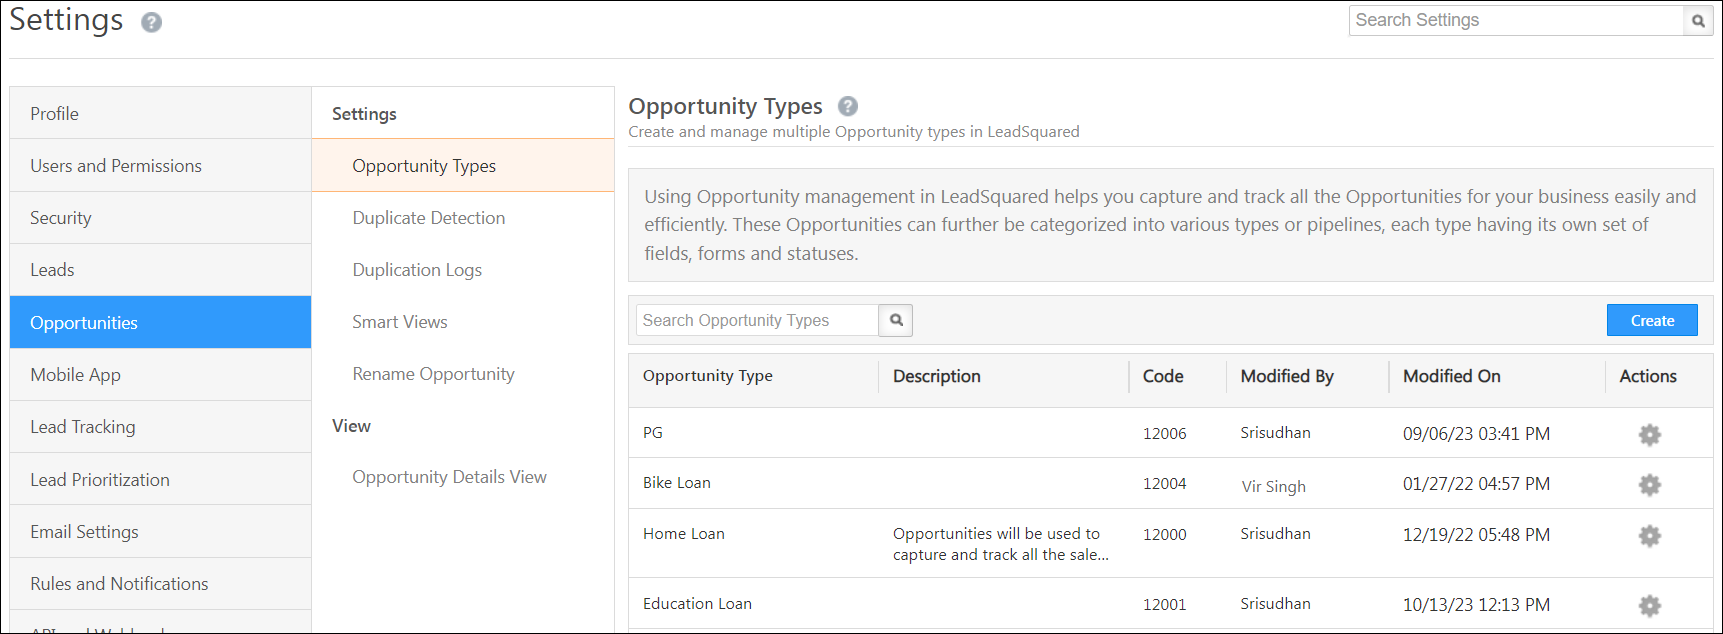
3. Manage Opportunity Types
Manage all your opportunities here, and create different fields, forms, stages and statuses for each opportunity type. Hover your cursor alongside the settings icon (under the Actions column) to edit, delete or clone an opportunity type.
4. Create New Opportunity Types
Opportunity types are templates you can create for the various products your business offers. Once an opportunity type is created, users can add leads to opportunities, and track these to completion. Examples of opportunity types for a bank are –
- Home loan
- Vehicle loan
- Health insurance
- Credit cards
- Fixed Deposit
You can add and configure multiple opportunity types for your organization.
- From the main menu, navigate to My Profile>Settings>Opportunities.
- Under the Opportunity Types tab, click Create.
- Under Create Opportunity Type, you’ll have three tabs – Basic Details, Field Configuration and Form Configuration.
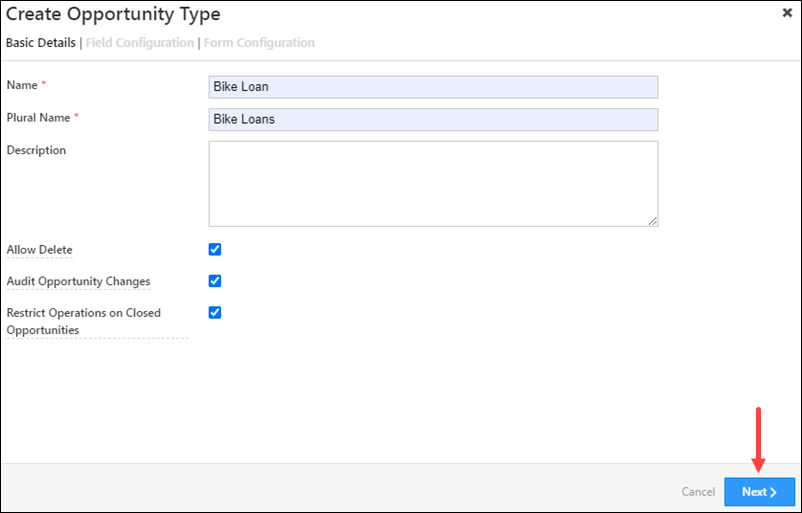
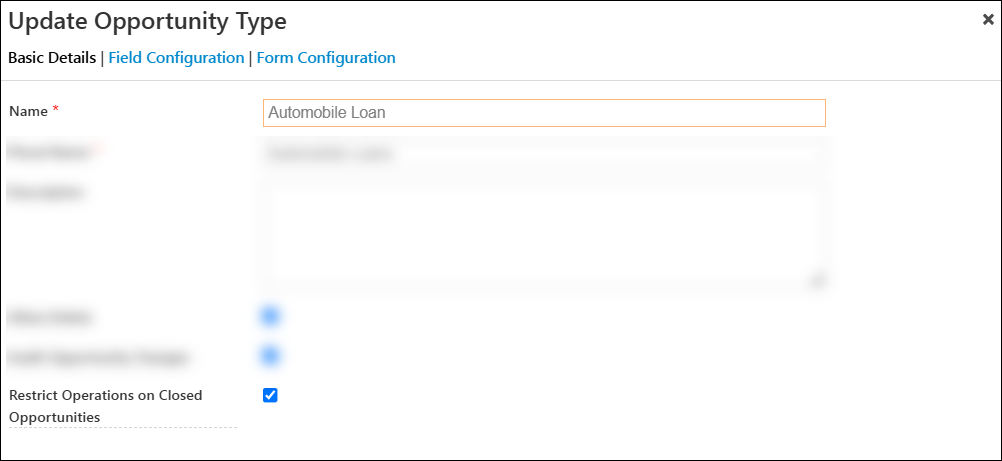
4.1 Basic Details
These are the basic details that are required to create an opportunity. The fields are –
| Field Name | Description |
| Name | The name for your opportunity (Car Loan, Course, etc.). This field is mandatory. |
| Plural Name | The plural name for your opportunity (Car Loans, Courses, etc.). This field is mandatory. |
| Description | A description to help your team understand the Opportunity better. |
| Allow Delete | To give non-Admin users permission to delete the Opportunity, check the |
| Audit Opportunity Changes | To keep a log of all the changes and updates made to the Opportunity, check the |
| Restrict Operations on Closed Opportunities | To prevent non-Admin users from making updates, or posting activities/tasks to a closed opportunity, check the |
Note:
- You must follow the above steps to update an existing opportunity.
- To Restrict Operations on Closed Opportunities, enable the Enables restricting Operations on Closed Opportunities (Won/Lost) Organization Setting.
Once you’re done, click Next.
4.2 Field Configuration
Add custom fields that have to be filled out by your users while managing opportunities.
You can track the current status of the opportunity in the sales funnel through Status Configuration. To configure it, click on the ![]() icon.
icon.
- The three statuses available by default are “Open“, “Won” and “Lost“. You cannot delete or edit these options, and you also cannot add any other status as an option.
- Create a list of reasons for changes in each status, under Status – Reason. You can list down multiple reasons for each status. Users can select a reason from the list every time they update an opportunity status. This will help all the stakeholders track the opportunity to completion. To configure Status – Reasons –
- Add reasons for status change –
- Select the status for which you want to add reasons, and click the Add button found at the bottom of the page.
- Add reasons that are indicative of status change.
- Once you’ve added a reason, click the
 icon to save it.
 - Repeat the same process to add multiple reasons.
- The number in a bracket next to the status indicates the number of reasons listed for that particular status.
- To edit an existing reason, click the
 icon.
icon. - To delete an existing reason, click the
 icon.
icon. - To change the order of the reasons listed, use the
 and
and  arrows.
- Add reasons for status change –
- To enable user comments while changing the opportunity status, check
 Enable Comments checkbox.*
 - To set a default status for new opportunities, from the Default Status dropdown, select the status.
- To set a default stage for new opportunities, from the Default Stage dropdown, select the stage.
- Once you’re done, click Save.
Note:
- * When comments are enabled, it becomes mandatory for users to enter comments when changing the status of the opportunity (across both the UI and APIs).
- To set a Default Status and Default Stage for new opportunities, enable the Enable Default Status And Stage Organization Setting.

Field Configuration
- A default number of fields are pre-selected. These fields are mandatory.
- You can use the Add Field button at the bottom of the page to select multiple custom fields, depending on your requirement.
- Under Mandatory, tick the checkboxes for mandatory fields that your users must populate.
- To delete a field that you’ve added, click the icon against the field.
- Once you are done, click Next.
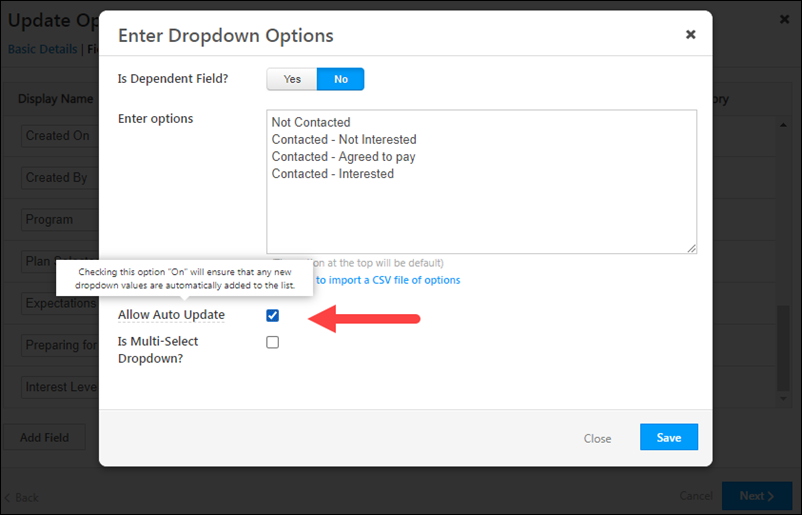
You can also configure opportunity dropdown fields to automatically add new dropdown values sent through APIs, opportunity imports and the Update Opportunity card in Automation. To do this –
- Click on the
 icon against a dropdown field.
 - On the Enter Dropdown Options pop-up, click the checkbox against Allow Auto Update.
- Once you’re done, click Save.
Note: The Allow Auto Update feature is not support updating the field through dynamic form rules.
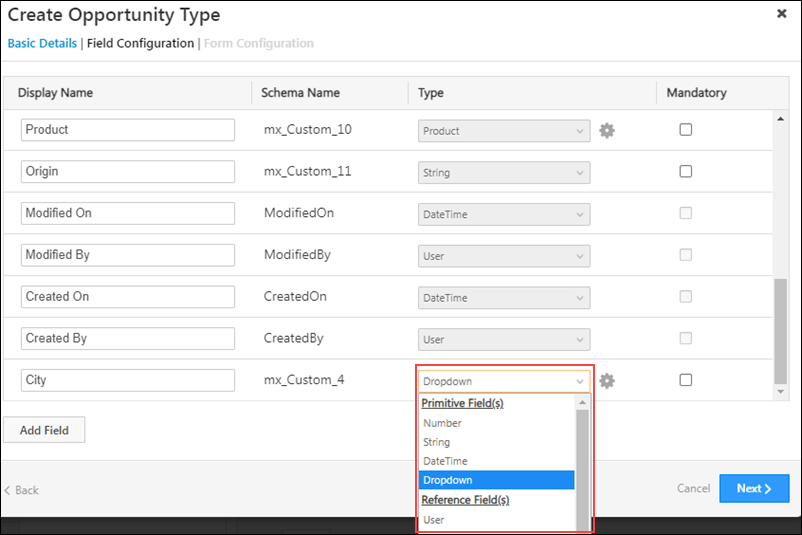
The following data types are available by default, which can be used to configure custom opportunity fields –
- Number
- String
- DateTime
- Dropdown
- User
You can also use the following additional data types to configure custom opportunity fields. To enable these data types on your account, refer to Advanced Configurations.
- Phone – This data type stores phone numbers.
- Email – This data type stores email Ids.
- Date – This data type stores dates (and not time).
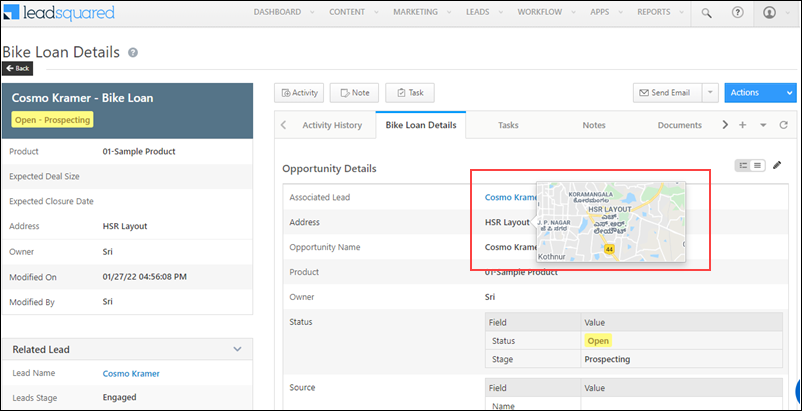
- Geolocation – This data type stores geographic locations. Any location (MG Road, Indira Nagar, etc.) entered in this field can be previewed on the Opportunity Details page.
- AutoID – A unique ID is automatically generated for each opportunity. This Id can be used to bulk update, import, retrieve, and delete opportunities through the Opportunity Management APIs.

4.3 Form Configuration
Create forms to enable your users to capture opportunity details. To know more, refer to
In this section, you can edit two types of forms – the default form and the left panel form.
Default Form
- Under Select Form to Edit, choose “Create”.
- There are four mandatory fields – “Created On”, “Opportunity Name”, “Owner” and “Status”. These fields cannot be deleted.
- You can add other custom fields, through drag and drop from the list of available fields on the right side of your page.
- You can add multiple sections to the form. To do this, scroll to the bottom of the page and click Add Section.
To access the form, from the main menu, navigate to Leads>Manage Opportunities, and click the Add Opportunity button, available on the right side of the screen.

Left Panel Form
- Under Select Form to Edit, choose “Left Panel”.
- Select a colour for the tab by clicking the
 dropdown.
- Along with the VCard, this colour will be visible on the Activities History tab on the Lead Details page, to help users identify all activities associated with the opportunity.
- The two mandatory fields are First Name and Last Name.
- You can remove existing fields by clicking the
 icon.
icon. - You can drag and drop fields from Available Fields, on the right side of the screen. You can only add fields that are available for the Opportunity.
- Under Available Fields, you can search from your list of Lead Fields. To do this, choose Lead Fields from the dropdown.
Note: You cannot add Lead Fields to the VCard. You can only add it to the Related Lead section. - Once you’re done, click Save.
To access the form, from the main menu, navigate to Leads>Manage Opportunities, and click on a lead on whom the Opportunity was created. On the Lead Details page, you can find the Left Panel. To edit the opportunity, hover your cursor on the top right corner of the VCard, and click the ![]() icon.
icon.

To know how to manage opportunities, and perform multiple actions on them, such as updates, exports and reset filters, refer to Opportunity Management.
5. FAQs
Unable to Edit or Perform Activities on Opportunities
- Issue: I’m unable to update opportunities or perform activities on them, even though I have the necessary permissions via permission templates.
- Possible Causes:
- Closed Opportunity: The issue may arise if the opportunity is in a Closed status (Won or Lost), and operations are disabled on closed opportunities.
- Advanced Configuration Settings:
- If the Advanced Configuration setting for restricting updates on closed opportunities is enabled, users will be unable to update or post activities/tasks on closed opportunities.
- Solution:
- Disable the Restrict operations on closed opportunities advanced configuration setting.

-
- Disable the Restrict Operations on Closed Opportunities setting in the opportunity type configuration
Any Questions?
Did you find this article helpful? Please let us know any feedback you may have in the comments section below. We’d love to hear from you and help you out!
one of the field value is not getting pushed to netsuite through email internal the field data type is custom type string>200 characters, why the field value is not getting pushed
Hi. We need more context on this. Please give us a detailed description of the issue we’re facing, so that we can help you out.