1. Feature Overview
You can create leads, opportunities, activities, and tasks all through the same dynamic form. Including tasks in your forms will help you create a task on the go while simultaneously creating a lead and/or activity.
- Create both to-do and appointment type tasks through forms
- View the task calendars of users while creating tasks. This helps you see the availability of your users and schedule tasks accordingly.
- Set maximum/minimum dates, and use regex to set custom logic (e.g., date is after 7 days, etc.)
2. Prerequisites
- You must be an administrator user in your LeadSquared account
- See How to Create Tasks to configure tasks that match your requirements
- If you’re new to Forms and Processes, see How to Create a Form
3. Adding Tasks to a Form
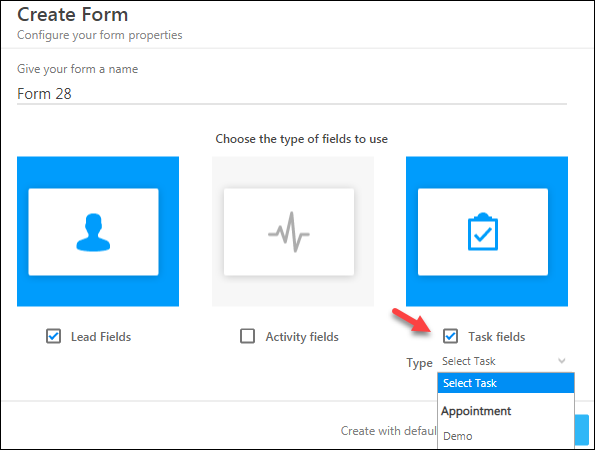
While creating a form from the Manage Forms page (Workflow>Manage Forms), on the Create Form pop-up, click Task Fields and select the task type. Follow the remaining steps as mentioned in How to Create a Form.

3.1 Displaying the Task Calendar (Optional)
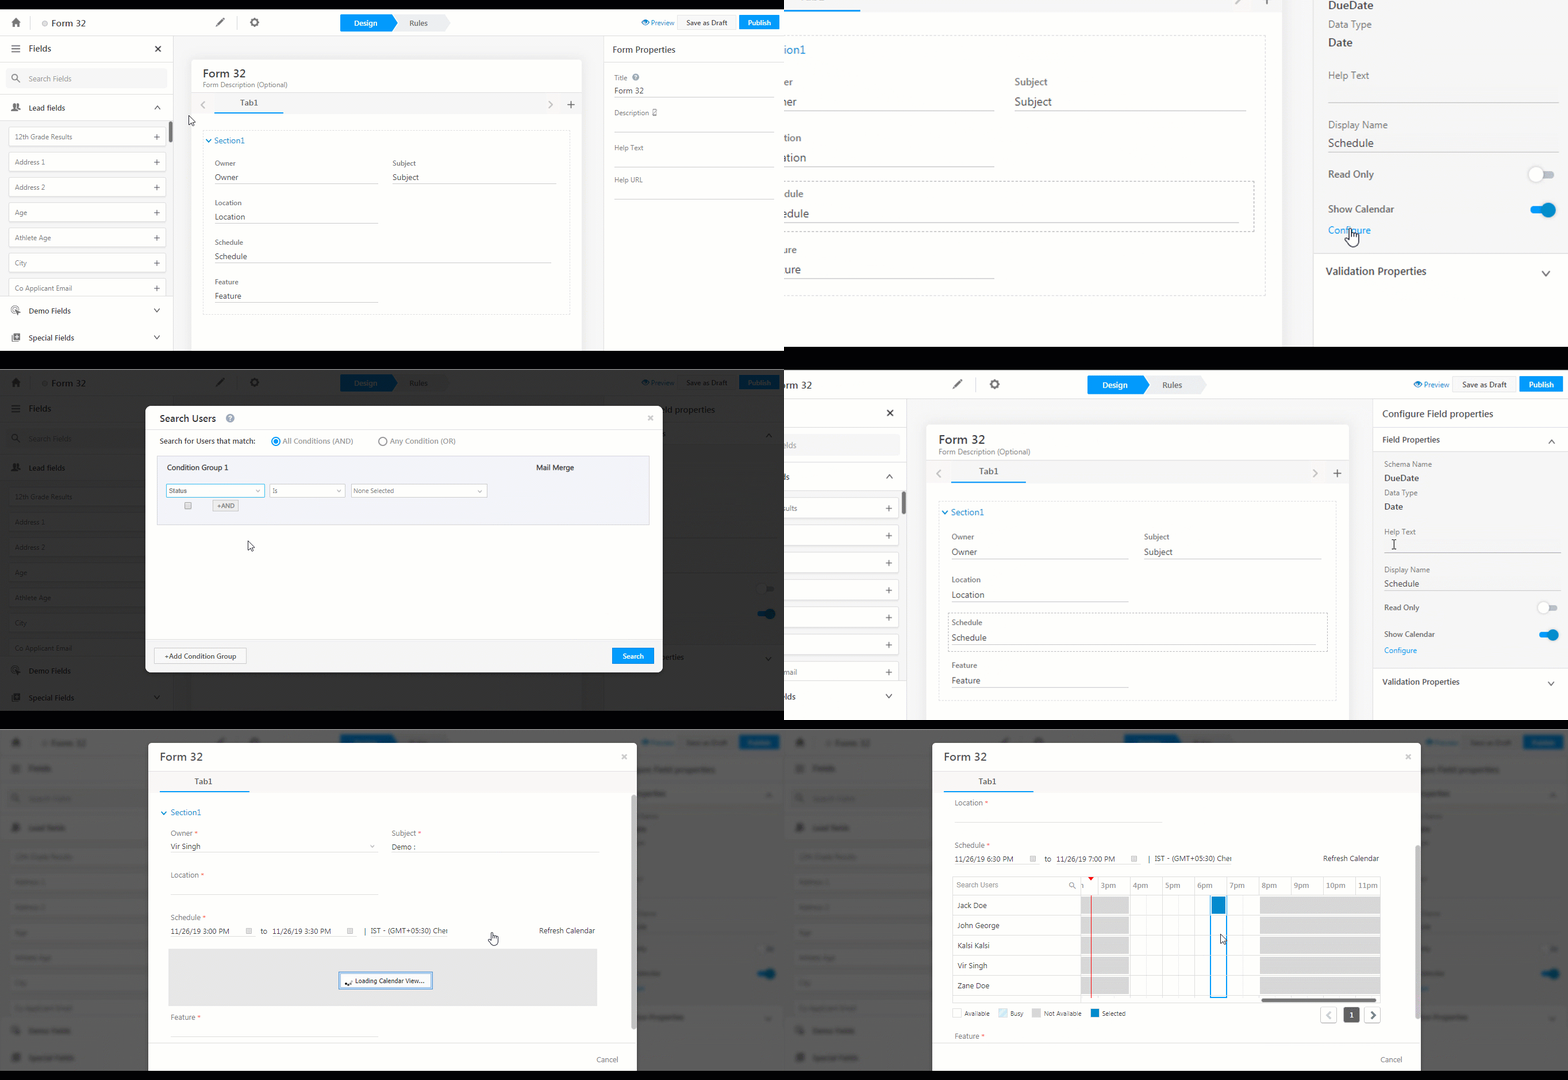
The most powerful feature you get with adding tasks to your forms is the ‘Check Availability’ calendar. Using it, you can simultaneously see the calendars of all selected users and schedule tasks at the appropriate time.
- Click the Schedule field.
- On the right pane, select Field Properties, click Show Calendar, then click Configure.
- Use advanced search to select the users you want to view in the calendar. Click Search when you’re done.*
- Now click Preview at the top of the form.
- Alongside the Schedule field, click Check Availability.
* While configuring the calendar view, you can also mail merge values of fields included in the form to help filter your users. For example, if you’re filtering users by city, you can mail merge the value of the lead’s city to show only those users that are available in the lead’s city.
You can now schedule tasks based on the availability of your users. Please note, the availability will be shown in accordance with the configured workday template.

Note: When submitting the form, it is mandatory to fill the Owner, Subject, Location and Schedule fields. If no lead fields are included in the form, it is also mandatory to pass the Associated Lead field.
3.2 Setting a Custom Date Range (Optional)
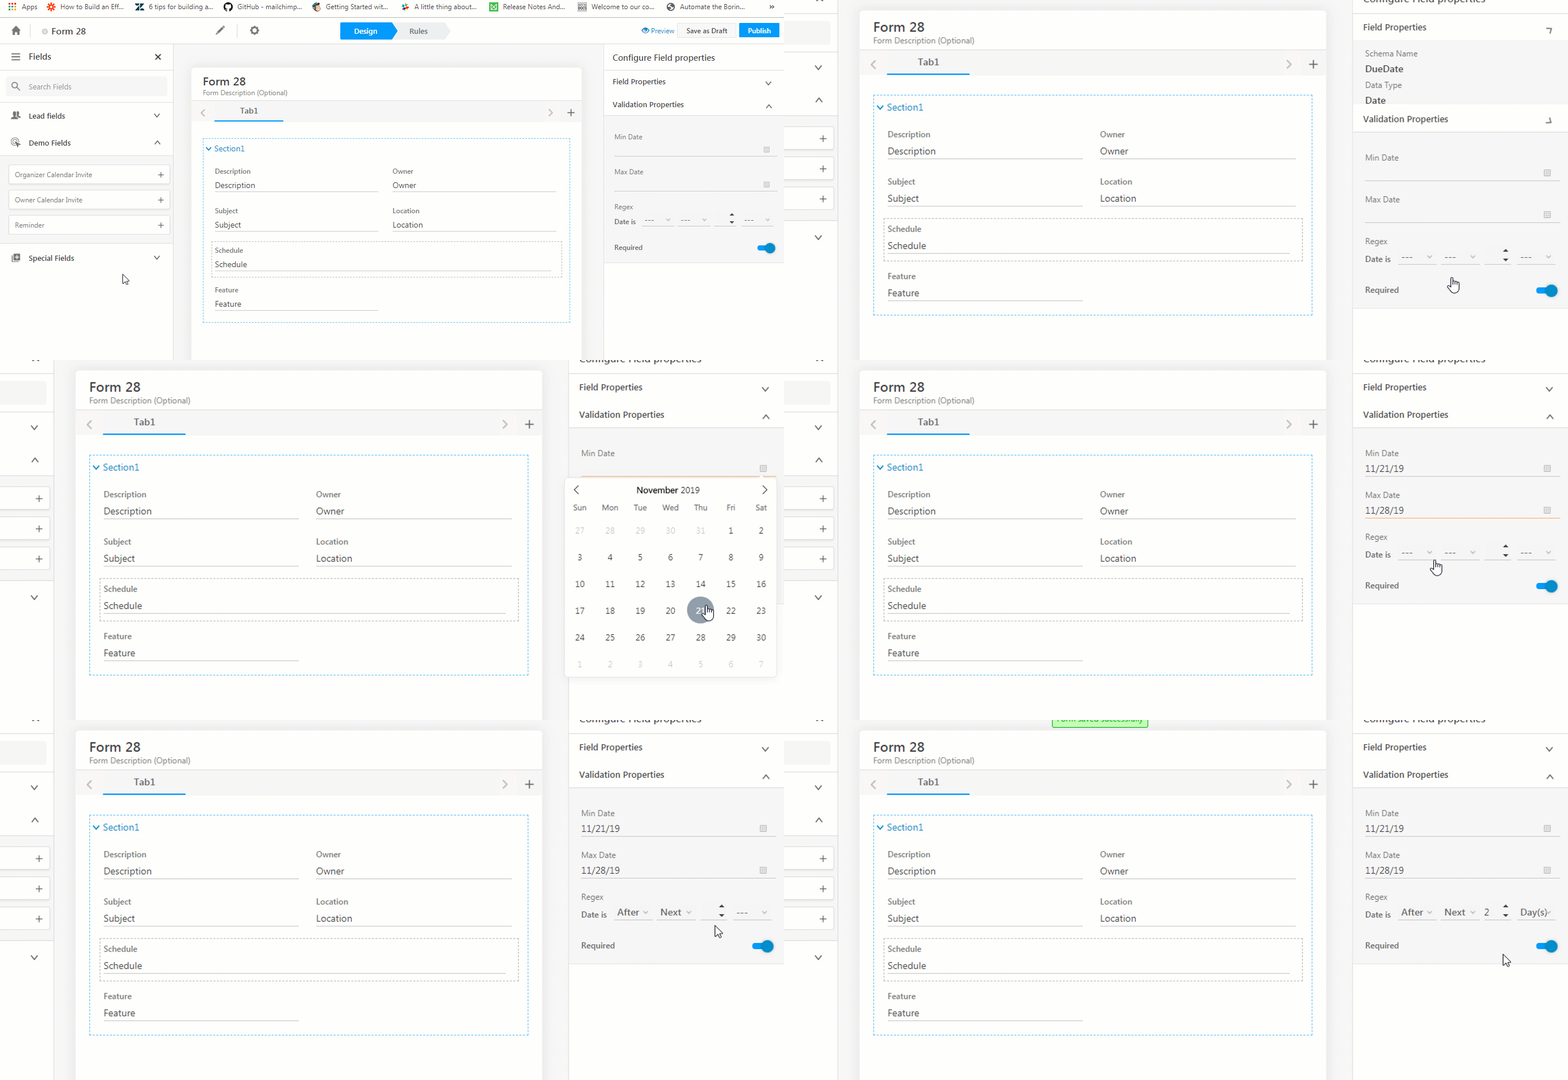
You can customize the schedule field to accept values
- Click the Schedule field.
- On the right pane, click the Validation Properties.
- Set a minimum and maximum date and/or set your own regex logic.

4. Adding the Form to a Process
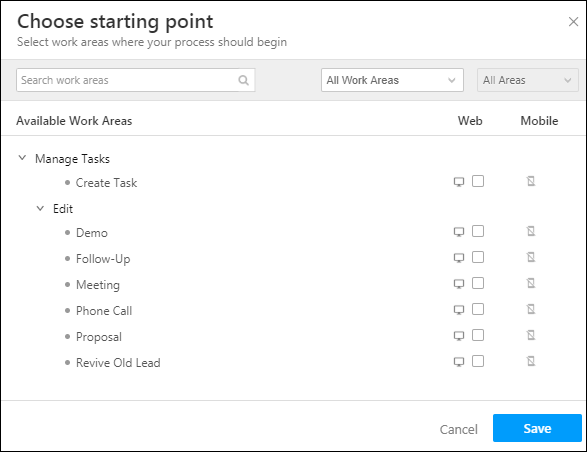
Once you’ve published the form, you can add it to a process and display it in the appropriate work area. There are a number of task-related work areas available in the process designer. You can find them under Manage Tasks –

For more information on the process designer, see How to Create a Process.
Any Questions?
Please leave a comment below and we’ll get back you


